2017 PEUGEOT 5008 engine
[x] Cancel search: enginePage 66 of 404
64
Closing
When a door is not closed correctly:-
w
ith the engine running or the
vehicle moving (speed below
6
mph (10 km/h)), this warning
lamp comes on, accompanied by
an alert message displayed for a
few seconds.
-
w
ith the vehicle moving (speed
above 6
mph (10 km/h)), in
addition to the warning lamp and
alert message, an audible signal
sounds for a few seconds.
Boot
Opening the tailgate
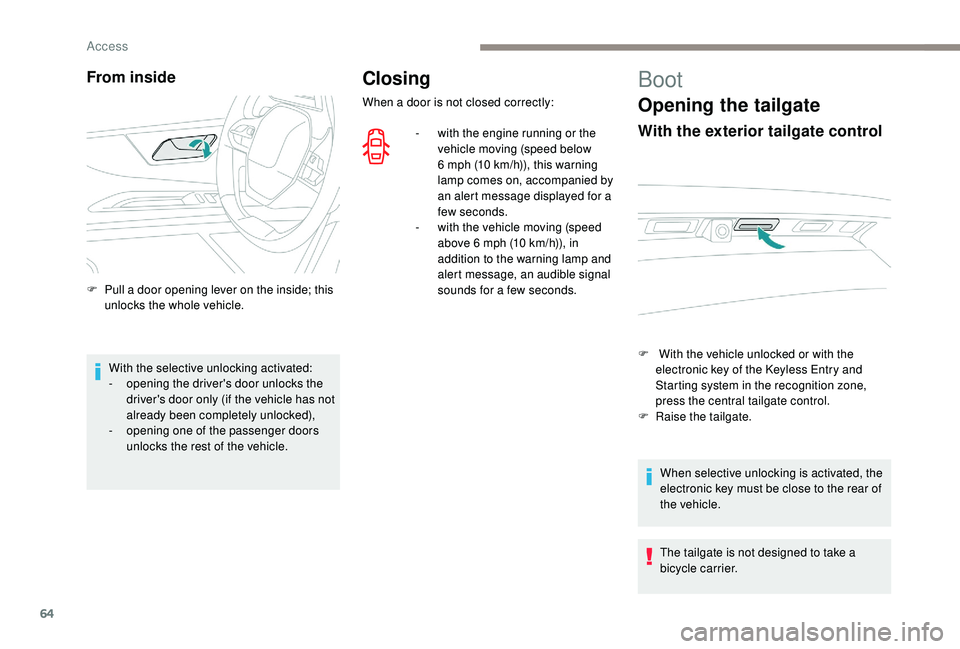
With the exterior tailgate control
F With the vehicle unlocked or with the electronic key of the K eyless Entry and
Starting system in the recognition zone,
press the central tailgate control.
F
Ra
ise the tailgate.
When selective unlocking is activated, the
electronic key must be close to the rear of
the vehicle.
The tailgate is not designed to take a
bicycle carrier.
From inside
F Pull a door opening lever on the inside; this unlocks the whole vehicle.
With the selective unlocking activated:
-
o
pening the driver's door unlocks the
driver's door only (if the vehicle has not
already been completely unlocked),
-
o
pening one of the passenger doors
unlocks the rest of the vehicle.
Access
Page 73 of 404
71
Principles
Complete opening of the sunroof involves partly
raising the mobile glass, then sliding it over the
fixed glass.
Any intermediate position is possible.
Opening the roof involves opening the blind. By
contrast, the blind can remain open when the
roof is closed.
The control buttons for the sunroof and blind
can be used:
-
w
ith the ignition on, if the state of charge of
the battery is adequate,
-
w
ith the engine running,
-
i
n STOP mode with Stop & Start,
-
d
uring the 45 seconds after switching off
the ignition,
-
d
uring the 45 seconds after locking the
vehicle.
Before operating the sunroof or blind
control buttons, ensure that no object or
person might prevent the movement.
Operating the sunroof
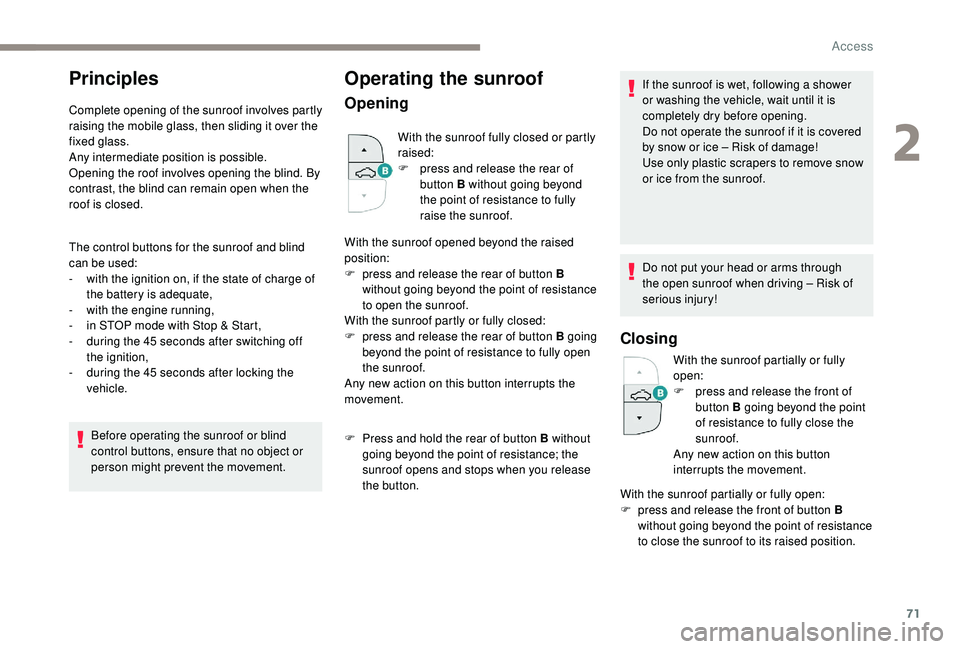
Opening
With the sunroof fully closed or partly
raised:
F
p
ress and release the rear of
button B without going beyond
the point of resistance to fully
raise the sunroof.
With the sunroof opened beyond the raised
position:
F
p
ress and release the rear of button B
without going beyond the point of resistance
to open the sunroof.
With the sunroof partly or fully closed:
F
p
ress and release the rear of button B going
beyond the point of resistance to fully open
the sunroof.
Any new action on this button interrupts the
movement.
F
P
ress and hold the rear of button B without
going beyond the point of resistance; the
sunroof opens and stops when you release
the button. If the sunroof is wet, following a shower
or washing the vehicle, wait until it is
completely dry before opening.
Do not operate the sunroof if it is covered
by snow or ice – Risk of damage!
Use only plastic scrapers to remove snow
or ice from the sunroof.
Do not put your head or arms through
the open sunroof when driving – Risk of
serious injury!
Closing
With the sunroof partially or fully
open:
F
p
ress and release the front of
button B going beyond the point
of resistance to fully close the
sunroof.
Any new action on this button
interrupts the movement.
With the sunroof partially or fully open:
F
p
ress and release the front of button B
without going beyond the point of resistance
to close the sunroof to its raised position.
2
Access
Page 81 of 404
79
Front head restraints
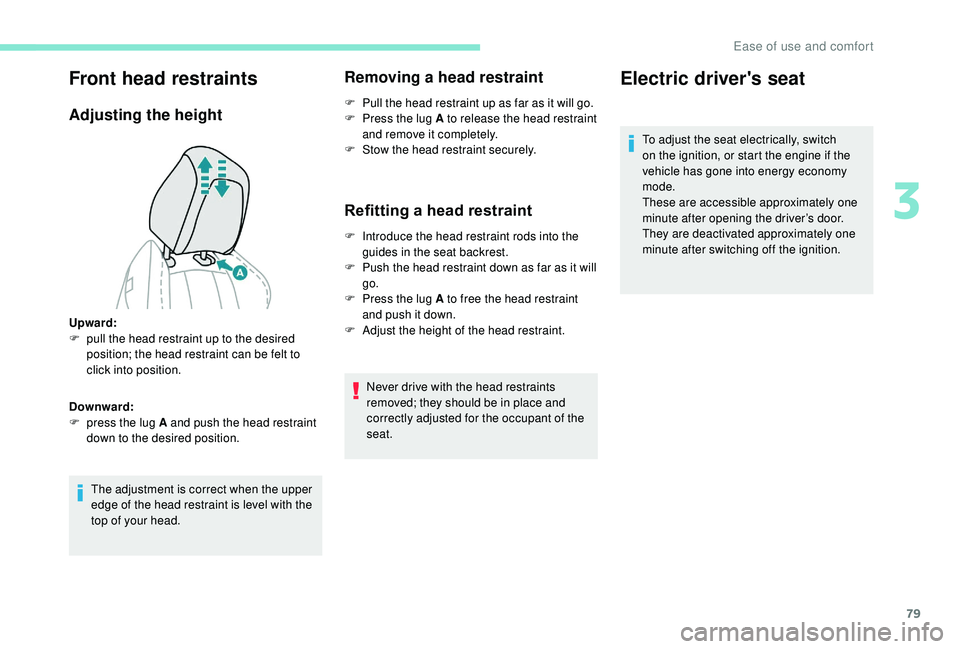
Adjusting the height
The adjustment is correct when the upper
edge of the head restraint is level with the
top of your head.
Removing a head restraint
F Pull the head restraint up as far as it will go.
F P ress the lug A to release the head restraint
and remove it completely.
F
S
tow the head restraint securely.
Refitting a head restraint
F Introduce the head restraint rods into the guides in the seat backrest.
F
P
ush the head restraint down as far as it will
go.
F
P
ress the lug A to free the head restraint
and push it down.
F
A
djust the height of the head restraint.
Never drive with the head restraints
removed; they should be in place and
correctly adjusted for the occupant of the
seat.
Upward:
F
p
ull the head restraint up to the desired
position; the head restraint can be felt to
click into position.
Downward:
F
p
ress the lug A and push the head restraint
down to the desired position.
Electric driver's seat
To adjust the seat electrically, switch
on the ignition, or start the engine if the
vehicle has gone into energy economy
mode.
These are accessible approximately one
minute after opening the driver’s door.
They are deactivated approximately one
minute after switching off the ignition.
3
Ease of use and comfort
Page 83 of 404

81
Before moving the seat backwards,
ensure that there is nothing that might
prevent the full travel of the seat.
There is a risk of trapping or pinching
passengers if present in the rear seats
or jamming the seat if large objects are
placed on the floor behind the seat.
Storing driving positions
Associated with adjustments of the electrical
driver’s seat, this function allows two driving
positions to be memorised, to make these
adjustments easier if there are frequent driver
changes.
It takes account of the electric adjustments of
the seat and the door mirrors.
Storing a position
Using buttons M / 1 / 2
F S it in the driver’s seat.
F
S
witch on the ignition.
F
A
djust your seat and the door mirrors.
F
P
ress button M , then press button 1
or
2
within four seconds.
An audible signal indicates that the position has
been stored.
Storing a new position cancels the
previous position.
Recalling a stored position
Ignition on or engine running
F P ress button 1 or 2 to recall the
corresponding position.
An audible signal confirms that adjustment is
complete.
You can interrupt the current movement by
pressing button M , 1
or 2 or by using one
of the seat controls.
A stored position cannot be recalled while
driving.
Recalling stored positions is deactivated
45
seconds after switching off the ignition.
Heated seats
The function is active only with the engine
running.
Switching on
F Press the button corresponding to your seat.
F
E
ach press changes the level of heating; the
corresponding number of indicator lamps
come on:
•
1
indicator lamp = low.
•
2
indicator lamps = medium.
•
3
indicator lamps = high.
Switching off
F Press the button again until all the indicator lamps are off.
The state of the system is not kept in memory
when the ignition is switched off.
Do not use the function when the seat is
not occupied.
Reduce the intensity of the heating as
soon as possible.
When the seat and passenger
compartment have reached an adequate
temperature, you can stop the function;
reducing the consumption of electrical
current reduces fuel consumption.
3
Ease of use and comfort
Page 84 of 404
82
Prolonged use is not recommended for
those with sensitive skin.
There is a risk of burns for people whose
perception of heat is impaired (illness,
taking medication, etc.).
There is a risk of overheating the system if
material with insulating properties is used,
such as cushions or seat covers.
Do not use the system:
-
i
f wearing damp clothing,
-
i
f child seats are fitted.
To avoid breaking the heating element in
the seat:
-
d
o not place heavy objects on the seat,
-
d
o not kneel or stand on the seat,
-
d
o not place sharp objects on the seat,
-
d
o not spill liquids onto the seat.
To avoid the risk of short-circuit:
-
d
o not use liquid products for cleaning
the seat,
-
n
ever use the heating function when
the seat is damp.Multipoint massage
System with a choice of type of massage and
adjustment of its intensity.
This system operates with the engine running,
as well as in STOP mode of Stop & Start.
Activation / Settings
The massage settings are adjusted in the touch
screen.
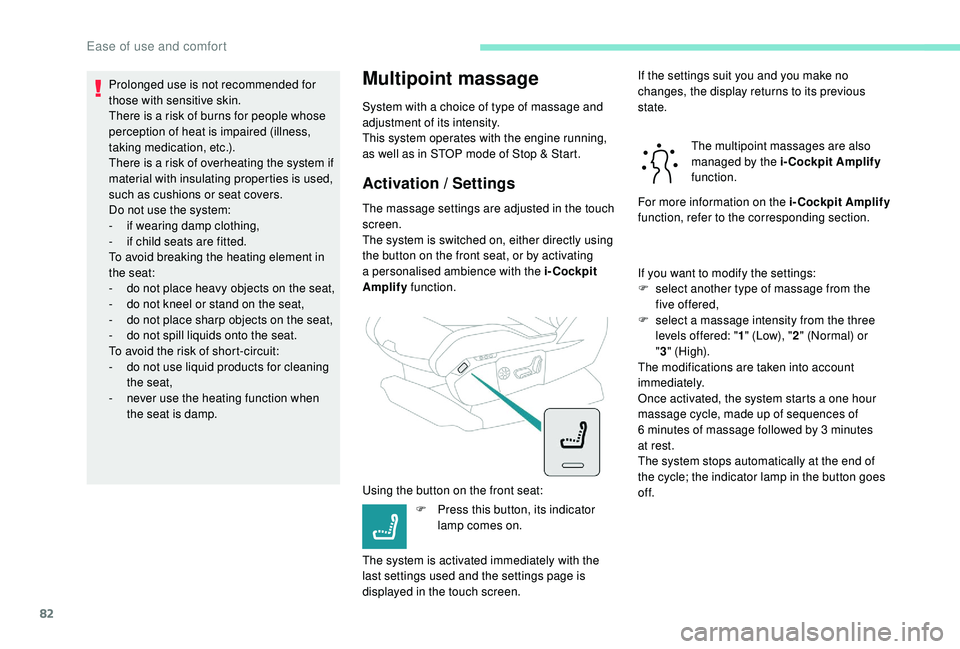
The system is switched on, either directly using
the button on the front seat, or by activating
a personalised ambience with the i-Cockpit
Amplify function.
Using the button on the front seat: F
P
ress this button, its indicator
lamp comes on.
The system is activated immediately with the
last settings used and the settings page is
displayed in the touch screen. If the settings suit you and you make no
changes, the display returns to its previous
state.
The multipoint massages are also
managed by the i-Cockpit Amplify
function.
For more information on the i-Cockpit Amplify
function, refer to the corresponding section.
If you want to modify the settings:
F
s
elect another type of massage from the
five offered,
F
s
elect a massage intensity from the three
levels offered: " 1" (Low), " 2" (Normal) or
" 3 " (High).
The modifications are taken into account
immediately.
Once activated, the system starts a one hour
massage cycle, made up of sequences of
6
minutes of massage followed by 3 minutes
at rest.
The system stops automatically at the end of
the cycle; the indicator lamp in the button goes
of f.
Ease of use and comfort
Page 86 of 404

84
F From outside: lock the vehicle using the remote control or the key.
F
F
rom inside: with the ignition on, pull the
control A in the central position rearwards.
If the mirrors are folded using control A ,
they will not unfold when the vehicle is
unlocked. Pull again on control A .
Unfolding
F From outside: unlock the vehicle using the
remote control or the key.
F
F
rom inside: with the ignition on, pull the
control A in the central position rearwards. The folding and unfolding of the door
mirrors using the remote control can be
deactivated by a PEUGEOT dealer or a
qualified workshop.
If necessary the mirrors can be folded
manually.
Automatic tilting in reverse gear
System which provides a view of the ground
during parking manoeuvres in reverse gear.
With the engine running, on engaging reverse
gear, the mirror glasses tilt downwards.
They return to their initial position:
-
a f
ew seconds after coming out of reverse
g e a r,
-
o
nce the speed of the vehicle exceeds
6
mph (10 km/h),
-
o
n switching off the engine. This function is activated /
deactivated via the " Vehicle
settings " tab in the Vehicle /
Driving menu of the touch screen.
Rear view mirror
Equipped with an anti-dazzle system, which
darkens the mirror glass and reduces the
nuisance to the driver caused by the sun,
headlamps from other vehicles, etc.
Manual model
Folding
Adjustment
F
A djust the mirror so that the glass is
directed correctly in the "day" position.
Day / night position
F
P
ull the lever to change to the "night" anti-
dazzle position.
F
P
ush the lever to change to the normal
"day" position.
Automatic "electrochrome"
model
In order to ensure optimum visibility during
your manoeuvres, the mirror lightens
automatically when reverse gear is
engaged.
This system automatically and progressively
changes between day and night use by means
of a sensor measuring the light coming from the
rear of the vehicle.
Ease of use and comfort
Page 97 of 404

95
Recommendations for ventilation and air
conditioning
In order for these systems to be fully effective,
follow the operation and maintenance
guidelines below:
F
T
o ensure that the air is distributed evenly,
keep the external air intake grilles at the
base of the windscreen, the nozzles, the
vents, the air outlets and the air extractor
in the boot free from obstructions.
F
D
o not cover the sunshine sensor,
located on the dashboard; this is used for
regulation of the automatic air conditioning
system.
F
O
perate the air conditioning system for
at least 5
to 10 minutes once or twice a
month to keep it in per fect working order.
F
E
nsure that the passenger compartment
filter is in good condition and have the
filter elements replaced regularly. We
recommend the use of a combined
passenger compartment filter. Thanks to
its special active additive, it contributes
to the purification of the air breathed by
the occupants and the cleanliness of the
passenger compartment (reduction of
allergic symptoms, bad odours and greasy
deposits). If after an extended stop in sunshine,
the interior temperature is very
high, first ventilate the passenger
compartment for a few moments.
Put the air flow control at a setting high
enough to quickly change the air in the
passenger compartment.
The condensation created by the air
conditioning results in a discharge of
water under the vehicle which is per fectly
normal.
F
T o ensure correct operation of the
air conditioning system, you are also
advised to have it checked regularly
as recommended in the Warranty and
Maintenance Record.
F
I
f the system does not produce cold air,
switch it off and contact a PEUGEOT
dealer or a qualified workshop.
When towing the maximum load on a steep
gradient in high temperatures, switching off
the air conditioning increases the available
engine power and so improves the towing
ability.
Stop & Star t
The heating and air conditioning systems
only work when the engine is running.
To maintain a comfortable temperature
in the passenger compartment, you can
temporarily deactivate the Stop & Start
system.
For more information on Stop & Star t,
refer to the corresponding section.
3
Ease of use and comfort
Page 98 of 404
96
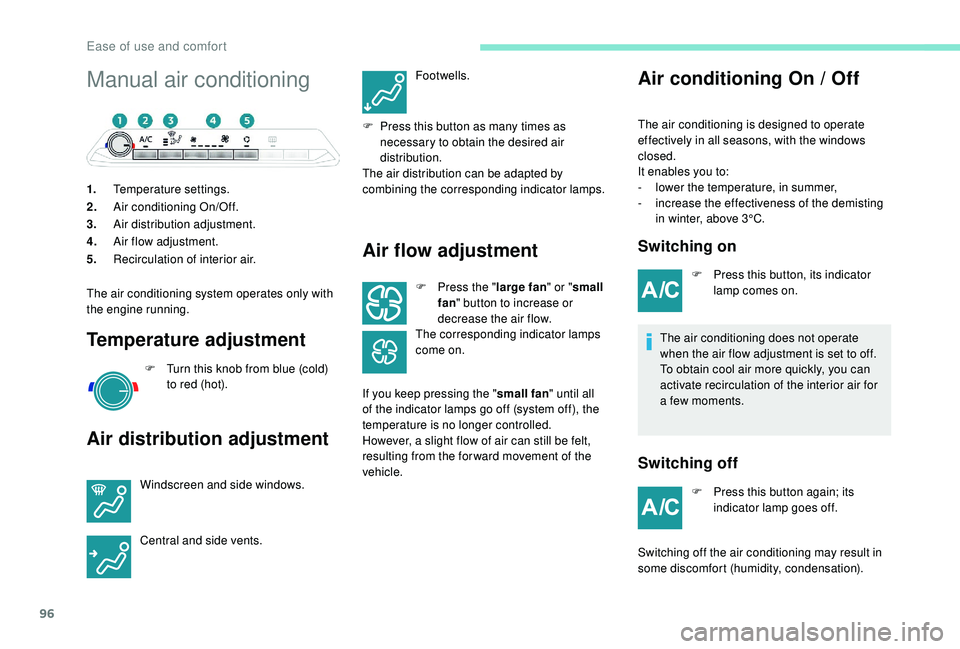
Manual air conditioning
1.Temperature settings.
2. Air conditioning On/Off.
3. Air distribution adjustment.
4. Air flow adjustment.
5. Recirculation of interior air.
The air conditioning system operates only with
the engine running.
Temperature adjustment
F Turn this knob from blue (cold) to red (hot).
Air distribution adjustment
Windscreen and side windows.
Central and side vents. Footwells.
F
P
ress this button as many times as
necessary to obtain the desired air
distribution.
The air distribution can be adapted by
combining the corresponding indicator lamps.
Air flow adjustment
F Press the " large fan" or "small
fan " button to increase or
decrease the air flow.
The corresponding indicator lamps
come on.
If you keep pressing the " small fan" until all
of the indicator lamps go off (system off), the
temperature is no longer controlled.
However, a slight flow of air can still be felt,
resulting from the for ward movement of the
vehicle.
Air conditioning On / Off
The air conditioning is designed to operate
effectively in all seasons, with the windows
closed.
It enables you to:
-
l
ower the temperature, in summer,
-
i
ncrease the effectiveness of the demisting
in winter, above 3°C.
Switching on
F Press this button, its indicator lamp comes on.
The air conditioning does not operate
when the air flow adjustment is set to off.
To obtain cool air more quickly, you can
activate recirculation of the interior air for
a few moments.
Switching off
F Press this button again; its indicator lamp goes off.
Switching off the air conditioning may result in
some discomfort (humidity, condensation).
Ease of use and comfort