Page 44 of 566
42
3008-2_en_Chap01_instruments-de-bord_ed01-2016
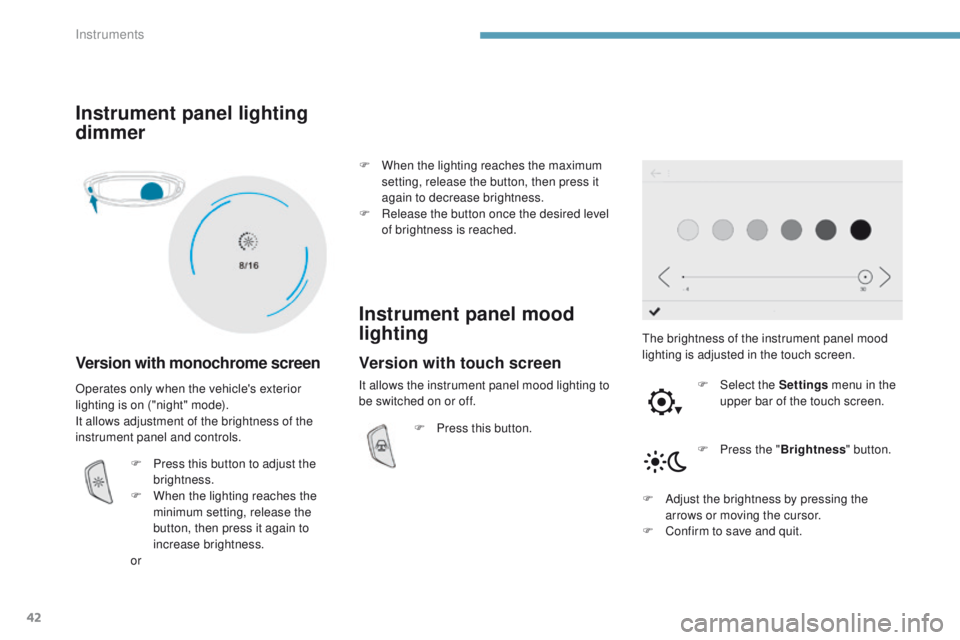
Instrument panel lighting
dimmer
Version with monochrome screen
The brightness of the instrument panel mood
lighting is adjusted in the touch screen.F
Sel
ect the Settings menu in the
upper bar of the touch screen.
Operates only when the vehicle's exterior
lighting is on ("night" mode).
It allows adjustment of the brightness of the
instrument panel and controls.
F
P
ress this button to adjust the
brightness.
F
W
hen the lighting reaches the
minimum setting, release the
button, then press it again to
increase brightness.
or F
W
hen the lighting reaches the maximum
setting, release the button, then press it
again to decrease brightness.
F
R
elease the button once the desired level
of brightness is reached.
Instrument panel mood
lighting
F Press this button.
F
P
ress the "Brightness " button.
F
A
djust the brightness by pressing the
arrows or moving the cursor.
F
C
onfirm to save and quit.
Version with touch screen
It allows the instrument panel mood lighting to
be switched on or off.
Instruments
Page 45 of 566
43
3008-2_en_Chap01_instruments-de-bord_ed01-2016
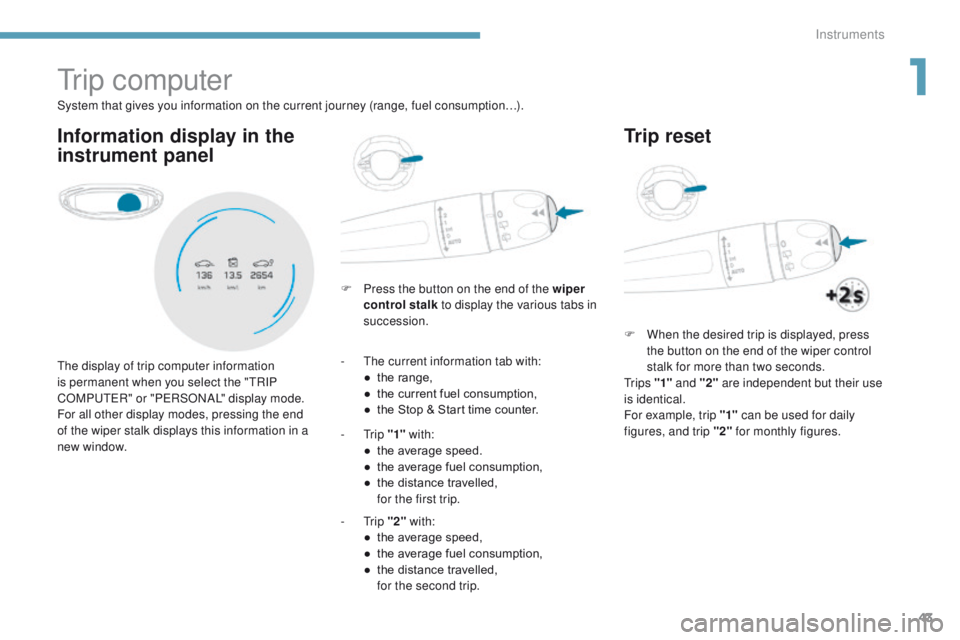
Tr i p c o m p u t e r
Information display in the
instrument panel
F Press the button on the end of the wiper control stalk to display the various tabs in
succession.
The display of trip computer information
is permanent when you select the "TRIP
COMPUTER" or "PERSONAL" display mode.
For all other display modes, pressing the end
of the wiper stalk displays this information in a
new window. System that gives you information on the current journey (range, fuel consumption…).
-
T
he current information tab with:
●
t
he range,
●
t
he current fuel consumption,
●
t
he Stop & Start time counter.
-
Trip "1" with:
●
t
he average speed.
●
t
he average fuel consumption,
●
t
he distance travelled,
f
or the first trip.
-
Trip "2" with:
●
t
he average speed,
●
t
he average fuel consumption,
●
t
he distance travelled,
f
or the second trip.
Trip reset
F When the desired trip is displayed, press the button on the end of the wiper control
stalk for more than two seconds.
Tr i p s "1" and "2" are independent but their use
is identical.
For example, trip "1" can be used for daily
figures, and trip "2" for monthly figures.
1
Instruments
Page 47 of 566
45
3008-2_en_Chap01_instruments-de-bord_ed01-2016
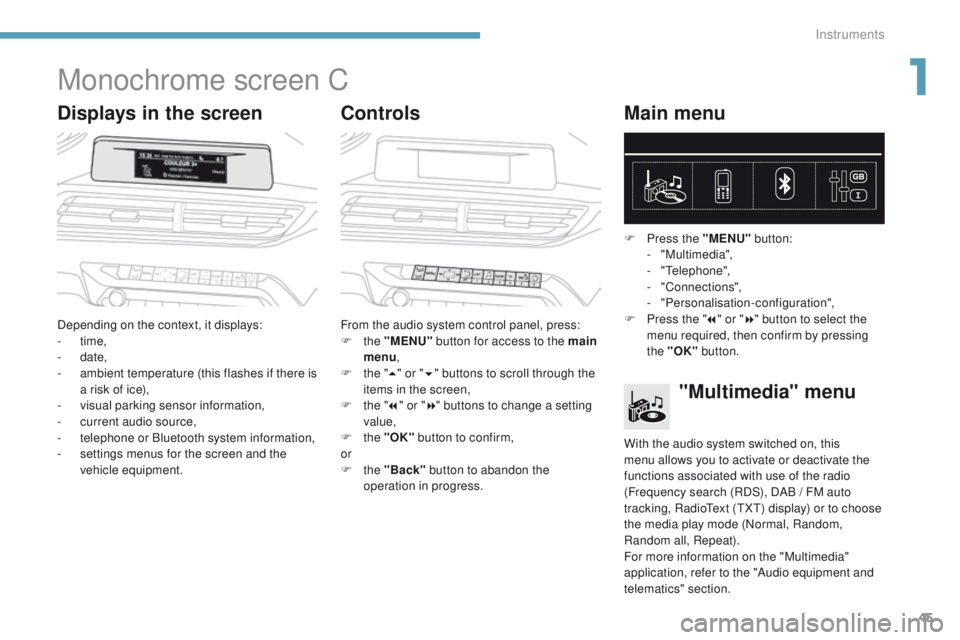
Monochrome screen C
Displays in the screenControlsMain menu
Depending on the context, it displays:
-
time,
-
date,
-
a
mbient temperature (this flashes if there is
a risk of ice),
-
v
isual parking sensor information,
-
c
urrent audio source,
-
t
elephone or Bluetooth system information,
-
s
ettings menus for the screen and the
vehicle equipment. From the audio system control panel, press:
F
the "MENU" button for access to the main
menu ,
F
t
he "5" or " 6" buttons to scroll through the
items in the screen,
F
t
he "7" or " 8" buttons to change a setting
value,
F
the "OK" button to confirm,
or
F
the "Back" button to abandon the
operation in progress. F
P
ress the "MENU"
button:
- "Multimedia",
-
"Telephone",
-
"Connections",
-
"Personalisation-configuration",
F P ress the "
7" or " 8" button to select the
menu required, then confirm by pressing
the "OK" button.
"Multimedia" menu
With the audio system switched on, this
menu allows you to activate or deactivate the
functions associated with use of the radio
(Frequency search (RDS), DAB
/ FM auto
tracking, RadioText (TXT) display) or to choose
the media play mode (Normal, Random,
Random all, Repeat).
For more information on the "Multimedia"
application, refer to the "Audio equipment and
telematics" section.
1
Instruments
Page 49 of 566
47
3008-2_en_Chap01_instruments-de-bord_ed01-2016
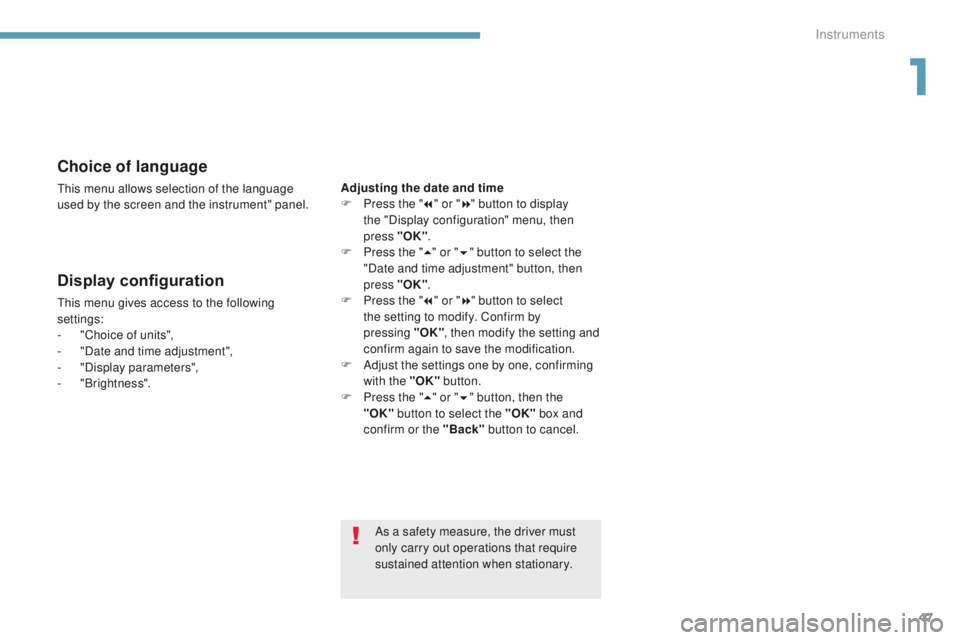
Choice of language
This menu allows selection of the language
used by the screen and the instrument" panel.
Display configuration
This menu gives access to the following
settings:
-
"
Choice of units",
-
"
Date and time adjustment",
-
"
Display parameters",
-
"Brightness". Adjusting the date and time
F
P
ress the "
7" or " 8" button to display
the "Display configuration" menu, then
press "OK"
.
F
P
ress the "
5" or " 6" button to select the
"Date and time adjustment" button, then
press "OK" .
F P ress the "
7" or " 8" button to select
the setting to modify. Confirm by
pressing
"OK", then modify the setting and
confirm again to save the modification.
F
A
djust the settings one by one, confirming
with the "OK" button.
F
P
ress the "5" or " 6" button, then the
"OK"
button to select the "OK" box and
confirm or the "Back" button to cancel.
As a safety measure, the driver must
only carry out operations that require
sustained attention when stationary.
1
Instruments
Page 51 of 566
49
3008-2_en_Chap01_instruments-de-bord_ed01-2016
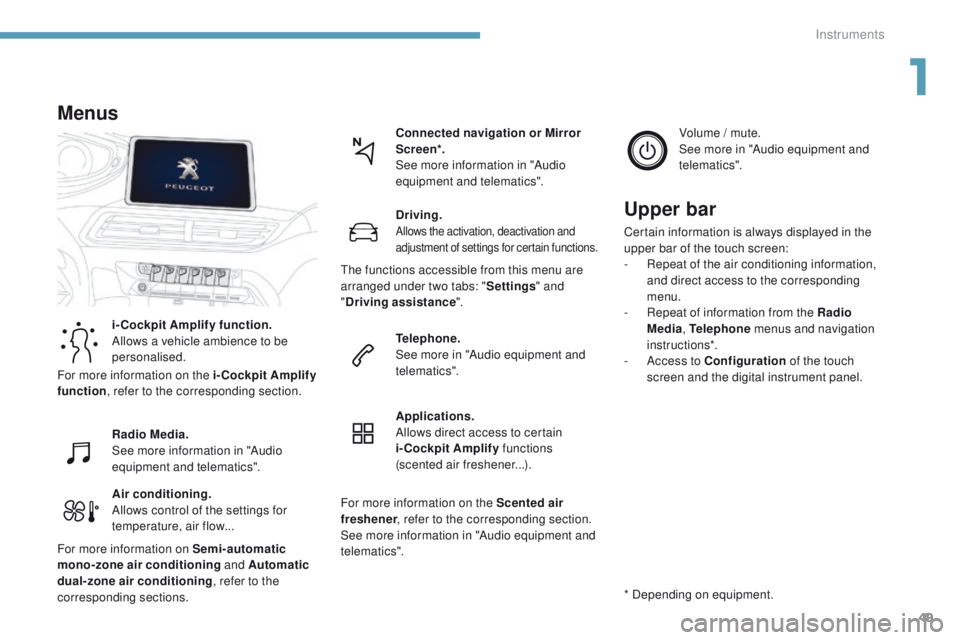
Air conditioning.
Allows control of the settings for
temperature, air flow...Connected navigation or Mirror
Scre en*.
See more information in "Audio
equipment and telematics".
Menus
i-Cockpit Amplify function.
Allows a vehicle ambience to be
personalised.
Radio Media.
See more information in "Audio
equipment and telematics".
Driving.
Allows the activation, deactivation and
adjustment of settings for certain functions.
Telephone.
See more in "Audio equipment and
telematics".
Applications.
Allows direct access to certain
i-Cockpit Amplify
functions
(scented air freshener...). Volume / mute.
See more in "Audio equipment and
telematics".
* Depending on equipment.
Upper bar
Certain information is always displayed in the
upper bar of the touch screen:
-
R
epeat of the air conditioning information,
and direct access to the corresponding
menu.
-
R
epeat of information from the Radio
Media , Telephone menus and navigation
instructions*.
-
A
ccess to Configuration of the touch
screen and the digital instrument panel.
For more information on the i-Cockpit Amplify
function , refer to the corresponding section.
For more information on Semi-automatic
mono-zone air conditioning and Automatic
dual-zone air conditioning , refer to the
corresponding sections. The functions accessible from this menu are
arranged under two tabs: "
Settings" and
" Driving assistance ".
For more information on the Scented air
freshener , refer to the corresponding section.
See more information in "Audio equipment and
telematics".
1
Instruments
Page 54 of 566
52
3008-2_en_Chap01_instruments-de-bord_ed01-2016
Configuration
The functions available through this menu are detailed in the table below.
Button Comments
Turn off the screen (black screen).
To return to the current screen, press the black screen or one of the menu buttons.
Adjustment of the brightness of the instrument panel mood lighting.
Choice and settings for three user profiles.
Settings for the touch screen and the digital instrument panel...
Activation and adjustment of Wi-Fi settings.
Instruments
Page 55 of 566
53
3008-2_en_Chap01_instruments-de-bord_ed01-2016
ButtonCorresponding function Comments
Screen configuration Adjustment of the display settings (scrolling of text, animations...) and brightness.
Instrument panel perso Select the type of information displayed in the digital instrument panel.
System configuration Choice of units:
-
t
emperature (°Celsius or °Fahrenheit)
-
d
istance and fuel consumption (l/100 km, mpg or km/l).
Languages Choice of language used for the touch screen and the digital instrument panel.
Time / Date Setting the time, date and format.
Option of synchronisation with GPS.
Settings
The settings possible for the touch screen and the digital instrument panel are presented in the table below.
1
Instruments
Page 68 of 566
66
3008-2_en_Chap02_ouvertures_ed01-2016
Changing the battery
A message appears in the instrument panel screen when replacement of the battery is needed.
Version without Keyless Entr y and Star ting
Batter y type: CR1620 / 3 volts.Version with Keyless Entr y and Star ting
Batter y type: CR2032 / 3 volts.
F
U
nclip the cover using a small screwdriver
at the cut-out.
F
L
ift off the cover.
F
R
emove the discharged battery from its
housing.
F
F
it the new battery into its housing
observing the polarity.
F
C
lip the cover onto the casing.
The remote control must be reinitialised after
replacing the battery.
For more information on reinitialising the
remote control, refer to the corresponding
section.
Access