2017 Peugeot 3008 Hybrid 4 heating
[x] Cancel search: heatingPage 4 of 566

.
.
3008-2_en_Chap00a_sommaire_ed01-2016
Digital instrument panel 12
Indicator and warning lamps 1 6
Indicators
32
Manual test
4
0
Distance recorders
4
1
Lighting dimmer
4
2
Trip computer
4
3
Monochrome screen C
4
5
Touch screen
4
8
Remote control
5
4
Keyless Entry and Starting
5
8
Back-up procedures
6
4
Central locking
6
8
Alarm
70
D o o r s
74
Boot
7
5
Hands-free tailgate
7
6
Electric windows
8
2
Panoramic opening sunroof
8
4Driving position
8
8
Front seats
9
0
Steering wheel adjustment
9
9
Mirrors 99
i- Cockpit Amplify function
1
02
Heating and Ventilation
1
04
Manual air conditioning
1
06
Semi-automatic mono-zone air conditioning
1
08
Dual-zone automatic air conditioning 1 11
Front demist - defrost 1 16
Heated windscreen
1
17
Rear screen demist - defrost
1
18
Front fittings
1
19
Courtesy lamps
1
28
Interior mood lighting
1
29
Rear seats
1
30
Rear fittings
1
33
Boot fittings
1
35
Boot lamp
1
40Exterior lighting control stalk
1
41
Direction indicators
1
44
Headlamp beam height adjustment
1
45
Automatic illumination of headlamps
1
46
Automatic headlamp dipping
1
49
Cornering lighting
1
51
Wiper control stalk
1
52
Automatic rain sensitive wipers
1
55
General safety recommendations
1
56
Hazard warning lamps
1
57
Hor n
15
7
Emergency or assistance
1
58
Electronic stability programme (ESC)
1
60
Advanced Grip Control
1
64
Hill Assist Descent Control
1
66
Seat belts
1
68
Airbags
1
72
Child seats
1
77
Deactivating the passenger's front airbag
1
79
ISOFIX child seats
1
86
i-Size child seats
1
90
Child lock
1
93
Over view
Eco-driving
Instruments
Access Ease of use and comfort
Lighting and visibility
Safety
Contents
Page 9 of 566

7
3008-2_en_Chap00b_vue-ensemble_ed01-2016
Instruments and controls
Digital instrument panel 12-15
Warning lamps 1 6-31
Indicators, gauges
3
2- 40
Setting buttons
4
0 - 42
-
C
HECK / trip distance recorder
-
d
ashboard lighting dimmer /
mood lighting
Door mirrors
9
9 -100
Electric windows
8
2- 83
Changing a fuse
3
31
Opening the bonnet
2
94
Manual gearbox
2
10
Automatic gearbox
21
1-215
Electric parking brake
20
3-209 Blind / Panoramic opening
sunroof 84- 87
Courtesy lamps 1 28
Interior mood lighting 1 29
Emergency or assistance call
1
58 -159
Seat belts / passenger's front airbag warning lamp display
1
69-170, 174
Rear view mirror
1
01
Heating / Ventilation
1
04-105
Manual air conditioning
1
06-107
Semi-automatic mono-zone air conditioning
108 -110
Automatic dual-zone air c o n d i t i o n i n g
111
-115
Demisting / Defrosting, front
1
16
Demisting / Defrosting, rear screen
1
18
Heated seats
9
7
Monochrome screen C
4
5-47
Touch screen
4
8 -53
i- Cockpit Amplify function
1
02-103
Hazard warning lamps
1
57
Anti-theft / Starting with the START/ STOP button
20
0-202
Advanced Grip Control
1
64-165
Hill Assist Descent Control
1
66 -167
.
Over view
Page 20 of 566

18
3008-2_en_Chap01_instruments-de-bord_ed01-2016
Warning / indicator lampStateCause Action / Observations
Diesel engine
pre-heating fixed.
When the ignition is switched on
with a key in the ignition switch or
a starting instruction made using
the
"START/STOP " button, the
engine temperature makes engine
pre-heating necessary. The period of illumination of the indicator lamp is
determined by the ambient conditions (up to about
thirty seconds in severe winter conditions).
With an ignition switch and key, wait until the indicator
lamp goes off before starting.
With Keyless Entry and Starting, once it goes off,
starting is immediate, on condition that the brake
pedal remains pressed with an automatic gearbox, or
the clutch pedal is pressed fully down with a manual
gearbox.
If the engine does not start, switch the ignition off and
then on, wait until the indicator lamp goes off again,
then start the engine.
Stop & Star t fixed. When the vehicle stops (red lights, traffic
jams,
...) the Stop & Start system has put
the engine into STOP mode. The warning lamp goes off and the engine restarts
automatically in START mode, as soon as you want
to move off.
flashes for a few
seconds, then goes
of f. STOP mode is temporarily
unavailable,
or
START mode is invoked
automatically. For more information on Stop & Star t
, refer to the
corresponding section.
Rear foglamps
fixed. The rear foglamps have been
switched on using the ring on the
lighting control stalk. Turn the ring on the lighting control stalk rear wards to
switch off the rear foglamps.
Front foglamps fixed. The front foglamps are switched on
using the ring on the lighting control
stalk. Turn the ring on the lighting control stalk rear ward
twice to switch off the front foglamps.
Instruments
Page 50 of 566

48
3008-2_en_Chap01_instruments-de-bord_ed01-2016
Touch screen
This system gives access to:
- t he permanent display of the time and
the ambient temperature (a blue symbol
appears when there is a risk of ice),
-
t
he heating/air conditioning controls,
-
m
enus for adjusting settings for vehicle
functions and systems,
-
a
udio system and telephone controls and
the display of associated information,
-
t
he display of visual parking aids (visual
parking sensor information, Park Assist, ...),
-
I
nternet services, and the display of
associated information.General operation
and, depending on equipment, allows:
- a ccess to the navigation system controls
and the display of associated information. As a safety measure, the driver
should only carr y out operations
that require close attention with the
vehicle stationary.
Some functions are not accessible
when driving.
Recommendations
This screen is of the capacitive type.
Use is possible in all temperatures.
Do not use pointed objects on the touch
screen.
Do not touch the touch screen with wet hands.
Uses a soft clean cloth to clean the touch
screen.
Principles
Use the buttons below the touch screen for
access to the menus, then press the virtual
buttons in the touch screen.
Certain menus may be displayed over two
pages. Press the "
OPTIONS" button to go to
the second page.
To deactivate or activate a function,
select
"OFF " or " ON".
To modify a setting or access additional
information, press the symbol for the function.
Use this button to confirm.
Use this button to return to the
previous page.
After a few moments with no action
on the second page, the first page is
displayed automatically.
For the audio and telematic systems,
refer to the supplement to the handbook
or go to the following internet address:
http://public.servicebox.peugeot.com/ddb/
Instruments
Page 81 of 566

79
3008-2_en_Chap02_ouvertures_ed01-2016
When opening and closing a motorised tailgate
manually, there is no assistance from gas-filled
struts. Resistance to opening and closing is
therefore entirely normal.Repeated opening and closing of
the motorised tailgate can cause
overheating of its electric motor, after
which opening and closing will not be
possible.
Allow at least 10 minutes for the electric
motor to cool down before operating the
tailgate again.
If you are unable to wait, operate it
manually.
Detection of obstacles
If an obstacle (person or object) is
encountered, the anti-pinch system stops the
closing movement and raises the tailgate by a
few centimetres to clear the obstacle.
Memorising an opening
position
Where height is restricted (garage with a low
ceiling, ...) it is possible to limit and memorise
the opening angle of the motorised tailgate.
This memorisation is done as follows:
F
o
pen the tailgate to the desired position,
F
p
ress button C or the exterior control B for
more than 3 seconds.
Memorisation of the maximum opening position
of the tailgate is confirmed by an audible signal.
To cancel the memorised position:
F
s
top the tailgate in an intermediate
position,
F
p
ress button C or the exterior control B for
more than 3 seconds.
Cancellation of the memorised position is
confirmed by an audible signal.
Manual operation
The tailgate can be opened and closed
manually, even if motorised operation is
activated.
However, any manual operation must be done
with the tailgate first stopped.
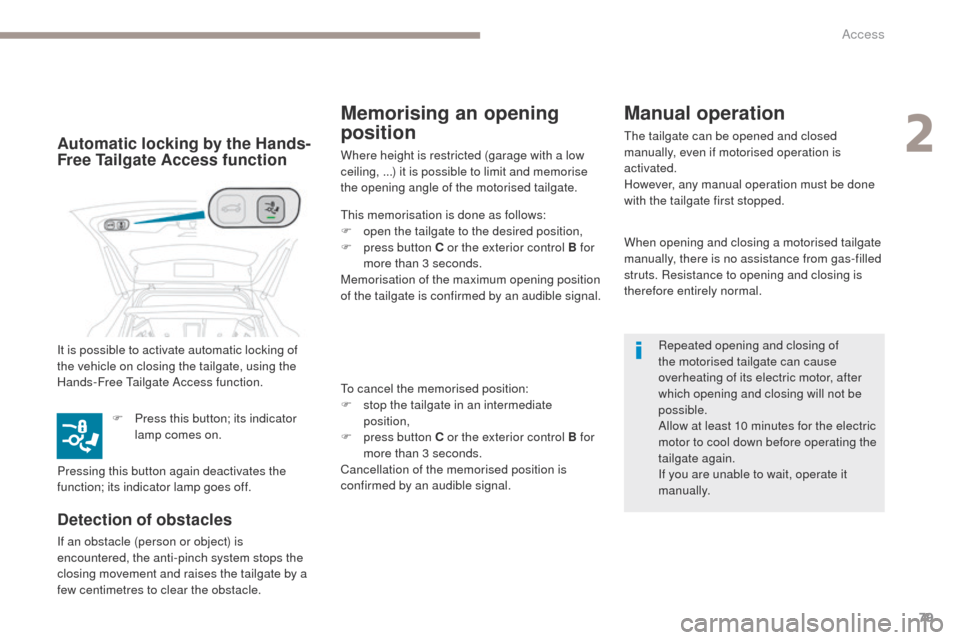
It is possible to activate automatic locking of
the vehicle on closing the tailgate, using the
Hands-Free Tailgate Access function. F
P
ress this button; its indicator
lamp comes on.
Pressing this button again deactivates the
function; its indicator lamp goes off.Automatic locking by the Hands-
Free Tailgate Access function
2
Access
Page 82 of 566

80
3008-2_en_Chap02_ouvertures_ed01-2016
Precautions in use
In wintry conditions
In the event of an accumulation of snow
on the tailgate, clear the snow before
commanding a motorised opening of
the tailgate.
The formation of ice can block the
tailgate and prevent its opening: wait
until the ice melts with the heating of
the passenger compartment.
When washing
When washing the vehicle in an
automatic car wash, don't forget to
lock your vehicle to avoid the risk of
unexpected opening.
Reinitialising the motorised
tailgate
This operation is necessary where there is
no movement - after detection of an obstacle,
connecting or recharging the battery, ...
F
O
pen the tailgate manually, if necessary.
F
F
ully close the tailgate manually.
If the problem persists, contact a PEUGEOT
dealer or a qualified workshop.
Access
Page 99 of 566

97
3008-2_en_Chap03_ergonomie-et-confort_ed01-2016
Heated seats
The function is active only with the engine
running.
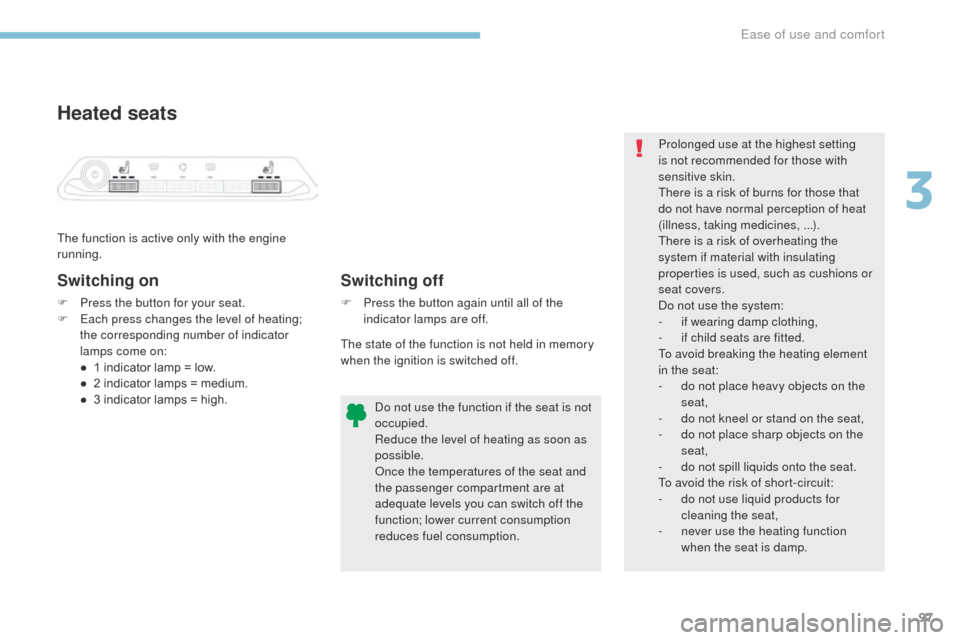
Switching on
F Press the button for your seat.
F E ach press changes the level of heating;
the corresponding number of indicator
lamps come on:
●
1 i
ndicator lamp = low.
●
2 i
ndicator lamps = medium.
●
3 i
ndicator lamps = high. Do not use the function if the seat is not
occupied.
Reduce the level of heating as soon as
possible.
Once the temperatures of the seat and
the passenger compartment are at
adequate levels you can switch off the
function; lower current consumption
reduces fuel consumption.
Switching off
F Press the button again until all of the
indicator lamps are off.
The state of the function is not held in memory
when the ignition is switched off. Prolonged use at the highest setting
is not recommended for those with
sensitive skin.
There is a risk of burns for those that
do not have normal perception of heat
(illness, taking medicines, ...).
There is a risk of overheating the
system if material with insulating
properties is used, such as cushions or
seat covers.
Do not use the system:
-
i
f wearing damp clothing,
-
i
f child seats are fitted.
To avoid breaking the heating element
in the seat:
-
d
o not place heavy objects on the
seat,
-
d
o not kneel or stand on the seat,
-
d
o not place sharp objects on the
seat,
-
d
o not spill liquids onto the seat.
To avoid the risk of short-circuit:
-
d
o not use liquid products for
cleaning the seat,
-
n
ever use the heating function
when the seat is damp.
3
Ease of use and comfort
Page 106 of 566

104
3008-2_en_Chap03_ergonomie-et-confort_ed01-2016
Heating and Ventilation
Air intake
The air circulating in the passenger
compartment is filtered and originates either
from the outside via the grille located at the
base of the windscreen or from the inside in air
recirculation mode.
Controls
The incoming air follows various routes
depending on the controls selected by
the driver, the front passenger and rear
passengers, according to the level of
equipment.
The temperature control enables you to obtain
the level of comfort required by mixing the air of
the various circuits.
The air distribution control enables you to
select the air vents used in the passenger
compartment by the combined use of the
associated buttons.
The air flow control enables you to increase or
reduce the speed of the ventilation fan.
Depending on your vehicle, the controls are
accessible in the "Air conditioning" menu of
the touch screen or are grouped together on
control panel on the centre console.
Air distribution
1. Windscreen demisting/defrosting vents.
2. F ront side window demisting/defrosting
vents.
3.
S
ide adjustable air vents.
4.
C
entral adjustable air vents.
5.
A
ir outlets to the front footwells. 6. A
ir outlets to the rear footwells.
To close the air vents:
F
s
ide vents; place the cursor in the central
position, then move it sideways towards the
d o o r.
F
c
entre vents; place the cursor in the central
position, then move it sideways towards the
centre of the dashboard.
Ease of use and comfort