Page 304 of 566
302
3008-2_en_Chap07_infos-pratiques_ed01-2016
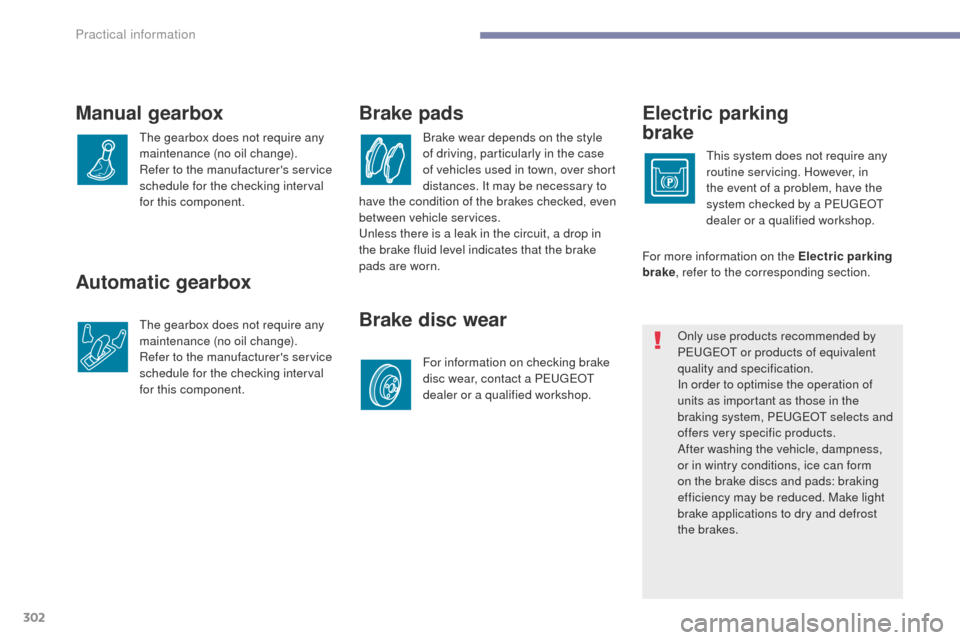
Automatic gearbox
The gearbox does not require any
maintenance (no oil change).
Refer to the manufacturer's service
schedule for the checking interval
for this component.
Electric parking
brake
This system does not require any
routine servicing. However, in
the event of a problem, have the
system checked by a PEUGEOT
dealer or a qualified workshop.
Brake pads
Brake wear depends on the style
of driving, particularly in the case
of vehicles used in town, over short
distances. It may be necessary to
Brake disc wear
For information on checking brake
disc wear, contact a PEUGEOT
dealer or a qualified workshop.For more information on the Electric parking
brake
, refer to the corresponding section.
Manual gearbox
The gearbox does not require any
maintenance (no oil change).
Refer to the manufacturer's service
schedule for the checking interval
for this component.
Only use products recommended by
PEUGEOT or products of equivalent
quality and specification.
In order to optimise the operation of
units as important as those in the
braking system, PEUGEOT selects and
offers very specific products.
After washing the vehicle, dampness,
or in wintry conditions, ice can form
on the brake discs and pads: braking
efficiency may be reduced. Make light
brake applications to dry and defrost
the brakes.
have the condition of the brakes checked, even
between vehicle services.
Unless there is a leak in the circuit, a drop in
the brake fluid level indicates that the brake
pads are worn.
Practical information
Page 307 of 566
305
3008-2_en_Chap07_infos-pratiques_ed01-2016
Recommendations on storage ProcedurePark the vehicle
F Before topping-up, ensure that the vehicle is parked on a flat and level sur face.
F
S
witch off the ignition to stop the engine
and remove the key from the switch.
or
F
W
ith Keyless Entry and Starting, press
the
"START/STOP " button to stop the
engine.
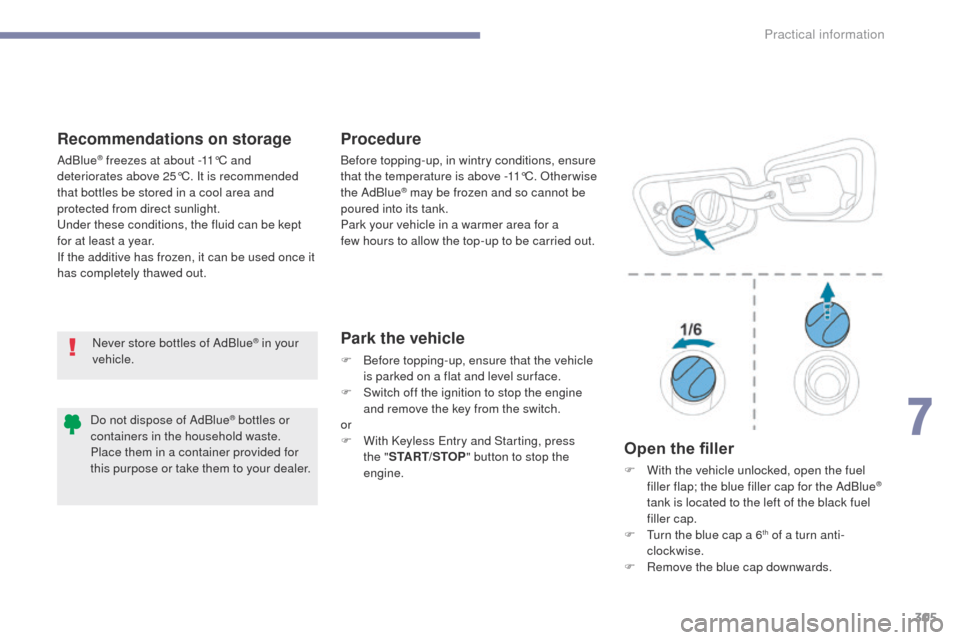
Open the filler
F With the vehicle unlocked, open the fuel filler flap; the blue filler cap for the AdBlue®
tank is located to the left of the black fuel
filler cap.
F
T
urn the blue cap a 6
th of a turn anti-
clockwise.
F
R
emove the blue cap downwards.
Never store bottles of AdBlue
® in your
vehicle. Before topping-up, in wintry conditions, ensure
that the temperature is above -11°C. Other wise
the AdBlue
® may be frozen and so cannot be
poured into its tank.
Park your vehicle in a warmer area for a
few
hours to allow the top-up to be carried out.
AdBlue
® freezes at about -11°C and
deteriorates above 25°C. It is recommended
that bottles be stored in a cool area and
protected from direct sunlight.
Under these conditions, the fluid can be kept
for at least a year.
If the additive has frozen, it can be used once it
has completely thawed out.
Do not dispose of AdBlue
® bottles or
containers in the household waste.
Place them in a container provided for
this purpose or take them to your dealer.
7
Practical information
Page 325 of 566
323
3008-2_en_Chap08_en cas-de-panne_ed01-2016
Changing a bulb
The headlamps have polycarbonate
lenses with a protective coating:
F
d
o not clean them using a dr y
or abrasive cloth, nor with a
detergent or solvent product,
F
u
se a sponge and soapy water or a
pH neutral product,
F
w
hen using a high pressure washer
on persistent marks, do not keep
the lance directed towards the
lamps or their edges for too long,
so as not to damage their protective
coating and seals.
Changing a bulb should only be done
after the headlamp has been switched
off for several minutes (risk of serious
burns).
F
D
o not touch the bulb directly with
your fingers, use a lint-free cloth.
It is imperative to use only anti-
ultraviolet (UV) type bulbs to avoid
damaging the headlamp.
Always replace a failed bulb with a
new bulb with the same type and
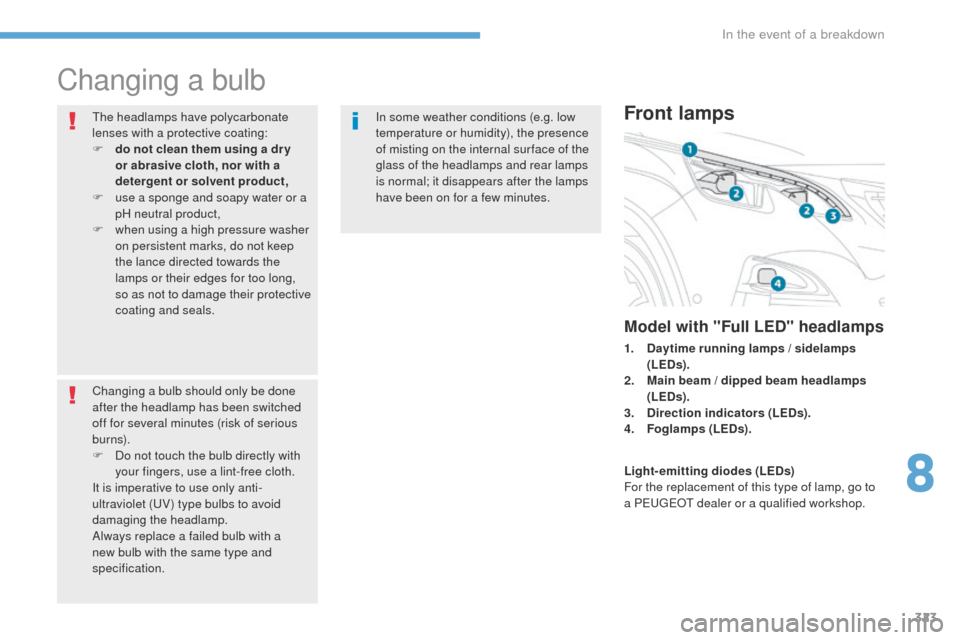
specification.Front lamps
Model with "Full LED" headlamps
1. Daytime running lamps / sidelamps (LEDs).
2.
M
ain beam / dipped beam headlamps
(LEDs).
3.
D
irection indicators (LEDs).
4.
Fo
glamps (LEDs).
In some weather conditions (e.g. low
temperature or humidity), the presence
of misting on the internal sur face of the
glass of the headlamps and rear lamps
is normal; it disappears after the lamps
have been on for a few minutes.
Light-emitting diodes (LEDs)
For the replacement of this type of lamp, go to
a PEUGEOT dealer or a qualified workshop.
8
In the event of a breakdown
Page 326 of 566
324
3008-2_en_Chap08_en cas-de-panne_ed01-2016
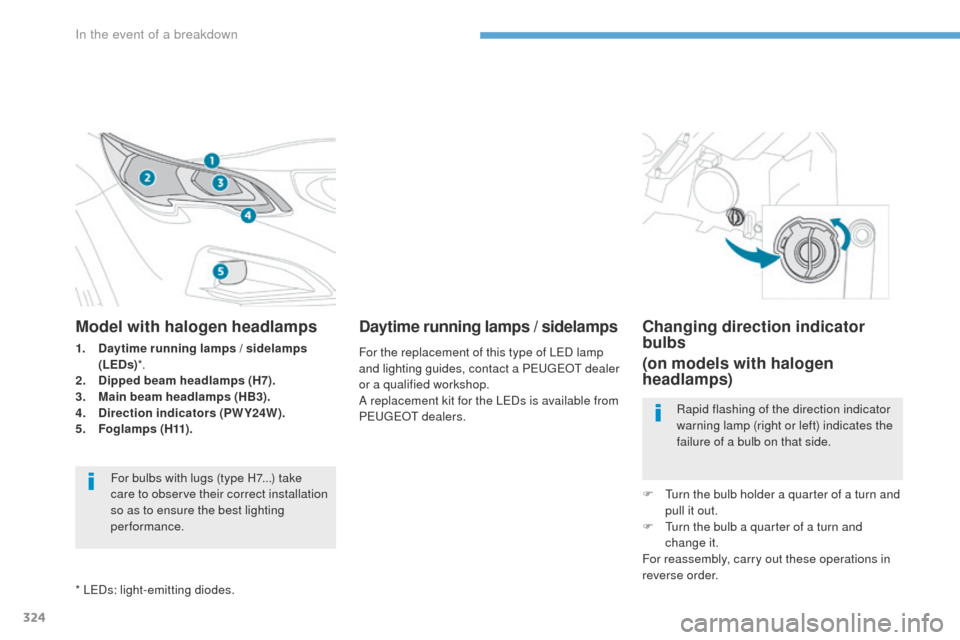
Model with halogen headlamps
1. Daytime running lamps / sidelamps (LEDs) *.
2.
D
ipped beam headlamps (H7).
3.
M
ain beam headlamps (HB3).
4.
D
irection indicators (PWY24W).
5.
Fo
glamps ( H11) .
For bulbs with lugs (type H7...) take
care to observe their correct installation
so as to ensure the best lighting
performance.
* LEDs: light-emitting diodes.
Daytime running lamps / sidelamps
For the replacement of this type of LED lamp
and lighting guides, contact a PEUGEOT dealer
or a qualified workshop.
A replacement kit for the LEDs is available from
PEUGEOT dealers.
Changing direction indicator
bulbs
(on models with halogen
headlamps)
Rapid flashing of the direction indicator
warning lamp (right or left) indicates the
failure of a bulb on that side.
F
T
urn the bulb holder a quarter of a turn and
pull it out.
F
T
urn the bulb a quarter of a turn and
change it.
For reassembly, carry out these operations in
reverse order.
In the event of a breakdown
Page 329 of 566
327
3008-2_en_Chap08_en cas-de-panne_ed01-2016
Changing the side spotlamps
(LEDs)
For the replacement of this type of light emitting
diode lamp, contact a PEUGEOT dealer or a
qualified workshop.
Changing direction indicator side
repeaters (LEDs)
For the replacement of this type of light-
emitting diode lamp, contact a PEUGEOT
dealer or a qualified workshop.
8
In the event of a breakdown
Page 330 of 566
328
3008-2_en_Chap08_en cas-de-panne_ed01-2016
Direction indicators
(on the wings)
F Open the tailgate then unclip the access cover on the side in question.
F
S
lacken the lamp fixing nut using a 10 mm
box spanner or socket.
F
T
o avoid losing the nut if it drops into the
wing trim, first place a cloth below it.
F
M
anually unscrew and remove the lamp
fixing nut.
F
D
isengage the retaining clip, while pushing
the lamp out slightly.
Rear lamps
1. Brake lamps (LEDs).
2. Si delamps / daytime running lamps
(LEDs).
3.
D
irection indicators (WY16W amber).
4.
R
eversing lamps (W16W).
5.
F
oglamp (P21W).
LEDs: light-emitting diodes. F
F
rom the outside, carefully remove the
lamp by pulling it to the rear, then up.
F
D
isconnect the lamp connector.
F
T
urn the bulb holder a quarter turn and pull
it out using a standard pair of pliers.
F
P
ull the bulb out and replace it.
For reassembly, carry out these operations in
reverse order.
In the event of a breakdown
Page 331 of 566
329
3008-2_en_Chap08_en cas-de-panne_ed01-2016
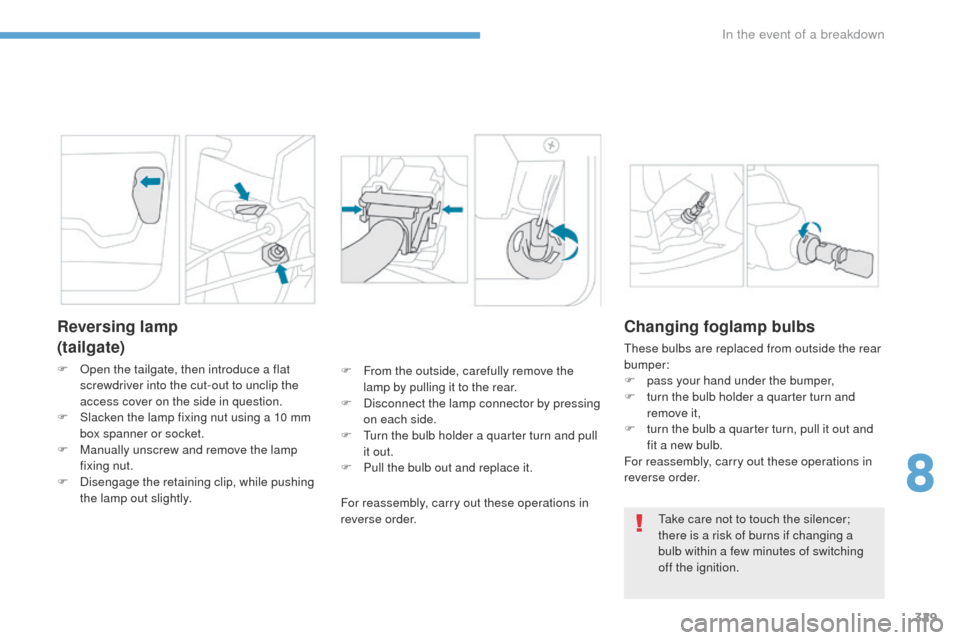
Reversing lamp
(tailgate)
F Open the tailgate, then introduce a flat screwdriver into the cut-out to unclip the
access cover on the side in question.
F
S
lacken the lamp fixing nut using a 10 mm
box spanner or socket.
F
M
anually unscrew and remove the lamp
fixing nut.
F
D
isengage the retaining clip, while pushing
the lamp out slightly. F
F rom the outside, carefully remove the
lamp by pulling it to the rear.
F
D
isconnect the lamp connector by pressing
on each side.
F
T
urn the bulb holder a quarter turn and pull
it out.
F
P
ull the bulb out and replace it.
For reassembly, carry out these operations in
reverse order.
Changing foglamp bulbs
These bulbs are replaced from outside the rear
bumper:
F
p
ass your hand under the bumper,
F
t
urn the bulb holder a quarter turn and
remove it,
F
t
urn the bulb a quarter turn, pull it out and
fit a new bulb.
For reassembly, carry out these operations in
reverse order.
Take care not to touch the silencer;
there is a risk of burns if changing a
bulb within a few minutes of switching
off the ignition.
8
In the event of a breakdown
Page 332 of 566
330
3008-2_en_Chap08_en cas-de-panne_ed01-2016
Third brake lamp (light emitting
diodes - LEDs)
Contact a PEUGEOT dealer or qualified
workshop.
Number plate lamps
F Insert a thin screwdriver into the slot in the lens.
F
P
ush it outwards to unclip it.
F
R
emove the lens.
F
P
ull the bulb out and change it.
In the event of a breakdown