2017 Peugeot 3008 Hybrid 4 keyless
[x] Cancel search: keylessPage 79 of 566

77
3008-2_en_Chap02_ouvertures_ed01-2016
Operation
There are several ways of operating the
motorised tailgate:
A.
u
sing the electronic key of the Keyless
Entry and Starting system,
B.
u
sing the exterior control on the tailgate,
C.
u
sing the interior tailgate control,
D.
u
sing the control on the dashboard,
E.
u
sing the "hands-free access" procedure
below the rear bumper.
Motorised opening
There are several possibilities.
F M ake a long press on the central button A
of the electronic key.
or
F
P
ress the exterior control B on the tailgate
with the electronic key on your person.
or
F
P
ress twice in succession on the
dashboard control D .
The command is confirmed by an audible
signal.
The tailgate opens, either completely as the
default setting, or to the memorised position.
Motorised closing
There are several possibilities.
F M ake a long press on the central button A
of the electronic key.
or
F
P
ress the exterior control B on the tailgate.
or
F
P
ress the interior tailgate control C .
or
F
P
ress twice in succession on the
dashboard control D .
The command is confirmed by an audible
signal.
Activation and deactivation of
motorised operation of the tailgate
is done in the Driving
menu of the
touch screen.
This function is deactivated by default.
It is possible to stop the movement of
the tailgate.
Pressing one of these controls again
interrupts the movement.
Following the interruption of a
movement, pressing one of these
controls again resumes the movement.
2
Access
Page 80 of 566
78
3008-2_en_Chap02_ouvertures_ed01-2016
"Hands-free" motorised
opening
This movement first unlocks just the
boot, or the vehicle if the latter was
locked.
F
W
ith the electronic key of the Keyless Entry
and Starting system on your person,
F
U
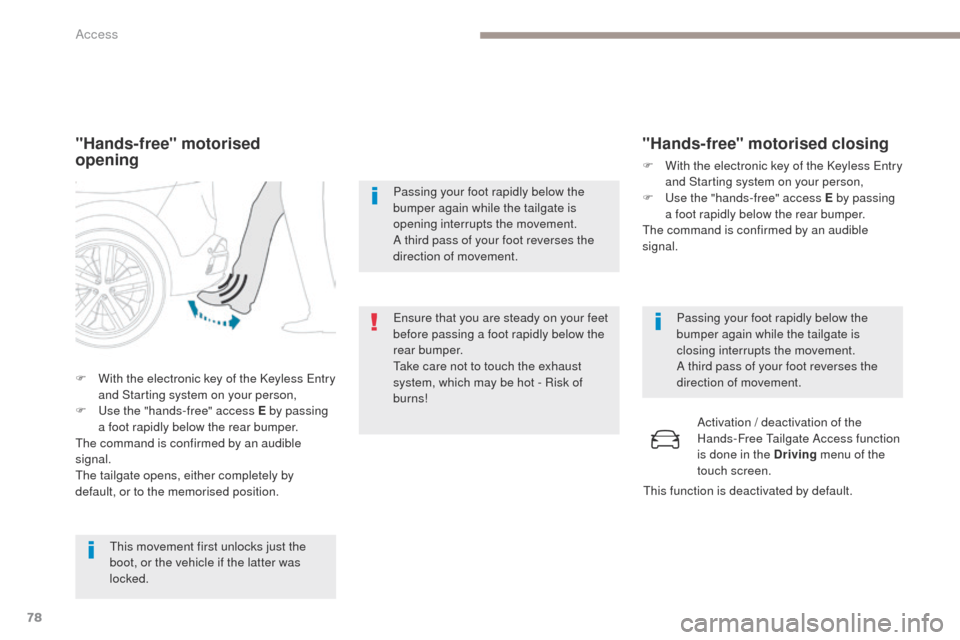
se the "hands-free" access E by passing
a foot rapidly below the rear bumper.
The command is confirmed by an audible
signal.
The tailgate opens, either completely by
default, or to the memorised position. Ensure that you are steady on your feet
before passing a foot rapidly below the
rear bumper.
Take care not to touch the exhaust
system, which may be hot - Risk of
burns! Passing your foot rapidly below the
bumper again while the tailgate is
opening interrupts the movement.
A third pass of your foot reverses the
direction of movement.
"Hands-free" motorised closing
F With the electronic key of the Keyless Entry
and Starting system on your person,
F
U
se the "hands-free" access E by passing
a foot rapidly below the rear bumper.
The command is confirmed by an audible
signal.
Passing your foot rapidly below the
bumper again while the tailgate is
closing interrupts the movement.
A third pass of your foot reverses the
direction of movement.Activation / deactivation of the
Hands-Free Tailgate Access function
is done in the Driving menu of the
touch screen.
This function is deactivated by default.
Access
Page 85 of 566
83
3008-2_en_Chap02_ouvertures_ed01-2016
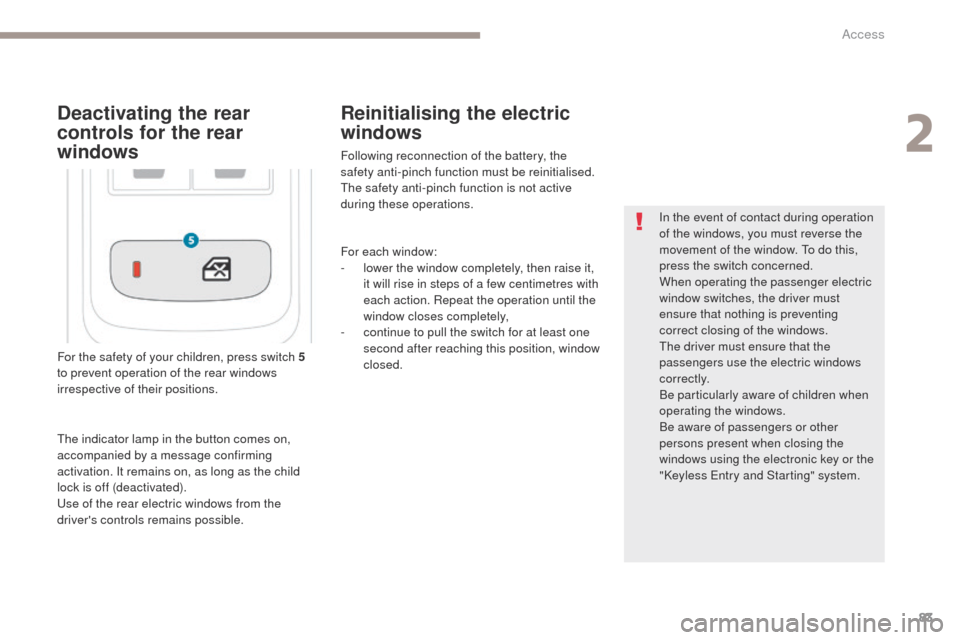
For the safety of your children, press switch 5
t o prevent operation of the rear windows
irrespective of their positions. In the event of contact during operation
of the windows, you must reverse the
movement of the window. To do this,
press the switch concerned.
When operating the passenger electric
window switches, the driver must
ensure that nothing is preventing
correct closing of the windows.
The driver must ensure that the
passengers use the electric windows
c o r r e c t l y.
Be particularly aware of children when
operating the windows.
Be aware of passengers or other
persons present when closing the
windows using the electronic key or the
"Keyless Entry and Starting" system.
Deactivating the rear
controls for the rear
windows
The indicator lamp in the button comes on,
accompanied by a message confirming
activation. It remains on, as long as the child
lock is off (deactivated).
Use of the rear electric windows from the
driver's controls remains possible.
Reinitialising the electric
windows
Following reconnection of the battery, the
safety anti-pinch function must be reinitialised.
The safety anti-pinch function is not active
during these operations.
For each window:
-
l
ower the window completely, then raise it,
it will rise in steps of a few centimetres with
each action. Repeat the operation until the
window closes completely,
-
c
ontinue to pull the switch for at least one
second after reaching this position, window
closed.
2
Access
Page 124 of 566
122
3008-2_en_Chap03_ergonomie-et-confort_ed01-2016
Wireless charger
Operation
The charger works with the engine running and
in STOP mode of Stop & Start.
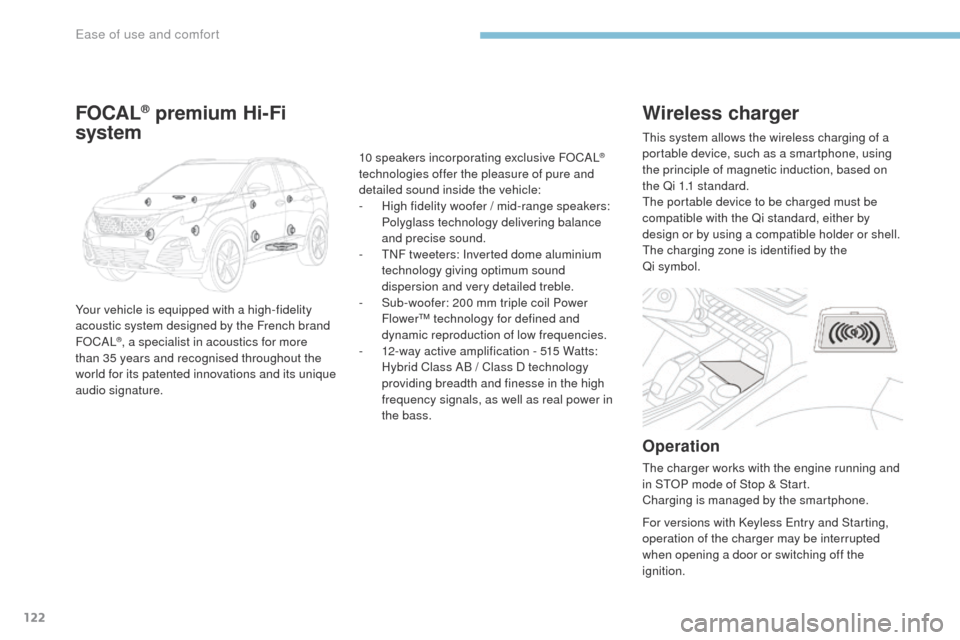
Charging is managed by the smartphone. This system allows the wireless charging of a
portable device, such as a smartphone, using
the principle of magnetic induction, based on
the Qi 1.1 standard.
The portable device to be charged must be
compatible with the Qi standard, either by
design or by using a compatible holder or shell.
The charging zone is identified by the
Qi symbol.
For versions with Keyless Entry and Starting,
operation of the charger may be interrupted
when opening a door or switching off the
ignition.
FOCAL® premium Hi-Fi
system
Your vehicle is equipped with a high-fidelity
acoustic system designed by the French brand
FOCAL
®, a specialist in acoustics for more
than 35 years and recognised throughout the
world for its patented innovations and its unique
audio signature. 10 speakers incorporating exclusive FOCAL
®
technologies offer the pleasure of pure and
detailed sound inside the vehicle:
-
H
igh fidelity woofer / mid-range speakers:
Polyglass technology delivering balance
and precise sound.
-
T
NF tweeters: Inverted dome aluminium
technology giving optimum sound
dispersion and very detailed treble.
-
S
ub-woofer: 200 mm triple coil Power
Flower™ technology for defined and
dynamic reproduction of low frequencies.
-
1
2-way active amplification - 515 Watts:
Hybrid Class AB / Class D technology
providing breadth and finesse in the high
frequency signals, as well as real power in
the bass.
Ease of use and comfort
Page 202 of 566
200
3008-2_en_Chap06_conduite_ed01-2016
Starting / Switching off the engine with
Keyless Entry and Starting
Starting the engine
F Briefly press the "S TA R T/
STOP " button while maintaining
pressure on the pedal until the
engine starts. The presence of the "Keyless Entry
and Starting" electronic key in the
recognition zone is essential.
If the electronic key is not detected in
this zone, a message is displayed.
Move the electronic key into this zone
so that the engine can be started.
If there is still a problem, refer to the
"Key not detected - Back-up starting"
section.
If one of the starting conditions is not met,
a reminder message is displayed in the
instrument panel.
In some circumstances, it is necessary
to turn the steering wheel slightly while
pressing the "
START/STOP " button to
assist unlocking of the steering column; a
message warns you when this is needed.
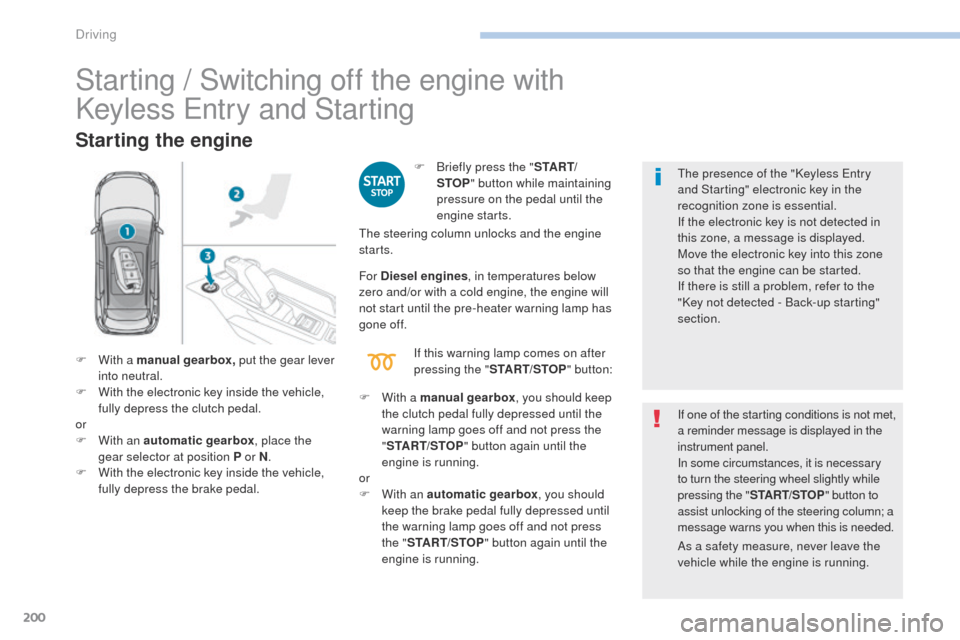
F
W
ith a manual gearbox , put the gear lever
into neutral.
F
W
ith the electronic key inside the vehicle,
fully depress the clutch pedal.
or
F
W
ith an automatic gearbox , place the
gear selector at position P or N .
F
W
ith the electronic key inside the vehicle,
fully depress the brake pedal. The steering column unlocks and the engine
starts.
F
W
ith a manual gearbox , you should keep
the clutch pedal fully depressed until the
warning lamp goes off and not press the
" START/STOP " button again until the
engine is running.
or
F
W
ith an automatic gearbox , you should
keep the brake pedal fully depressed until
the warning lamp goes off and not press
the " START/STOP " button again until the
engine is running.
For Diesel engines
, in temperatures below
zero and/or with a cold engine, the engine will
not start until the pre-heater warning lamp has
gone of f.
If this warning lamp comes on after
pressing the " START/STOP " button:
As a safety measure, never leave the
vehicle while the engine is running.
Driving
Page 203 of 566
201
3008-2_en_Chap06_conduite_ed01-2016
Switching off the engine
F Immobilise the vehicle, engine at idle.
F W ith a manual gearbox , put the gear lever
into neutral.
or
F
W
ith an automatic gearbox , place the
gear selector at position P or N .
Never leave your vehicle with the
electronic key still inside.
Switching off the engine leads to a loss
of braking assistance. If the vehicle is not immobilised, the
engine will not stop. F
W
ith the electronic key inside
the vehicle, press the " S TA R T/
STOP " button.
The engine stops and the steering
column locks.
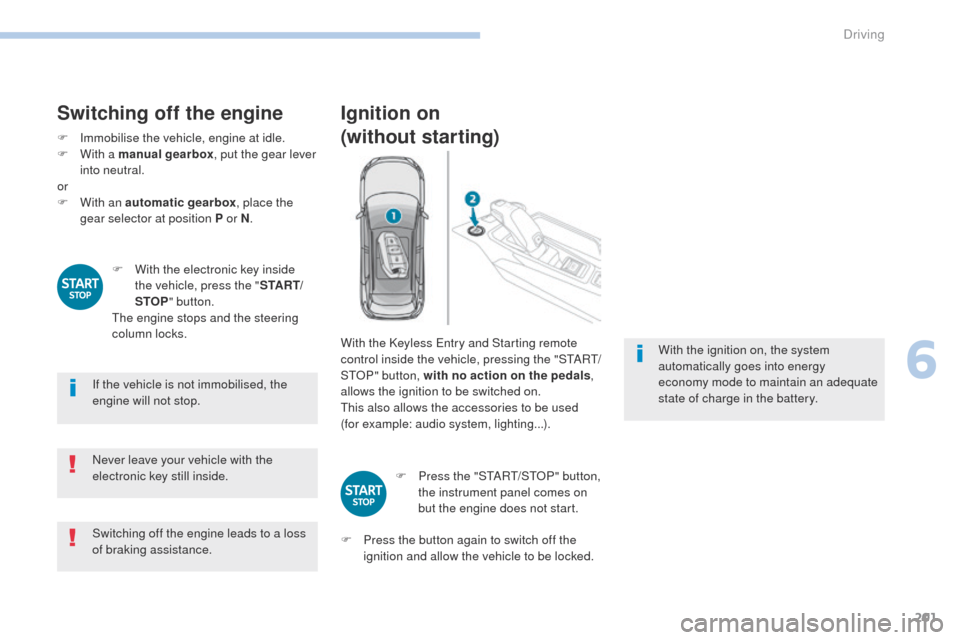
Ignition on
(without starting)
With the Keyless Entry and Starting remote
control inside the vehicle, pressing the "START/
STOP" button, with no action on the pedals ,
allows the ignition to be switched on.
This also allows the accessories to be used
(for example: audio system, lighting...).
F
P
ress the "START/STOP" button,
the instrument panel comes on
but the engine does not start.
F
P
ress the button again to switch off the
ignition and allow the vehicle to be locked. With the ignition on, the system
automatically goes into energy
economy mode to maintain an adequate
state of charge in the battery.
6
Driving
Page 283 of 566
281
3008-2_en_Chap07_infos-pratiques_ed01-2016
Fuel tank
Fuel tank capacity: approximately 53 litres.
When the low fuel level is reached in the
fuel tank, this warning lamp comes on on
the instrument panel, accompanied by
the display of a message and an audible
signal. When it first comes on there remains
approximately 6 litres of fuel in the tank.
Low fuel level
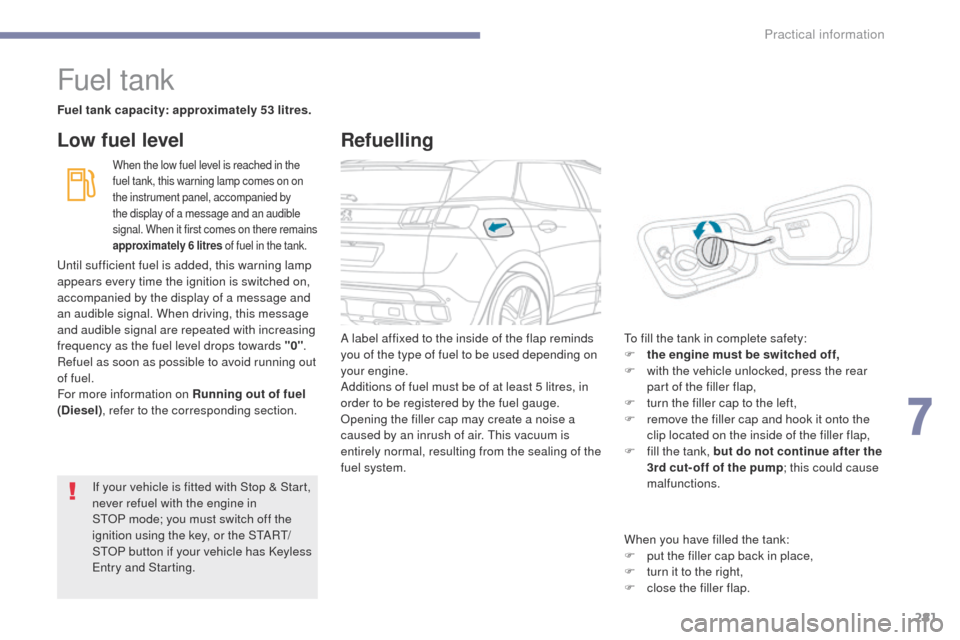
A label affixed to the inside of the flap reminds
you of the type of fuel to be used depending on
your engine.
Additions of fuel must be of at least 5 litres, in
order to be registered by the fuel gauge.
Opening the filler cap may create a noise a
caused by an inrush of air. This vacuum is
entirely normal, resulting from the sealing of the
fuel system. To fill the tank in complete safety:
F
t he engine must be switched off,
F
w
ith the vehicle unlocked, press the rear
part of the filler flap,
F
t
urn the filler cap to the left,
F
r
emove the filler cap and hook it onto the
clip located on the inside of the filler flap,
F
f
ill the tank, but do not continue after the
3rd cut- off of the pump ; this could cause
malfunctions.
If your vehicle is fitted with Stop
&
Start,
never refuel with the engine in
STOP
mode; you must switch off the
ignition using the key, or the START/
STOP button if your vehicle has Keyless
Entry and Starting.
Until sufficient fuel is added, this warning lamp
appears every time the ignition is switched on,
accompanied by the display of a message and
an audible signal. When driving, this message
and audible signal are repeated with increasing
frequency as the fuel level drops towards "0"
.
Refuel as soon as possible to avoid running out
of fuel.
For more information on Running out of fuel
(Diesel) , refer to the corresponding section.
Refuelling
When you have filled the tank:
F
p ut the filler cap back in place,
F
t
urn it to the right,
F
c
lose the filler flap.
7
Practical information
Page 307 of 566
305
3008-2_en_Chap07_infos-pratiques_ed01-2016
Recommendations on storage ProcedurePark the vehicle
F Before topping-up, ensure that the vehicle is parked on a flat and level sur face.
F
S
witch off the ignition to stop the engine
and remove the key from the switch.
or
F
W
ith Keyless Entry and Starting, press
the
"START/STOP " button to stop the
engine.
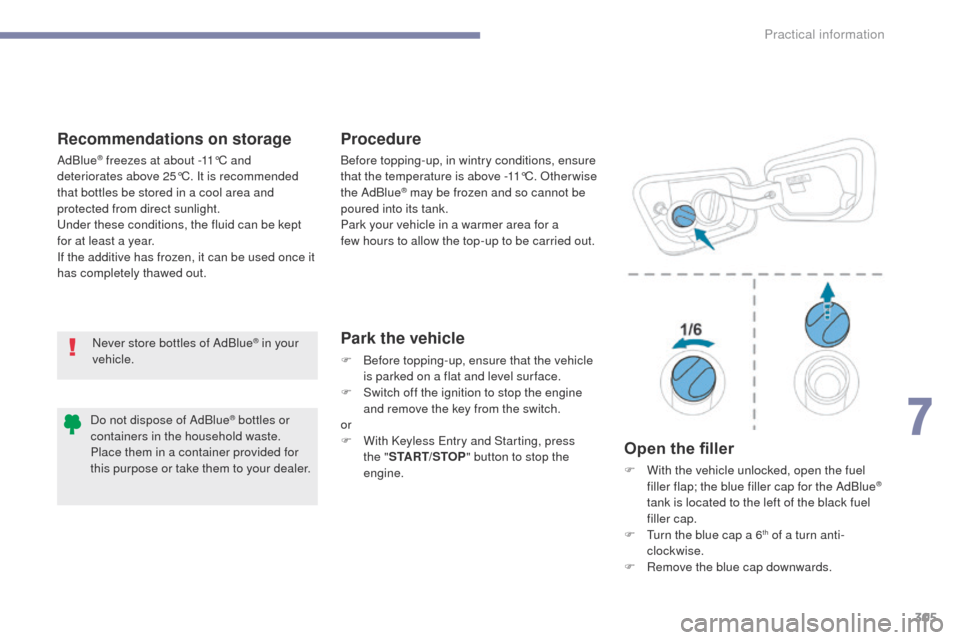
Open the filler
F With the vehicle unlocked, open the fuel filler flap; the blue filler cap for the AdBlue®
tank is located to the left of the black fuel
filler cap.
F
T
urn the blue cap a 6
th of a turn anti-
clockwise.
F
R
emove the blue cap downwards.
Never store bottles of AdBlue
® in your
vehicle. Before topping-up, in wintry conditions, ensure
that the temperature is above -11°C. Other wise
the AdBlue
® may be frozen and so cannot be
poured into its tank.
Park your vehicle in a warmer area for a
few
hours to allow the top-up to be carried out.
AdBlue
® freezes at about -11°C and
deteriorates above 25°C. It is recommended
that bottles be stored in a cool area and
protected from direct sunlight.
Under these conditions, the fluid can be kept
for at least a year.
If the additive has frozen, it can be used once it
has completely thawed out.
Do not dispose of AdBlue
® bottles or
containers in the household waste.
Place them in a container provided for
this purpose or take them to your dealer.
7
Practical information