2017 NISSAN TITAN key
[x] Cancel search: keyPage 23 of 40

21
FM/AM/SiriusXM®
* SATELLITE RADIO WITH CD PLAYER
(if so equipped)
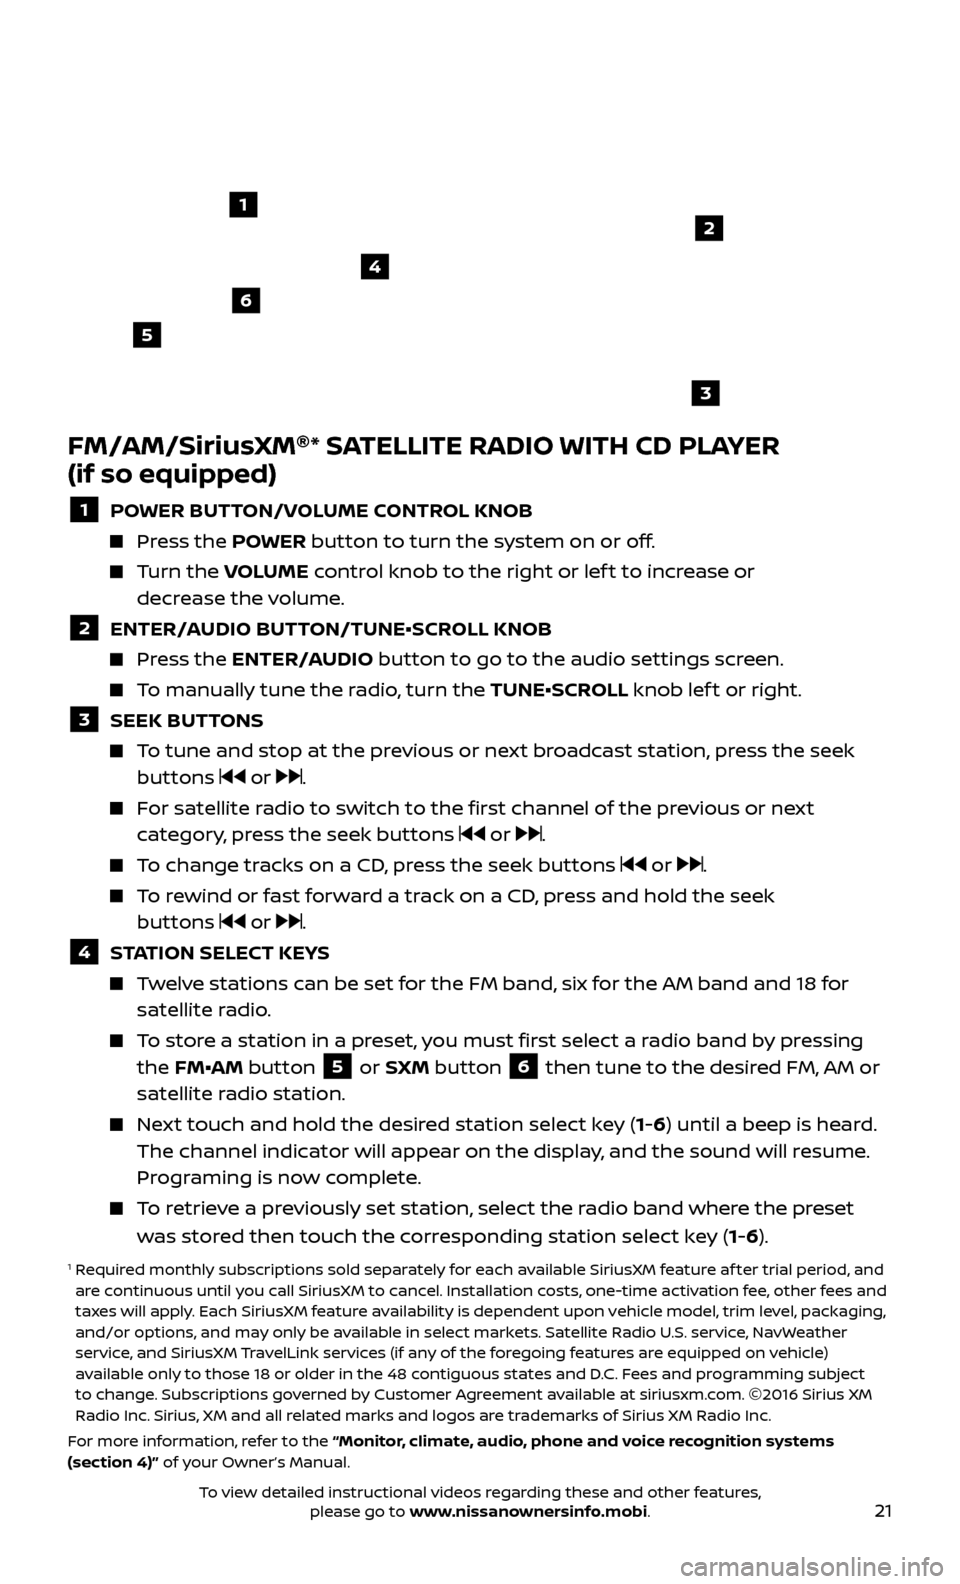
1 POWER BUTTON/VOLUME CONTROL KNOB
Press the POWER button to turn the system on or off.
Turn the V OLUME control knob to the right or lef t to increase or
decrease the volume.
2 ENTER/A UDIO BUTTON/TUNE•SCROLL KNOB Press the ENTER/AUDIO button to go to the audio settings screen.
To manually tune the radio, turn the TUNE•SCROLL knob lef t or right.
3 SEEK BUT TONS To tune and stop at the previous or next broadcast station, press the seek
buttons or .
For satellite radio to switch to the first channel of the previous or next category, press the seek buttons or .
To change tracks on a CD, press the seek buttons or .
To rewind or fast forward a track on a CD, press and hold the seek buttons or .
4 S TATION SELECT KEYS Twelve stations can be set for the FM band, six for the AM band and 18 for
satellite radio.
To store a station in a preset, you must first select a radio band by pressing the FM•AM button 5 or SXM button 6 then tune to the desired FM, AM or
satellite radio station.
Next touch and hold the desired station select key (1-6) until a beep is heard. The channel indicator will appear on the display, and the sound will resume.
Programing is now complete.
To retrieve a previously set station, select the radio band where the preset was stored then touch the corresponding station select key (1-6).
1 Required monthly subscriptions sold separately for each available SiriusXM feature af ter trial period, and are continuous until you call SiriusXM to cancel. Installation costs, one-time activation fee, other fees and
taxes will apply. Each SiriusXM feature availability is dependent upon vehicle model, trim level, packaging,
and/or options, and may only be available in select markets. Satellite Radio U.S. service, NavWeather
service, and SiriusXM TravelLink services (if any of the foregoing features are equipped on vehicle)
available only to those 18 or older in the 48 contiguous states and D.C. Fees and programming subject
to change. Subscriptions governed by Customer Agreement available at siriusxm.com. ©2016 Sirius XM
Radio Inc. Sirius, XM and all related marks and logos are trademarks of Sirius XM Radio Inc.
For more information, refer to the “Monitor, climate, audio, phone and voice recognition systems
(section 4)” of your Owner’s Manual.
4
6
2
3
1
5
To view detailed instructional videos regarding these and other features, please go to www.nissanownersinfo.mobi.
Page 31 of 40

29
RECEIVING/ENDING A CALL
When you receive a cellular phone call, a ring tone sounds through the audio system.
To accept the call, press the button on the steering wheel.
To reject the call, press the button on the steering wheel.
To hang up the cellular phone at the end of a call or to disconnect during call placement, press the
button on the steering wheel.
1 Some jurisdictions prohibit the use of cellular telephones while driving.2 Availability of specific features is dependent upon the phone’s Bluetooth ®
support. Please refer to your
phone owner’s manual for details. Bluetooth ®
word mark and logos are owned by Bluetooth SIG, Inc., and
any use of such marks by NISSAN is under license. See www.NissanUSA.com/bluetooth for details.
3 Laws in some jurisdictions may restrict the use of “Text-to-Speech”. Some applications and features, such as social networking and texting, may also be restricted. Check local regulations for any requirements
before using these features.
Compatible smartphone required. Text rates and/or data usage may apply.
To view detailed instructional videos regarding these and other features, please go to
www.nissanownersinfo.mobi.
For more information, refer to the “Monitor, climate, audio, phone and voice recognition systems
(section 4)” of your Owner’s Manual.
BLUETOOTH ®
SYSTEM WITH NAVIGATION1, 2, 3 (if so equipped)
Send predefined or custom text messages4
through your vehicle’s Bluetooth ®,2 system.
Receive texts through your vehicle’s
Bluetooth ®,2 system that can be read to you.
Bluetooth®,2 Streaming Audio allows you to
use a compatible Bluetooth ®,2 device to play
audio files on your device. Your compatible
device can be connected to the vehicle’s
audio system, allowing audio files to play
through the vehicle’s speakers.
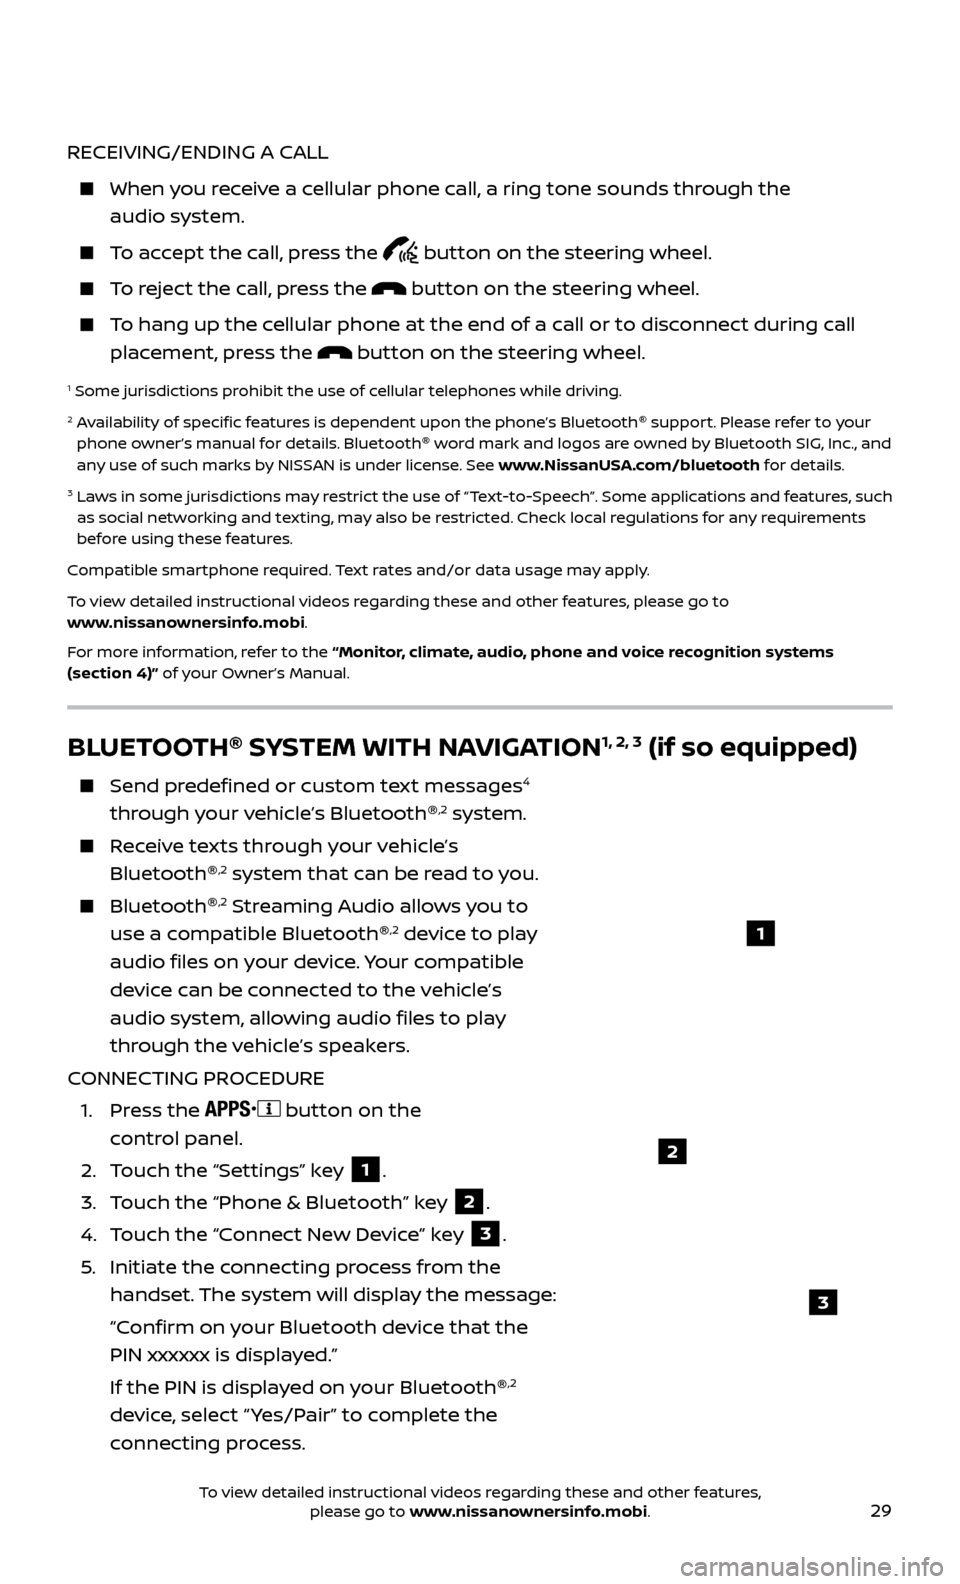
CONNECTING PROCEDURE
1.
Press the
button on the
control panel.
2.
T
ouch the “Settings” key
1.
3.
T
ouch the “Phone & Bluetooth” key
2.
4.
T
ouch the “Connect New Device” key
3.
5
.
Initiate the c
onnecting process from the
handset. The system will display the message:
“C
onfirm on your Bluetooth device that the
PIN xxxxxx is displayed.”
If the PIN is displa
yed on your Bluetooth ®
,2
device, select “ Yes/Pair” to complete the
connecting process.
1
2
3
To view detailed instructional videos regarding these and other features, please go to www.nissanownersinfo.mobi.
Page 32 of 40

30
VEHICLE PHONEBOOK
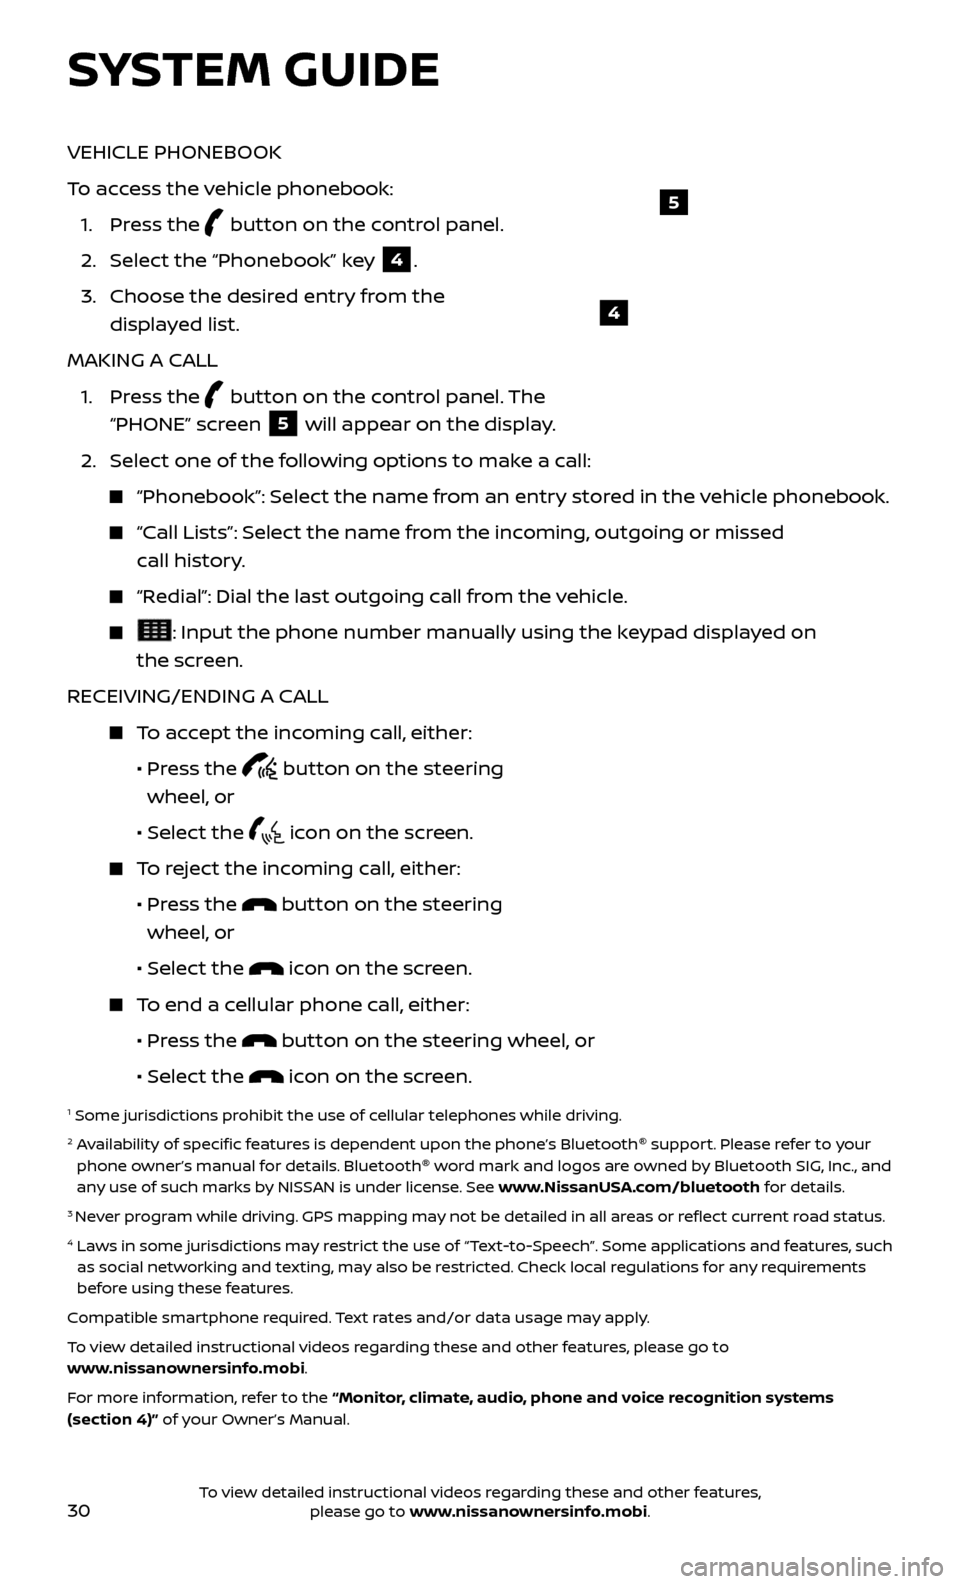
To access the vehicle phonebook:
1. Pr
ess the
button on the control panel.
2. Selec
t the “Phonebook” key
4.
3.
Choose the desir
ed entry from the
displayed list.
MAKING A CALL
1.
Press the
button on the control panel. The
“PHONE” screen 5 will appear on the display.
2. Selec
t one of the following options to make a call:
“Phonebook”: Select the name from an entry stored in the vehicle phonebook.
“Call Lists”: Select the name from the incoming, outgoing or missed
call history.
“Redial”: Dial the last outgoing call from the vehicle.
: Input the phone number manually using the keypad displayed on
the screen.
RECEIVING/ENDING A CALL
To accept the incoming call, either:
•
Pr
ess the
button on the steering
wheel, or
• Selec
t the
icon on the screen.
To reject the incoming call, either:
•
Pr
ess the
button on the steering
wheel, or
• Selec
t the
icon on the screen.
To end a cellular phone call, either:
• Pr
ess the
button on the steering wheel, or
• Selec
t the
icon on the screen.
1 Some jurisdictions prohibit the use of cellular telephones while driving.2 Availability of specific features is dependent upon the phone’s Bluetooth ®
support. Please refer to your
phone owner’s manual for details. Bluetooth ®
word mark and logos are owned by Bluetooth SIG, Inc., and
any use of such marks by NISSAN is under license. See www.NissanUSA.com/bluetooth for details.
3 Never program while driving. GPS mapping may not be detailed in all areas or reflect current road status.4 Laws in some jurisdictions may restrict the use of “Text-to-Speech”. Some applications and features, such as social networking and texting, may also be restricted. Check local regulations for any requirements
before using these features.
Compatible smartphone required. Text rates and/or data usage may apply.
To view detailed instructional videos regarding these and other features, please go to
www.nissanownersinfo.mobi.
For more information, refer to the “Monitor, climate, audio, phone and voice recognition systems
(section 4)” of your Owner’s Manual.
4
5
SYSTEM GUIDE
To view detailed instructional videos regarding these and other features, please go to www.nissanownersinfo.mobi.
Page 35 of 40

33
To help promote safe driving, some functions cannot be operated or have limited operation when the vehicle speed is above 5 mph (8 km/h). The
on-screen text and keys for these restricted functions will be “grayed-out”
or muted and cannot be selected while driving. These functions will become
available again when the vehicle speed is reduced to 5 mph (8 km/h). Voice
commands may be available for some of the restricted functions. For more
information, refer to the “Monitor, climate, audio, phone and voice recognition
systems (section 4)” of your Owner’s Manual.
1 NAV button – Press to access the functions of the Navigation System.
2 MAP button – Press to display the current location map screen.
3 VOL control knob – Turn right to increase the volume or lef t to decrease
the volume.
4 key – Select to zoom the map in.
5 key – Select to zoom the map out.
6 button – Press to access SiriusXM Traffic, MyApps, Settings, SiriusXM
Travel Link, Voice Commands, and NissanConnectSM Services.
7 button – Press to change the display brightness between day and night
modes. While the mode is being displayed, the brightness can be adjusted using
the
TUNE•SCROLL knob. Press and hold to turn the display off. Press again to
turn the display on.
8 BACK button – Press to return to the previous screen.
9 TUNE•SCR OLL knob – Turn to navigate the items in a list. Press to select a
menu item.
10 Touch-screen display
11 SD-card location – An SD-card with map data must be inserted here for map functions to operate.
1 Never program while driving. GPS mapping may not be detailed in all areas or reflect current road status.
For more information, refer to your Navigation System Owner’s Manual.
To view detailed instructional videos regarding these and other features, please go to www.nissanownersinfo.mobi.