2017 NISSAN TITAN AUX
[x] Cancel search: AUXPage 314 of 671
will be charged while connected to the vehicle
with the ignition switch in the ACC or ON posi-
tion.
While connected to the vehicle, the iPod® can
only be operated by the vehicle audio controls.
To disconnect the iPod® from the vehicle, re-
move the USB end of the cable from the USB
connection port on the vehicle, then remove the
cable from the iPod®.
* iPod® is a trademark of Apple Inc., registered in
the U.S. and other countries.
Compatibility
The following models are compatible:● iPod® Classic 5th generation (firmware ver-
sion 1.3.0 or later)
● iPod® Classic 6th generation (firmware ver-
sion 2.0.1 or later)
● iPod® Classic 7th generation (firmware ver-
sion 2.0.4 or later)
● iPod® Touch 2nd generation (firmware ver-
sion 4.2.1 or later)*
● iPod® Touch 3rd generation (firmware ver-
sion 5.1 or later)
● iPod® Touch 4th generation (firmware ver-
sion 5.1 or later) ●
iPod® nano - 1st generation (firmware ver-
sion 1.3.1 or later)
● iPod® nano - 2nd generation (firmware ver-
sion 1.1.3 or later)
● iPod® nano - 3rd generation (firmware ver-
sion 1.1.3 or later)
● iPod® nano - 4th generation (firmware ver-
sion 1.0.4 or later)
● iPod® nano - 5th generation (firmware ver-
sion 1.0.2 or later)
● iPod® nano - 6th generation (firmware ver-
sion 1.1 or later)
● iPhone® 3G (firmware version 4.2.1 or later)
● iPhone® 3GS (firmware version 5.1 or later)
● iPhone® 4 (firmware version 5.1 or later)
● iPhone® 4S (firmware version 5.1 or later)
* Some features of this iPod® may not be fully
functional.
Make sure that your iPod® firmware is updated to
the version indicated above.Audio main operation
AUX button
When the AUX button is pressed with the system
off and the iPod® connected, the system will turn
on. If another audio source is playing and the
iPod® is connected, press the AUX button re-
peatedly until the center display changes to the
iPod® mode.
LHA4007
Monitor, climate, audio, phone and voice recognition systems4-77
Page 318 of 671
4. Touch the “Connect New Device” key.
5. The system acknowledges the commandand asks you to initiate connecting from the
phone handset.
NOTE:
The connecting procedure of the cellular
phone varies according to each cellular
phone model. For additional information, re-
fer to the cellular phone Owner’s Manual. You
can also visit www.nissanusa.com/bluetooth
or www.nissan.ca/bluetooth for instructions
on connecting NISSAN recommended cellu-
lar phones.
Audio main operation
To switch to the Bluetooth® audio mode, press
the AUX button repeatedly until the Bluetooth®
audio mode is displayed on the screen.
The controls for the Bluetooth® audio are dis-
played on the screen.
CD CARE AND CLEANING
● Handle a CD by its edges. Do not bend the
disc. Never touch the surface of the disc.
● Always place the discs in the storage case
when they are not being used.
●
To clean a disc, wipe the surface from the center
to the outer edge using a clean, soft cloth. Do
not wipe the disc using a circular motion.
● Do not use a conventional record cleaner or
alcohol intended for industrial use.
● A new disc may be rough on the inner and
outer edges. Remove the rough edges by
rubbing the inner and outer edges with the
side of a pen or pencil as illustrated.
LHA2844LHA0049
Monitor, climate, audio, phone and voice recognition systems4-81
Page 319 of 671
STEERING WHEEL SWITCH FOR
AUDIO CONTROL
The audio system can be operated using the
controls on the steering wheel.1. SOURCE switch
2. Menu control switch/ENTER button
3.
switches
4. Volume control switch
SOURCE switch
With the ignition switch in the ACC or ON posi-
tion, push the SOURCE switch to turn the audio
system on.
Push the SOURCE switch to change the mode in
the following sequence:
AM →FM1 →FM2 →SXM1 (satellite radio, if so
equipped) →SXM2 (satellite radio, if so equip-
ped)→SXM3 (satellite radio, if so equipped) →
CD* →USB/iPod®*→ Bluetooth® Audio* →Au-
dio App*→ AUX*→AM.
* These modes are only available when compat-
ible media storage is inserted into the device or
connected to the system.
Volume control switch
Push the volume control switch to increase or
decrease the volume.
Menu control switch/ENTER button
While the display is showing a map or audio
screen, tilt the Menu Control switch upward or
downward to select a station, track, CD or folder.
For most audio sources, tilting the switch
up/down for more than 1.5 seconds provides a
different function than a tilting up/down for less
than 1.5 seconds. AM and FM
● Tilt up/down for less than 1.5 seconds to
increase or decrease the preset station.
● Tilt up/down for more than 1.5 seconds to
seek up or down to the next station.
● Press the ENTER button to show the list of
preset stations.
SXM (if so equipped) ● Tilt up/down for less than 1.5 seconds to
increase or decrease the preset station.
● Tilt up/down for more than 1.5 seconds to
go to the next or previous channel.
● Press the ENTER button to show the SXM
Menu.
iPod® ● Tilt up/down for less than 1.5 seconds to
increase or decrease the track number.
● Press the ENTER button to show the iPod
Menu.
LHA3812
4-82Monitor, climate, audio, phone and voice recognition systems
Page 320 of 671
CD● Tilt up/down for less than 1.5 seconds to
increase or decrease the track number.
● Tilt up/down for more than 1.5 seconds to
increase or decrease the folder number (if
playing compressed audio files) .
● Press the ENTER button to show the CD
Menu.
USB ● Tilt up/down for less than 1.5 seconds to
increase or decrease the track number.
● Tilt up/down for more than 1.5 seconds to
increase or decrease the folder number.
● Press the ENTER button to show the USB
Menu.
Bluetooth® Audio ● Tilt up/down for less than 1.5 seconds to
skip ahead or back to the next song.
● Tilt up/down for more than 1.5 seconds to
reverse or fast forward the current song.
AUX ● Press the ENTER button to show the AUX
Menu.ANTENNA
The antenna cannot be shortened, but can be
removed. When you need to remove the antenna,
turn the antenna rod counterclockwise.
To install the antenna rod, turn the antenna rod
clockwise and hand tighten.
CAUTION
● Always properly tighten the antenna
rod during installation or the antenna
rod may break during vehicle operation.
● Be sure that the antenna is removed
before the vehicle enters an automatic
car wash.
● Be sure to fold down the antenna be-
fore the vehicle enters a garage with a
low ceiling. This vehicle is equipped with Smartphone Inte-
gration technology. This allows many compatible
Smartphone applications to be displayed and
easily controlled through the vehicle’s touch-
screen.
NOTE:
A compatible smartphone and registration
is required to use mobile applications or to
access connected features of certain ve-
hicle applications.
REGISTERING WITH
NISSANCONNECTSMMOBILE APPS
To use the Smartphone Integration feature, it is
necessary for the user to register. In order to
register, visit the NissanConnect
SMwebsite,
www.nissanusa.com/connect/ or www.cana-
da.nissanconnect.com (For Canada) and sign up
or create an account through the prompts on the
NissanConnect Mobile App. Once registered,
download the NissanConnect App from your
compatible phone’s application download
source and then log into the application. If you
already have an account created through the
App, please log in.
NISSANCONNECTSMMOBILE APPS
(if so equipped)
Monitor, climate, audio, phone and voice recognition systems4-83
Page 324 of 671
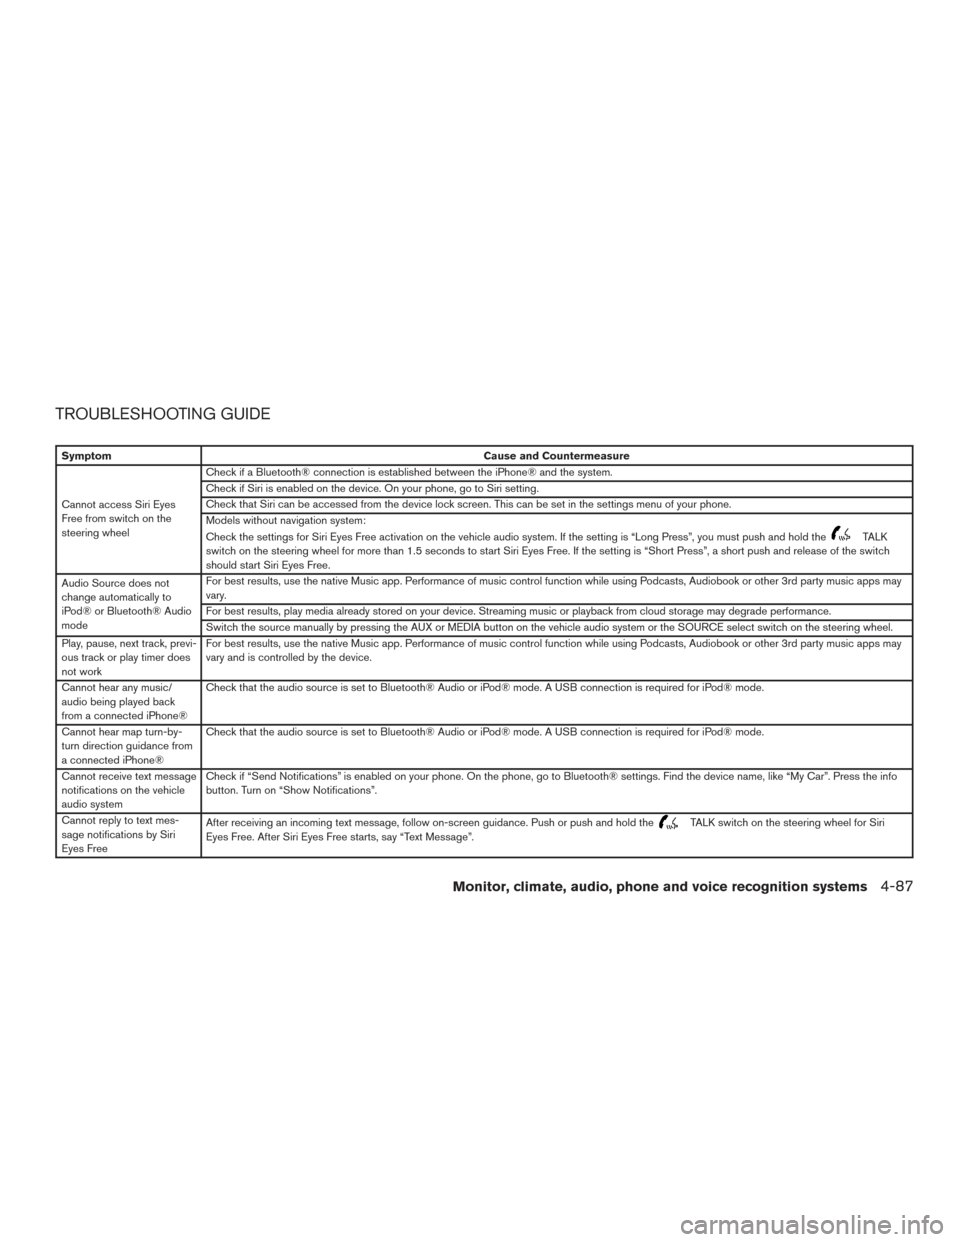
TROUBLESHOOTING GUIDE
SymptomCause and Countermeasure
Cannot access Siri Eyes
Free from switch on the
steering wheel Check if a Bluetooth® connection is established between the iPhone® and the system.
Check if Siri is enabled on the device. On your phone, go to Siri setting.
Check that Siri can be accessed from the device lock screen. This can be set in the settings menu of your phone.
Models without navigation system:
Check the settings for Siri Eyes Free activation on the vehicle audio system. If the setting is “Long Press”, you must push and hold the
TALK
switch on the steering wheel for more than 1.5 seconds to start Siri Eyes Free. If the setting is “Short Press”, a short push and release of the switch
should start Siri Eyes Free.
Audio Source does not
change automatically to
iPod® or Bluetooth® Audio
mode For best results, use the native Music app. Performance of music control function while using Podcasts, Audiobook or other 3rd party music apps may
vary.
For best results, play media already stored on your device. Streaming music or playback from cloud storage may degrade performance.
Switch the source manually by pressing the AUX or MEDIA button on the vehicle audio system or the SOURCE select switch on the steering wheel.
Play, pause, next track, previ-
ous track or play timer does
not work For best results, use the native Music app. Performance of music control function while using Podcasts, Audiobook or other 3rd party music apps may
vary and is controlled by the device.
Cannot hear any music/
audio being played back
from a connected iPhone® Check that the audio source is set to Bluetooth® Audio or iPod® mode. A USB connection is required for iPod® mode.
Cannot hear map turn-by-
turn direction guidance from
a connected iPhone® Check that the audio source is set to Bluetooth® Audio or iPod® mode. A USB connection is required for iPod® mode.
Cannot receive text message
notifications on the vehicle
audio system Check if “Send Notifications” is enabled on your phone. On the phone, go to Bluetooth® settings. Find the device name, like “My Car”. Press the info
button. Turn on “Show Notifications”.
Cannot reply to text mes-
sage notifications by Siri
Eyes Free After receiving an incoming text message, follow on-screen guidance. Push or push and hold the
TALK switch on the steering wheel for Siri
Eyes Free. After Siri Eyes Free starts, say “Text Message”.
Monitor, climate, audio, phone and voice recognition systems4-87
Page 334 of 671
DVD–A button
Press this button to transmit the remote control
codes and functions to operate monitor A.
GENERAL OPERATING
INSTRUCTIONS
Turning the monitor ON or OFF
1. Press the POWER button on the front panelor the remote control to turn the monitor on
or off. When powered on, the front panel
controls will illuminate.
2. After the monitor has been turned on and is displaying a picture, adjust the viewing angle
by pivoting the screen to optimize the picture
quality.
3. Remember to turn the monitor off and return the LCD monitor to the fully closed (upright)
position when not in use.
Listening through vehicle speakers
Press the AUX button on the factory radio and
toggle through AUX screens to select VTRF —
Jack to listen to the audio from monitor A.
Sharing sources between Monitor A
and Monitor B
The source button on your monitor unit or remote
control allows viewing monitor A video on moni-
tor B and vice versa. Press the source button to
cycle through available video sources.
Disc/DVD Basic Operation
To get the most use out of each disc, make sure
you read this section completely.
For additional information, refer to “CD care and
cleaning” in this section.
Regional coding
Both the DVD player and discs are coded by
region. These regional codes must match in order
for the disc to play. The system is preset to the
region code designated for your area by the DVD
Copy Control Association. Other regions may not
be played in this system.
Supported Disc Types
● DVD-Video: DVD contains video
● DVD +/- R: DVD contains video
● CD-DA: CD contains audio
● CD-Video: CD contains video
● CD-R/+RW: CD contains audio Unsupported Disc Types
Before you load a disc, make sure that it is
compatible with the player. Note that the follow-
ing disc CANNOT be used with this system:
Optical disc- CD-1, CD-ROM, and DVD-ROM
Mini disc- CDG (audio only, not graphics) , and
Blu-ray (list is not all inclusive) .
Loading and Playing Discs
Press the POWER button to turn the monitor on.
Insert the disc about halfway into the disc com-
partment slot, with the disc’s label facing the rear
of the vehicle. Do NOT insert the disc at an angle.
The Disc must be inserted straight into the player.
The disc will load automatically and begin to play.
Some discs may start at the root menu, where
playback must be selected to start a movie. De-
pending on the disc and playback location on the
disc, a “
” icon may be displayed in the upper-
left hand corner of the screen indicating that
playback is not possible during certain times.
Monitor, climate, audio, phone and voice recognition systems4-97
Page 346 of 671
CHARGING A USB DEVICE
Plug the USB cable (not supplied) into the USB
connection port and then connect the other end
to the USB device.
NOTE:
Depending on the device, it may or may not
charge when connected to the USB port.
Not all devices are able to charge when
connected to the USB port.
CONNECTING AN EXTERNAL
AUXILIARY A/V SOURCE — INPUT
An external A/V source such as a media player,
video game, or other audio/video device may be
connected to the RCA type jacks on the front of
the monitor. Connect the external audio/video
source to the RCA type input jacks on the front of
the monitor using RCA type connectors (sold
separately) .
Yellow: Video input
Red: Audio-right channel input
White: Audio-left channel input
The system will automatically select the auxiliary
input mode when the RCA type connectors are
inserted into the input jacks. The auxiliary input
connection overrides disc and USB playback.The system provides priority for each of the fol-
lowing device inputs:
1. External RCA A/V input
2. USB port
3. Disc playback
For example if a disc is playing and a USB device
is plugged in, the USB device will take priority
over disc playback. The external RCA A/V input
connections have priority over both USB port and
disc playback.
CONNECTING AN EXTERNAL A/V
MONITOR — OUTPUT
An external audio/video monitor may be con-
nected to the 3.5mm A/V connector (sold sepa-
rately) .
NOTE:
Use the 3.5mm A/V cable made specifically
for the device. An optional adapter (sold
separately) may be used to convert the
3.5mm A/V output to the standard RCA
jacks.
SELECTING MONITOR A OR B AS
THE SOURCE
It is possible to select monitor B as the source
from monitor A and vice versa. This will allow
content that is playing on monitor B to be dis-
played on monitor A.
Monitor A:
To select monitor B as the source for monitor A,
press the source button on the front panel or the
remote control until “MONITOR B” is displayed.
Monitor B:
To select monitor A as the source for monitor B,
press the source button on the front panel or the
remote control until “MONITOR A” is displayed.
Monitor, climate, audio, phone and voice recognition systems4-109
Page 598 of 671
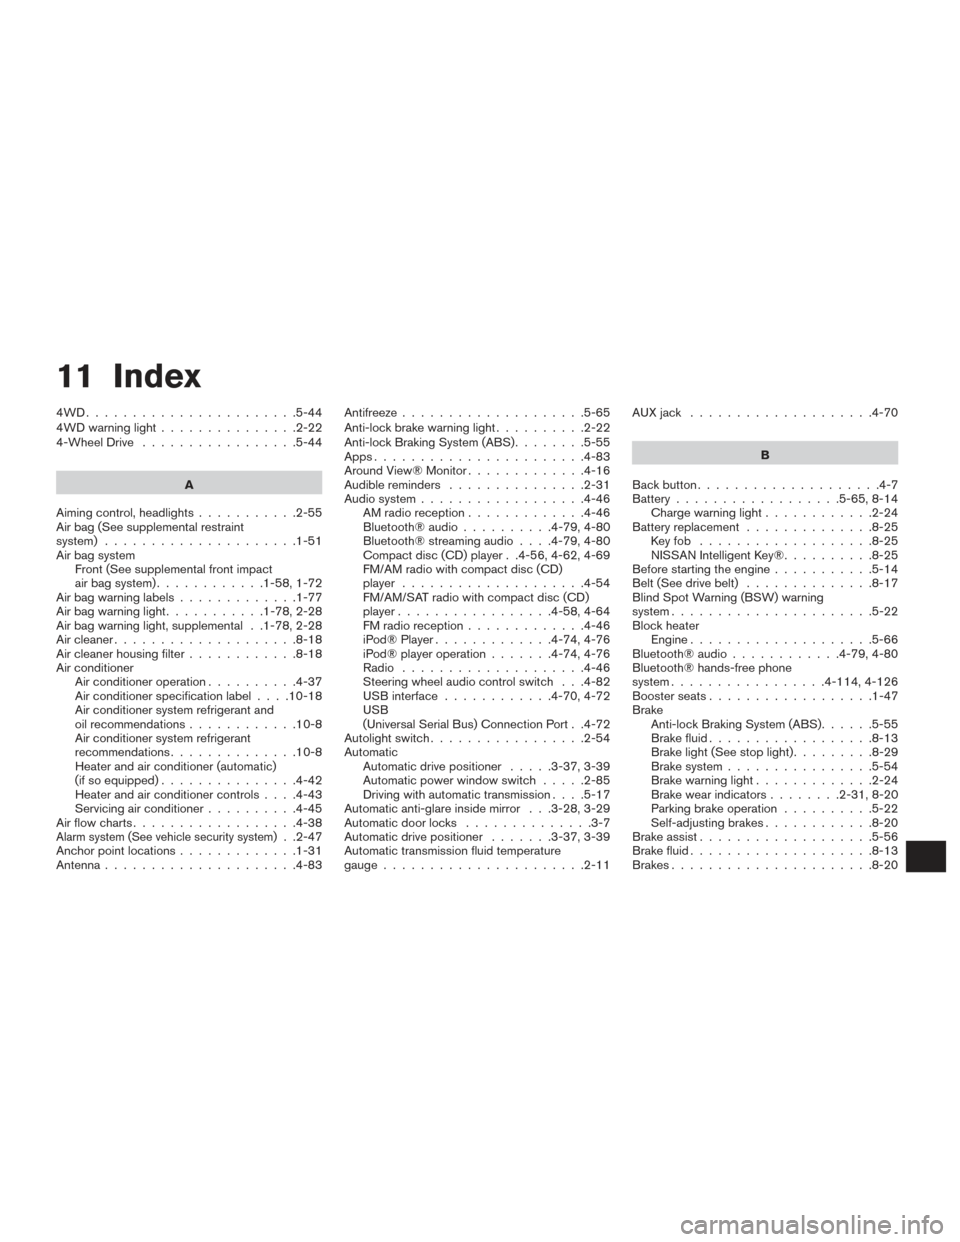
11 Index
4WD.......................5-44
4WDwarninglight...............2-22
4-Wheel Drive.................5-44
A
Aiming control, headlights ...........2-55
Air bag (See supplemental restraint
system) .....................1-51
Air bag system Front (See supplemental front impact
air bag system) ............1-58,1-72
Airbagwarninglabels.............1-77
Airbagwarninglight...........1-78,2-28
Air bag warning light, supplemental . .1-78, 2-28
Aircleaner....................8-18
Air cleaner housing filter ............8-18
Air conditioner Air conditioner operation ..........4-37
Air conditioner specification label ....10-18
Air conditioner system refrigerant and
oil recommendations ............10-8
Air conditioner system refrigerant
recommendations ..............10-8
Heater and air conditioner (automatic)
(if so equipped) ...............4-42
Heater and air conditioner controls ....4-43
Servicing air conditioner ..........4-45
Airflowcharts..................4-38
Alarm system (See vehicle security system). .2-47
Anchor point locations .............1-31
Antenna .....................4-83 Antifreeze
....................5-65
Anti-lock brake warning light ..........2-22
Anti-lock Braking System (ABS) ........5-55
Apps .......................4-83
AroundView®Monitor.............4-16
Audible reminders ...............2-31
Audio system ..................4-46
AMradioreception.............4-46
Bluetooth®audio..........4-79,4-80
Bluetooth® streaming audio ....4-79,4-80
Compact disc (CD) player . .4-56, 4-62, 4-69
FM/AM radio with compact disc (CD)
player ....................4-54
FM/AM/SAT radio with compact disc (CD)
player.................4-58,4-64
FMradioreception.............4-46
iPod® Player .............4-74,4-76
iPod® player operation .......4-74,4-76
Radio ....................4-46
Steering wheel audio control switch . . .4-82
USB interface ............4-70,4-72
USB
(Universal Serial Bus) Connection Port . .4-72
Autolight switch .................2-54
Automatic Automatic drive positioner .....3-37,3-39
Automatic power window switch .....2-85
Driving with automatic transmission ....5-17
Automatic anti-glare inside mirror . . .3-28, 3-29
Automatic door locks ..............3-7
Automatic drive positioner .......3-37,3-39
Automatic transmission fluid temperature
gauge......................2-11 AUXjack ....................4-70
B
Back button ....................4-7
Battery ..................5-65, 8-14
Charge warning light ............2-24
Battery replacement ..............8-25
Keyfob ...................8-25
NISSAN Intelligent Key® ..........8-25
Before starting the engine ...........5-14
Belt (See drive belt) ..............8-17
Blind Spot Warning (BSW) warning
system......................5-22
Block heater Engine ....................5-66
Bluetooth® audio ............4-79,4-80
Bluetooth® hands-free phone
system.................4- 114, 4-126
Boosterseats..................1-47
Brake Anti-lock Braking System (ABS) ......5-55
Brake fluid ..................8-13
Brakelight(Seestoplight).........8-29
Brake system ................5-54
Brakewarninglight.............2-24
Brakewearindicators........2-31,8-20
Parking brake operation ..........5-22
Self-adjusting brakes ............8-20
Brake assist ...................5-56
Brake fluid ....................8-13
Brakes ......................8-20