2017 NISSAN QUEST instrument panel
[x] Cancel search: instrument panelPage 178 of 520
SPA2547
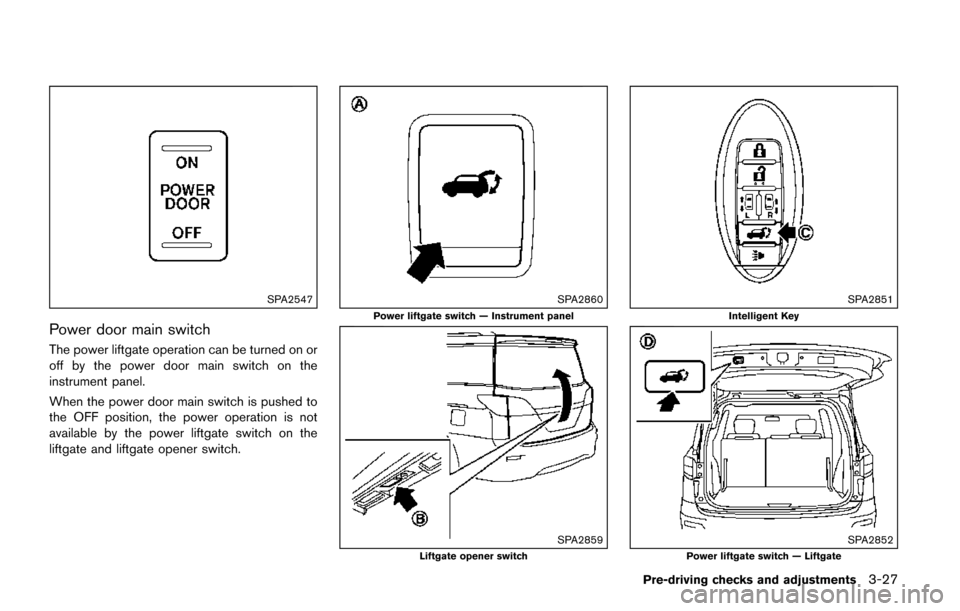
Power door main switch
The power liftgate operation can be turned on or
off by the power door main switch on the
instrument panel.
When the power door main switch is pushed to
the OFF position, the power operation is not
available by the power liftgate switch on the
liftgate and liftgate opener switch.
SPA2860
Power liftgate switch — Instrument panel
SPA2859Liftgate opener switch
SPA2851
Intelligent Key
SPA2852Power liftgate switch — Liftgate
Pre-driving checks and adjustments3-27
Page 179 of 520
3-28Pre-driving checks and adjustments
Power open
When the liftgate is fully closed, the liftgate will
fully open automatically by:
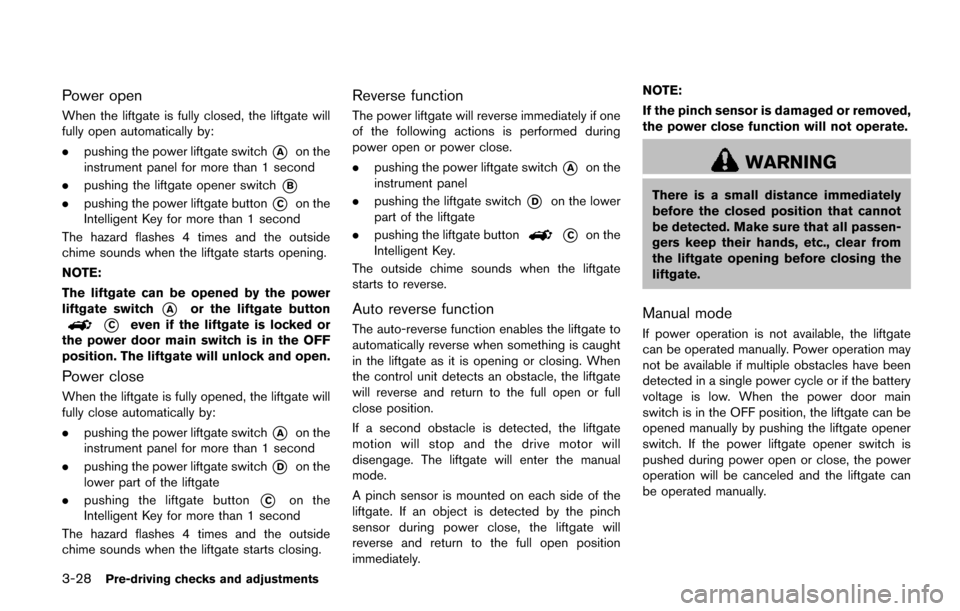
.pushing the power liftgate switch
*Aon the
instrument panel for more than 1 second
. pushing the liftgate opener switch
*B
.pushing the power liftgate button*Con the
Intelligent Key for more than 1 second
The hazard flashes 4 times and the outside
chime sounds when the liftgate starts opening.
NOTE:
The liftgate can be opened by the power
liftgate switch
*Aor the liftgate button
*Ceven if the liftgate is locked or
the power door main switch is in the OFF
position. The liftgate will unlock and open.
Power close
When the liftgate is fully opened, the liftgate will
fully close automatically by:
. pushing the power liftgate switch
*Aon the
instrument panel for more than 1 second
. pushing the power liftgate switch
*Don the
lower part of the liftgate
. pushing the liftgate button
*Con the
Intelligent Key for more than 1 second
The hazard flashes 4 times and the outside
chime sounds when the liftgate starts closing.
Reverse function
The power liftgate will reverse immediately if one
of the following actions is performed during
power open or power close.
. pushing the power liftgate switch
*Aon the
instrument panel
. pushing the liftgate switch
*Don the lower
part of the liftgate
. pushing the liftgate button
*Con the
Intelligent Key.
The outside chime sounds when the liftgate
starts to reverse.
Auto reverse function
The auto-reverse function enables the liftgate to
automatically reverse when something is caught
in the liftgate as it is opening or closing. When
the control unit detects an obstacle, the liftgate
will reverse and return to the full open or full
close position.
If a second obstacle is detected, the liftgate
motion will stop and the drive motor will
disengage. The liftgate will enter the manual
mode.
A pinch sensor is mounted on each side of the
liftgate. If an object is detected by the pinch
sensor during power close, the liftgate will
reverse and return to the full open position
immediately. NOTE:
If the pinch sensor is damaged or removed,
the power close function will not operate.
WARNING
There is a small distance immediately
before the closed position that cannot
be detected. Make sure that all passen-
gers keep their hands, etc., clear from
the liftgate opening before closing the
liftgate.
Manual mode
If power operation is not available, the liftgate
can be operated manually. Power operation may
not be available if multiple obstacles have been
detected in a single power cycle or if the battery
voltage is low. When the power door main
switch is in the OFF position, the liftgate can be
opened manually by pushing the liftgate opener
switch. If the power liftgate opener switch is
pushed during power open or close, the power
operation will be canceled and the liftgate can
be operated manually.
Page 237 of 520
4-48Monitor, heater, air conditioner, audio, phone and voice recognition systems
SAA3594
SAA3514
OPERATING TIPS (for automatic air
conditioner)
When the engine coolant temperature and
outside air temperature are low, the air flow
from the foot outlets may not operate. However,
this is not a malfunction. After the coolant
temperature warms up, the air flow from the
foot outlets will operate normally.
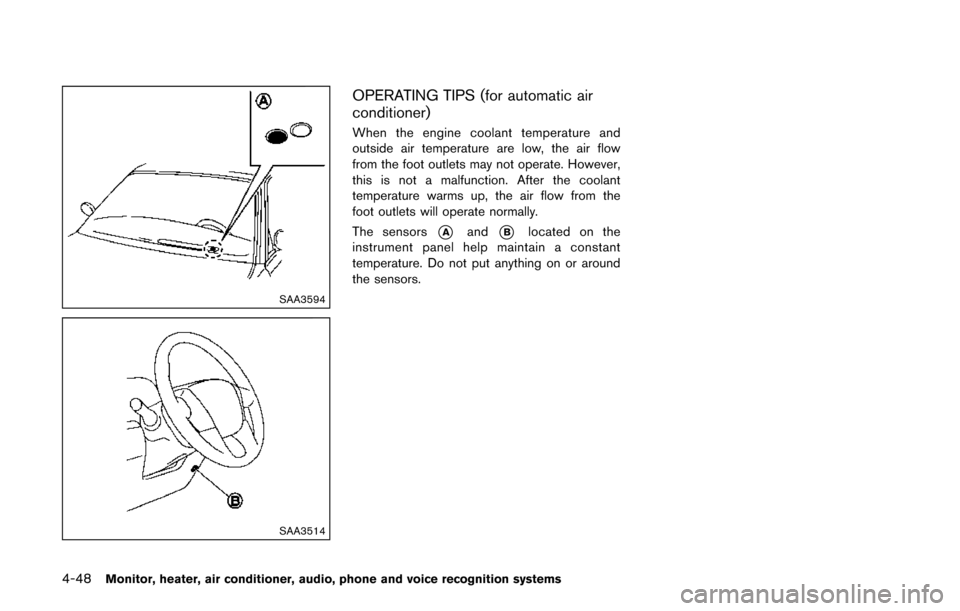
The sensors
*Aand*Blocated on the
instrument panel help maintain a constant
temperature. Do not put anything on or around
the sensors.
Page 279 of 520
4-90Monitor, heater, air conditioner, audio, phone and voice recognition systems
SAA3607
Compact Disc (CD) player operation
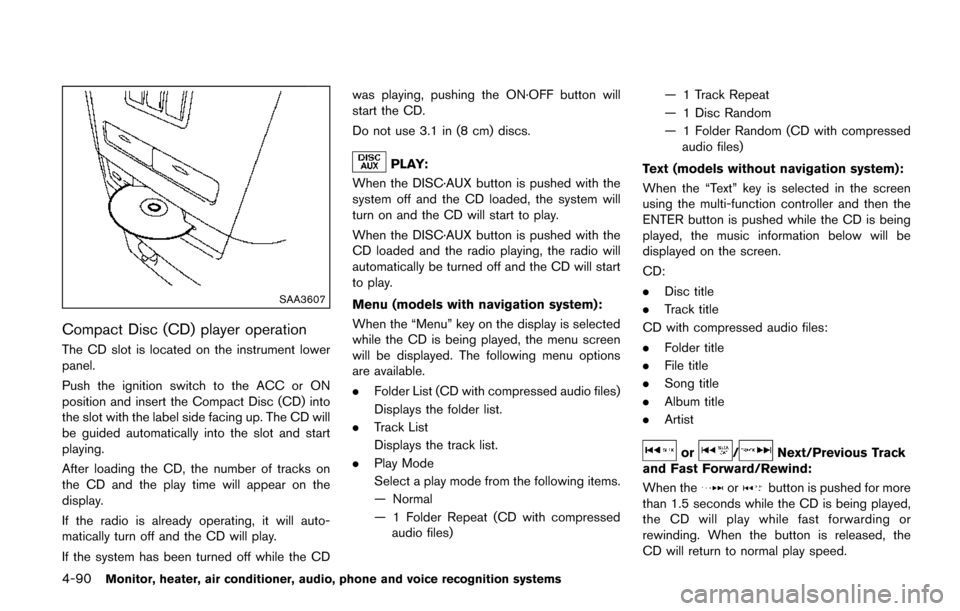
The CD slot is located on the instrument lower
panel.
Push the ignition switch to the ACC or ON
position and insert the Compact Disc (CD) into
the slot with the label side facing up. The CD will
be guided automatically into the slot and start
playing.
After loading the CD, the number of tracks on
the CD and the play time will appear on the
display.
If the radio is already operating, it will auto-
matically turn off and the CD will play.
If the system has been turned off while the CDwas playing, pushing the ON·OFF button will
start the CD.
Do not use 3.1 in (8 cm) discs.
PLAY:
When the DISC·AUX button is pushed with the
system off and the CD loaded, the system will
turn on and the CD will start to play.
When the DISC·AUX button is pushed with the
CD loaded and the radio playing, the radio will
automatically be turned off and the CD will start
to play.
Menu (models with navigation system):
When the “Menu” key on the display is selected
while the CD is being played, the menu screen
will be displayed. The following menu options
are available.
. Folder List (CD with compressed audio files)
Displays the folder list.
. Track List
Displays the track list.
. Play Mode
Select a play mode from the following items.
— Normal
— 1 Folder Repeat (CD with compressed
audio files) — 1 Track Repeat
— 1 Disc Random
— 1 Folder Random (CD with compressed
audio files)
Text (models without navigation system):
When the “Text” key is selected in the screen
using the multi-function controller and then the
ENTER button is pushed while the CD is being
played, the music information below will be
displayed on the screen.
CD:
. Disc title
. Track title
CD with compressed audio files:
. Folder title
. File title
. Song title
. Album title
. Artist
or/Next/Previous Track
and Fast Forward/Rewind:
When the
orbutton is pushed for more
than 1.5 seconds while the CD is being played,
the CD will play while fast forwarding or
rewinding. When the button is released, the
CD will return to normal play speed.
Page 281 of 520
4-92Monitor, heater, air conditioner, audio, phone and voice recognition systems
SAA2497
Type A
SAA3091Type B
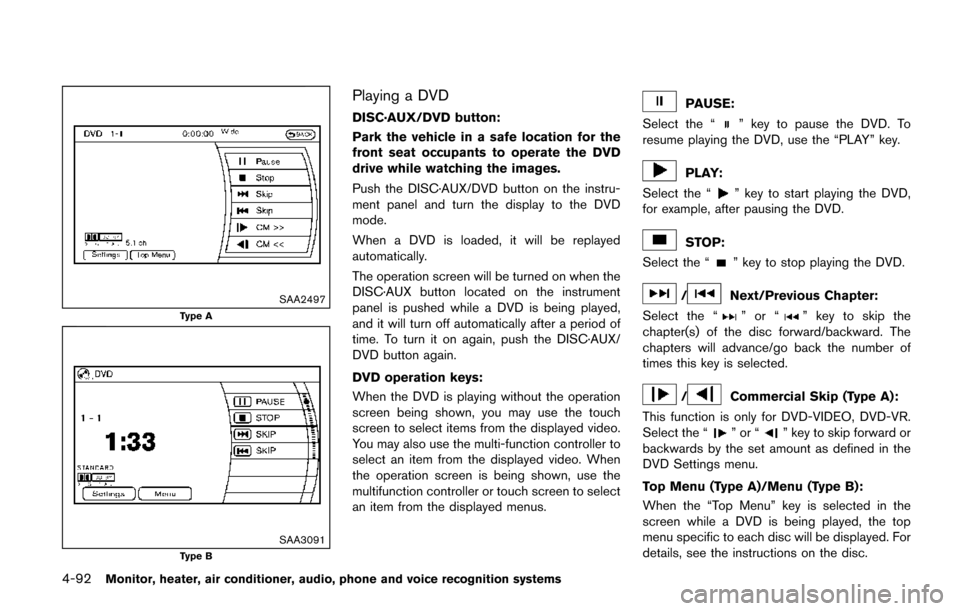
Playing a DVD
DISC·AUX/DVD button:
Park the vehicle in a safe location for the
front seat occupants to operate the DVD
drive while watching the images.
Push the DISC·AUX/DVD button on the instru-
ment panel and turn the display to the DVD
mode.
When a DVD is loaded, it will be replayed
automatically.
The operation screen will be turned on when the
DISC·AUX button located on the instrument
panel is pushed while a DVD is being played,
and it will turn off automatically after a period of
time. To turn it on again, push the DISC·AUX/
DVD button again.
DVD operation keys:
When the DVD is playing without the operation
screen being shown, you may use the touch
screen to select items from the displayed video.
You may also use the multi-function controller to
select an item from the displayed video. When
the operation screen is being shown, use the
multifunction controller or touch screen to select
an item from the displayed menus.PAUSE:
Select the “
” key to pause the DVD. To
resume playing the DVD, use the “PLAY” key.
PLAY:
Select the “
” key to start playing the DVD,
for example, after pausing the DVD.
STOP:
Select the “
” key to stop playing the DVD.
/Next/Previous Chapter:
Select the “
”or“” key to skip the
chapter(s) of the disc forward/backward. The
chapters will advance/go back the number of
times this key is selected.
/Commercial Skip (Type A):
This function is only for DVD-VIDEO, DVD-VR.
Select the “
”or“” key to skip forward or
backwards by the set amount as defined in the
DVD Settings menu.
Top Menu (Type A)/Menu (Type B):
When the “Top Menu” key is selected in the
screen while a DVD is being played, the top
menu specific to each disc will be displayed. For
details, see the instructions on the disc.
Page 300 of 520
SAA3607
DIGITAL VERSATILE DISC (DVD) SYS-
TEM COMPONENTS
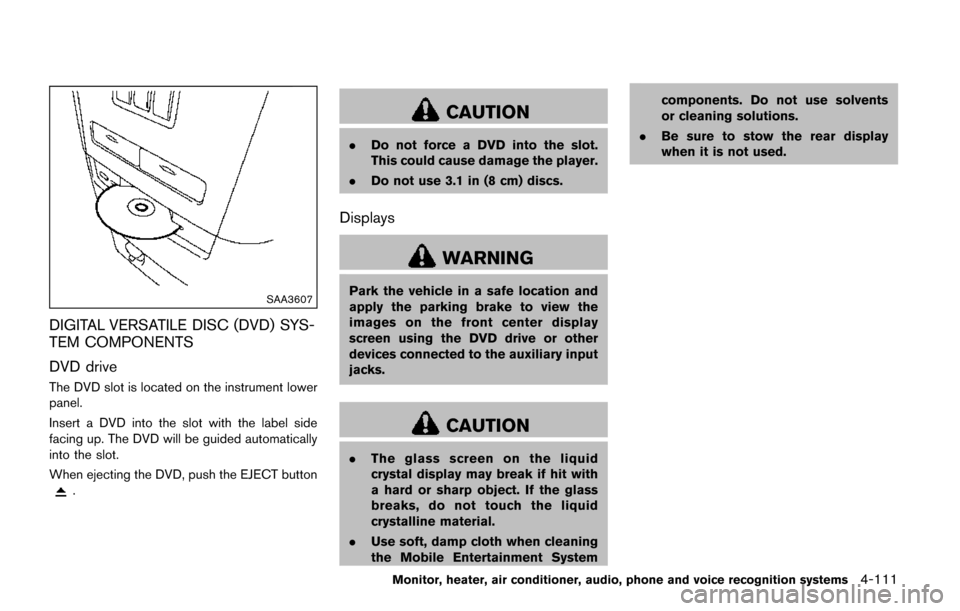
DVD drive
The DVD slot is located on the instrument lower
panel.
Insert a DVD into the slot with the label side
facing up. The DVD will be guided automatically
into the slot.
When ejecting the DVD, push the EJECT button
.
CAUTION
.Do not force a DVD into the slot.
This could cause damage the player.
. Do not use 3.1 in (8 cm) discs.
Displays
WARNING
Park the vehicle in a safe location and
apply the parking brake to view the
images on the front center display
screen using the DVD drive or other
devices connected to the auxiliary input
jacks.
CAUTION
.The glass screen on the liquid
crystal display may break if hit with
a hard or sharp object. If the glass
breaks, do not touch the liquid
crystalline material.
. Use soft, damp cloth when cleaning
the Mobile Entertainment System components. Do not use solvents
or cleaning solutions.
. Be sure to stow the rear display
when it is not used.
Monitor, heater, air conditioner, audio, phone and voice recognition systems4-111
Page 306 of 520
SAA3656
Rear display
PLAYING A DVD
DISC·AUX button
Park the vehicle in a safe location for the
front seat occupants to operate the DVD
drive while watching the images.
Insert a DVD into the CD/DVD slot with the
labeled side up. The DVD will be guided
automatically into the slot. When ejecting the
DVD, push the EJECT button.
Push the DISC·AUX button on the instrument
panel, turn the display to the DVD mode, and
begin playing DVD automatically.
When a DVD is loaded, it will be replayedautomatically.
The front screen will be turned on when the
DISC·AUX button is pushed while a DVD is
being played, and it will turn off automatically
after a period of time. To turn it on again, push
the DISC·AUX button again.
Adjust Front/Rear display
Front display:
To adjust the front display, push the
SETTING
button while the DVD is being played, select the
“Others” key and then select the “Display” key.
To adjust the display ON/OFF, brightness, tint,
color and contrast, select the “Display Adjust-
ment” key and then select the preferred key for
setting.
You can then adjust each item using the multi-
function controller. After changes have been
made press the BACK button to save the
setting.
Rear display:
To adjust the rear display, push the “DISP”
(Display) button on the remote controller.
To adjust aspect, color system, 3D Y/C filter and
picture mode, select each key using the joystick
on the remote controller and tilt the joystick to
right or left.
Push the BACK button to apply the settings and return to the previous display.
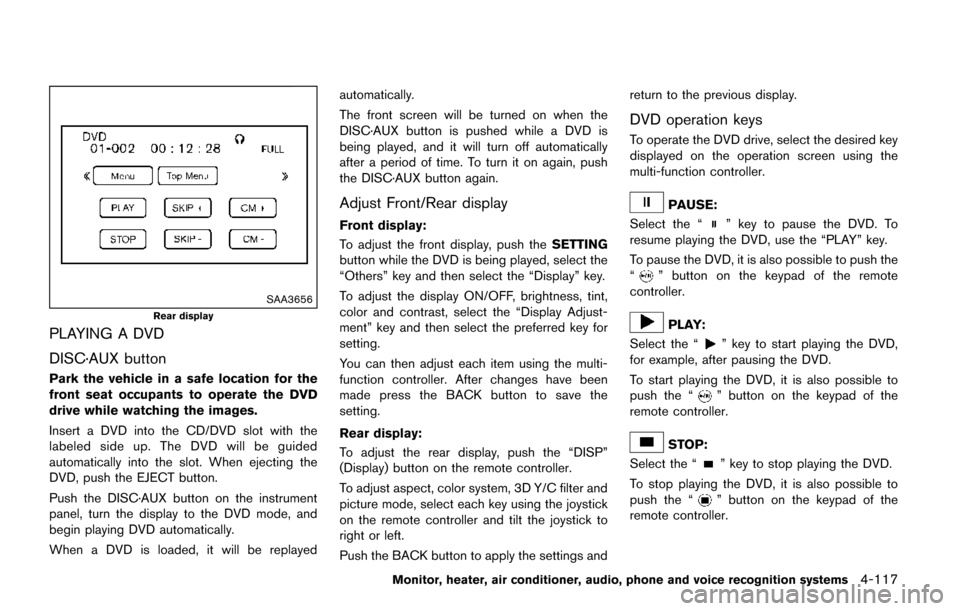
DVD operation keys
To operate the DVD drive, select the desired key
displayed on the operation screen using the
multi-function controller.
PAUSE:
Select the “
” key to pause the DVD. To
resume playing the DVD, use the “PLAY” key.
To pause the DVD, it is also possible to push the
“
” button on the keypad of the remote
controller.
PLAY:
Select the “
” key to start playing the DVD,
for example, after pausing the DVD.
To start playing the DVD, it is also possible to
push the “
” button on the keypad of the
remote controller.
STOP:
Select the “
” key to stop playing the DVD.
To stop playing the DVD, it is also possible to
push the “
” button on the keypad of the
remote controller.
Monitor, heater, air conditioner, audio, phone and voice recognition systems4-117
Page 319 of 520
4-130Monitor, heater, air conditioner, audio, phone and voice recognition systems
.Cancel Mute
This will appear after “Mute” is selected.
Mute will be canceled.
. Switch Call*
Select “Switch Call” to answer another
incoming call. By selecting “Hang up”, you
can end a call and can speak to a caller who
is on hold again.
* This function may not be usable, depend-
ing on the model of phone.
To adjust the person’s voice to be louder or
quieter, push the volume control switch (+ or �í)
on the steering wheel or turn the volume control
knob on the instrument panel while talking on
the phone. This adjustment is also available in
the SETTING mode.
JVH0480X
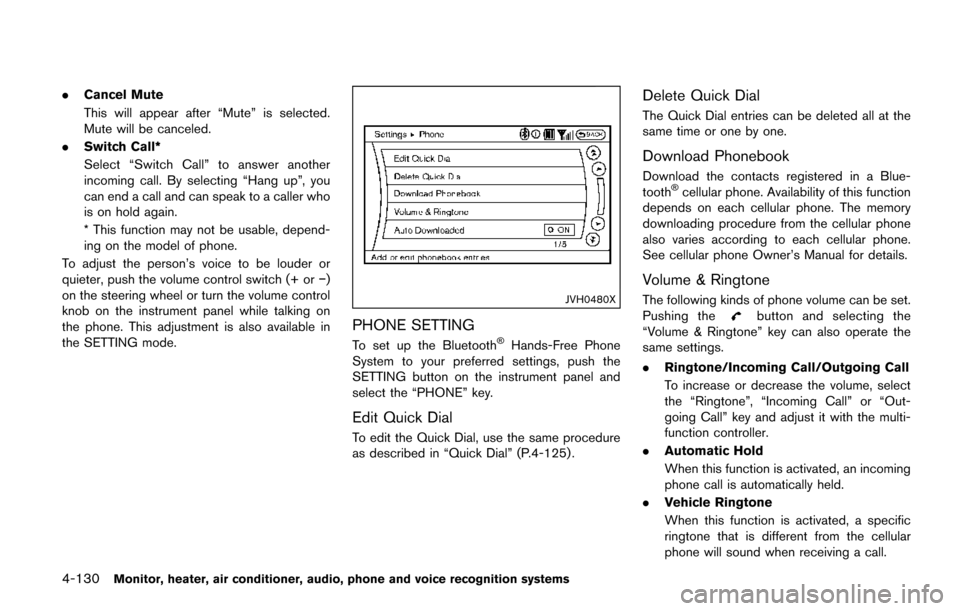
PHONE SETTING
To set up the Bluetooth�ŠHands-Free Phone
System to your preferred settings, push the
SETTING button on the instrument panel and
select the “PHONE” key.
Edit Quick Dial
To edit the Quick Dial, use the same procedure
as described in “Quick Dial” (P.4-125) .
Delete Quick Dial
The Quick Dial entries can be deleted all at the
same time or one by one.
Download Phonebook
Download the contacts registered in a Blue-
tooth�Šcellular phone. Availability of this function
depends on each cellular phone. The memory
downloading procedure from the cellular phone
also varies according to each cellular phone.
See cellular phone Owner’s Manual for details.
Volume & Ringtone
The following kinds of phone volume can be set.
Pushing thebutton and selecting the
“Volume & Ringtone” key can also operate the
same settings.
. Ringtone/Incoming Call/Outgoing Call
To increase or decrease the volume, select
the “Ringtone”, “Incoming Call” or “Out-
going Call” key and adjust it with the multi-
function controller.
. Automatic Hold
When this function is activated, an incoming
phone call is automatically held.
. Vehicle Ringtone
When this function is activated, a specific
ringtone that is different from the cellular
phone will sound when receiving a call.