2017 NISSAN QUEST air filter
[x] Cancel search: air filterPage 190 of 520
4 Monitor, heater, air conditioner, audio, phoneand voice recognition systems
Safety note ........................................................................\
.......... 4-4
Center multi-function control panel (if so equipped) ...... 4-5
How to use multi-function controller .............................. 4-7
How to use touch screen (models with
navigation system) .............................................................. 4-7
Menu options (models with navigation system) .......... 4-9
How to select menus on the screen ........................... 4-10
Vehicle information and settings (models with center
multi-function control panel) ............................................... 4-10 How to use STATUS button .......................................... 4-10
How to use brightness control and display
ON/OFF button ................................................................ 4-10
How to use DISP button (models without
navigation system) ........................................................... 4-10
How to use ECON button (models without
navigation system) ........................................................... 4-11
How to use INFO button ............................................... 4-11
How to use SETTING button ....................................... 4-15
RearView Monitor (if so equipped) ................................... 4-25
RearView Monitor system operation .......................... 4-25
How to read the displayed lines .................................. 4-26
Difference between predictive and actual distances
(if so equipped) ................................................................ 4-26
How to park with predictive course lines
(models with center multi-function control panel) ..... 4-28
Adjusting the screen ....................................................... 4-29 Predictive course line settings (if so equipped) ..... 4-29
RearView Monitor system limitations ........................ 4-30
System maintenance ..................................................... 4-31
Around View
�ŠMonitor (if so equipped) .......................... 4-32
Around View�ŠMonitor system operation ................. 4-33
How to adjust the screen view ................................... 4-39
Around View
�ŠMonitor system limitations ................ 4-39
System maintenance ..................................................... 4-41
Moving Object Detection (MOD) (if so equipped) ...... 4-42 MOD system operation ................................................ 4-43
Turning on and off the MOD system ........................ 4-44
MOD system limitations ............................................... 4-44
System maintenance ..................................................... 4-45
Ventilators ........................................................................\
........ 4-46 Center ventilators ........................................................... 4-46
Side ventilators ............................................................... 4-46
Rear ventilators ............................................................... 4-47
Heater and air conditioner .................................................. 4-47 Operating tips (for automatic air conditioner) ........ 4-48
Manual air conditioner .................................................. 4-49
Automatic air conditioner ............................................. 4-54
Servicing air conditioner .............................................. 4-60
In-cabin microfilter ......................................................... 4-60
Audio system ........................................................................\
.. 4-61 Audio operation precautions ....................................... 4-61
Page 202 of 520
SAA2481
Models with navigation system
JVH0183MModels without navigation system
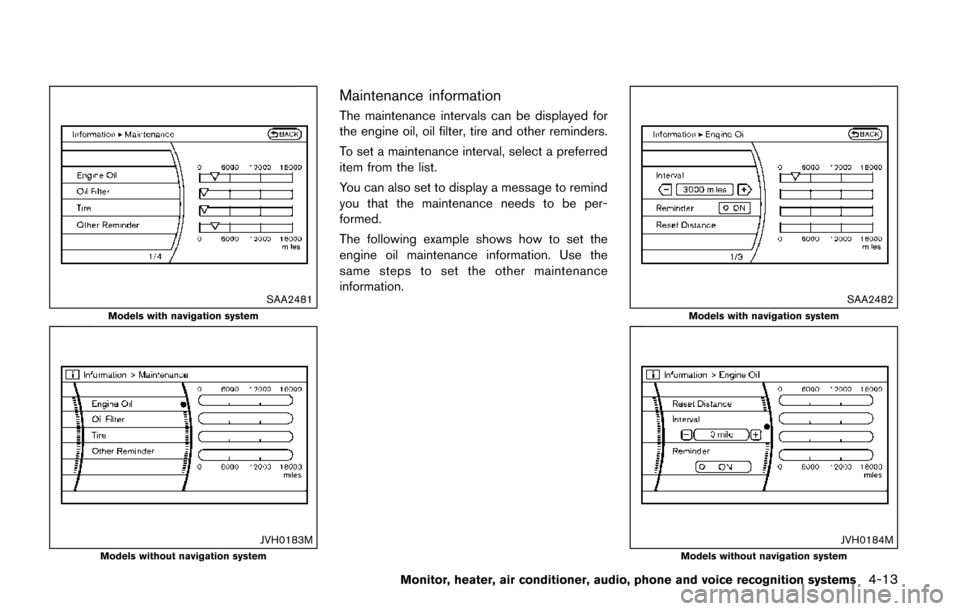
Maintenance information
The maintenance intervals can be displayed for
the engine oil, oil filter, tire and other reminders.
To set a maintenance interval, select a preferred
item from the list.
You can also set to display a message to remind
you that the maintenance needs to be per-
formed.
The following example shows how to set the
engine oil maintenance information. Use the
same steps to set the other maintenance
information.
SAA2482
Models with navigation system
JVH0184MModels without navigation system
Monitor, heater, air conditioner, audio, phone and voice recognition systems4-13
Page 249 of 520
4-60Monitor, heater, air conditioner, audio, phone and voice recognition systems
Rear control buttons:
The rear seat passengers can adjust the rear
automatic air conditioning system using the
control switches located on the ceiling above
the rear seats (models with NISSAN Mobile
Entertainment System) or on the upper left side
of the second row seat (models without
NISSAN Mobile Entertainment System) .
The rear control buttons do not function when
“
” is shown on the front display. To activate
the rear control buttons, push the “REAR”
button on the front air conditioner control panel
and cancel the rear air conditioner control mode
(“
” will disappear from the front display) .
“OFF” button: Turns off the rear air conditioning
system.
“
” Fan speed control buttons: Adjust rear
fan speed
“AUTO” button: Turns on/off the automatic
operation mode when rear air conditioning
system is on
“MODE” button: Changes the rear air flow
“TEMP” buttons: Adjust the rear temperature
SERVICING AIR CONDITIONER
WARNING
The air conditioner contains refrigerant
under high pressure. To avoid personal
injury, any air conditioner service
should be done only by an experienced
technician with the proper equipment.
The air conditioner system in your vehicle is
charged with a refrigerant designed with the
environment in mind.
This refrigerant will not harm the earth’s
ozone layer. However, it may contribute in a
small part to global warming.
Special charging equipment and lubricant are
required when servicing your vehicle’s air con-
ditioner. Using improper refrigerants or lubri-
cants will cause severe damage to the air
conditioner system. (See “Air conditioning sys-
tem refrigerant and lubricant recommendations”
(P.10-6) .)
A NISSAN dealer will be able to service your
environmentally friendly air conditioner system.
IN-CABIN MICROFILTER
The climate control system is equipped with an
in-cabin microfilter which collects dirt, pollen,
dust, etc. To make sure the air conditioner heats,
defogs, and ventilates efficiently, replace the
filter in accordance with the specified main-
tenance intervals listed in the “9. Maintenance
and schedules” section. It is recommended to
visit a NISSAN dealer to replace the filter. A
natural grape seed polyphenol filter (if so
equipped) collects and neutralizes dirt, pollen,
dust, etc.
The filter should be replaced if air flow is
extremely decreased or when windows fog
up easily when operating heater or air
conditioning system.
Page 306 of 520
SAA3656
Rear display
PLAYING A DVD
DISC·AUX button
Park the vehicle in a safe location for the
front seat occupants to operate the DVD
drive while watching the images.
Insert a DVD into the CD/DVD slot with the
labeled side up. The DVD will be guided
automatically into the slot. When ejecting the
DVD, push the EJECT button.
Push the DISC·AUX button on the instrument
panel, turn the display to the DVD mode, and
begin playing DVD automatically.
When a DVD is loaded, it will be replayedautomatically.
The front screen will be turned on when the
DISC·AUX button is pushed while a DVD is
being played, and it will turn off automatically
after a period of time. To turn it on again, push
the DISC·AUX button again.
Adjust Front/Rear display
Front display:
To adjust the front display, push the
SETTING
button while the DVD is being played, select the
“Others” key and then select the “Display” key.
To adjust the display ON/OFF, brightness, tint,
color and contrast, select the “Display Adjust-
ment” key and then select the preferred key for
setting.
You can then adjust each item using the multi-
function controller. After changes have been
made press the BACK button to save the
setting.
Rear display:
To adjust the rear display, push the “DISP”
(Display) button on the remote controller.
To adjust aspect, color system, 3D Y/C filter and
picture mode, select each key using the joystick
on the remote controller and tilt the joystick to
right or left.
Push the BACK button to apply the settings and return to the previous display.
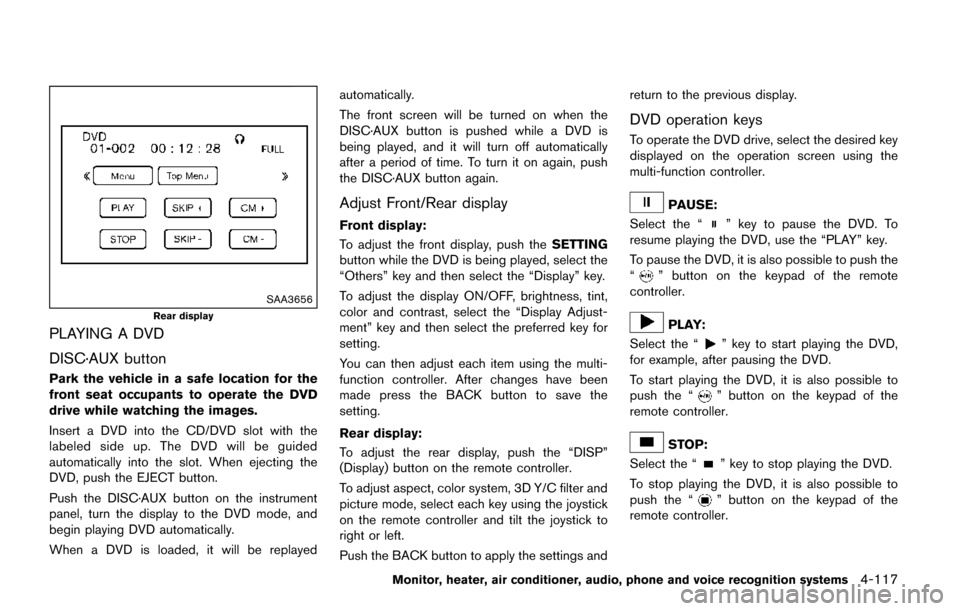
DVD operation keys
To operate the DVD drive, select the desired key
displayed on the operation screen using the
multi-function controller.
PAUSE:
Select the “
” key to pause the DVD. To
resume playing the DVD, use the “PLAY” key.
To pause the DVD, it is also possible to push the
“
” button on the keypad of the remote
controller.
PLAY:
Select the “
” key to start playing the DVD,
for example, after pausing the DVD.
To start playing the DVD, it is also possible to
push the “
” button on the keypad of the
remote controller.
STOP:
Select the “
” key to stop playing the DVD.
To stop playing the DVD, it is also possible to
push the “
” button on the keypad of the
remote controller.
Monitor, heater, air conditioner, audio, phone and voice recognition systems4-117
Page 309 of 520
4-120Monitor, heater, air conditioner, audio, phone and voice recognition systems
To turn off the subtitles, push and hold the
ENTER button until a beep sounds.
Display Mode (DVD-VIDEO, VIDEO-CD):
Choose from the “Full”, “Wide”, “Normal” or
“Cinema” mode using the multi-function con-
troller and push the ENTER button again.
Play Mode:
Choose the preferred play mode using the multi-
function controller and push the ENTER button.
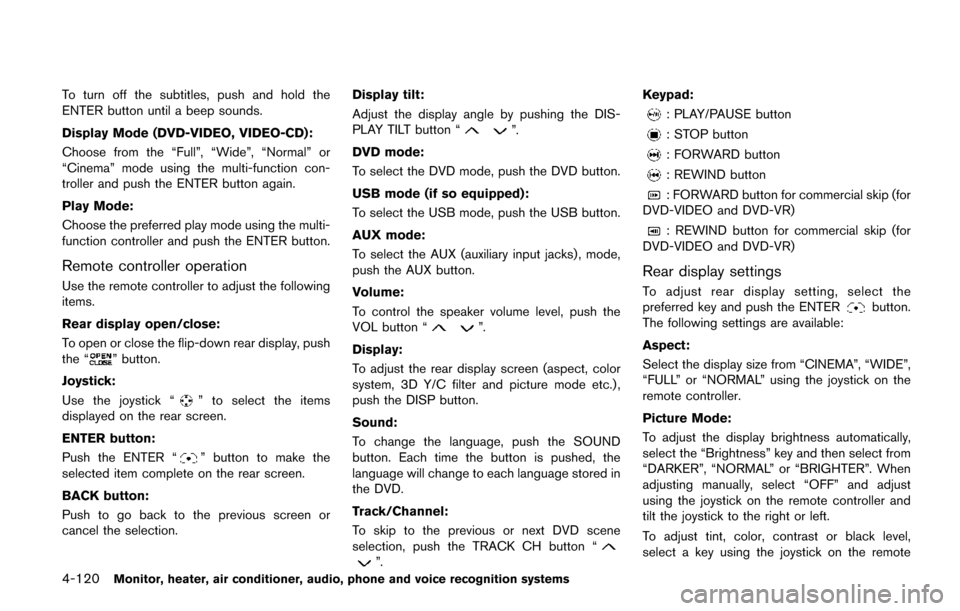
Remote controller operation
Use the remote controller to adjust the following
items.
Rear display open/close:
To open or close the flip-down rear display, push
the “
” button.
Joystick:
Use the joystick “
” to select the items
displayed on the rear screen.
ENTER button:
Push the ENTER “
” button to make the
selected item complete on the rear screen.
BACK button:
Push to go back to the previous screen or
cancel the selection. Display tilt:
Adjust the display angle by pushing the DIS-
PLAY TILT button “
”.
DVD mode:
To select the DVD mode, push the DVD button.
USB mode (if so equipped):
To select the USB mode, push the USB button.
AUX mode:
To select the AUX (auxiliary input jacks) , mode,
push the AUX button.
Volume:
To control the speaker volume level, push the
VOL button “
”.
Display:
To adjust the rear display screen (aspect, color
system, 3D Y/C filter and picture mode etc.) ,
push the DISP button.
Sound:
To change the language, push the SOUND
button. Each time the button is pushed, the
language will change to each language stored in
the DVD.
Track/Channel:
To skip to the previous or next DVD scene
selection, push the TRACK CH button “
”. Keypad:
: PLAY/PAUSE button
: STOP button
: FORWARD button
: REWIND button
: FORWARD button for commercial skip (for
DVD-VIDEO and DVD-VR)
: REWIND button for commercial skip (for
DVD-VIDEO and DVD-VR)
Rear display settings
To adjust rear display setting, select the
preferred key and push the ENTERbutton.
The following settings are available:
Aspect:
Select the display size from “CINEMA”, “WIDE”,
“FULL” or “NORMAL” using the joystick on the
remote controller.
Picture Mode:
To adjust the display brightness automatically,
select the “Brightness” key and then select from
“DARKER”, “NORMAL” or “BRIGHTER”. When
adjusting manually, select “OFF” and adjust
using the joystick on the remote controller and
tilt the joystick to the right or left.
To adjust tint, color, contrast or black level,
select a key using the joystick on the remote
Page 310 of 520
controller and tilt the joystick to the right or left.
Push the BACK button on the remote controller
to apply the settings and return to the previous
display.
To return the adjustment levels to the default
value, select “Execute” next to “Initialization”
using the joystick on the remote controller and
push the ENTER
button. The “Execute” key
is deactivated when the picture mode settings
are already in the default value.
Color System:
To choose the color system, select from
“NTSC”, “PAL”, “PAL-60”, “PAL-M”, “PAL-N” or
“AUTO” using the joystick on the remote
controller and tilt the joystick to the right or left.
3D Y/C filter:
Set to ON/OFF using the joystick on the remote
controller. When turned on, small characters
and an outline of the shapes will be displayed
more clearly than when turned off.
CARE AND MAINTENANCE
Use a lightly dampened, lint free cloth to clean
the surfaces of your Mobile Entertainment
System (DVD player face, screen, remote
controller, etc.) .
CAUTION
. Do not use any solvents or cleaning
solutions when cleaning the video
system.
. Do not use excessive force on the
monitor screen.
. Avoid touching or scratching the
monitor screen as it may become
dirty or damaged.
. Do not attempt to operate the
system in extreme temperature con-
ditions [below �í48F( �í208 C) and
above 1588F (708C)].
. Do not attempt to operate the
system in extreme humidity condi-
tions (less than 10% or more than
75%) . When installing a car phone or a CB radio in
your vehicle, be sure to observe the following
cautions, otherwise the new equipment may
adversely affect the electronic control modules
and electronic control system harness.
WARNING
.
A cellular phone should not be used
for any purpose while driving so full
attention may be given to vehicle
operation. Some jurisdictions prohi-
bit the use of cellular phones while
driving.
. If you must make a call while your
vehicle is in motion, the hands-free
cellular phone operational mode (if
so equipped) is highly recom-
mended. Exercise extreme caution
at all times so full attention may be
given to vehicle operation.
. If you are unable to devote full
attention to vehicle operation while
talking on the phone, pull off the
road to a safe location and stop
your vehicle.
Monitor, heater, air conditioner, audio, phone and voice recognition systems4-121
CAR PHONE OR CB RADIO
Page 397 of 520
5-28Starting and driving
.Recirculating the cool air in the cabinwhen the A/C is on reduces cooling load.
4. Drive at economical speeds and distances.
.Observing the speed limit and not ex- ceeding 60 MPH (97 km/h) (where
legally allowed) can improve fuel effi-
ciency due to reduced aerodynamic
drag.
.Maintaining a safe following distancebehind other vehicles reduces unneces-
sary braking.
.Safely monitoring traffic to anticipatechanges in speed permits reduced brak-
ing and smooth acceleration changes.
.Select a gear range suitable to road conditions.
5. Use cruise control.
.Using cruise control during highway driving helps maintain a steady speed.
.Cruise control is particularly effective in providing fuel savings when driving on
flat terrains.
6. Plan for the shortest route.
.Utilize a map or navigation system to determine the best route to save time.
7. Avoid idling.
.Shutting off your engine when safe for stops exceeding 30-60 seconds saves fuel and reduces emissions.
8. Buy an automated pass for toll roads.
.Automated passes permit drivers to use special lanes to maintain cruising speed
through the toll and avoid stopping and
starting.
9. Winter warm up.
.Limit idling time to minimize impact to fuel economy.
.Vehicles typically need no more than 30seconds of idling at start-up to effectively
circulate the engine oil before driving.
.Your vehicle will reach its ideal operatingtemperature more quickly while driving
versus idling.
10. Keeping your vehicle cool.
.Park your vehicle in a covered parking area or in the shade whenever possible.
.When entering a hot vehicle, opening thewindows will help to reduce the inside
temperature faster, resulting in reduced
demand on your A/C system. .
Keep your engine tuned up.
. Follow the recommended scheduled main-
tenance.
. Keep the tires inflated to the correct
pressure. Low tire pressure increases tire
wear and lowers fuel economy.
. Keep the wheels in correct alignment.
Improper alignment increases tire wear and
lowers fuel economy.
. Use the recommended viscosity engine oil.
(See “Engine oil and oil filter recommenda-
tion” (P.10-5) .)
INCREASING FUEL ECONOMY
Page 430 of 520
8 Do-it-yourself
Maintenance precautions ........................................................ 8-2
Engine compartment check locations .................................. 8-3VQ35DE engine .................................................................. 8-3
Engine cooling system ............................................................. 8-4 Checking engine coolant level ......................................... 8-5
Changing engine coolant .................................................. 8-5
Engine oil ........................................................................\
............ 8-5 Checking engine oil level .................................................. 8-5
Changing engine oil and filter .......................................... 8-6
Continuously Variable Transmission (CVT) fluid ............... 8-8
Power steering fluid .................................................................. 8-8
Brake fluid ........................................................................\
........... 8-9
Window washer fluid ............................................................ 8-10
Battery ........................................................................\
............... 8-10 Jump starting ..................................................................... 8-12
Variable voltage control system .......................................... 8-12
Drive belt ........................................................................\
.......... 8-12
Spark plugs ........................................................................\
..... 8-13 Replacing spark plugs .................................................... 8-13
Air cleaner ........................................................................\
........ 8-14 Windshield wiper blades ..................................................... 8-14
Cleaning ........................................................................\
... 8-14
Replacing ........................................................................\
. 8-15
Washer nozzle ................................................................ 8-16
Rear window wiper blade ................................................... 8-17
Brakes ........................................................................\
.............. 8-17
Self-adjusting brakes .................................................... 8-17
Brake pad wear warning .............................................. 8-17
Fuses ........................................................................\
................ 8-18 Engine compartment ..................................................... 8-18
Passenger compartment .............................................. 8-19
Intelligent Key battery replacement ................................... 8-20
Lights ........................................................................\
................ 8-22
Headlights ........................................................................\
8-22
Exterior and interior lights ............................................ 8-24
Wheels and tires ................................................................... 8-27
Tire pressure ................................................................... 8-27
Tire labeling ..................................................................... 8-31
Types of tires ................................................................... 8-33
Tire chains ....................................................................... 8-33
Changing wheels and tires .......................................... 8-35