2017 NISSAN QUEST reset
[x] Cancel search: resetPage 112 of 520
SIC3674
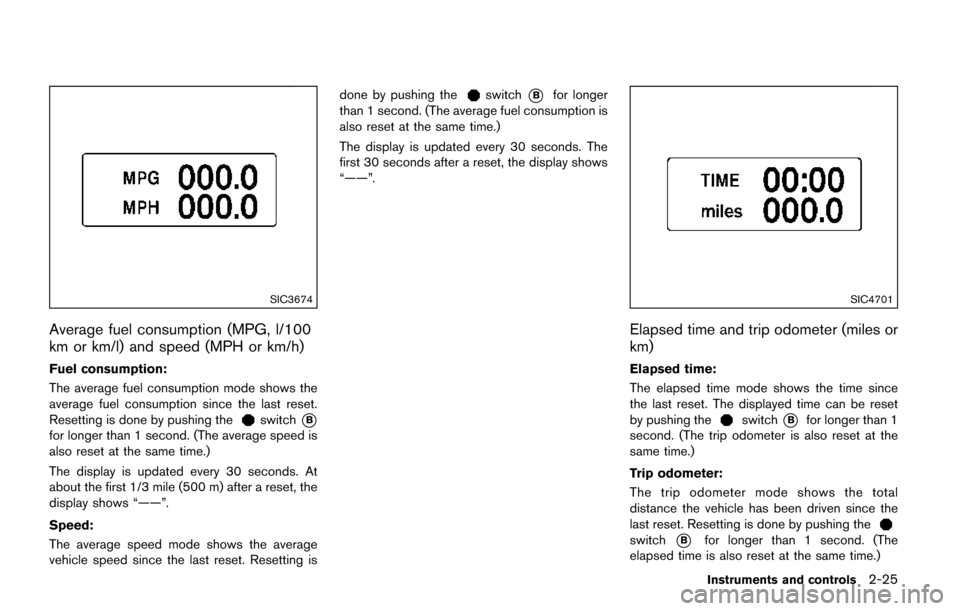
Average fuel consumption (MPG, l/100
km or km/l) and speed (MPH or km/h)
Fuel consumption:
The average fuel consumption mode shows the
average fuel consumption since the last reset.
Resetting is done by pushing the
switch*B
for longer than 1 second. (The average speed is
also reset at the same time.)
The display is updated every 30 seconds. At
about the first 1/3 mile (500 m) after a reset, the
display shows “——”.
Speed:
The average speed mode shows the average
vehicle speed since the last reset. Resetting isdone by pushing the
switch*Bfor longer
than 1 second. (The average fuel consumption is
also reset at the same time.)
The display is updated every 30 seconds. The
first 30 seconds after a reset, the display shows
“——”.
SIC4701
Elapsed time and trip odometer (miles or
km)
Elapsed time:
The elapsed time mode shows the time since
the last reset. The displayed time can be reset
by pushing the
switch*Bfor longer than 1
second. (The trip odometer is also reset at the
same time.)
Trip odometer:
The trip odometer mode shows the total
distance the vehicle has been driven since the
last reset. Resetting is done by pushing the
switch*Bfor longer than 1 second. (The
elapsed time is also reset at the same time.)
Instruments and controls2-25
Page 114 of 520
SIC3678
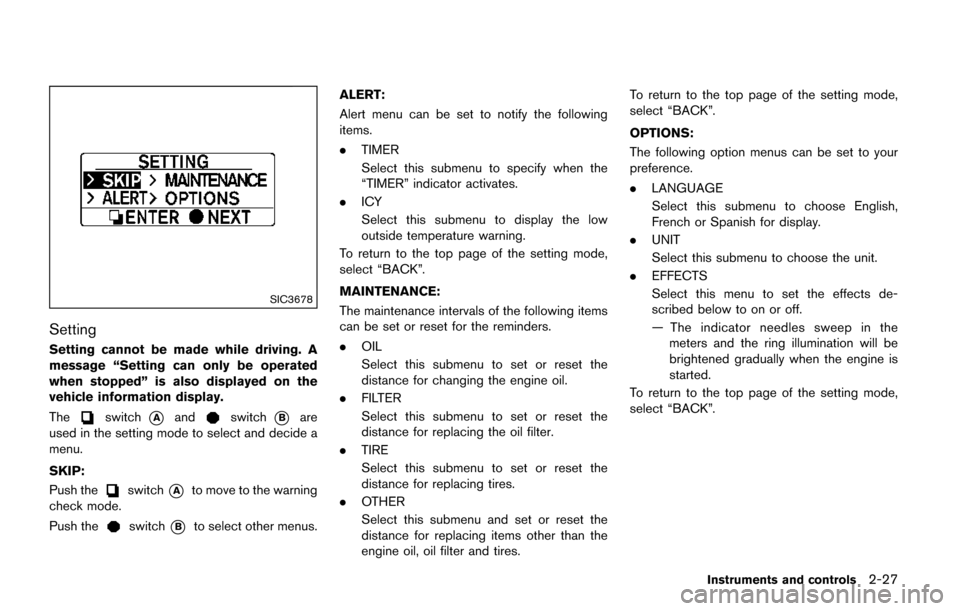
Setting
Setting cannot be made while driving. A
message “Setting can only be operated
when stopped” is also displayed on the
vehicle information display.
The
switch*Aandswitch*Bare
used in the setting mode to select and decide a
menu.
SKIP:
Push the
switch*Ato move to the warning
check mode.
Push the
switch*Bto select other menus. ALERT:
Alert menu can be set to notify the following
items.
.
TIMER
Select this submenu to specify when the
“TIMER” indicator activates.
. ICY
Select this submenu to display the low
outside temperature warning.
To return to the top page of the setting mode,
select “BACK”.
MAINTENANCE:
The maintenance intervals of the following items
can be set or reset for the reminders.
. OIL
Select this submenu to set or reset the
distance for changing the engine oil.
. FILTER
Select this submenu to set or reset the
distance for replacing the oil filter.
. TIRE
Select this submenu to set or reset the
distance for replacing tires.
. OTHER
Select this submenu and set or reset the
distance for replacing items other than the
engine oil, oil filter and tires. To return to the top page of the setting mode,
select “BACK”.
OPTIONS:
The following option menus can be set to your
preference.
.
LANGUAGE
Select this submenu to choose English,
French or Spanish for display.
. UNIT
Select this submenu to choose the unit.
. EFFECTS
Select this menu to set the effects de-
scribed below to on or off.
— The indicator needles sweep in the
meters and the ring illumination will be
brightened gradually when the engine is
started.
To return to the top page of the setting mode,
select “BACK”.
Instruments and controls2-27
Page 176 of 520
SPA2858
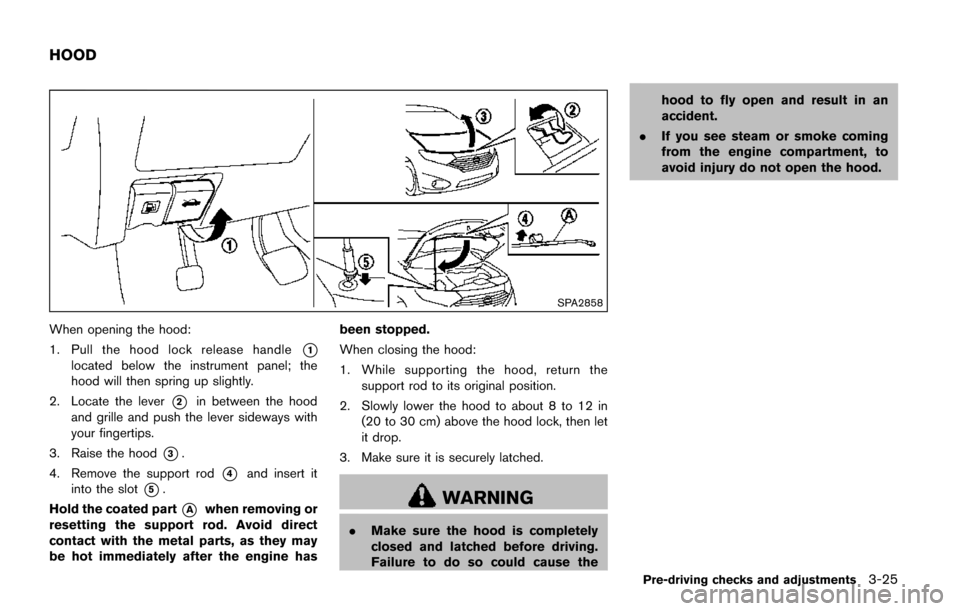
When opening the hood:
1. Pull the hood lock release handle
*1
located below the instrument panel; the
hood will then spring up slightly.
2. Locate the lever
*2in between the hood
and grille and push the lever sideways with
your fingertips.
3. Raise the hood
*3.
4. Remove the support rod
*4and insert it
into the slot
*5.
Hold the coated part
*Awhen removing or
resetting the support rod. Avoid direct
contact with the metal parts, as they may
be hot immediately after the engine has been stopped.
When closing the hood:
1. While supporting the hood, return the
support rod to its original position.
2. Slowly lower the hood to about 8 to 12 in (20 to 30 cm) above the hood lock, then let
it drop.
3. Make sure it is securely latched.WARNING
. Make sure the hood is completely
closed and latched before driving.
Failure to do so could cause the hood to fly open and result in an
accident.
. If you see steam or smoke coming
from the engine compartment, to
avoid injury do not open the hood.
Pre-driving checks and adjustments3-25
HOOD
Page 183 of 520
3-32Pre-driving checks and adjustments
SPA2833
LOOSE FUEL CAP warning
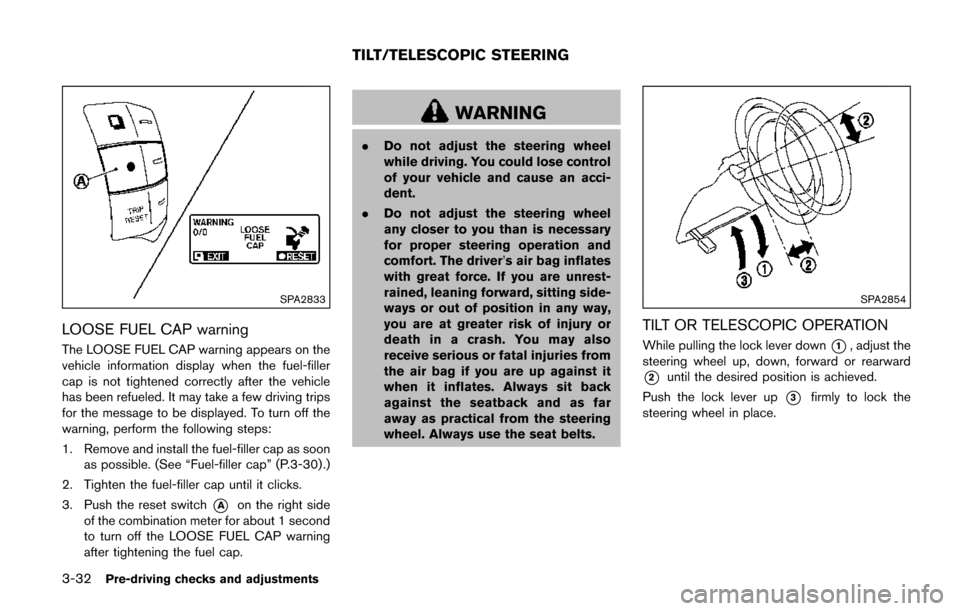
The LOOSE FUEL CAP warning appears on the
vehicle information display when the fuel-filler
cap is not tightened correctly after the vehicle
has been refueled. It may take a few driving trips
for the message to be displayed. To turn off the
warning, perform the following steps:
1. Remove and install the fuel-filler cap as soonas possible. (See “Fuel-filler cap” (P.3-30) .)
2. Tighten the fuel-filler cap until it clicks.
3. Push the reset switch
*Aon the right side
of the combination meter for about 1 second
to turn off the LOOSE FUEL CAP warning
after tightening the fuel cap.
WARNING
. Do not adjust the steering wheel
while driving. You could lose control
of your vehicle and cause an acci-
dent.
. Do not adjust the steering wheel
any closer to you than is necessary
for proper steering operation and
comfort. The driver’s air bag inflates
with great force. If you are unrest-
rained, leaning forward, sitting side-
ways or out of position in any way,
you are at greater risk of injury or
death in a crash. You may also
receive serious or fatal injuries from
the air bag if you are up against it
when it inflates. Always sit back
against the seatback and as far
away as practical from the steering
wheel. Always use the seat belts.
SPA2854
TILT OR TELESCOPIC OPERATION
While pulling the lock lever down*1, adjust the
steering wheel up, down, forward or rearward
*2until the desired position is achieved.
Push the lock lever up
*3firmly to lock the
steering wheel in place.
TILT/TELESCOPIC STEERING
Page 189 of 520
3-38Pre-driving checks and adjustments
Confirming memory storage
.Push the ignition switch to the ON position
and push the SET switch. If the main
memory has not been stored, the indicator
light will come on for approximately 0.5
second. When the memory has stored in
position, the indicator light will stay on for
approximately 5 seconds.
. If the battery cable is disconnected, or if the
fuse opens, the memory will be canceled. In
this case, reset the desired position using
the previous procedure.
. If optional keys are added to your vehicle,
the memory storage procedure to switch 1
or 2 and linking Intelligent Key procedure to
a stored memory position should be per-
formed again for each Intelligent Key. For
additional Intelligent Key information, see
“Keys” (P.3-3) .
Selecting the memorized position
1. Move the shift lever to the P (Park) position.
2. Use one of the following methods to move
the driver’s seat and outside mirrors.
.Push the memory switch (1 or 2) ..Within 45 seconds of opening thedriver’s door, push the memory switch
(1 or 2) .
The driver’s seat and outside mirrors will move to the memorized position with the
indicator light flashing, and then the light will
stay on for approximately 5 seconds.
SYSTEM OPERATION
The automatic drive positioner system will not
work or will stop operating under the following
conditions:
.
When the vehicle speed is above 4 MPH (7
km/h) (entry/exit function) .
. When the vehicle is driven (memory sto-
rage) .
. When the adjusting switch for the driver’s
seat is turned on while the automatic drive
positioner is operating.
. When the driver’s seat and outside mirrors
have already been moved to the memorized
position.
. When no position is stored in the memory
switch.
. When the engine is started while moving the
automatic drive positioner.
. When the shift lever is moved from the P
(Park) position to any other position. (How-
ever, it will not be canceled while the driver’s
seat is returning to the previous positions
(entry/exit function) .)
. When the driver’s door remains open for
more than 45 seconds and the ignition switch is not in the ON position.
Page 201 of 520
4-12Monitor, heater, air conditioner, audio, phone and voice recognition systems
JVH0995X
SAA2480Models with navigation system
JVH0996X
JVH0181MModels without navigation system
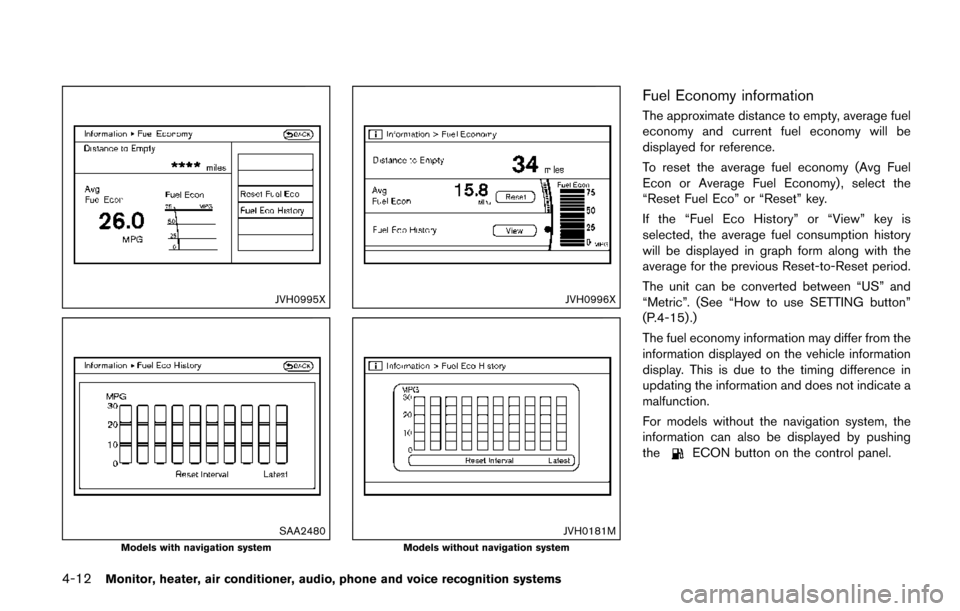
Fuel Economy information
The approximate distance to empty, average fuel
economy and current fuel economy will be
displayed for reference.
To reset the average fuel economy (Avg Fuel
Econ or Average Fuel Economy) , select the
“Reset Fuel Eco” or “Reset” key.
If the “Fuel Eco History” or “View” key is
selected, the average fuel consumption history
will be displayed in graph form along with the
average for the previous Reset-to-Reset period.
The unit can be converted between “US” and
“Metric”. (See “How to use SETTING button”
(P.4-15) .)
The fuel economy information may differ from the
information displayed on the vehicle information
display. This is due to the timing difference in
updating the information and does not indicate a
malfunction.
For models without the navigation system, the
information can also be displayed by pushing
the
ECON button on the control panel.
Page 203 of 520
4-14Monitor, heater, air conditioner, audio, phone and voice recognition systems
1. Set the interval (mileage) of the maintenanceschedule. To determine the recommended
maintenance interval, refer to the “9. Main-
tenance and schedules” section.
2. To display the reminder automatically when the desired distance is reached, select the
“Reminder” key.
3. Reset the driving distance to the new maintenance schedule.
4. To return to the previous screen, push the BACK button.
The unit can be converted between “US” and
“Metric”. (See “How to use SETTING button”
(P.4-15) .)
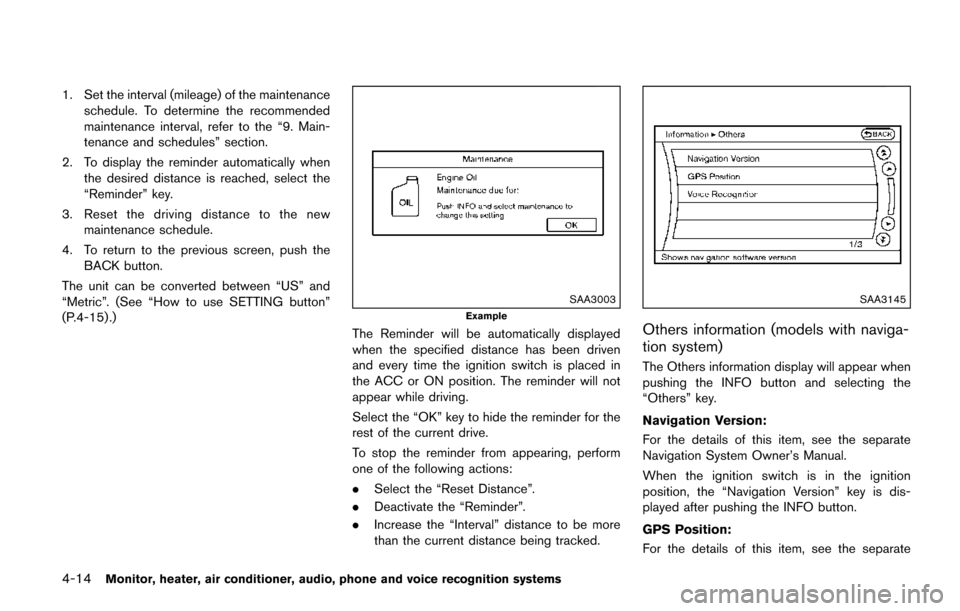
SAA3003
Example
The Reminder will be automatically displayed
when the specified distance has been driven
and every time the ignition switch is placed in
the ACC or ON position. The reminder will not
appear while driving.
Select the “OK” key to hide the reminder for the
rest of the current drive.
To stop the reminder from appearing, perform
one of the following actions:
. Select the “Reset Distance”.
. Deactivate the “Reminder”.
. Increase the “Interval” distance to be more
than the current distance being tracked.
SAA3145
Others information (models with naviga-
tion system)
The Others information display will appear when
pushing the INFO button and selecting the
“Others” key.
Navigation Version:
For the details of this item, see the separate
Navigation System Owner’s Manual.
When the ignition switch is in the ignition
position, the “Navigation Version” key is dis-
played after pushing the INFO button.
GPS Position:
For the details of this item, see the separate
Page 255 of 520
4-66Monitor, heater, air conditioner, audio, phone and voice recognition systems
nano�Š, iPod shuffle�Š, and iPod touch�Šare
trademarks of Apple Inc., registered in the U.S.
and other countries. Lightning is a trademark of
Apple Inc.
. Improperly plugging in the iPod
�Šmay cause
a checkmark to be displayed on and off
(flickering) . Always make sure that the iPod
�Š
is connected properly.
. An iPod nano�Š(1st Generation) may remain
in fast forward or rewind mode if it is
connected during a seek operation. In this
case, please manually reset the iPod
�Š.
. An iPod nano�Š(2nd Generation) will con-
tinue to fast-forward or rewind if it is
disconnected during a seek operation.
. An incorrect song title may appear when the
Play Mode is changed while using an iPod
nano
�Š(2nd Generation)
. Audiobooks may not play in the same order
as they appear on an iPod
�Š.
. Large video files cause slow responses in an
iPod
�Š. The vehicle center display may
momentarily black out, but will soon recover.
. If an iPod
�Šautomatically selects large video
files while in the shuffle mode, the vehicle
center display may momentarily black out,
but will soon recover.
Compressed Audio Files (MP3/WMA/
AAC)
Explanation of terms:
. MP3 — MP3 is short for Moving Pictures
Experts Group Audio Layer 3. MP3 is the
most well known compressed digital audio
file format. This format allows for near “CD
quality” sound, but at a fraction of the size of
normal audio files. MP3 conversion of an
audio track can reduce the file size by
approximately a 10:1 ratio (Sampling: 44.1
kHz, Bit rate: 128 kbps) with virtually no
perceptible loss in quality. The compression
reduces certain parts of sound that seem
inaudible to most people.
. WMA — Windows Media Audio (WMA) is a
compressed audio format created by Micro-
soft as an alternative to MP3. The WMA
codec offers greater file compression than
the MP3 codec, enabling storage of more
digital audio tracks in the same amount of
space when compared to MP3s at the same
level of quality.
. AAC/M4A (if so equipped) — Advanced
Audio Coding (AAC) is a lossy audio
compression format. Audio files that have
been encoded with AAC are generally
smaller in size and deliver a higher quality
of sound than MP3. .
Bit rate — Bit rate denotes the number of
bits per second used by a digital music file.
The size and quality of a compressed digital
audio file is determined by the bit rate used
when encoding the file.
. Sampling frequency — Sampling frequency
is the rate at which the samples of a signal
are converted from analog to digital (A/D
conversion) per second.
. Multisession — Multisession is one of the
methods for writing data to media. Writing
data once to the media is called a single
session, and writing more than once is
called a multisession.
. ID3/WMA Tag — The ID3/WMA tag is the
part of the encoded MP3 or WMA file that
contains information about the digital music
file such as song title, artist, album title,
encoding bit rate, track time duration, etc.
ID3 tag information is displayed on the
Album/Artist/Track title line on the display.
* Windows
�Šand Windows Media�Šare regis-
tered trademarks or trademarks of Microsoft
Corporation in the United States of America
and/or other countries.
This product is protected by certain intellectual
property rights of Microsoft Corporation and
third parties. Use or distribution of such
technology outside of this product is prohibited