2017 NISSAN QUEST oil filter
[x] Cancel search: oil filterPage 110 of 520
SIC4237
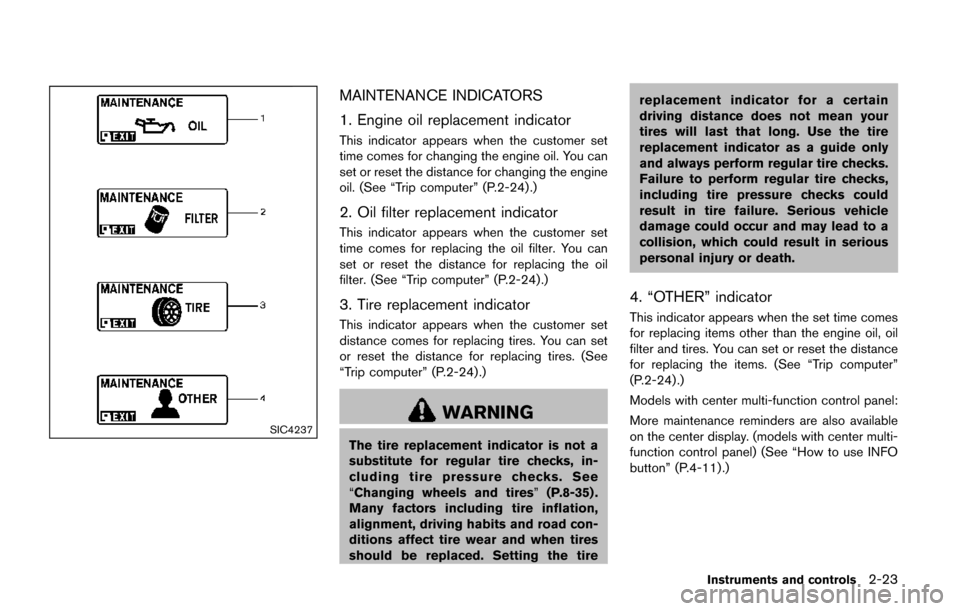
MAINTENANCE INDICATORS
1. Engine oil replacement indicator
This indicator appears when the customer set
time comes for changing the engine oil. You can
set or reset the distance for changing the engine
oil. (See “Trip computer” (P.2-24) .)
2. Oil filter replacement indicator
This indicator appears when the customer set
time comes for replacing the oil filter. You can
set or reset the distance for replacing the oil
filter. (See “Trip computer” (P.2-24).)
3. Tire replacement indicator
This indicator appears when the customer set
distance comes for replacing tires. You can set
or reset the distance for replacing tires. (See
“Trip computer” (P.2-24) .)
WARNING
The tire replacement indicator is not a
substitute for regular tire checks, in-
cluding tire pressure checks. See
“Changing wheels and tires”(P.8-35) .
Many factors including tire inflation,
alignment, driving habits and road con-
ditions affect tire wear and when tires
should be replaced. Setting the tire replacement indicator for a certain
driving distance does not mean your
tires will last that long. Use the tire
replacement indicator as a guide only
and always perform regular tire checks.
Failure to perform regular tire checks,
including tire pressure checks could
result in tire failure. Serious vehicle
damage could occur and may lead to a
collision, which could result in serious
personal injury or death.
4. “OTHER” indicator
This indicator appears when the set time comes
for replacing items other than the engine oil, oil
filter and tires. You can set or reset the distance
for replacing the items. (See “Trip computer”
(P.2-24) .)
Models with center multi-function control panel:
More maintenance reminders are also available
on the center display. (models with center multi-
function control panel) (See “How to use INFO
button” (P.4-11).)
Instruments and controls2-23
Page 114 of 520
SIC3678
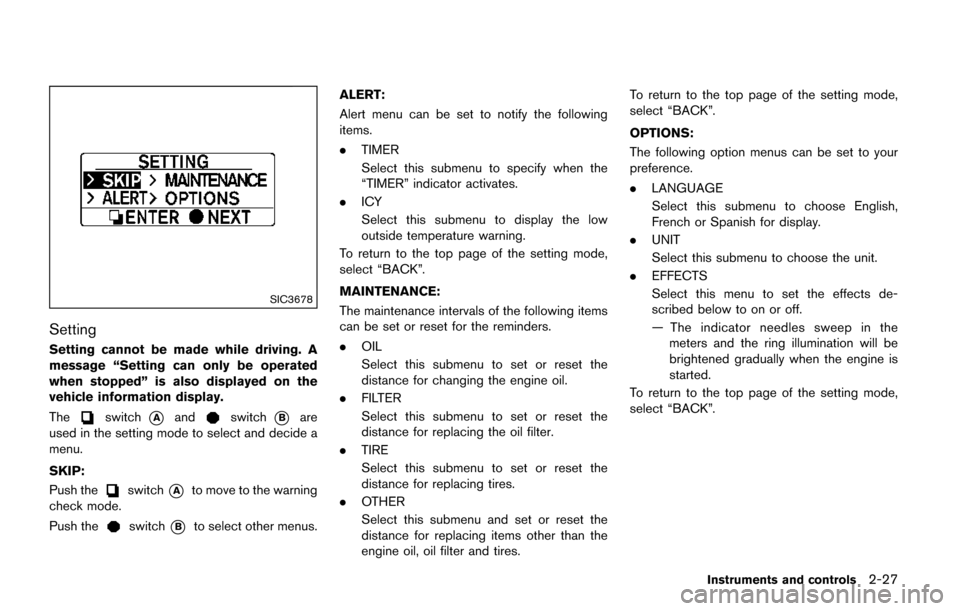
Setting
Setting cannot be made while driving. A
message “Setting can only be operated
when stopped” is also displayed on the
vehicle information display.
The
switch*Aandswitch*Bare
used in the setting mode to select and decide a
menu.
SKIP:
Push the
switch*Ato move to the warning
check mode.
Push the
switch*Bto select other menus. ALERT:
Alert menu can be set to notify the following
items.
.
TIMER
Select this submenu to specify when the
“TIMER” indicator activates.
. ICY
Select this submenu to display the low
outside temperature warning.
To return to the top page of the setting mode,
select “BACK”.
MAINTENANCE:
The maintenance intervals of the following items
can be set or reset for the reminders.
. OIL
Select this submenu to set or reset the
distance for changing the engine oil.
. FILTER
Select this submenu to set or reset the
distance for replacing the oil filter.
. TIRE
Select this submenu to set or reset the
distance for replacing tires.
. OTHER
Select this submenu and set or reset the
distance for replacing items other than the
engine oil, oil filter and tires. To return to the top page of the setting mode,
select “BACK”.
OPTIONS:
The following option menus can be set to your
preference.
.
LANGUAGE
Select this submenu to choose English,
French or Spanish for display.
. UNIT
Select this submenu to choose the unit.
. EFFECTS
Select this menu to set the effects de-
scribed below to on or off.
— The indicator needles sweep in the
meters and the ring illumination will be
brightened gradually when the engine is
started.
To return to the top page of the setting mode,
select “BACK”.
Instruments and controls2-27
Page 202 of 520
SAA2481
Models with navigation system
JVH0183MModels without navigation system
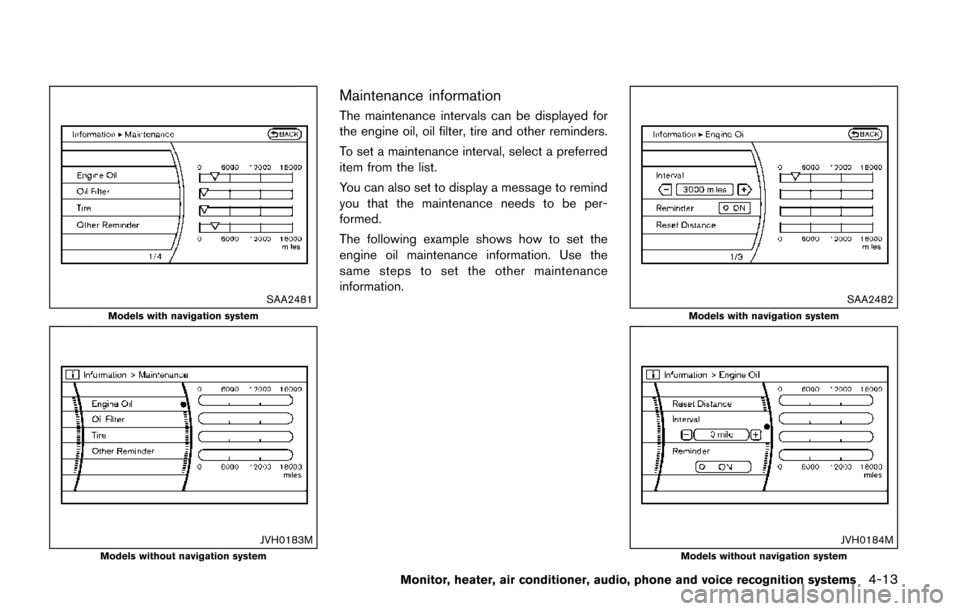
Maintenance information
The maintenance intervals can be displayed for
the engine oil, oil filter, tire and other reminders.
To set a maintenance interval, select a preferred
item from the list.
You can also set to display a message to remind
you that the maintenance needs to be per-
formed.
The following example shows how to set the
engine oil maintenance information. Use the
same steps to set the other maintenance
information.
SAA2482
Models with navigation system
JVH0184MModels without navigation system
Monitor, heater, air conditioner, audio, phone and voice recognition systems4-13
Page 397 of 520
5-28Starting and driving
.Recirculating the cool air in the cabinwhen the A/C is on reduces cooling load.
4. Drive at economical speeds and distances.
.Observing the speed limit and not ex- ceeding 60 MPH (97 km/h) (where
legally allowed) can improve fuel effi-
ciency due to reduced aerodynamic
drag.
.Maintaining a safe following distancebehind other vehicles reduces unneces-
sary braking.
.Safely monitoring traffic to anticipatechanges in speed permits reduced brak-
ing and smooth acceleration changes.
.Select a gear range suitable to road conditions.
5. Use cruise control.
.Using cruise control during highway driving helps maintain a steady speed.
.Cruise control is particularly effective in providing fuel savings when driving on
flat terrains.
6. Plan for the shortest route.
.Utilize a map or navigation system to determine the best route to save time.
7. Avoid idling.
.Shutting off your engine when safe for stops exceeding 30-60 seconds saves fuel and reduces emissions.
8. Buy an automated pass for toll roads.
.Automated passes permit drivers to use special lanes to maintain cruising speed
through the toll and avoid stopping and
starting.
9. Winter warm up.
.Limit idling time to minimize impact to fuel economy.
.Vehicles typically need no more than 30seconds of idling at start-up to effectively
circulate the engine oil before driving.
.Your vehicle will reach its ideal operatingtemperature more quickly while driving
versus idling.
10. Keeping your vehicle cool.
.Park your vehicle in a covered parking area or in the shade whenever possible.
.When entering a hot vehicle, opening thewindows will help to reduce the inside
temperature faster, resulting in reduced
demand on your A/C system. .
Keep your engine tuned up.
. Follow the recommended scheduled main-
tenance.
. Keep the tires inflated to the correct
pressure. Low tire pressure increases tire
wear and lowers fuel economy.
. Keep the wheels in correct alignment.
Improper alignment increases tire wear and
lowers fuel economy.
. Use the recommended viscosity engine oil.
(See “Engine oil and oil filter recommenda-
tion” (P.10-5) .)
INCREASING FUEL ECONOMY
Page 430 of 520
8 Do-it-yourself
Maintenance precautions ........................................................ 8-2
Engine compartment check locations .................................. 8-3VQ35DE engine .................................................................. 8-3
Engine cooling system ............................................................. 8-4 Checking engine coolant level ......................................... 8-5
Changing engine coolant .................................................. 8-5
Engine oil ........................................................................\
............ 8-5 Checking engine oil level .................................................. 8-5
Changing engine oil and filter .......................................... 8-6
Continuously Variable Transmission (CVT) fluid ............... 8-8
Power steering fluid .................................................................. 8-8
Brake fluid ........................................................................\
........... 8-9
Window washer fluid ............................................................ 8-10
Battery ........................................................................\
............... 8-10 Jump starting ..................................................................... 8-12
Variable voltage control system .......................................... 8-12
Drive belt ........................................................................\
.......... 8-12
Spark plugs ........................................................................\
..... 8-13 Replacing spark plugs .................................................... 8-13
Air cleaner ........................................................................\
........ 8-14 Windshield wiper blades ..................................................... 8-14
Cleaning ........................................................................\
... 8-14
Replacing ........................................................................\
. 8-15
Washer nozzle ................................................................ 8-16
Rear window wiper blade ................................................... 8-17
Brakes ........................................................................\
.............. 8-17
Self-adjusting brakes .................................................... 8-17
Brake pad wear warning .............................................. 8-17
Fuses ........................................................................\
................ 8-18 Engine compartment ..................................................... 8-18
Passenger compartment .............................................. 8-19
Intelligent Key battery replacement ................................... 8-20
Lights ........................................................................\
................ 8-22
Headlights ........................................................................\
8-22
Exterior and interior lights ............................................ 8-24
Wheels and tires ................................................................... 8-27
Tire pressure ................................................................... 8-27
Tire labeling ..................................................................... 8-31
Types of tires ................................................................... 8-33
Tire chains ....................................................................... 8-33
Changing wheels and tires .......................................... 8-35
Page 431 of 520
8-2Do-it-yourself
When performing any inspection or mainte-
nance work on your vehicle, always take care
to prevent serious accidental injury to yourself or
damage to the vehicle. The following are general
precautions which should be closely observed.
WARNING
.Park the vehicle on a level surface,
apply the parking brake securely
and block the wheels to prevent
the vehicle from moving. Move the
shift lever to P (Park) .
. Be sure the ignition switch is in the
OFF or LOCK position when per-
forming any parts replacement or
repairs.
. If you must work with the engine
running, keep your hands, clothing,
hair and tools away from moving
fans, belts and any other moving
parts.
. It is advisable to secure or remove
any loose clothing and remove any
jewelry, such as rings, watches, etc.
before working on your vehicle.
. Always wear eye protection when-
ever you work on your vehicle. .
If you must run the engine in an
enclosed space such as a garage, be
sure there is proper ventilation for
exhaust gases to escape.
. Never get under the vehicle while it
is supported only by a jack. If it is
necessary to work under the vehicle,
support it with safety stands.
. Keep smoking materials, flame and
sparks away from fuel tank and the
battery.
. Because the fuel lines on gasoline
engine models are under high pres-
sure even when the engine is off, it
is recommended you visit a NISSAN
dealer for service of the fuel filter or
fuel lines.
CAUTION
.Do not work under the hood while
the engine is hot. Turn the engine
off and wait until it cools down.
. Avoid direct contact with used en-
gine oil and coolant. Improperly
disposed engine oil, and engine
coolant and/or other vehicle fluids can damage the environment. Al-
ways conform to local regulations
for disposal of vehicle fluid.
. Never leave the engine or the CVT
related component harnesses dis-
connected while the ignition switch
is in the ON position.
. Never connect or disconnect the
battery or any transistorized com-
ponent while the ignition switch is
in the ON position.
. Your vehicle is equipped with an
automatic engine cooling fan. It may
come on at any time without warn-
ing, even if the ignition key is in the
OFF position and the engine is not
running. To avoid injury, always
disconnect the negative battery
cable before working near the fan.
This “8. Do-it-yourself” section gives instruc-
tions regarding only those items which are
relatively easy for an owner to perform.
A genuine NISSAN Service Manual is also
available. (See “Owner’s manual/service manual
order information” (P.10-27) .)
You should be aware that incomplete or
improper servicing may result in operating
MAINTENANCE PRECAUTIONS
Page 435 of 520
8-6Do-it-yourself
opening.Do not overfill*3.
6. Recheck oil level with the dipstick.
It is normal to add some oil between oil
maintenance intervals or during the break-
in period, depending on the severity of
operating conditions.
CAUTION
Oil level should be checked regularly.
Operating the engine with an insuffi-
cient amount of oil can damage the
engine, and such damage is not cov-
ered by the warranty.
CHANGING ENGINE OIL AND FILTER
Vehicle set-up
1. Park the vehicle on a level surface and apply the parking brake.
2. Start the engine and let it idle until it reaches operating temperature.
3. Turn the engine off and wait more than 10 minutes.
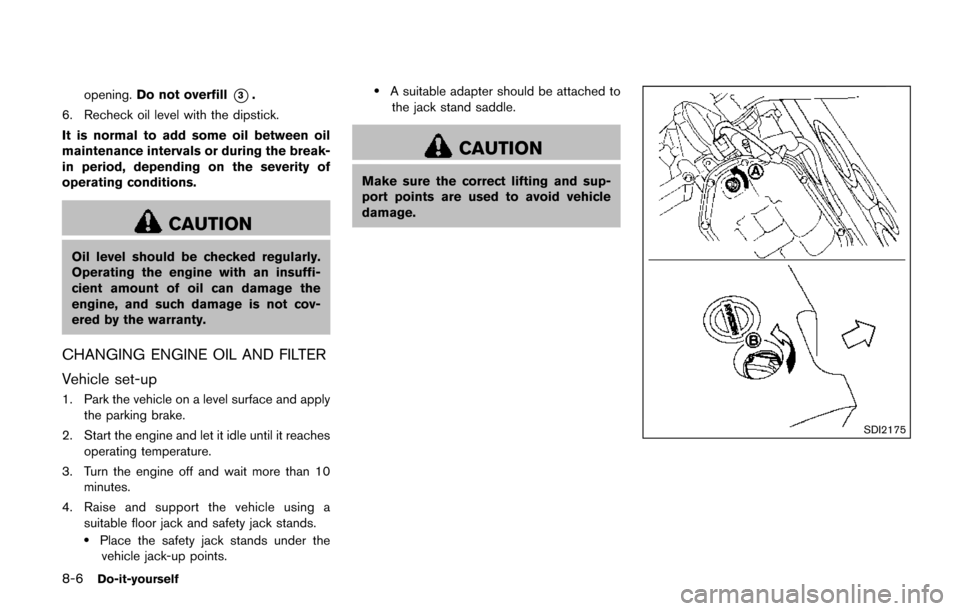
4. Raise and support the vehicle using a suitable floor jack and safety jack stands.
.Place the safety jack stands under thevehicle jack-up points.
.A suitable adapter should be attached tothe jack stand saddle.
CAUTION
Make sure the correct lifting and sup-
port points are used to avoid vehicle
damage.
SDI2175
Page 436 of 520
SDI2717
Engine oil and filter
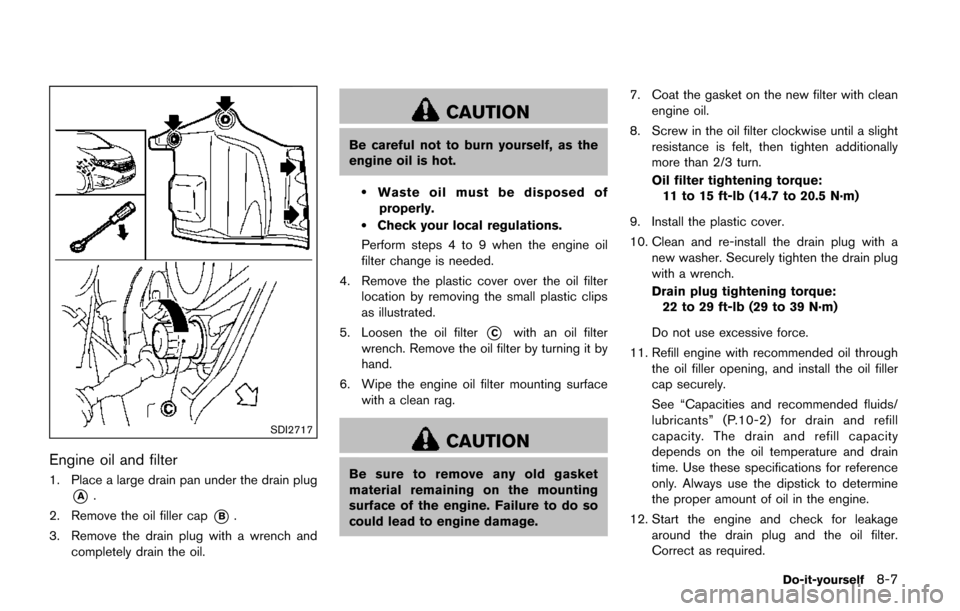
1. Place a large drain pan under the drain plug
*A.
2. Remove the oil filler cap
*B.
3. Remove the drain plug with a wrench and completely drain the oil.
CAUTION
Be careful not to burn yourself, as the
engine oil is hot.
.Waste oil must be disposed of
properly.
.Check your local regulations.
Perform steps 4 to 9 when the engine oil
filter change is needed.
4. Remove the plastic cover over the oil filter location by removing the small plastic clips
as illustrated.
5. Loosen the oil filter
*Cwith an oil filter
wrench. Remove the oil filter by turning it by
hand.
6. Wipe the engine oil filter mounting surface with a clean rag.
CAUTION
Be sure to remove any old gasket
material remaining on the mounting
surface of the engine. Failure to do so
could lead to engine damage. 7. Coat the gasket on the new filter with clean
engine oil.
8. Screw in the oil filter clockwise until a slight resistance is felt, then tighten additionally
more than 2/3 turn.
Oil filter tightening torque:
11 to 15 ft-lb (14.7 to 20.5 N·m)
9. Install the plastic cover.
10. Clean and re-install the drain plug with a new washer. Securely tighten the drain plug
with a wrench.
Drain plug tightening torque:22 to 29 ft-lb (29 to 39 N·m)
Do not use excessive force.
11. Refill engine with recommended oil through the oil filler opening, and install the oil filler
cap securely.
See “Capacities and recommended fluids/
lubricants” (P.10-2) for drain and refill
capacity. The drain and refill capacity
depends on the oil temperature and drain
time. Use these specifications for reference
only. Always use the dipstick to determine
the proper amount of oil in the engine.
12. Start the engine and check for leakage around the drain plug and the oil filter.
Correct as required.
Do-it-yourself8-7