Page 5 of 36

3
For information regarding how to access additional viewing cycles, please
see your Owner’s Manual.
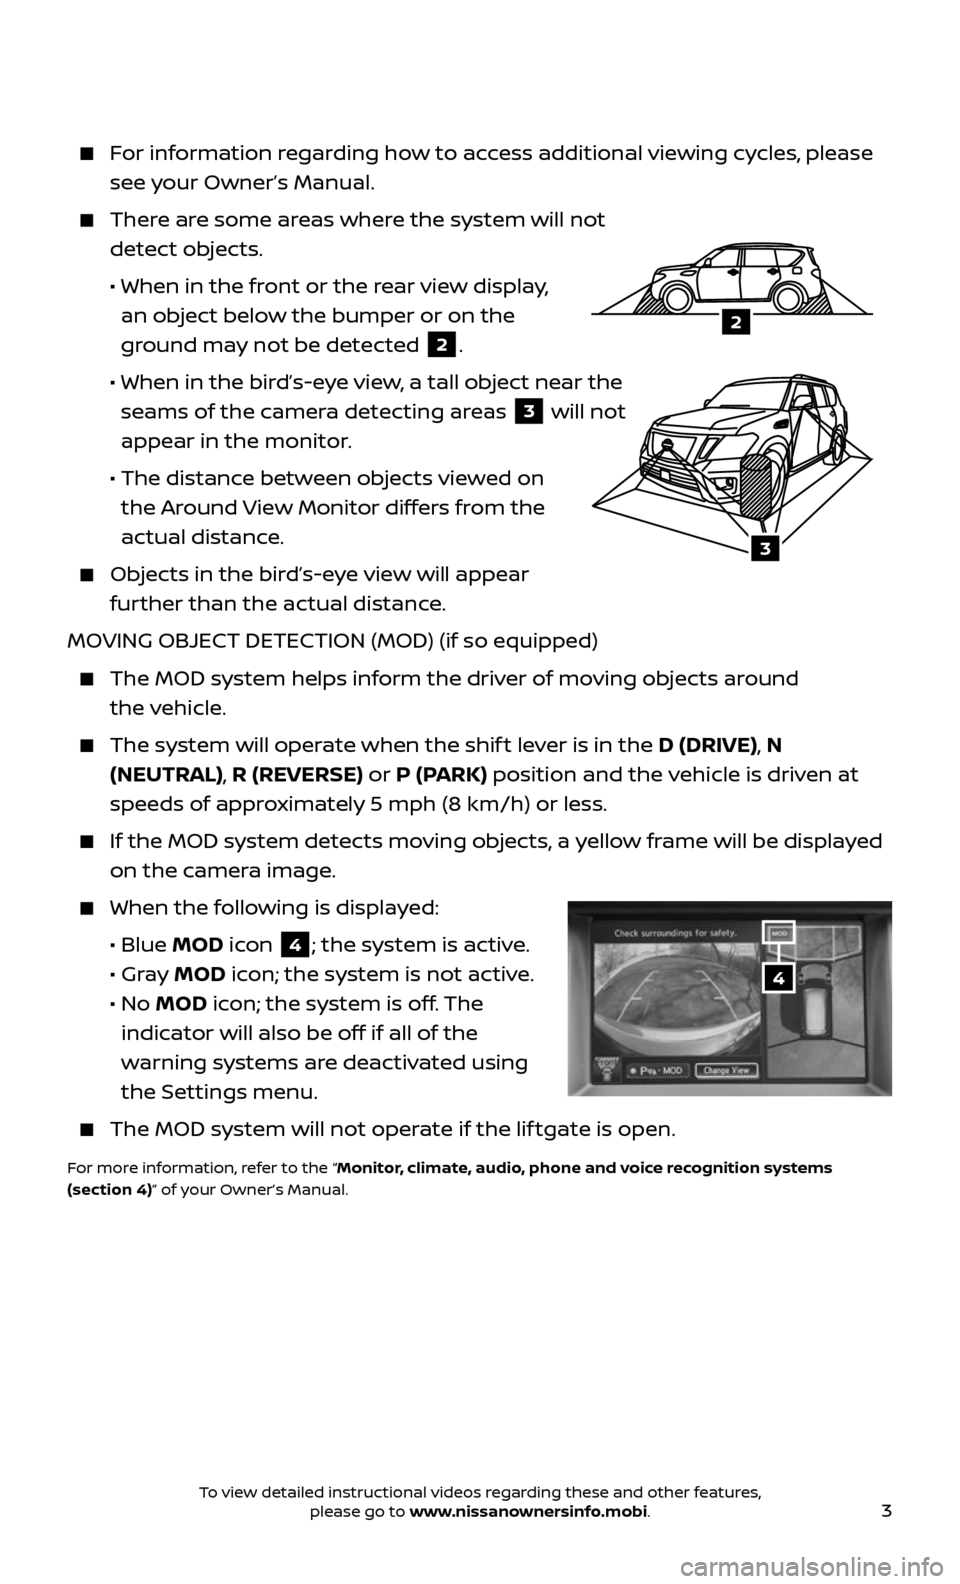
There are some areas where the system will not
detect objects.
• When in the fr ont or the rear view display,
an object below the bumper or on the
ground may not be detected
2.
• When in the bir d’s-eye view, a tall object near the
seams of the camera detecting areas
3 will not
appear in the monitor.
• The distanc e between objects viewed on
the Around View Monitor differs from the
actual distance.
Objects in the bird’s-eye view will appear
further than the actual distance.
MOVING OBJECT DETECTION (MOD) (if so equipped)
The MOD system helps inf orm the driver of moving objects around
the vehicle.
The system wil l operate when the shif t lever is in the D (DRIVE), N
(NEUTRAL), R (REVERSE) or P (PARK) position and the vehicle is driven at
speeds of approximately 5 mph (8 km/h) or less.
If the MOD system detec ts moving objects, a yellow frame will be displayed
on the camera image.
When the following is displayed:
• Blue MOD icon 4; the system is active.
• Gray MOD icon; the system is not active.
• No MOD icon; the system is off. The
indicator will also be off if all of the
warning systems are deactivated using
the Settings menu.
The MOD system wil l not operate if the lif tgate is open.
For more information, refer to the “Monitor, climate, audio, phone and voice recognition systems
(section 4)” of your Owner’s Manual.
4
3
2
To view detailed instructional videos regarding these and other features, please go to www.nissanownersinfo.mobi.
Page 10 of 36

8
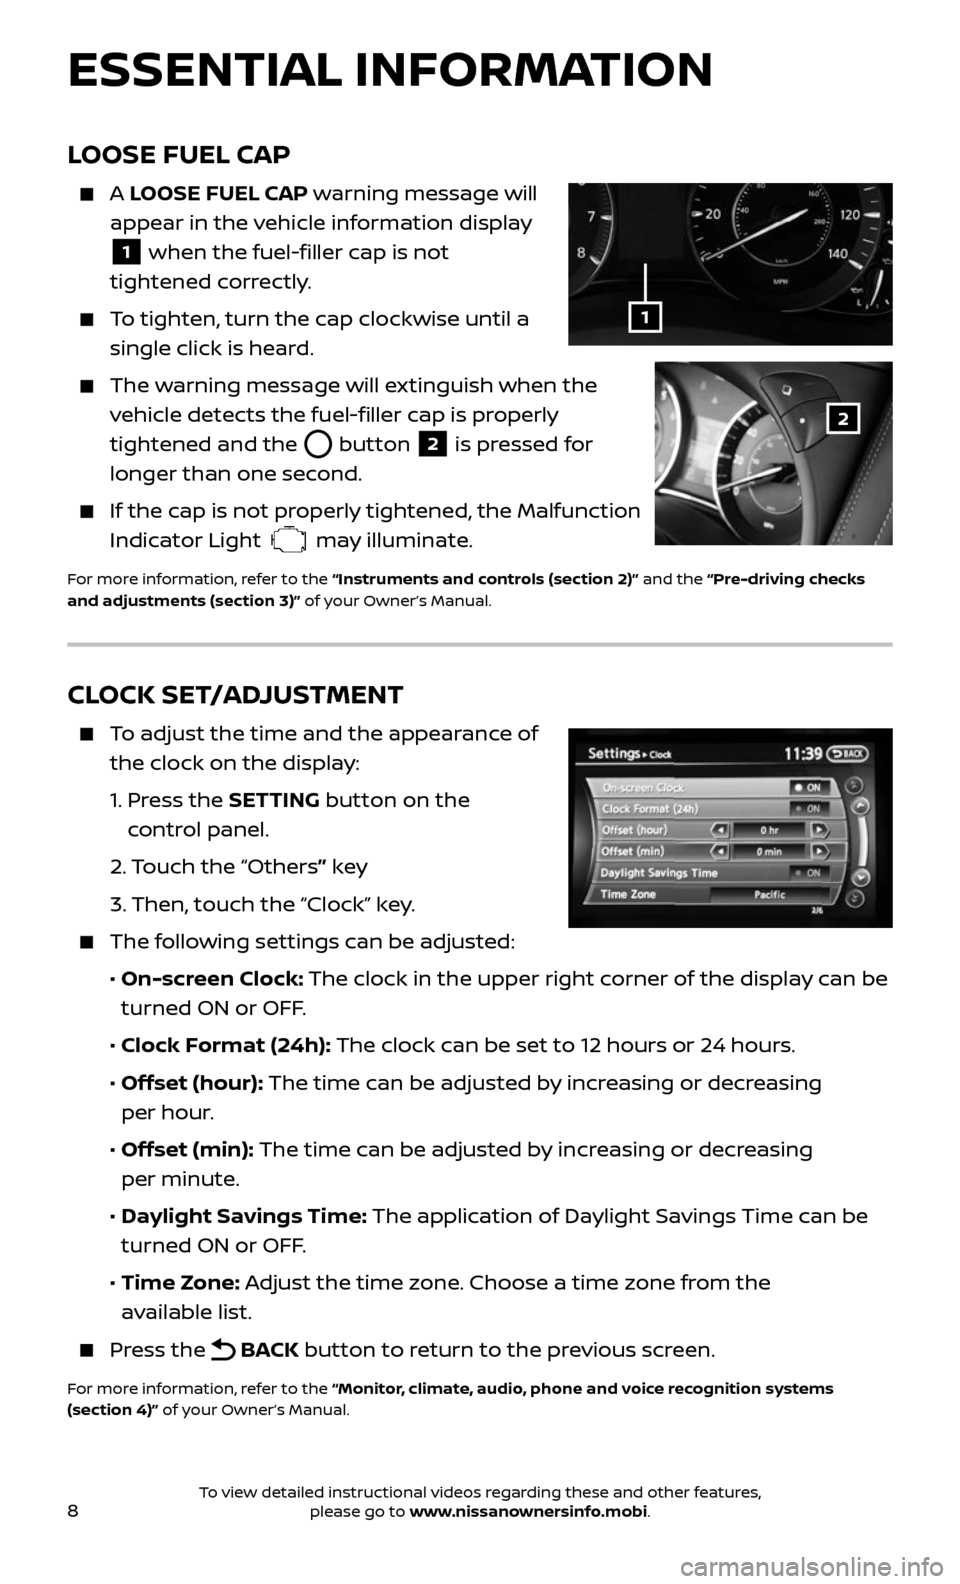
CLOCK SET/ADJUSTMENT
To adjust the time and the appearance of
the clock on the display:
1. Press the SETTING button on the
control panel.
2. Touch the “Others” key
3. Then, touch the “Clock” key.
The following settings can be adjusted:
• On-screen Clock: The clock in the upper right corner of the display can be
turned ON or OFF.
• Clock Format (24h): The clock can be set to 12 hours or 24 hours.
• Offset (hour): The time can be adjusted by increasing or decreasing
per hour.
• Offset (min): The time can be adjusted by increasing or decreasing
per minute.
• Daylight Savings Time: The application of Daylight Savings Time can be
turned ON or OFF.
• Time Zone: Adjust the time zone. Choose a time zone from the
available list.
Press the BACK button to return to the previous screen.
For more information, refer to the “Monitor, climate, audio, phone and voice recognition systems
(section 4)” of your Owner’s Manual.
ESSENTIAL INFORMATION
LOOSE FUEL CAP
A LOOSE FUEL CAP warning message will
appear in the vehicle information display
1 when the fuel-filler cap is not
tightened correctly.
To tighten, turn the cap clockwise until a
single click is heard.
The warning message will extinguish when the
vehicle detects the fuel-filler cap is properly
tightened and the
button 2 is pressed for
longer than one second.
If the cap is not properly tightened, the Malfunction
Indicator Light may illuminate.
For more information, refer to the “Instruments and controls (section 2)” and the “Pre-driving checks
and adjustments (section 3)” of your Owner’s Manual.
1
2
To view detailed instructional videos regarding these and other features, please go to www.nissanownersinfo.mobi.
Page 21 of 36

19
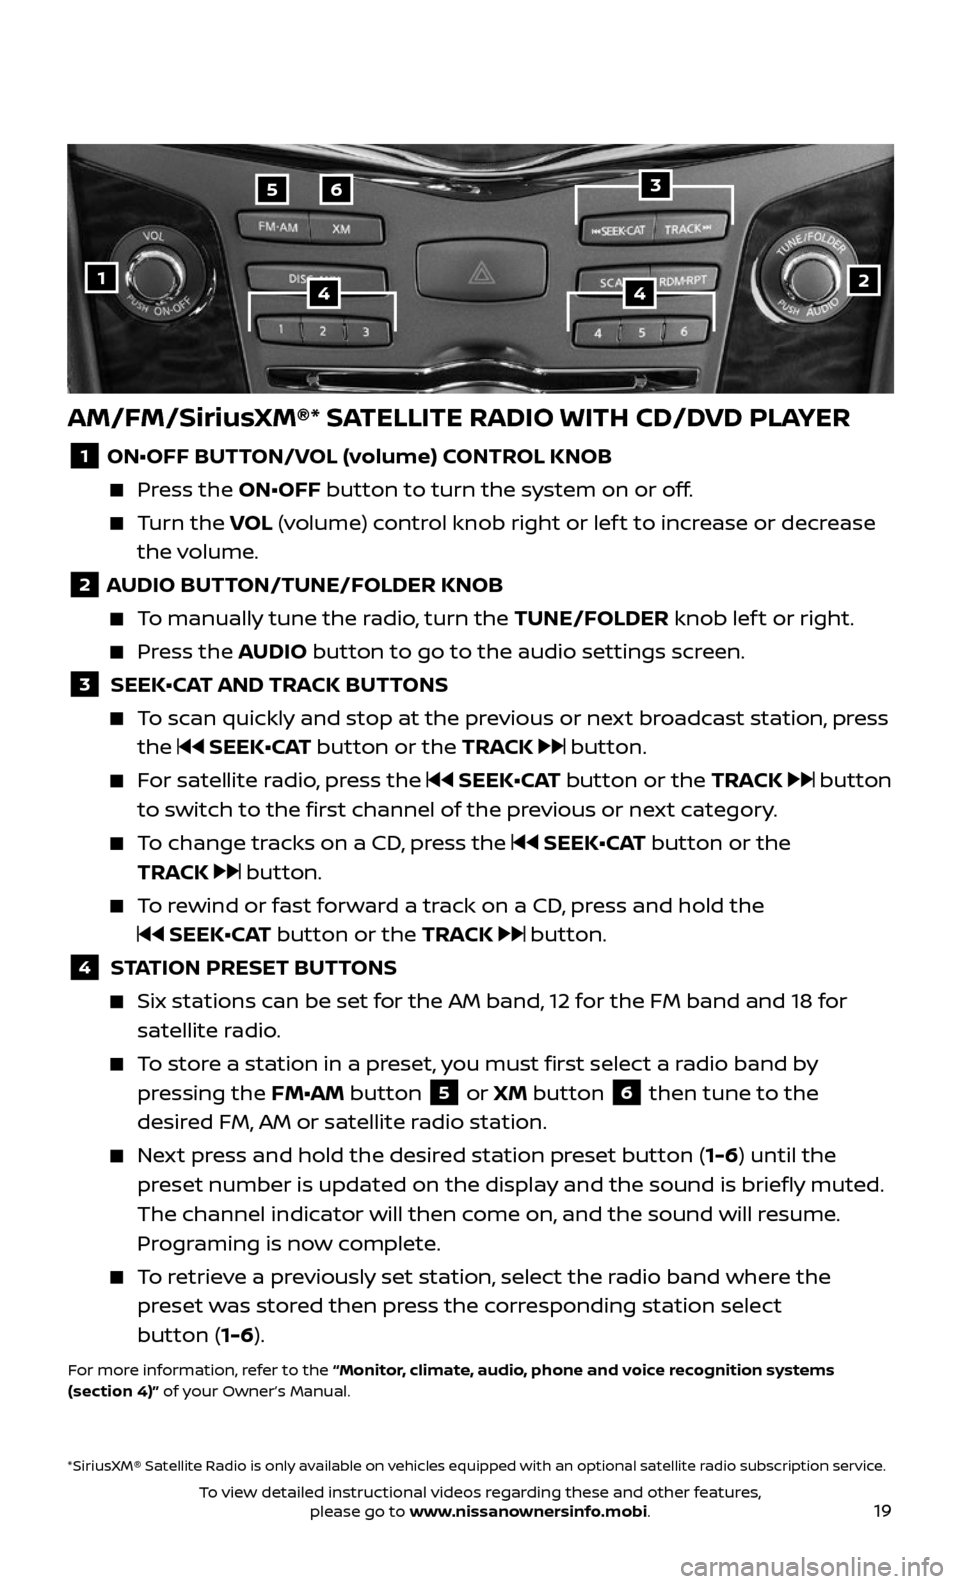
AM/FM/SiriusXM®* SATELLITE RADIO WITH CD/DVD PLAYER
1 ON•OFF BUTTON/VOL (volume) CONTROL KNOB
Press the ON•OFF button to turn the system on or off.
Turn the VOL (volume) control knob right or lef t to increase or decrease
the volume.
2 AUDIO BUTTON/TUNE/FOLDER KNOB
To manually tune the radio, turn the TUNE/FOLDER knob lef t or right.
Press the AUDIO button to go to the audio settings screen.
3 SEEK•CAT AND TRACK BUTTONS
To scan quickly and stop at the previous or next broadcast station, press
the SEEK•CAT button or the TRACK button.
For satellite radio, press the SEEK•CAT button or the TRACK button
to switch to the first channel of the previous or next category.
To change tracks on a CD, press the SEEK•CAT button or the
TRACK
button.
To rewind or fast forward a track on a CD, press and hold the
SEEK•CAT button or the TRACK button.
4 STATION PRESET BUTTONS
Six stations c an be set for the AM band, 12 for the FM band and 18 for
satellite radio.
To store a station in a preset, you must first select a radio band by
pressing the FM•AM button 5 or XM button 6 then tune to the
desired FM, AM or satellite radio station.
Next press and hold the desired station preset button (1-6) until the
preset number is updated on the display and the sound is briefly muted.
The channel indicator will then come on, and the sound will resume.
Programing is now complete.
To retrieve a previously set station, select the radio band where the
preset was stored then press the corresponding station select
button (1-6).
For more information, refer to the “Monitor, climate, audio, phone and voice recognition systems
(section 4)” of your Owner’s Manual.
2
65
144
*SiriusXM® Satellite Radio is only available on vehicles equipped with an optional satellite radio subscription service.
3
To view detailed instructional videos regarding these and other features, please go to www.nissanownersinfo.mobi.