2017 NISSAN ARMADA wheel
[x] Cancel search: wheelPage 417 of 614
5-76Starting and driving
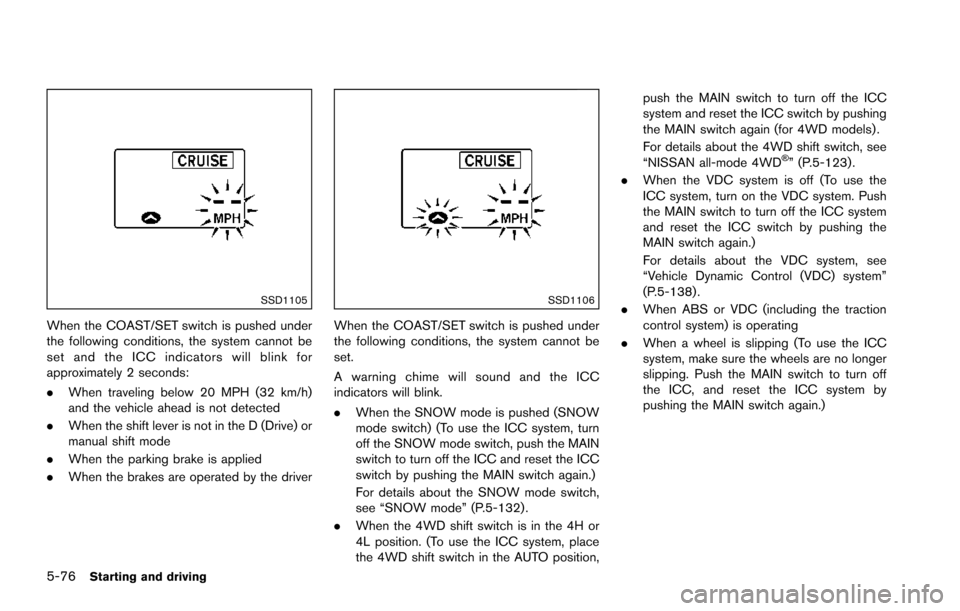
SSD1105
When the COAST/SET switch is pushed under
the following conditions, the system cannot be
set and the ICC indicators will blink for
approximately 2 seconds:
.When traveling below 20 MPH (32 km/h)
and the vehicle ahead is not detected
. When the shift lever is not in the D (Drive) or
manual shift mode
. When the parking brake is applied
. When the brakes are operated by the driver
SSD1106
When the COAST/SET switch is pushed under
the following conditions, the system cannot be
set.
A warning chime will sound and the ICC
indicators will blink.
.When the SNOW mode is pushed (SNOW
mode switch) (To use the ICC system, turn
off the SNOW mode switch, push the MAIN
switch to turn off the ICC and reset the ICC
switch by pushing the MAIN switch again.)
For details about the SNOW mode switch,
see “SNOW mode” (P.5-132) .
. When the 4WD shift switch is in the 4H or
4L position. (To use the ICC system, place
the 4WD shift switch in the AUTO position, push the MAIN switch to turn off the ICC
system and reset the ICC switch by pushing
the MAIN switch again (for 4WD models) .
For details about the 4WD shift switch, see
“NISSAN all-mode 4WD
�Š” (P.5-123) .
. When the VDC system is off (To use the
ICC system, turn on the VDC system. Push
the MAIN switch to turn off the ICC system
and reset the ICC switch by pushing the
MAIN switch again.)
For details about the VDC system, see
“Vehicle Dynamic Control (VDC) system”
(P.5-138) .
. When ABS or VDC (including the traction
control system) is operating
. When a wheel is slipping (To use the ICC
system, make sure the wheels are no longer
slipping. Push the MAIN switch to turn off
the ICC, and reset the ICC system by
pushing the MAIN switch again.)
Page 421 of 614
5-80Starting and driving
.The chime sounds.
. The vehicle ahead detection and set dis-
tance indicator blink.
The warning chime may not sound in some
cases when there is a short distance between
vehicles. Some examples are:
. When the vehicles are traveling at the same
speed and the distance between vehicles is
not changing
. When the vehicle ahead is traveling faster
and the distance between vehicles is
increasing
. When a vehicle cuts in near your vehicle
The warning chime will not sound when:
. Your vehicle approaches other vehicles that
are parked or moving slowly.
. The accelerator pedal is depressed, over-
riding the system.
NOTE:
The approach warning chime may sound
and the system display may blink when the
radar sensor detects objects on the side of
the vehicle or on the side of the road. This
may cause the ICC system to decelerate or
accelerate the vehicle. The radar sensor
may detect these objects when the vehicle
is driven on winding roads, narrow roads,
hilly roads or when entering or exiting a curve. In these cases you will have to
manually control the proper distance
ahead of your vehicle.
Also, the sensor sensitivity can be affected by
vehicle operation (steering maneuver or driving
position in the lane) or traffic or vehicle condition
(for example, if a vehicle is being driven with
some damage) .
Automatic cancellation
A chime sounds under the following conditions
and the control is automatically canceled.
.
When the vehicle ahead is not detected and
your vehicle is traveling below the speed of
15 MPH (24 km/h)
. When the system judges the vehicle is at
standstill
. When the shift lever is not in the D (Drive) or
manual shift mode
. When the parking brake is applied
. When the SNOW mode switch is pushed
on.
. When the 4WD shift switch is in the 4H or
4L position (for 4WD models)
. When the VDC system is turned off
. When ABS or VDC (including the traction
control system) operates .
When distance measurement becomes im-
paired due to adhesion of dirt or obstruction
to the sensor
. When a wheel slips
. When the radar signal is temporarily inter-
rupted
Vehicle-to-vehicle distance control mode
limitations
WARNING
Listed below are the system limitations
for the ICC system. Failure to operate
the vehicle in accordance with these
system limitations could result in ser-
ious injury or death.
.The system is primarily intended for
use on straight, dry, open roads with
light traffic. It is not advisable to use
the system in city traffic or con-
gested areas.
. This system will not adapt automa-
tically to road conditions. This sys-
tem should be used in evenly
flowing traffic. Do not use the
system on roads with sharp curves,
or on icy roads, in heavy rain or in
fog.
Page 431 of 614
5-90Starting and driving
To cancel the preset speed,use any of the
following methods:
1. Push the CANCEL switch. The SET indica- tor will turn off.
2. Tap the brake pedal. The SET indicator will turn off.
3. Turn the MAIN switch off. Both the MAIN switch indicator and SET indicator will turn
off.
To reset at a faster cruising speed, use one
of the following three methods:
1. Depress the accelerator pedal. When the vehicle attains the desired speed, push and
release the COAST/SET switch.
2. Push and hold the ACCELERATE/RESUME set switch. When the vehicle attains the
speed you desire, release the switch.
3. Push, then quickly release the ACCELER- ATE/RESUME switch. Each time you do
this, the set speed will increase by about 1
MPH (1.6 km/h) .
To reset at a slower cruising speed, use one
of the following three methods:
1. Lightly tap the brake pedal. When the vehicle attains the desired speed, push the
COAST/SET switch and release it. 2. Push and hold the COAST/SET switch.
Release the switch when the vehicle slows
down to the desired speed.
3. Push, then quickly release the COAST/SET switch. Each time you do this, the set speed
will decrease by about 1 MPH (1.6 km/h) .
To resume the preset speed, push and
release the ACCELERATE/RESUME switch.
The vehicle will resume the last set cruising
speed when the vehicle speed is over 25 MPH
(40 km/h) .
System temporarily unavailable
Under the following condition, a chime will
sound and the system control is automatically
canceled.
. When the vehicle slows down more than 8
MPH (13 km/h) below the set speed
. When the shift lever is shifted to the N
(Neutral) position
. When the parking brake is applied
. When the VDC (including the traction
control system) operates.
. When a wheel slipsJVS0661X
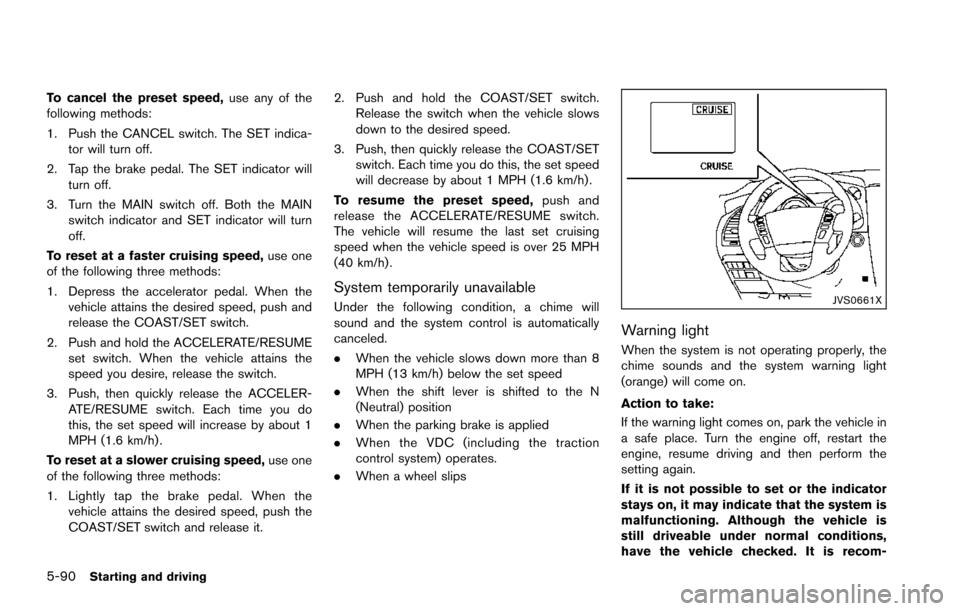
Warning light
When the system is not operating properly, the
chime sounds and the system warning light
(orange) will come on.
Action to take:
If the warning light comes on, park the vehicle in
a safe place. Turn the engine off, restart the
engine, resume driving and then perform the
setting again.
If it is not possible to set or the indicator
stays on, it may indicate that the system is
malfunctioning. Although the vehicle is
still driveable under normal conditions,
have the vehicle checked. It is recom-
Page 437 of 614
5-96Starting and driving
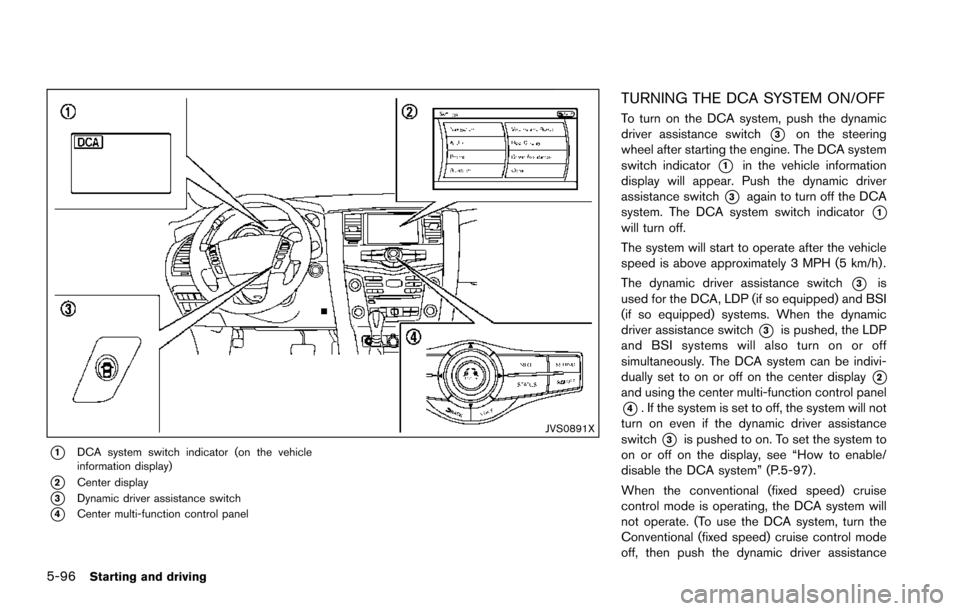
JVS0891X
*1DCA system switch indicator (on the vehicle
information display)
*2Center display
*3Dynamic driver assistance switch
*4Center multi-function control panel
TURNING THE DCA SYSTEM ON/OFF
To turn on the DCA system, push the dynamic
driver assistance switch
*3on the steering
wheel after starting the engine. The DCA system
switch indicator
*1in the vehicle information
display will appear. Push the dynamic driver
assistance switch
*3again to turn off the DCA
system. The DCA system switch indicator
*1will turn off.
The system will start to operate after the vehicle
speed is above approximately 3 MPH (5 km/h) .
The dynamic driver assistance switch
*3is
used for the DCA, LDP (if so equipped) and BSI
(if so equipped) systems. When the dynamic
driver assistance switch
*3is pushed, the LDP
and BSI systems will also turn on or off
simultaneously. The DCA system can be indivi-
dually set to on or off on the center display
*2and using the center multi-function control panel
*4. If the system is set to off, the system will not
turn on even if the dynamic driver assistance
switch
*3is pushed to on. To set the system to
on or off on the display, see “How to enable/
disable the DCA system” (P.5-97) .
When the conventional (fixed speed) cruise
control mode is operating, the DCA system will
not operate. (To use the DCA system, turn the
Conventional (fixed speed) cruise control mode
off, then push the dynamic driver assistance
Page 448 of 614
FEB SYSTEM OPERATION
The FEB system operates at speeds above
approximately 3 MPH (5 km/h) .
If a risk of a forward collision is detected, the
FEB system will provide the first warning to the
driver by illuminating the warning in the vehicle
information display and providing an audible
warning. In addition, the FEB system pushes the
accelerator pedal up. If the driver releases the
accelerator pedal, then the system applies
partial braking.
If the driver applies the brakes quickly and
forcefully after the warning, and the FEB system
detects that there is still the possibility of a
forward collision, the system will automatically
increase the braking force.
If a forward collision is imminent and the driver
does not take action, the FEB system issues the
second visual (flashing) and audible warning and
automatically applies harder braking.
NOTE:
The vehicle’s stop lights come on when
braking is performed by the FEB system.
Depending on vehicle speed and distance to the
vehicle ahead, as well as driving and roadway
conditions, the system may help the driver avoid
a forward collision or may help mitigate the
consequences of a collision should one beunavoidable.
If the driver is handling the steering wheel,
accelerating or braking, the FEB system will
function later or will not function.
The automatic braking will cease under the
following conditions:
.
When the steering wheel is turned as far as
necessary to avoid a collision.
. When the accelerator pedal is depressed.
. When there is no longer a vehicle detected
ahead.
If the FEB system has stopped the vehicle, the
vehicle will remain at a standstill for approxi-
mately 2 seconds before the brakes are
released.
Starting and driving5-107
Page 463 of 614
5-122Starting and driving
.Recirculating the cool air in the cabinwhen the A/C is on reduces cooling load.
4. Drive at economical speeds and distances.
.Observing the speed limit and not ex- ceeding 60 MPH (97 km/h) (where
legally allowed) can improve fuel effi-
ciency due to reduced aerodynamic
drag.
.Maintaining a safe following distancebehind other vehicles reduces unneces-
sary braking.
.Safely monitoring traffic to anticipatechanges in speed permits reduced brak-
ing and smooth acceleration changes.
.Select a gear range suitable to road conditions.
5. Use cruise control.
.Using cruise control during highway driving helps maintain a steady speed.
.Cruise control is particularly effective in providing fuel savings when driving on
flat terrains.
6. Plan for the shortest route.
.Utilize a map or navigation system to determine the best route to save time.
7. Avoid idling.
.Shutting off your engine when safe for stops exceeding 30-60 seconds saves fuel and reduces emissions.
8. Buy an automated pass for toll roads.
.Automated passes permit drivers to use special lanes to maintain cruising speed
through the toll and avoid stopping and
starting.
9. Winter warm up.
.Limit idling time to minimize impact to fuel economy.
.Vehicles typically need no more than 30seconds of idling at start-up to effectively
circulate the engine oil before driving.
.Your vehicle will reach its ideal operatingtemperature more quickly while driving
versus idling.
10. Keeping your vehicle cool.
.Park your vehicle in a covered parking area or in the shade whenever possible.
.When entering a hot vehicle, opening thewindows will help to reduce the inside
temperature faster, resulting in reduced
demand on your A/C system. .
Keep your engine tuned up.
. Follow the recommended scheduled main-
tenance.
. Keep the tires inflated to the correct
pressure. Low tire pressure increases tire
wear and lowers fuel economy.
. Keep the wheels in correct alignment.
Improper alignment increases tire wear and
lowers fuel economy.
. Use the recommended viscosity engine oil.
(See “Engine oil and oil filter recommenda-
tion” (P.10-6) .)
INCREASING FUEL ECONOMY
Page 464 of 614
WARNING
.Do not attempt to raise two wheels
off the ground and shift the trans-
mission to any drive or reverse
position with the engine running.
Doing so may result in drivetrain
damage or unexpected vehicle
movement which could result in
serious vehicle damage or personal
injury.
. Do not attempt to test a 4WD
equipped vehicle on a 2-wheel dy-
namometer or similar equipment
even if the other two wheels are
raised off the ground. Make sure
you inform test facility personnel
that your vehicle is equipped with
4WD before it is placed on a dy-
namometer. Using the wrong test
equipment may result in drivetrain
damage or unexpected vehicle
movement which could result in
serious vehicle damage or personal
injury.
CAUTION
.Do not drive the vehicle in the 4HI or
4LO position on dry hard surface
roads. Driving on dry, hard surfaces
in 4HI or 4LO may cause unneces-
sary noise, tire wear and increased
fuel consumption.
If the Four-Wheel Drive (4WD) warn-
ing light turns on when driving on
dry hard surface roads:
— in the 4HI position, shift the
4WD shift switch to AUTO.
— in the 4LO position, stop the vehicle and shift the transmis-
sion lever to the N (Neutral)
position with the brake pedal
depressed and shift the 4WD
shift switch to AUTO.
If the 4WD warning light is still
on after the above operation,
have your vehicle checked as
soon as possible. It is recom-
mended you visit a NISSAN
dealer for this service.
. The transfer case may be damaged
if you continue driving with the 4WD warning light blinking.
See “On-pavement and off-road driving precau-
tions” (P.5-9) for other precautions for offroad
driving.
NISSAN ALL-MODE 4WD�ŠSYSTEM
The all mode 4WD system provides 3 positions
(AUTO, 4HI and 4LO) , so you can select the
desired drive mode according to the driving
conditions.
Starting and driving5-123
NISSAN ALL-MODE 4WD�Š(if so
equipped)
Page 467 of 614
5-126Starting and driving
The 4WD shift switch is used to select the 4WD
mode depending on the driving conditions.
There are 3 types of drive modes available,
AUTO, 4HI and 4LO.
The 4WD shift switch electronically controls the
transfer case operation. Rotate the switch to
move between each mode, AUTO, 4H and 4L.
You must depress the 4WD shift switch to
select 4L, and the vehicle MUST be sta-
tionary and the shift lever in the N (Neutral)
position when changing into or out of 4L.
WARNING
.When parking, apply the parking
brake before stopping the engine
and make sure that the 4WD shift
indicator is on and the ATP warning
light turns off. Otherwise, the vehi-
cle could unexpectedly move even if
the automatic transmission is in the
P (Park) position.
. The 4LO and 4HI indicators must
stop blinking and the 4LO or 4HI
indicator must remain illuminated or
turn off before shifting the trans-
mission into gear. If the shift lever is
shifted from the N (Neutral) position
to any other gear while the 4LO and 4HI indicators are blinking alter-
nately, the vehicle may move unex-
pectedly.
CAUTION
.
Never shift the 4WD shift switch
between 4L and 4H while driving.
. The 4HI position provides greater
traction. Avoid excessive speed, as
it will cause increased fuel con-
sumption and higher oil tempera-
tures, and could damage drivetrain
component. Speeds over 62 MPH
(100 km/h) in 4HI is not recom-
mended.
. The 4LO position provides maxi-
mum traction. Avoid raising vehicle
speed excessively, as the maximum
speed is approximately 31 MPH (50
km/h) .
. When driving straight, shift the 4WD
shift switch to the AUTO or 4H
position. Do not move the 4WD shift
switch when making a turn or rever-
sing. .
Do not shift the 4WD shift switch
(between AUTO and 4H) while driv-
ing on steep downhill grades. Use
the engine brake and low automatic
transmission gears for engine brak-
ing.
. Do not operate the 4WD shift switch
(between AUTO and 4H) with the
rear wheels spinning.
. Do not drive on dry hard surface
roads in the 4HI or 4LO position.
Driving on dry hard surfaces in 4HI
or 4LO may cause unnecessary
noise and tire wear. NISSAN recom-
mends driving in the AUTO position
under these conditions.
. The 4WD transfer case may not be
shifted between 4HI and 4LO at low
ambient temperatures and the 4LO
and 4HI indicators may blink even
when the 4WD shift switch is
shifted. After driving for a while
you can change the 4WD shift
switch between 4H and 4L.