2017 NISSAN ARMADA headlight
[x] Cancel search: headlightPage 192 of 614
SPA2450-A
Automatic anti-glare type
The inside mirror is designed so that it
automatically changes reflection according to
the intensity of the headlights of the following
vehicle.
The anti-glare system will be automatically
turned on when the ignition switch is placed in
the ON position.
When the anti-glare system is turned on, the
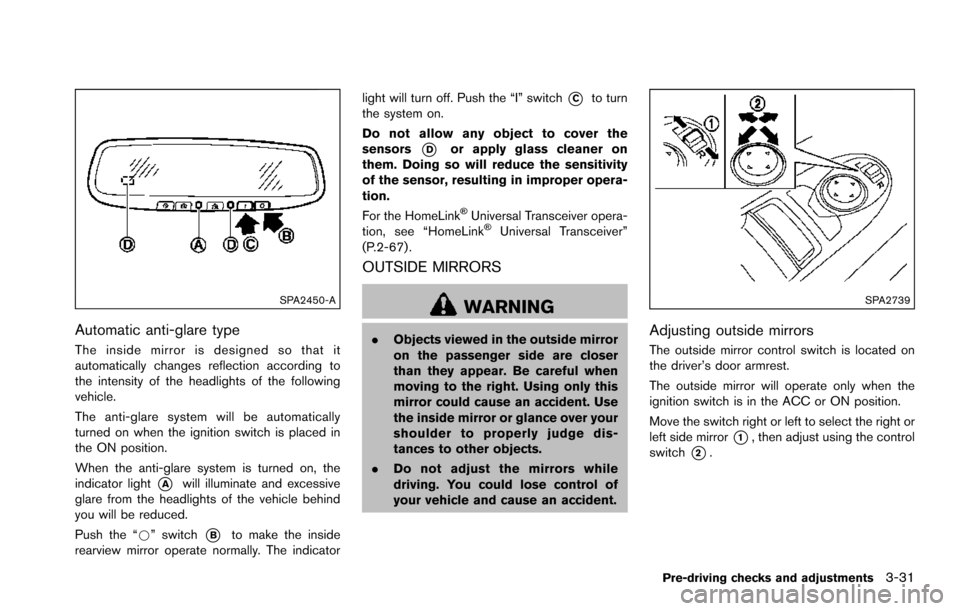
indicator light
*Awill illuminate and excessive
glare from the headlights of the vehicle behind
you will be reduced.
Push the “*” switch
*Bto make the inside
rearview mirror operate normally. The indicator light will turn off. Push the “I” switch
*Cto turn
the system on.
Do not allow any object to cover the
sensors
*Dor apply glass cleaner on
them. Doing so will reduce the sensitivity
of the sensor, resulting in improper opera-
tion.
For the HomeLink
�ŠUniversal Transceiver opera-
tion, see “HomeLink�ŠUniversal Transceiver”
(P.2-67) .
OUTSIDE MIRRORS
WARNING
. Objects viewed in the outside mirror
on the passenger side are closer
than they appear. Be careful when
moving to the right. Using only this
mirror could cause an accident. Use
the inside mirror or glance over your
shoulder to properly judge dis-
tances to other objects.
. Do not adjust the mirrors while
driving. You could lose control of
your vehicle and cause an accident.
SPA2739
Adjusting outside mirrors
The outside mirror control switch is located on
the driver’s door armrest.
The outside mirror will operate only when the
ignition switch is in the ACC or ON position.
Move the switch right or left to select the right or
left side mirror
*1, then adjust using the control
switch
*2.
Pre-driving checks and adjustments3-31
Page 194 of 614
4. The outside mirror surfaces move down-ward.
When one of the following conditions has
occurred, the outside mirror surfaces will return
to their original positions.
. The shift lever is moved to any position other
than R (Reverse) .
. The outside mirror control switch is set to
the center position.
. The ignition switch is placed in the OFF
position.
Automatic anti-glare (if so equipped)
The outside rearview mirrors are designed so
that its automatically change reflection accord-
ing to the intensity of the headlights of the
vehicle following you.
The anti-glare system will be automatically
turned on when the ignition switch is placed in
the ON position.SIC4448
VANITY MIRROR
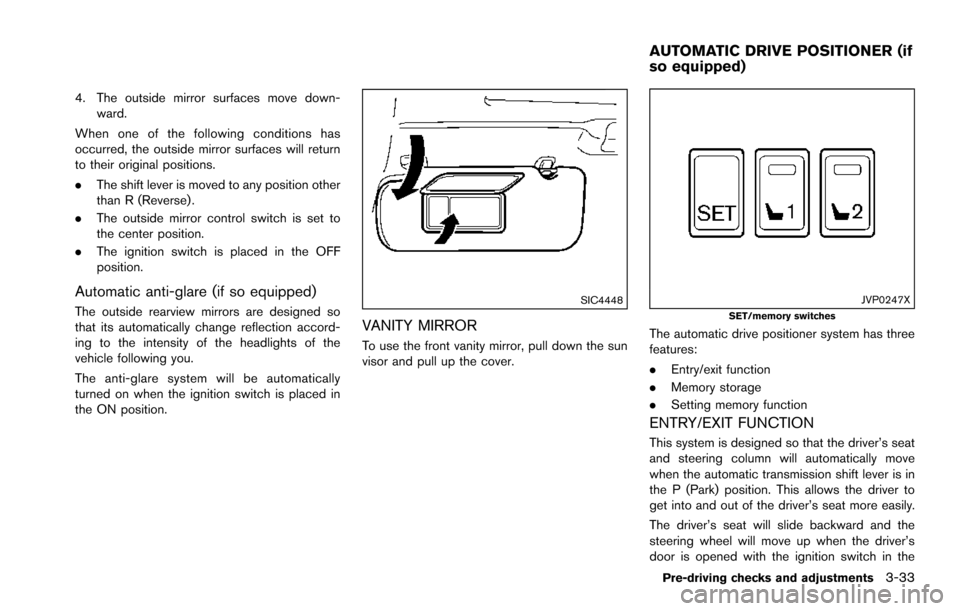
To use the front vanity mirror, pull down the sun
visor and pull up the cover.
JVP0247XSET/memory switches
The automatic drive positioner system has three
features:
.Entry/exit function
. Memory storage
. Setting memory function
ENTRY/EXIT FUNCTION
This system is designed so that the driver’s seat
and steering column will automatically move
when the automatic transmission shift lever is in
the P (Park) position. This allows the driver to
get into and out of the driver’s seat more easily.
The driver’s seat will slide backward and the
steering wheel will move up when the driver’s
door is opened with the ignition switch in the
Pre-driving checks and adjustments3-33
AUTOMATIC DRIVE POSITIONER (if
so equipped)
Page 214 of 614

When any mode button is pushed with the
screen off, the screen turns on for further
operation. The screen will turn off automatically
5 seconds after the operation is finished.
To turn on the screen, set this item to the ON
position, or push the
OFF button.
. Brightness/Contrast/Background Color
To adjust the brightness and contrast of the
screen, select the “Brightness” or “Contrast”
key.
Then, you can adjust the brightness and the
contrast using the multi-function controller.
For information on the “Background Color” key,
refer to the separate Navigation System Own-
er’s Manual.
Color Theme:
Choose the theme color of the menu screen.
SAA3151
Comfort settings (if so equipped)
The display as illustrated will appear when
pushing the SETTING button and selecting the
“Others” key, and then selecting the “Comfort”
key. This key does not appear on the display until
the ignition switch is pushed to the ON position.
Auto Interior Illumination:
When this item is turned to ON, the interior
lights will illuminate if any door is unlocked.
Light Sensitivity:
Adjust the sensitivity of the automatic headlights
higher (right) or lower (left) . Light Off Delay:
Choose the duration of the automatic headlight
off timer from 0, 30, 45, 60, 90, 120, 150 and
180 second periods.
Speed Sensing Wiper Interval (if so
equipped):
When this item is turned to ON, the wiper
interval is adjusted automatically according to
the vehicle speed.
Selective Door Unlock:
When this item is turned to ON, only the driver’s
door is unlocked first after the door unlock
operation. When the door handle request switch
on the driver’s or front passenger’s side door is
pushed to be unlocked, only the corresponding
door is unlocked first. All the doors can be
unlocked if the door unlock operation is per-
formed again within 60 seconds.
When this item is turned to OFF, all the doors
will be unlocked after the door unlock operation
is performed once.
Intelligent Key Lock/Unlock:
When this item is turned to ON, door lock/
unlock function by pushing the door handle
request switch will be activated.
Monitor, heater, air conditioner, audio, phone and voice recognition systems4-17
Page 247 of 614
4-50Monitor, heater, air conditioner, audio, phone and voice recognition systems
— When strong light such as an-other vehicle’s headlight or sun-
light is present.
— When camera orientation is not in its usual position, such as
when mirror is folded.
— When there is dirt, water drops or snow on the camera lens.
— When the position of the moving objects in the display is not
changed.
. The MOD system might detect flow-
ing water droplets on the camera
lens, white smoke from the muffler,
moving shadows, etc.
. The MOD system may not function
properly depending on the speed,
direction, distance or shape of the
moving objects.
. If your vehicle sustains damage to
the parts where the camera is
installed, leaving it misaligned or
bent, the sensing zone may be
altered and the MOD system may
not detect objects properly.
. When the temperature is extremely
high or low, the screen may not display objects clearly. This is not a
malfunction.
JVH1397X
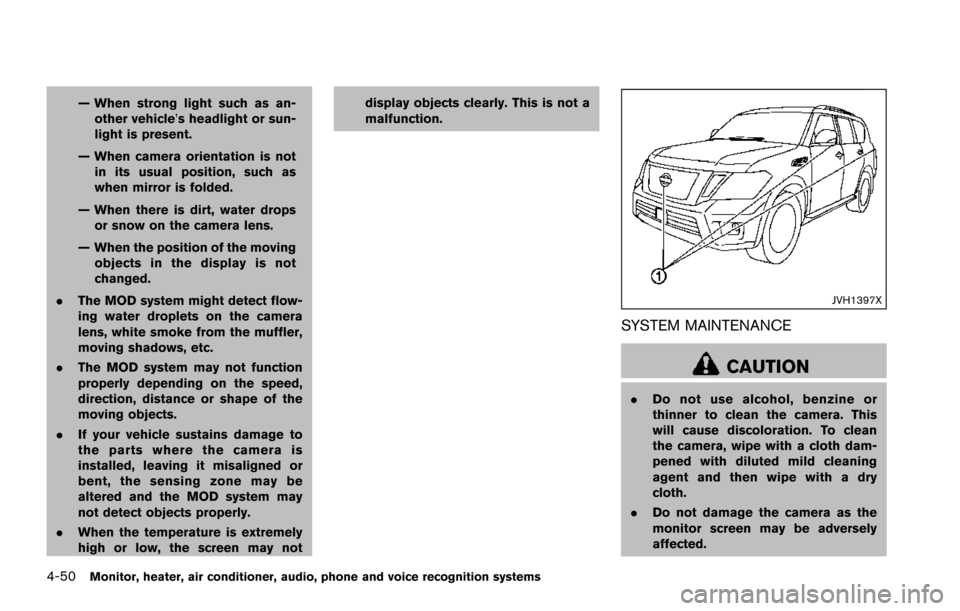
SYSTEM MAINTENANCE
CAUTION
.
Do not use alcohol, benzine or
thinner to clean the camera. This
will cause discoloration. To clean
the camera, wipe with a cloth dam-
pened with diluted mild cleaning
agent and then wipe with a dry
cloth.
. Do not damage the camera as the
monitor screen may be adversely
affected.
Page 371 of 614
5-30Starting and driving
after road repairs. (The LDW and
LDP systems could detect these
items as lane markers.)
— On roads where the traveling lane merges or separates.
— When the vehicle’s traveling di- rection does not align with the
lane marker.
— When traveling close to the vehicle in front of you, which
obstructs the lane camera unit
detection range.
— When rain, snow or dirt adheres to the windshield in front of the
lane camera unit.
— When the headlights are not bright due to dirt on the lens or
if the aiming is not adjusted
properly.
— When strong light enters the lane camera unit. (For example,
the light directly shines on the
front of the vehicle at sunrise or
sunset.)
— When a sudden change in brightness occurs. (For example,
when the vehicle enters or exits a tunnel or under a bridge.)
. Excessive noise will interfere with
the warning chime sound, and the
chime may not be heard.
Page 389 of 614
5-48Starting and driving
.The radar sensors may not be able
to detect and activate BSI when
certain objects are present such as:
— Pedestrians, bicycles, animals.
— Vehicles such as motorcycles,
low height vehicles, or high
ground clearance vehicles.
— Vehicles remaining in the detec- tion zone when you accelerate
from a stop.
— Oncoming vehicles.
— A vehicle merging into an adja- cent lane at a speed approxi-
mately the same as your vehicle.
— A vehicle approaching rapidly from behind.
— A vehicle which your vehicle overtakes rapidly.
— A vehicle that passes through the detection zone quickly.
. The radar sensor’s detection zone is
designed based on a standard lane
width. When driving in a wider lane,
the radar sensors may not detect
vehicles in an adjacent lane. When
driving in a narrow lane, the radar sensors may detect vehicles driving
two lanes away.
. The radar sensors are designed to
ignore most stationary objects,
however objects such as guardrails,
walls, foliage and parked vehicles
may occasionally be detected. This
is a normal operation condition.
. The camera may not detect lane
markers in the following situations
and the BSI system may not operate
properly.
— On roads where there are multi-
ple parallel lane markers; lane
markers that are faded or not
painted clearly; yellow painted
lane markers; non-standard lane
markers; lane markers covered
with water, dirt, snow, etc.
— On roads where discontinued lane markers are still detect-
able.
— On roads where there are sharp curves.
— On roads where there are shar- ply contrasting objects, such as
shadows, snow, water, wheel
ruts, seams or lines remaining after road repairs.
— On roads where the traveling lane merges or separates.
— When the vehicle’s traveling di- rection does not align with the
lane markers.
— When traveling close to the vehicle in front of you, which
obstructs the lane camera unit
detection range.
— When rain, snow or dirt adheres to the windshield in front of a
lane camera unit.
— When the headlights are not bright due to dirt on the lens or
if aiming is not adjusted prop-
erly.
— When strong light enters a lane camera unit. (For example: light
directly shines on the front of
the vehicle at sunrise or sunset.)
— When a sudden change in brightness occurs. (For example:
when the vehicle enters or exits
a tunnel or under a bridge.)
Page 516 of 614
8 Do-it-yourself
Maintenance precautions ........................................................ 8-2
Engine compartment check locations .................................. 8-3VK56VD engine ................................................................... 8-3
Engine cooling system ............................................................. 8-4 Checking engine coolant level ......................................... 8-5
Changing engine coolant .................................................. 8-5
Engine oil ........................................................................\
............ 8-6 Checking engine oil level .................................................. 8-6
Changing engine oil and filter .......................................... 8-6
Automatic Transmission Fluid (ATF) ..................................... 8-8
Power steering fluid .................................................................. 8-8
Brake fluid ........................................................................\
........... 8-9
Window washer fluid ............................................................ 8-10
Battery ........................................................................\
............... 8-11 Jump starting ..................................................................... 8-13
Variable voltage control system .......................................... 8-13
Drive belts ........................................................................\
........ 8-13
Spark plugs ........................................................................\
..... 8-14 Replacing spark plugs .................................................... 8-14
Air cleaner ........................................................................\
........ 8-15 Windshield wiper blades ..................................................... 8-16
Cleaning ........................................................................\
... 8-16
Replacing ........................................................................\
. 8-16
Rear window wiper blades ................................................. 8-17
Brakes ........................................................................\
.............. 8-17 Self-adjusting brakes .................................................... 8-17
Brake pad wear warning .............................................. 8-17
Brake booster ................................................................. 8-18
Fuses ........................................................................\
................ 8-18 Engine compartment ..................................................... 8-19
Passenger compartment .............................................. 8-20
Intelligent Key battery replacement ................................... 8-21
Lights ........................................................................\
................ 8-24
Headlights ........................................................................\
8-25
Exterior and interior lights ............................................ 8-26
Wheels and tires ................................................................... 8-30
Tire pressure ................................................................... 8-30
Tire labeling ..................................................................... 8-34
Types of tires ................................................................... 8-36
Tire chains ....................................................................... 8-36
Changing wheels and tires .......................................... 8-37
Page 534 of 614
ENGINE COMPARTMENT
WARNING
Never use a fuse of a higher or lower
amperage rating than that specified on
the fuse box cover. This could damage
the electrical system or electronic con-
trol units or cause a fire.
If any electrical equipment does not operate,
check for an open fuse.
1. Be sure the ignition switch is pushed to the OFF or LOCK position and the headlight
switch is turned to OFF.
2. Open the engine hood and remove the cover on the battery.
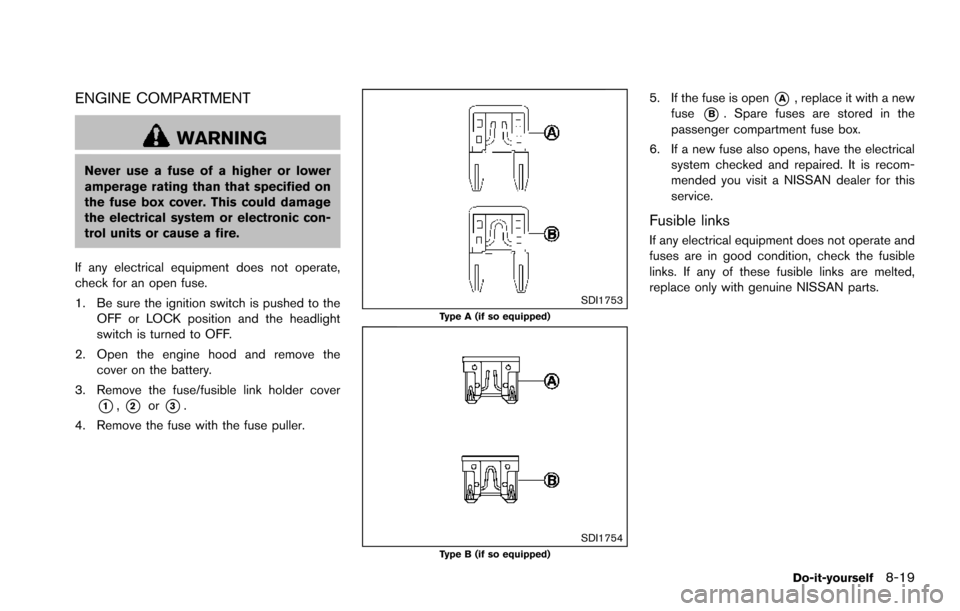
3. Remove the fuse/fusible link holder cover
*1,*2or*3.
4. Remove the fuse with the fuse puller.
SDI1753Type A (if so equipped)
SDI1754Type B (if so equipped)
5. If the fuse is open*A, replace it with a new
fuse
*B. Spare fuses are stored in the
passenger compartment fuse box.
6. If a new fuse also opens, have the electrical system checked and repaired. It is recom-
mended you visit a NISSAN dealer for this
service.
Fusible links
If any electrical equipment does not operate and
fuses are in good condition, check the fusible
links. If any of these fusible links are melted,
replace only with genuine NISSAN parts.
Do-it-yourself8-19