2017 NISSAN ARMADA steering wheel
[x] Cancel search: steering wheelPage 90 of 614
2 Instruments and controls
Cockpit ........................................................................\
................ 2-3
Instrument panel ........................................................................\
2-4
Meters and gauges ................................................................... 2-5Speedometer and odometer ............................................ 2-6
Tachometer ........................................................................\
... 2-7
Engine coolant temperature gauge ................................ 2-7
Fuel gauge ........................................................................\
.... 2-8
Engine oil pressure gauge ................................................ 2-8
Voltmeter ........................................................................\
........ 2-9
Meter/ring illumination and needle sweep .................... 2-9
Warning lights, indicator lights and
audible reminders ................................................................... 2-10 Checking lights ................................................................. 2-11
Warning lights ................................................................... 2-11
Indicator lights ................................................................... 2-17
Audible reminders ............................................................ 2-20
Vehicle information display .................................................. 2-20 Operational indicators ..................................................... 2-23
Maintenance indicators ................................................... 2-26
Trip computer .................................................................... 2-27
Security systems .................................................................... 2-30 Vehicle Security System ................................................. 2-30
NISSAN Vehicle Immobilizer System .......................... 2-31 Wiper and washer switch ................................................... 2-32
Windshield wiper and washer operation ................. 2-33
Rain-sensing auto wiper system (if
so equipped) ................................................................... 2-34
Rear window wiper and washer operation .............. 2-35
Rear window and outside mirror (if so equipped)
defroster switch ..................................................................... 2-36
Windshield deicer switch (if so equipped) .................... 2-36
Headlight and turn signal switch ....................................... 2-37 Headlight switch ............................................................ 2-37
Instrument brightness control ..................................... 2-40
Turn signal switch .......................................................... 2-41
Fog light switch (if so equipped) .............................. 2-42
Heated steering wheel (if so equipped) ......................... 2-42
Horn ........................................................................\
.................. 2-43
Heated seats ........................................................................\
.. 2-43 Front (if so equipped) ................................................... 2-44
Rear (if so equipped) .................................................... 2-44
Climate controlled seats (if so equipped) ...................... 2-45
Warning systems switch (if so equipped) ...................... 2-46
Sonar system OFF switch (if so equipped) ................... 2-47
SNOW mode switch ............................................................ 2-47
TOW mode switch ................................................................ 2-47
Page 92 of 614
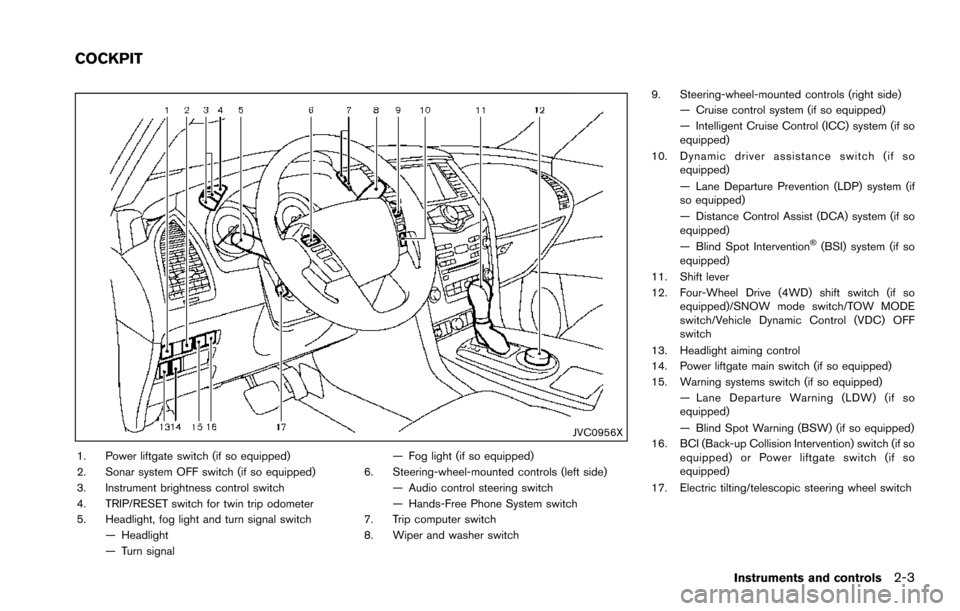
JVC0956X
1. Power liftgate switch (if so equipped)
2. Sonar system OFF switch (if so equipped)
3. Instrument brightness control switch
4. TRIP/RESET switch for twin trip odometer
5. Headlight, fog light and turn signal switch— Headlight
— Turn signal — Fog light (if so equipped)
6. Steering-wheel-mounted controls (left side) — Audio control steering switch
— Hands-Free Phone System switch
7. Trip computer switch
8. Wiper and washer switch 9. Steering-wheel-mounted controls (right side)
— Cruise control system (if so equipped)
— Intelligent Cruise Control (ICC) system (if so
equipped)
10. Dynamic driver assistance switch (if so equipped)
— Lane Departure Prevention (LDP) system (if
so equipped)
— Distance Control Assist (DCA) system (if so
equipped)
— Blind Spot Intervention
�Š(BSI) system (if so
equipped)
11. Shift lever
12. Four-Wheel Drive (4WD) shift switch (if so equipped)/SNOW mode switch/TOW MODE
switch/Vehicle Dynamic Control (VDC) OFF
switch
13. Headlight aiming control
14. Power liftgate main switch (if so equipped)
15. Warning systems switch (if so equipped) — Lane Departure Warning (LDW) (if so
equipped)
— Blind Spot Warning (BSW) (if so equipped)
16. BCI (Back-up Collision Intervention) switch (if so equipped) or Power liftgate switch (if so
equipped)
17. Electric tilting/telescopic steering wheel switch
Instruments and controls2-3
COCKPIT
Page 93 of 614
2-4Instruments and controls
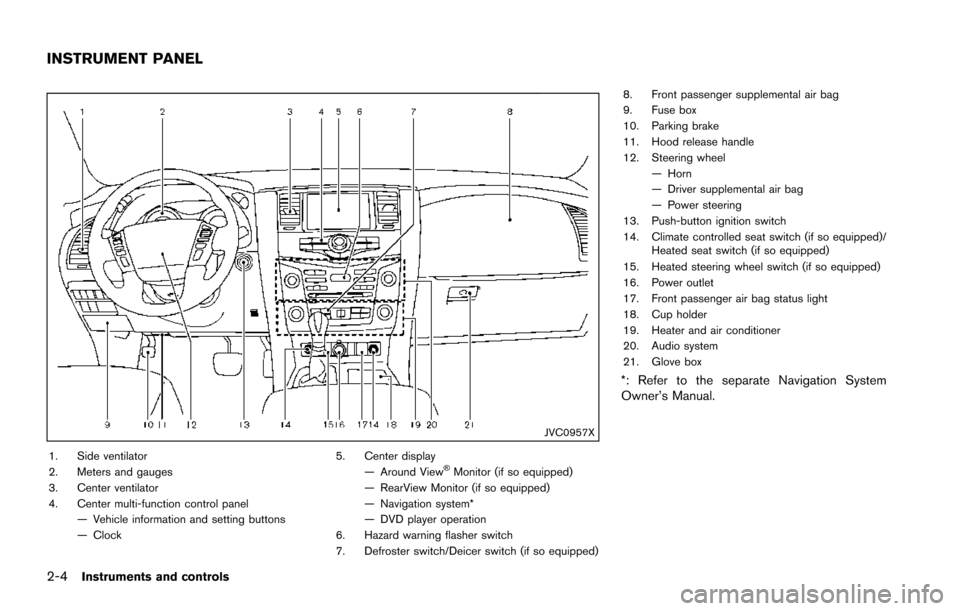
JVC0957X
1. Side ventilator
2. Meters and gauges
3. Center ventilator
4. Center multi-function control panel— Vehicle information and setting buttons
— Clock 5. Center display
— Around View�ŠMonitor (if so equipped)
— RearView Monitor (if so equipped)
— Navigation system*
— DVD player operation
6. Hazard warning flasher switch
7. Defroster switch/Deicer switch (if so equipped) 8. Front passenger supplemental air bag
9. Fuse box
10. Parking brake
11. Hood release handle
12. Steering wheel
— Horn
— Driver supplemental air bag
— Power steering
13. Push-button ignition switch
14. Climate controlled seat switch (if so equipped)/ Heated seat switch (if so equipped)
15. Heated steering wheel switch (if so equipped)
16. Power outlet
17. Front passenger air bag status light
18. Cup holder
19. Heater and air conditioner
20. Audio system
21. Glove box
*: Refer to the separate Navigation System
Owner’s Manual.
INSTRUMENT PANEL
Page 131 of 614
2-42Instruments and controls
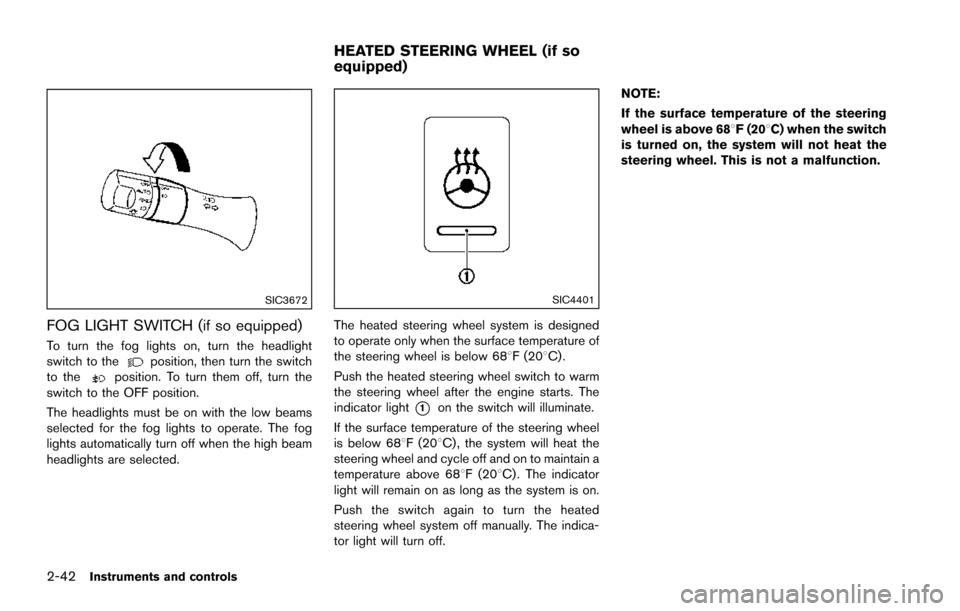
SIC3672
FOG LIGHT SWITCH (if so equipped)
To turn the fog lights on, turn the headlight
switch to theposition, then turn the switch
to theposition. To turn them off, turn the
switch to the OFF position.
The headlights must be on with the low beams
selected for the fog lights to operate. The fog
lights automatically turn off when the high beam
headlights are selected.
SIC4401
The heated steering wheel system is designed
to operate only when the surface temperature of
the steering wheel is below 688F (208C) .
Push the heated steering wheel switch to warm
the steering wheel after the engine starts. The
indicator light
*1on the switch will illuminate.
If the surface temperature of the steering wheel
is below 688F (208C) , the system will heat the
steering wheel and cycle off and on to maintain a
temperature above 688F (208C) . The indicator
light will remain on as long as the system is on.
Push the switch again to turn the heated
steering wheel system off manually. The indica-
tor light will turn off. NOTE:
If the surface temperature of the steering
wheel is above 688F (208C) when the switch
is turned on, the system will not heat the
steering wheel. This is not a malfunction.
HEATED STEERING WHEEL (if so
equipped)
Page 132 of 614
SIC4444
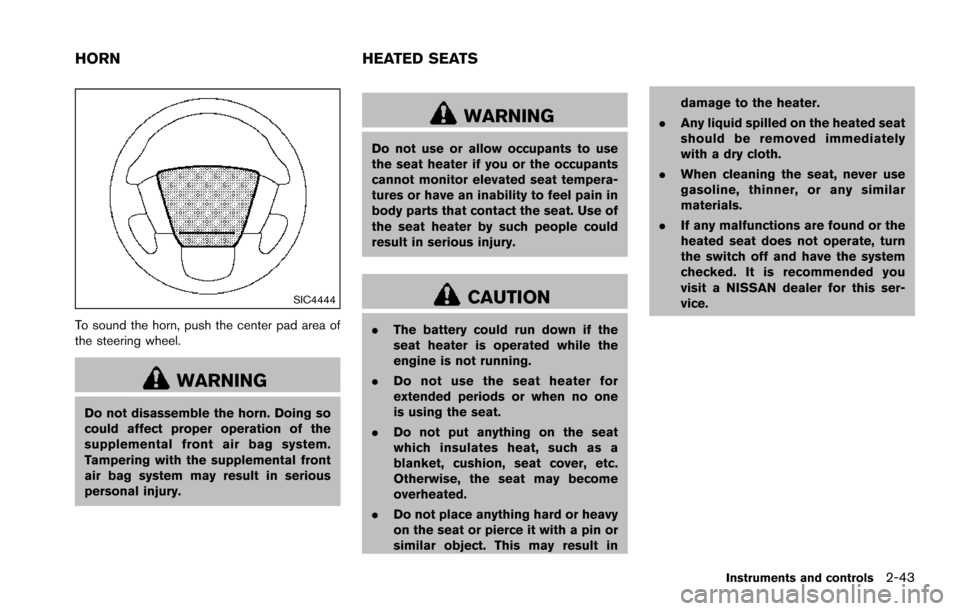
To sound the horn, push the center pad area of
the steering wheel.
WARNING
Do not disassemble the horn. Doing so
could affect proper operation of the
supplemental front air bag system.
Tampering with the supplemental front
air bag system may result in serious
personal injury.
WARNING
Do not use or allow occupants to use
the seat heater if you or the occupants
cannot monitor elevated seat tempera-
tures or have an inability to feel pain in
body parts that contact the seat. Use of
the seat heater by such people could
result in serious injury.
CAUTION
.The battery could run down if the
seat heater is operated while the
engine is not running.
. Do not use the seat heater for
extended periods or when no one
is using the seat.
. Do not put anything on the seat
which insulates heat, such as a
blanket, cushion, seat cover, etc.
Otherwise, the seat may become
overheated.
. Do not place anything hard or heavy
on the seat or pierce it with a pin or
similar object. This may result in damage to the heater.
. Any liquid spilled on the heated seat
should be removed immediately
with a dry cloth.
. When cleaning the seat, never use
gasoline, thinner, or any similar
materials.
. If any malfunctions are found or the
heated seat does not operate, turn
the switch off and have the system
checked. It is recommended you
visit a NISSAN dealer for this ser-
vice.
Instruments and controls2-43
HORN HEATED SEATS
Page 190 of 614
WARNING
.Do not adjust the steering wheel
while driving. You could lose control
of your vehicle and cause an acci-
dent.
. Do not adjust the steering wheel
any closer to you than is necessary
for proper steering operation and
comfort. The driver’s air bag inflates
with great force. If you are unrest-
rained, leaning forward, sitting side-
ways or out of position in any way,
you are at greater risk of injury or
death in a crash. You may also
receive serious or fatal injuries from
the air bag if you are up against it
when it inflates. Always sit back
against the seatback and as far
away as practical from the steering
wheel. Always use the seat belts.
SPA2754
ELECTRIC OPERATION
Tilt or telescopic operation
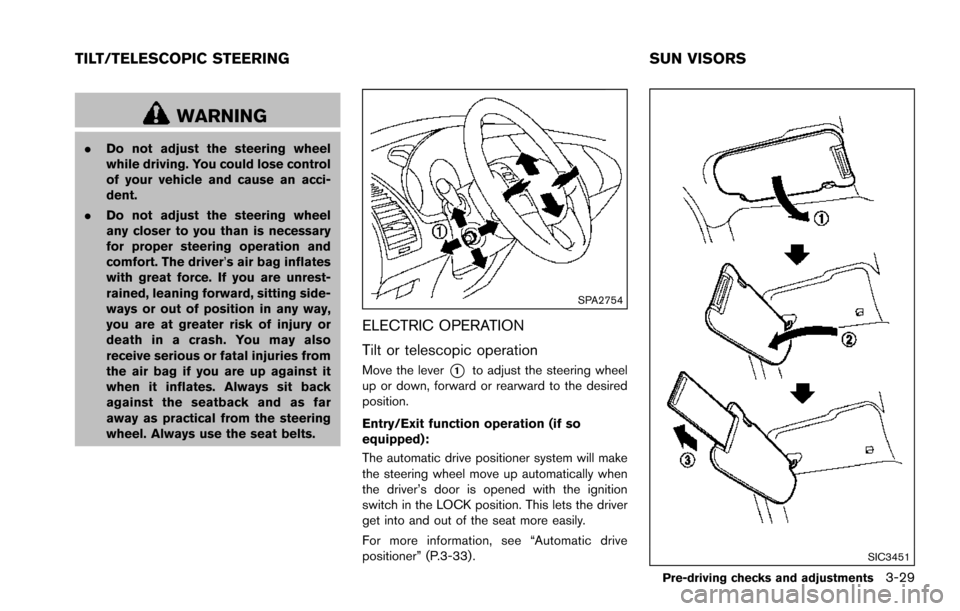
Move the lever*1to adjust the steering wheel
up or down, forward or rearward to the desired
position.
Entry/Exit function operation (if so
equipped):
The automatic drive positioner system will make
the steering wheel move up automatically when
the driver’s door is opened with the ignition
switch in the LOCK position. This lets the driver
get into and out of the seat more easily.
For more information, see “Automatic drive
positioner” (P.3-33).
SIC3451
Pre-driving checks and adjustments3-29
TILT/TELESCOPIC STEERING SUN VISORS
Page 194 of 614
4. The outside mirror surfaces move down-ward.
When one of the following conditions has
occurred, the outside mirror surfaces will return
to their original positions.
. The shift lever is moved to any position other
than R (Reverse) .
. The outside mirror control switch is set to
the center position.
. The ignition switch is placed in the OFF
position.
Automatic anti-glare (if so equipped)
The outside rearview mirrors are designed so
that its automatically change reflection accord-
ing to the intensity of the headlights of the
vehicle following you.
The anti-glare system will be automatically
turned on when the ignition switch is placed in
the ON position.SIC4448
VANITY MIRROR
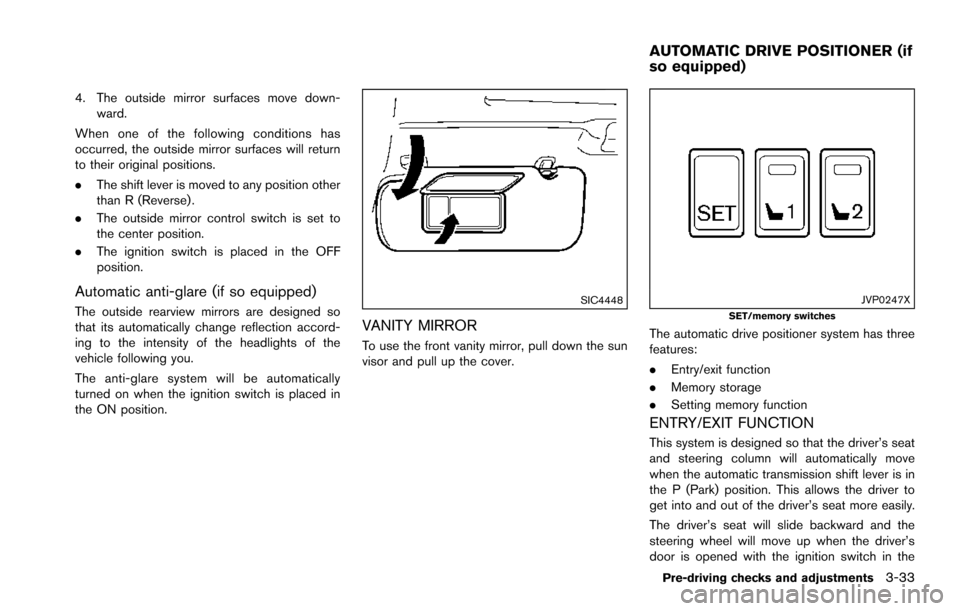
To use the front vanity mirror, pull down the sun
visor and pull up the cover.
JVP0247XSET/memory switches
The automatic drive positioner system has three
features:
.Entry/exit function
. Memory storage
. Setting memory function
ENTRY/EXIT FUNCTION
This system is designed so that the driver’s seat
and steering column will automatically move
when the automatic transmission shift lever is in
the P (Park) position. This allows the driver to
get into and out of the driver’s seat more easily.
The driver’s seat will slide backward and the
steering wheel will move up when the driver’s
door is opened with the ignition switch in the
Pre-driving checks and adjustments3-33
AUTOMATIC DRIVE POSITIONER (if
so equipped)
Page 195 of 614
3-34Pre-driving checks and adjustments
LOCK position.
The driver’s seat and steering wheel will return
to the previous positions when the ignition
switch is pushed to the ACC position.
The driver’s seat will not return to the previous
positions if the seat or steering adjusting switch
is operated when the seat is at the exit position.
Cancel or activate entry/exit function
The shift lever must be in the P (Park) position
with the ignition switch in the OFF position.
The entry/exit function can be activated or
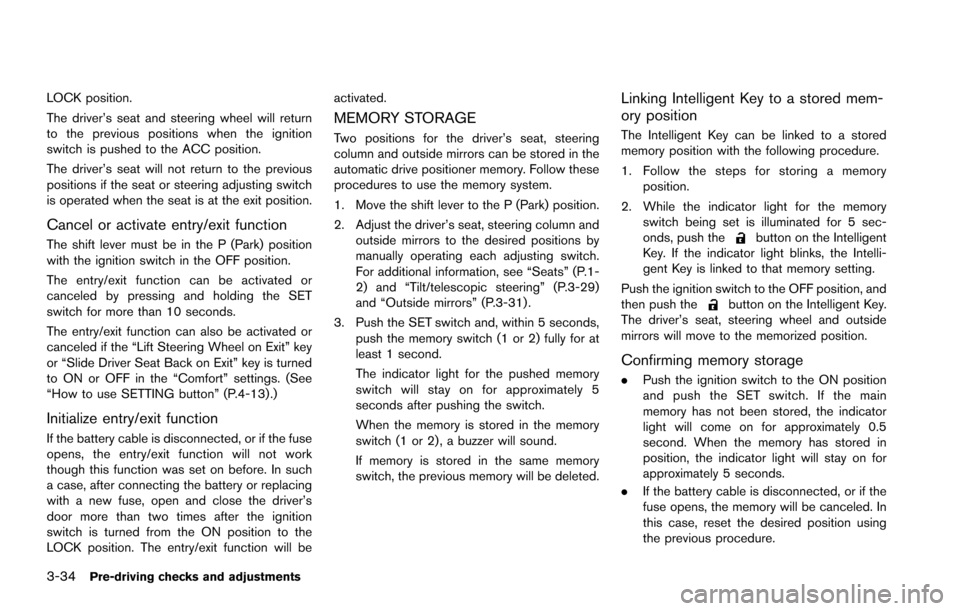
canceled by pressing and holding the SET
switch for more than 10 seconds.
The entry/exit function can also be activated or
canceled if the “Lift Steering Wheel on Exit” key
or “Slide Driver Seat Back on Exit” key is turned
to ON or OFF in the “Comfort” settings. (See
“How to use SETTING button” (P.4-13) .)
Initialize entry/exit function
If the battery cable is disconnected, or if the fuse
opens, the entry/exit function will not work
though this function was set on before. In such
a case, after connecting the battery or replacing
with a new fuse, open and close the driver’s
door more than two times after the ignition
switch is turned from the ON position to the
LOCK position. The entry/exit function will beactivated.
MEMORY STORAGE
Two positions for the driver’s seat, steering
column and outside mirrors can be stored in the
automatic drive positioner memory. Follow these
procedures to use the memory system.
1. Move the shift lever to the P (Park) position.
2. Adjust the driver’s seat, steering column and
outside mirrors to the desired positions by
manually operating each adjusting switch.
For additional information, see “Seats” (P.1-
2) and “Tilt/telescopic steering” (P.3-29)
and “Outside mirrors” (P.3-31) .
3. Push the SET switch and, within 5 seconds, push the memory switch (1 or 2) fully for at
least 1 second.
The indicator light for the pushed memory
switch will stay on for approximately 5
seconds after pushing the switch.
When the memory is stored in the memory
switch (1 or 2) , a buzzer will sound.
If memory is stored in the same memory
switch, the previous memory will be deleted.
Linking Intelligent Key to a stored mem-
ory position
The Intelligent Key can be linked to a stored
memory position with the following procedure.
1. Follow the steps for storing a memoryposition.
2. While the indicator light for the memory switch being set is illuminated for 5 sec-
onds, push the
button on the Intelligent
Key. If the indicator light blinks, the Intelli-
gent Key is linked to that memory setting.
Push the ignition switch to the OFF position, and
then push the
button on the Intelligent Key.
The driver’s seat, steering wheel and outside
mirrors will move to the memorized position.
Confirming memory storage
. Push the ignition switch to the ON position
and push the SET switch. If the main
memory has not been stored, the indicator
light will come on for approximately 0.5
second. When the memory has stored in
position, the indicator light will stay on for
approximately 5 seconds.
. If the battery cable is disconnected, or if the
fuse opens, the memory will be canceled. In
this case, reset the desired position using
the previous procedure.