2017 NISSAN ARMADA display
[x] Cancel search: displayPage 347 of 614
5-6Starting and driving
Additional information
.Since the spare tire is not equipped with the
TPMS, the TPMS does not monitor the tire
pressure of the spare tire.
. The TPMS will activate only when the
vehicle is driven at speeds above 16 MPH
(25 km/h) . Also, this system may not detect
a sudden drop in tire pressure (for example,
a flat tire while driving) .
. The low tire pressure warning light does not
automatically turn off when the tire pressure
is adjusted. After the tire is inflated to the
recommended pressure, the vehicle must be
driven at speeds above 16 MPH (25 km/h)
to activate the TPMS and turn off the low tire
pressure warning light. Use a tire pressure
gauge to check the tire pressure.
. The CHECK TIRE PRESSURE warning
appears in the vehicle information display
when the low tire pressure warning light is
illuminated and low tire pressure is detected.
The CHECK TIRE PRESSURE warning
turns off when the low tire pressure warning
light turns off.
The CHECK TIRE PRESSURE warning
appears each time the ignition switch is
placed in the ON position as long as the low
tire pressure warning light remains illumi-
nated. The CHECK TIRE PRESSURE warning
does not appear if the low tire pressure
warning light illuminates to indicate a TPMS
malfunction.
. Tire pressure rises and falls depending on
the heat caused by the vehicle’s operation
and the outside temperature. Do not reduce
the tire pressure after driving because the
tire pressure rises after driving. Low outside
temperature can lower the temperature of
the air inside the tire which can cause a
lower tire inflation pressure. This may cause
the low tire pressure warning light to
illuminate. If the warning light illuminates in
low ambient temperature, check the tire
pressure for all four tires.
. You can also check the pressure of all tires
(except the spare tire) on the display screen.
The order of the tire pressure figures
displayed on the screen does not corre-
spond with the actual order of the tire
position. See “TIRE PRESSURE informa-
tion” (P.4-10) .
For additional information, see “Low tire pres-
sure warning light” (P.2-15) and “Tire Pressure
Monitoring System (TPMS) ” (P.6-3) .WARNING
. If the low tire pressure warning light
illuminates or LOW PRESSURE in-
formation is displayed on the moni-
tor screen while driving, avoid
sudden steering maneuvers or
abrupt braking, reduce vehicle
speed, pull off the road to a safe
location and stop the vehicle as
soon as possible. Driving with un-
der-inflated tires may permanently
damage the tires and increase the
likelihood of tire failure. Serious
vehicle damage could occur and
may lead to an accident and could
result in serious personal injury.
Check the tire pressure for all four
tires. Adjust the tire pressure to the
recommended COLD tire pressure
shown on the Tire and Loading
Information label to turn the low
tire pressure warning light OFF. If
the light still illuminates while driv-
ing after adjusting the tire pressure,
a tire may be flat or the TPMS may
be malfunctioning. If you have a flat
tire, replace it with a spare tire as
soon as possible. If no tire is flat
Page 354 of 614
SSD0436
OPERATING RANGE FOR ENGINE
START FUNCTION
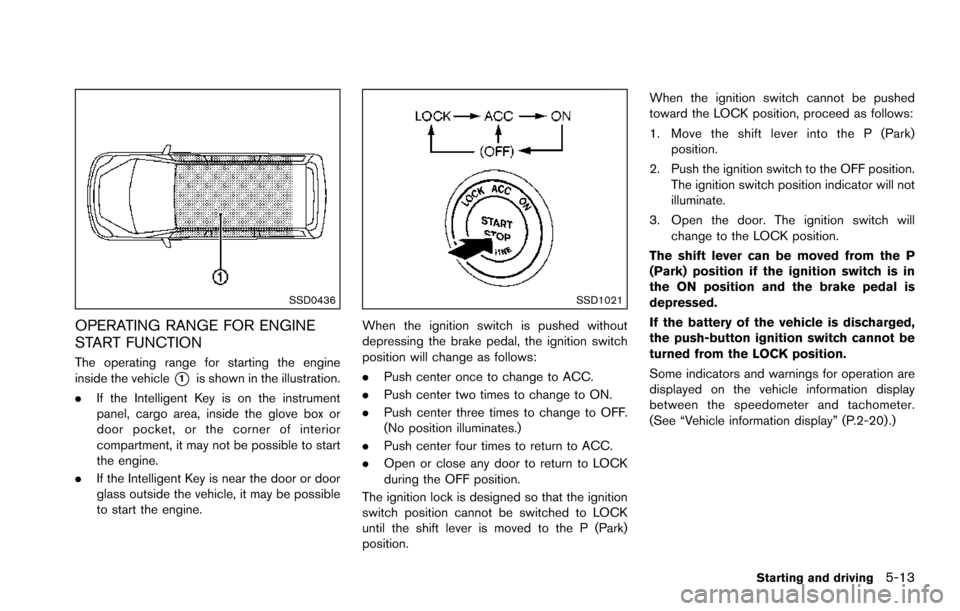
The operating range for starting the engine
inside the vehicle
*1is shown in the illustration.
. If the Intelligent Key is on the instrument
panel, cargo area, inside the glove box or
door pocket, or the corner of interior
compartment, it may not be possible to start
the engine.
. If the Intelligent Key is near the door or door
glass outside the vehicle, it may be possible
to start the engine.
SSD1021
When the ignition switch is pushed without
depressing the brake pedal, the ignition switch
position will change as follows:
.Push center once to change to ACC.
. Push center two times to change to ON.
. Push center three times to change to OFF.
(No position illuminates.)
. Push center four times to return to ACC.
. Open or close any door to return to LOCK
during the OFF position.
The ignition lock is designed so that the ignition
switch position cannot be switched to LOCK
until the shift lever is moved to the P (Park)
position. When the ignition switch cannot be pushed
toward the LOCK position, proceed as follows:
1. Move the shift lever into the P (Park)
position.
2. Push the ignition switch to the OFF position. The ignition switch position indicator will not
illuminate.
3. Open the door. The ignition switch will change to the LOCK position.
The shift lever can be moved from the P
(Park) position if the ignition switch is in
the ON position and the brake pedal is
depressed.
If the battery of the vehicle is discharged,
the push-button ignition switch cannot be
turned from the LOCK position.
Some indicators and warnings for operation are
displayed on the vehicle information display
between the speedometer and tachometer.
(See “Vehicle information display” (P.2-20) .)
Starting and driving5-13
Page 356 of 614
JVS0404X
INTELLIGENT KEY BATTERY DIS-
CHARGE
If the battery of the Intelligent Key is discharged,
or environmental conditions interfere with the
Intelligent Key operation, start the engine
according to the following procedure:
1. Move the shift lever to the P (Park) position.
2. Firmly apply the foot brake.
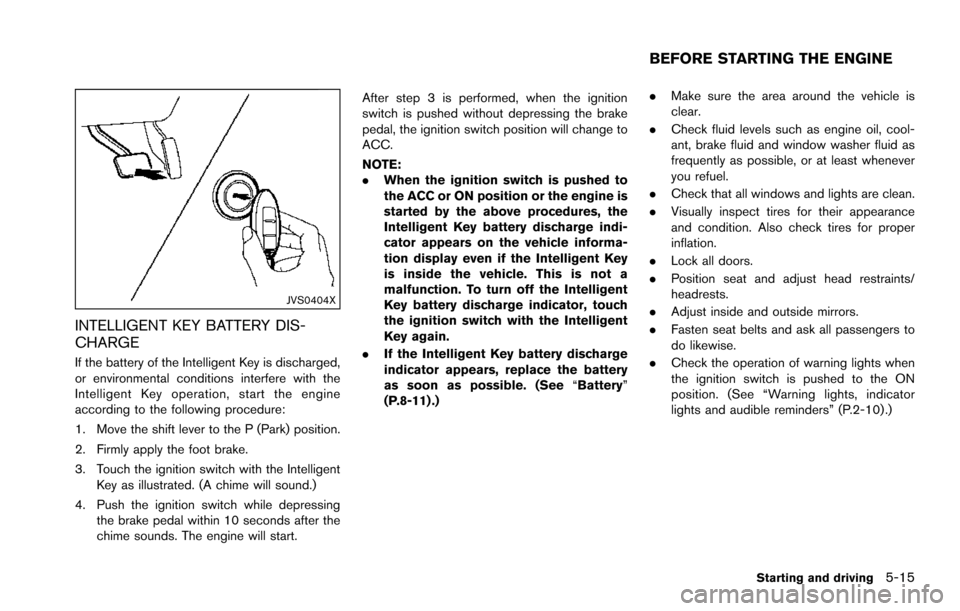
3. Touch the ignition switch with the IntelligentKey as illustrated. (A chime will sound.)
4. Push the ignition switch while depressing the brake pedal within 10 seconds after the
chime sounds. The engine will start. After step 3 is performed, when the ignition
switch is pushed without depressing the brake
pedal, the ignition switch position will change to
ACC.
NOTE:
.
When the ignition switch is pushed to
the ACC or ON position or the engine is
started by the above procedures, the
Intelligent Key battery discharge indi-
cator appears on the vehicle informa-
tion display even if the Intelligent Key
is inside the vehicle. This is not a
malfunction. To turn off the Intelligent
Key battery discharge indicator, touch
the ignition switch with the Intelligent
Key again.
. If the Intelligent Key battery discharge
indicator appears, replace the battery
as soon as possible. (See “Battery”
(P.8-11) .) .
Make sure the area around the vehicle is
clear.
. Check fluid levels such as engine oil, cool-
ant, brake fluid and window washer fluid as
frequently as possible, or at least whenever
you refuel.
. Check that all windows and lights are clean.
. Visually inspect tires for their appearance
and condition. Also check tires for proper
inflation.
. Lock all doors.
. Position seat and adjust head restraints/
headrests.
. Adjust inside and outside mirrors.
. Fasten seat belts and ask all passengers to
do likewise.
. Check the operation of warning lights when
the ignition switch is pushed to the ON
position. (See “Warning lights, indicator
lights and audible reminders” (P.2-10) .)
Starting and driving5-15
BEFORE STARTING THE ENGINE
Page 361 of 614
5-20Starting and driving
N (Neutral) position or any drive position to
the P (Park) position.Apply the parking brake.
When parking on a hill, apply the parking brake
first, then move the shift lever to the P (Park)
position.
CAUTION
Use this position only when the vehicle
is completely stopped.
R (Reverse):
Use this position to back up. Always be sure the
vehicle is completely stopped before selecting
the R (Reverse) position. The brake pedal
must be depressed and the shift lever
button pushed in to move the shift lever
from the P (Park) position, the N (Neutral)
position or any drive position to the R
(Reverse) position.
N (Neutral):
Neither forward nor reverse gear is engaged.
The engine can be started in this position. You
may shift to the N (Neutral) position and restart a
stalled engine while the vehicle is moving.
D (Drive):
Use this position for all normal forward driving.
Manual shift mode
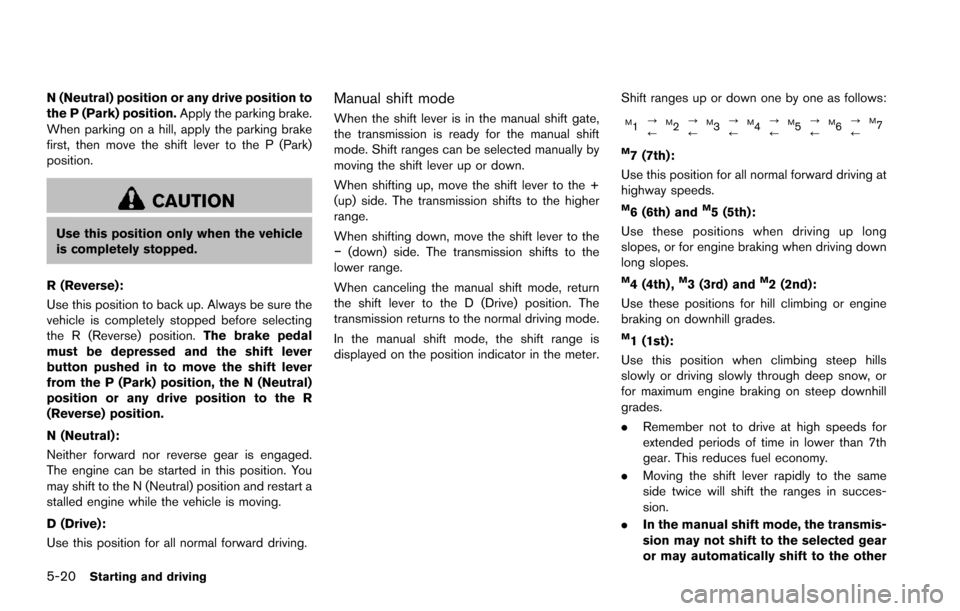
When the shift lever is in the manual shift gate,
the transmission is ready for the manual shift
mode. Shift ranges can be selected manually by
moving the shift lever up or down.
When shifting up, move the shift lever to the +
(up) side. The transmission shifts to the higher
range.
When shifting down, move the shift lever to the
�í (down) side. The transmission shifts to the
lower range.
When canceling the manual shift mode, return
the shift lever to the D (Drive) position. The
transmission returns to the normal driving mode.
In the manual shift mode, the shift range is
displayed on the position indicator in the meter. Shift ranges up or down one by one as follows:M1
?
/M2?
/M3?
/M4?
/M5?
/M6?
/M7
M7 (7th):
Use this position for all normal forward driving at
highway speeds.
M6 (6th) andM5 (5th):
Use these positions when driving up long
slopes, or for engine braking when driving down
long slopes.
M4 (4th) ,M3 (3rd) andM2 (2nd):
Use these positions for hill climbing or engine
braking on downhill grades.
M1 (1st):
Use this position when climbing steep hills
slowly or driving slowly through deep snow, or
for maximum engine braking on steep downhill
grades.
. Remember not to drive at high speeds for
extended periods of time in lower than 7th
gear. This reduces fuel economy.
. Moving the shift lever rapidly to the same
side twice will shift the ranges in succes-
sion.
. In the manual shift mode, the transmis-
sion may not shift to the selected gear
or may automatically shift to the other
Page 365 of 614
5-24Starting and driving
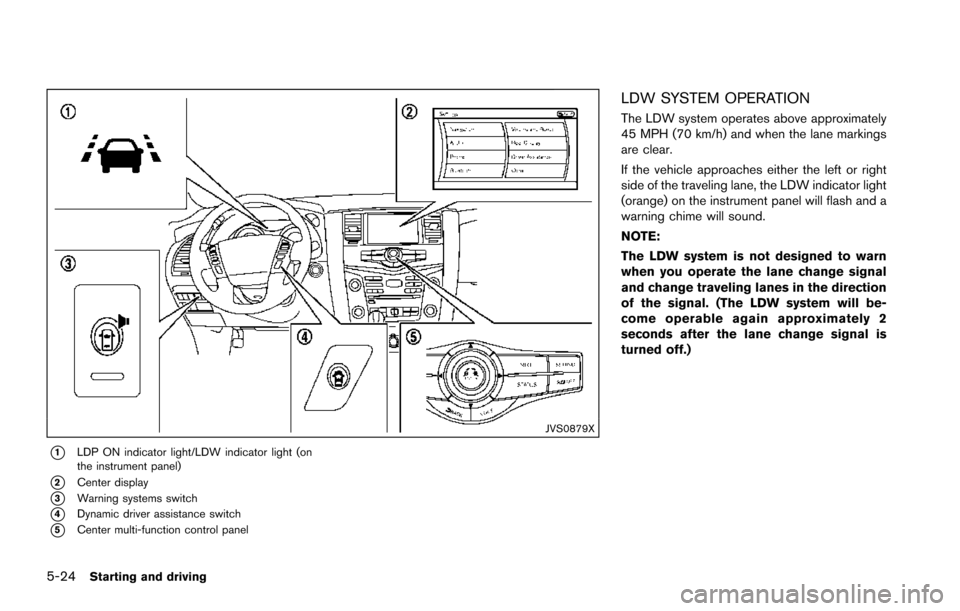
JVS0879X
*1LDP ON indicator light/LDW indicator light (on
the instrument panel)
*2Center display
*3Warning systems switch
*4Dynamic driver assistance switch
*5Center multi-function control panel
LDW SYSTEM OPERATION
The LDW system operates above approximately
45 MPH (70 km/h) and when the lane markings
are clear.
If the vehicle approaches either the left or right
side of the traveling lane, the LDW indicator light
(orange) on the instrument panel will flash and a
warning chime will sound.
NOTE:
The LDW system is not designed to warn
when you operate the lane change signal
and change traveling lanes in the direction
of the signal. (The LDW system will be-
come operable again approximately 2
seconds after the lane change signal is
turned off.)
Page 366 of 614
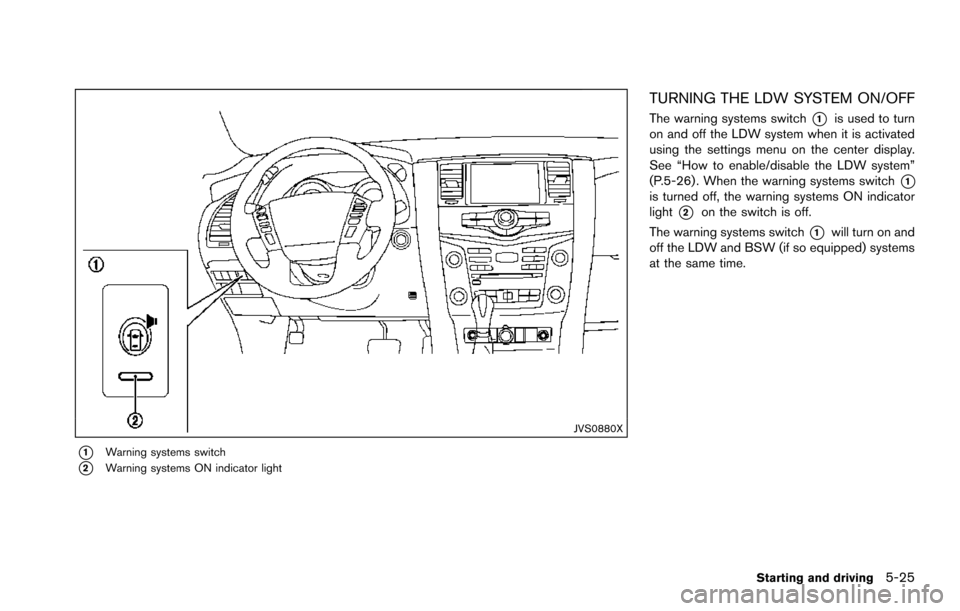
JVS0880X
*1Warning systems switch
*2Warning systems ON indicator light
TURNING THE LDW SYSTEM ON/OFF
The warning systems switch*1is used to turn
on and off the LDW system when it is activated
using the settings menu on the center display.
See “How to enable/disable the LDW system”
(P.5-26) . When the warning systems switch
*1is turned off, the warning systems ON indicator
light
*2on the switch is off.
The warning systems switch
*1will turn on and
off the LDW and BSW (if so equipped) systems
at the same time.
Starting and driving5-25
Page 367 of 614
5-26Starting and driving
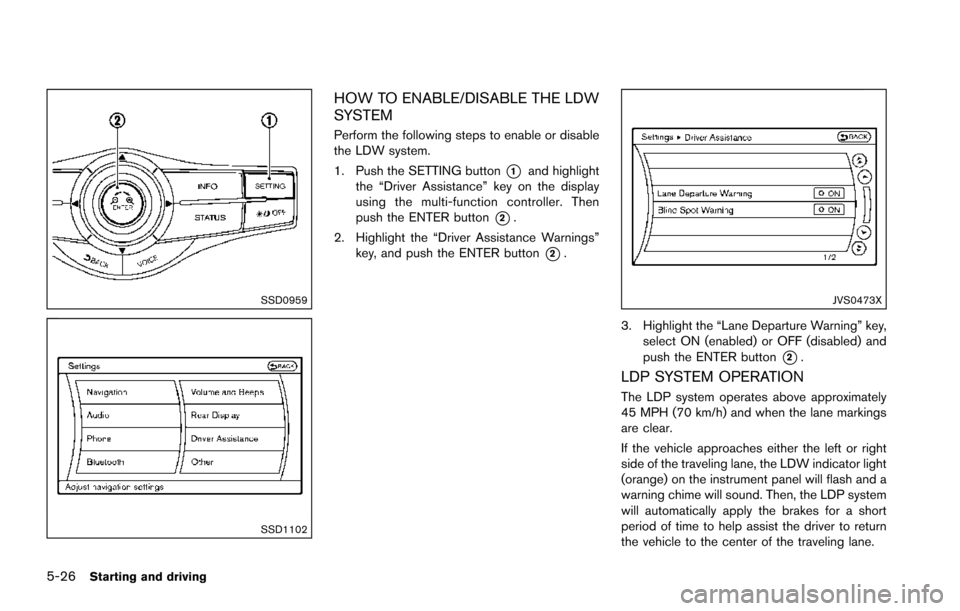
SSD0959
SSD1102
HOW TO ENABLE/DISABLE THE LDW
SYSTEM
Perform the following steps to enable or disable
the LDW system.
1. Push the SETTING button
*1and highlight
the “Driver Assistance” key on the display
using the multi-function controller. Then
push the ENTER button
*2.
2. Highlight the “Driver Assistance Warnings” key, and push the ENTER button
*2.
JVS0473X
3. Highlight the “Lane Departure Warning” key,
select ON (enabled) or OFF (disabled) and
push the ENTER button
*2.
LDP SYSTEM OPERATION
The LDP system operates above approximately
45 MPH (70 km/h) and when the lane markings
are clear.
If the vehicle approaches either the left or right
side of the traveling lane, the LDW indicator light
(orange) on the instrument panel will flash and a
warning chime will sound. Then, the LDP system
will automatically apply the brakes for a short
period of time to help assist the driver to return
the vehicle to the center of the traveling lane.
Page 368 of 614
NOTE:
.The LDP system is not designed to
work when you operate the lane
change signal and change traveling
lanes in the direction of the signal.
(The LDP system will become operable
again approximately 2 seconds after
the lane change signal is turned off.)
. The LDP braking assist will not operate
or will stop operating and only a
warning chime will sound under the
following conditions.
—When the brake pedal is depressed.
— When the steering wheel is turned
as far as necessary for the vehicle to
change lanes.
— When the accelerator pedal is de-
pressed while brake control assist is
provided.
— When the ICC, DCA, BSI, BSW,
PFCW or FEB warnings sound.
— When the hazard warning flashers
are operated.
— When driving on a curve at a high
speed.
. While the LDP system is operating, you
may hear a sound of brake operation.
This is normal and indicates that the
LDP system is operating properly.
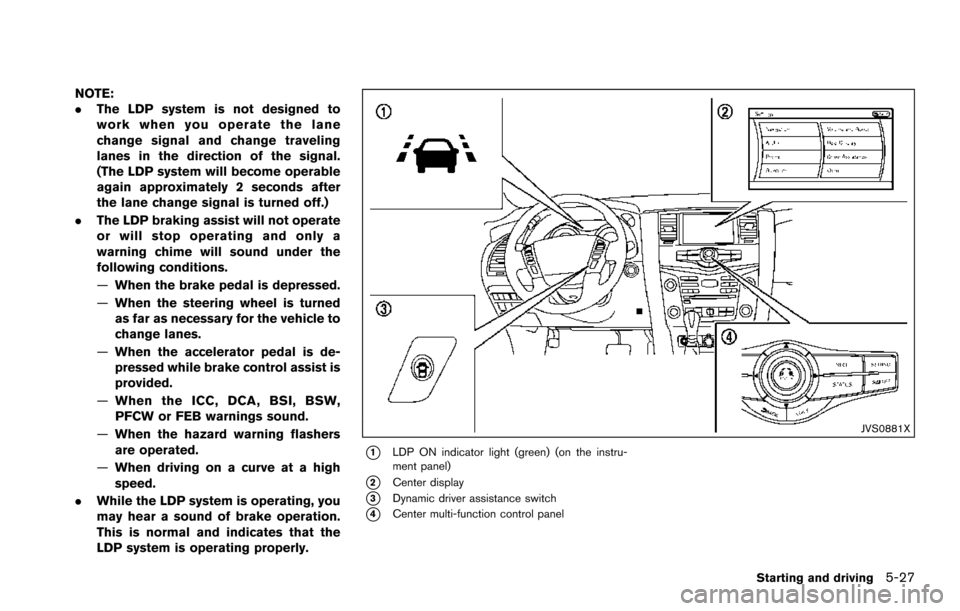
JVS0881X
*1LDP ON indicator light (green) (on the instru-
ment panel)
*2Center display
*3Dynamic driver assistance switch
*4Center multi-function control panel
Starting and driving5-27