2017 NISSAN ARMADA light
[x] Cancel search: lightPage 287 of 614
4-90Monitor, heater, air conditioner, audio, phone and voice recognition systems
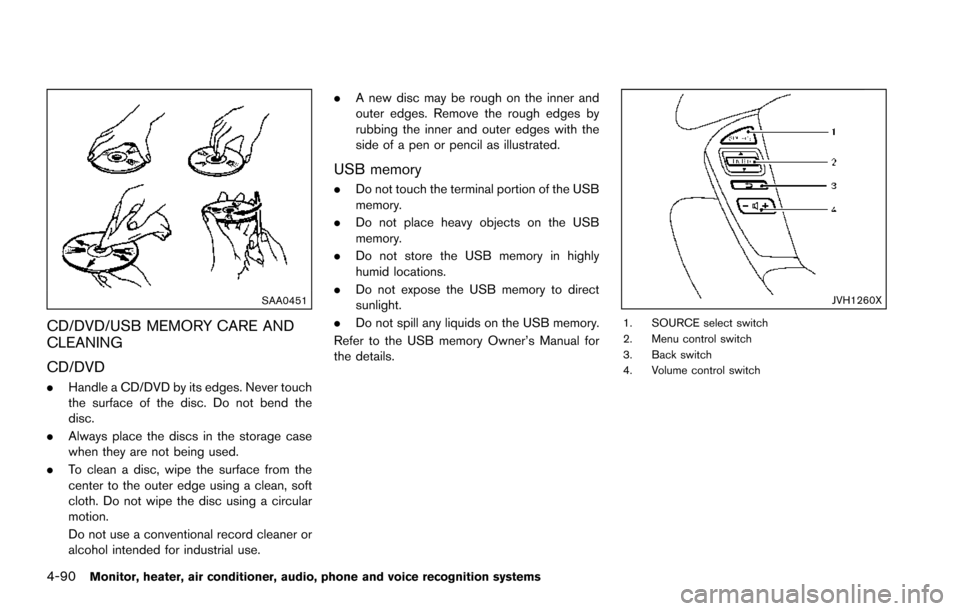
SAA0451
CD/DVD/USB MEMORY CARE AND
CLEANING
CD/DVD
.Handle a CD/DVD by its edges. Never touch
the surface of the disc. Do not bend the
disc.
. Always place the discs in the storage case
when they are not being used.
. To clean a disc, wipe the surface from the
center to the outer edge using a clean, soft
cloth. Do not wipe the disc using a circular
motion.
Do not use a conventional record cleaner or
alcohol intended for industrial use. .
A new disc may be rough on the inner and
outer edges. Remove the rough edges by
rubbing the inner and outer edges with the
side of a pen or pencil as illustrated.
USB memory
.Do not touch the terminal portion of the USB
memory.
. Do not place heavy objects on the USB
memory.
. Do not store the USB memory in highly
humid locations.
. Do not expose the USB memory to direct
sunlight.
. Do not spill any liquids on the USB memory.
Refer to the USB memory Owner’s Manual for
the details.
JVH1260X
1. SOURCE select switch
2. Menu control switch
3. Back switch
4. Volume control switch
Page 289 of 614
4-92Monitor, heater, air conditioner, audio, phone and voice recognition systems
ANTENNA
Window antenna
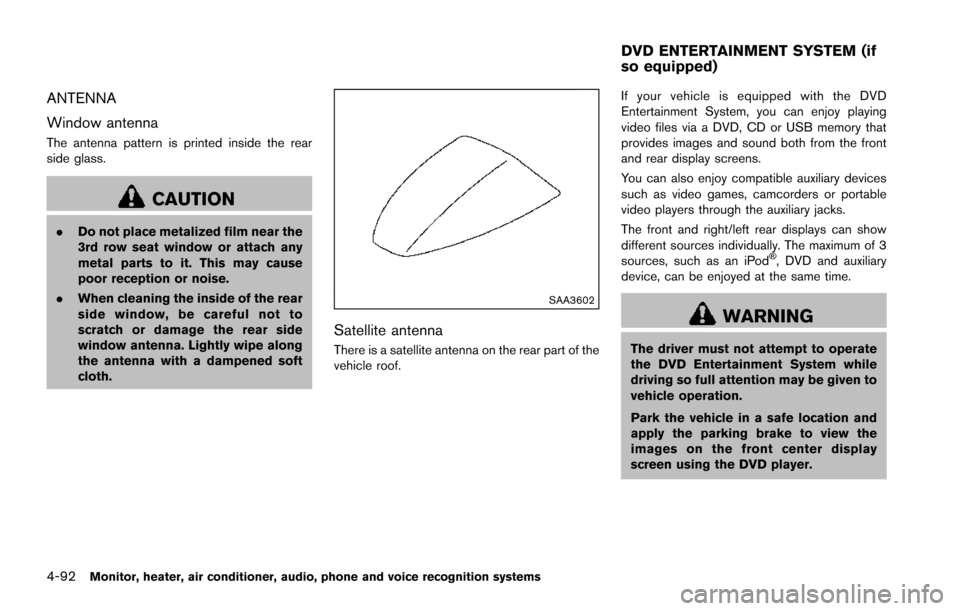
The antenna pattern is printed inside the rear
side glass.
CAUTION
.Do not place metalized film near the
3rd row seat window or attach any
metal parts to it. This may cause
poor reception or noise.
. When cleaning the inside of the rear
side window, be careful not to
scratch or damage the rear side
window antenna. Lightly wipe along
the antenna with a dampened soft
cloth.
SAA3602
Satellite antenna
There is a satellite antenna on the rear part of the
vehicle roof. If your vehicle is equipped with the DVD
Entertainment System, you can enjoy playing
video files via a DVD, CD or USB memory that
provides images and sound both from the front
and rear display screens.
You can also enjoy compatible auxiliary devices
such as video games, camcorders or portable
video players through the auxiliary jacks.
The front and right/left rear displays can show
different sources individually. The maximum of 3
sources, such as an iPod
�Š, DVD and auxiliary
device, can be enjoyed at the same time.
WARNING
The driver must not attempt to operate
the DVD Entertainment System while
driving so full attention may be given to
vehicle operation.
Park the vehicle in a safe location and
apply the parking brake to view the
images on the front center display
screen using the DVD player.
DVD ENTERTAINMENT SYSTEM (if
so equipped)
Page 297 of 614
4-100Monitor, heater, air conditioner, audio, phone and voice recognition systems
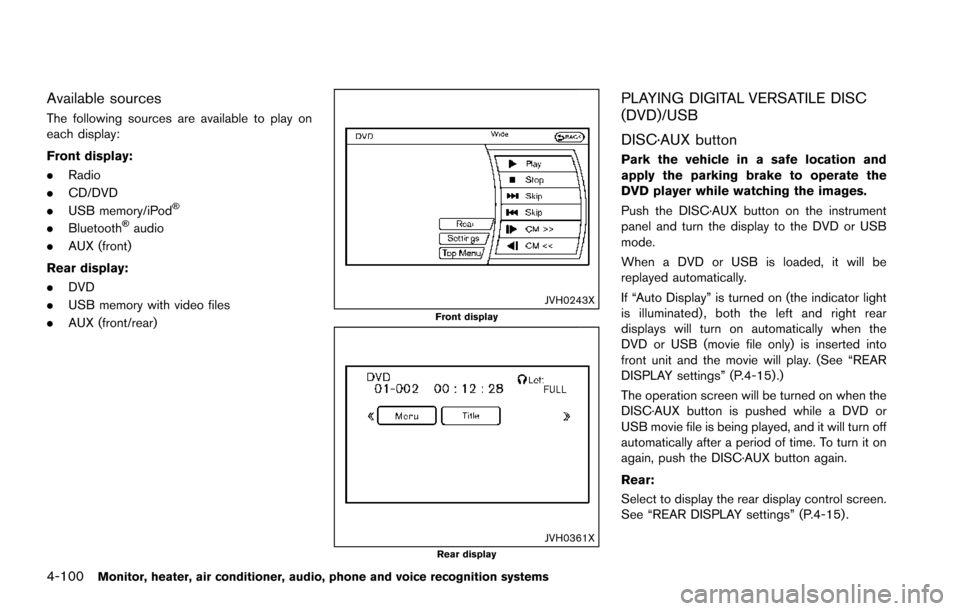
Available sources
The following sources are available to play on
each display:
Front display:
.Radio
. CD/DVD
. USB memory/iPod
�Š
.Bluetooth�Šaudio
. AUX (front)
Rear display:
. DVD
. USB memory with video files
. AUX (front/rear)
JVH0243XFront display
JVH0361XRear display
PLAYING DIGITAL VERSATILE DISC
(DVD)/USB
DISC·AUX button
Park the vehicle in a safe location and
apply the parking brake to operate the
DVD player while watching the images.
Push the DISC·AUX button on the instrument
panel and turn the display to the DVD or USB
mode.
When a DVD or USB is loaded, it will be
replayed automatically.
If “Auto Display” is turned on (the indicator light
is illuminated) , both the left and right rear
displays will turn on automatically when the
DVD or USB (movie file only) is inserted into
front unit and the movie will play. (See “REAR
DISPLAY settings” (P.4-15) .)
The operation screen will be turned on when the
DISC·AUX button is pushed while a DVD or
USB movie file is being played, and it will turn off
automatically after a period of time. To turn it on
again, push the DISC·AUX button again.
Rear:
Select to display the rear display control screen.
See “REAR DISPLAY settings” (P.4-15) .
Page 302 of 614
OPERATING TIPS
.The images from a device that is connected
to the rear auxiliary input jacks cannot be
viewed on the front displays.
. It is not possible to display different video
files, such as DVD or video files in the USB
memory, on the front and rear displays at the
same time.
. It is not possible to play an audio file and a
video file in the same USB memory at the
same time.
Multiple source display
It is possible to play different sources on each
display. The following example shows how to
operate multiple sources.
It is also possible to set in the front display. For
more details, see “REAR DISPLAY settings”
(P.4-15) .
1. Display a video file in the front display by
selecting the DVD mode.
2. Set the rear display select switch on the remote controller to the L side and push the
POWER button. The left rear display will
turn on and the DVD screen will be
displayed.
(If “Auto Display” is set to ON, the display
will turn on automatically.) 3. Set the rear display select switch on the
remote controller to the R side and push the
POWER button. The right rear display will
turn on and the DVD screen will be
displayed.
(If “Auto Display” is set to ON, the display
will turn on automatically.)
4. Switch the source on the front display to an audio source. The sound from the speakers
switches according to the front display. The
rear display continues to display the DVD.
5. Turn on a pair of headphones and listen to the DVD on the rear displays using the
headphones.
6. Connect an auxiliary device to the AUX jack, set the rear display select switch to the L or
R side and push the SOURCE button to
select “Rear AUX”. The selected side of the
rear display will switch to the AUX mode.
The other rear display will continue to
display the DVD.
7. Turn on the other pair of headphones. If the sound from the headphones is not from the
AUX jacks, switch the channel with the
channel select switch on the headphones.
CARE AND MAINTENANCE
Use a lightly dampened, lint free cloth to clean
the surfaces of your DVD Entertainment System
(DVD player face, screen, remote controller,
etc.) .
CAUTION
.Do not use any solvents or cleaning
solutions when cleaning the video
system.
. Do not use excessive force on the
monitor screen.
. Avoid touching or scratching the
monitor screen as it may become
dirty or damaged.
. Do not attempt to operate the
system in extreme temperature con-
ditions [below �í48F( �í208 C) and
above 1588F (708C)].
. Do not attempt to operate the
system in extreme humidity condi-
tions (less than 10% or more than
75%) .
Monitor, heater, air conditioner, audio, phone and voice recognition systems4-105
Page 328 of 614
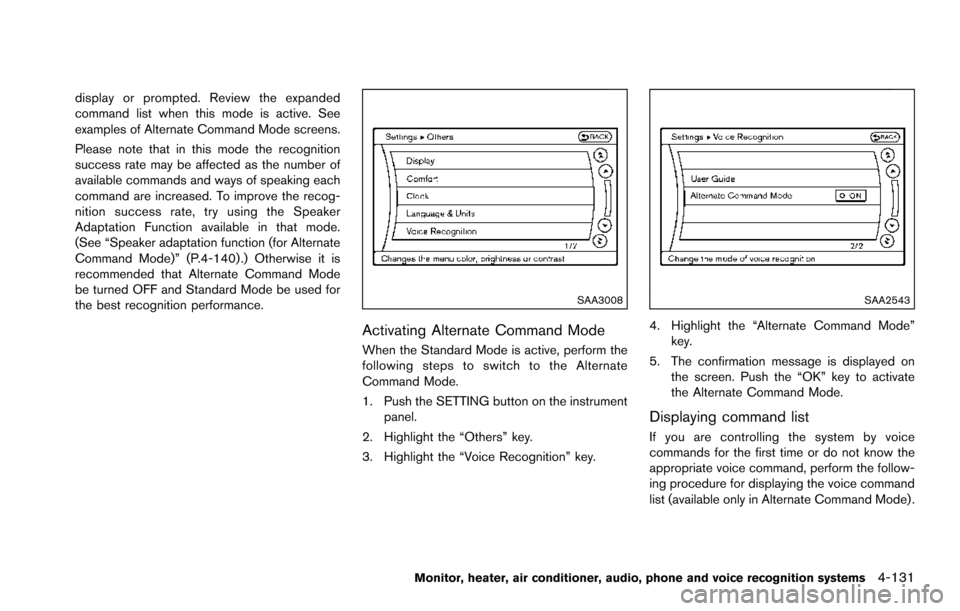
display or prompted. Review the expanded
command list when this mode is active. See
examples of Alternate Command Mode screens.
Please note that in this mode the recognition
success rate may be affected as the number of
available commands and ways of speaking each
command are increased. To improve the recog-
nition success rate, try using the Speaker
Adaptation Function available in that mode.
(See “Speaker adaptation function (for Alternate
Command Mode)” (P.4-140) .) Otherwise it is
recommended that Alternate Command Mode
be turned OFF and Standard Mode be used for
the best recognition performance.
SAA3008
Activating Alternate Command Mode
When the Standard Mode is active, perform the
following steps to switch to the Alternate
Command Mode.
1. Push the SETTING button on the instrumentpanel.
2. Highlight the “Others” key.
3. Highlight the “Voice Recognition” key.
SAA2543
4. Highlight the “Alternate Command Mode” key.
5. The confirmation message is displayed on the screen. Push the “OK” key to activate
the Alternate Command Mode.
Displaying command list
If you are controlling the system by voice
commands for the first time or do not know the
appropriate voice command, perform the follow-
ing procedure for displaying the voice command
list (available only in Alternate Command Mode) .
Monitor, heater, air conditioner, audio, phone and voice recognition systems4-131
Page 335 of 614
4-138Monitor, heater, air conditioner, audio, phone and voice recognition systems
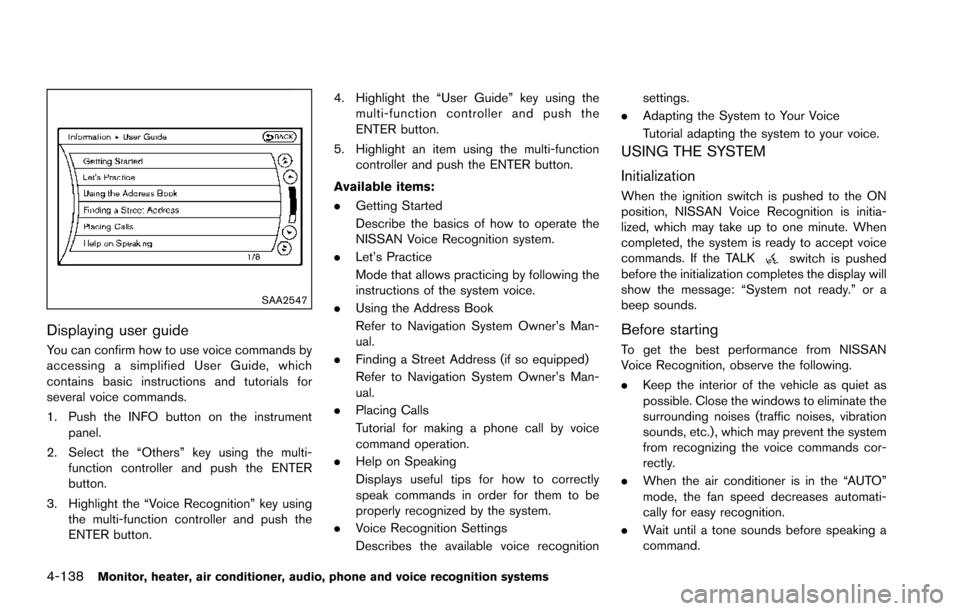
SAA2547
Displaying user guide
You can confirm how to use voice commands by
accessing a simplified User Guide, which
contains basic instructions and tutorials for
several voice commands.
1. Push the INFO button on the instrumentpanel.
2. Select the “Others” key using the multi- function controller and push the ENTER
button.
3. Highlight the “Voice Recognition” key using the multi-function controller and push the
ENTER button. 4. Highlight the “User Guide” key using the
multi-function controller and push the
ENTER button.
5. Highlight an item using the multi-function controller and push the ENTER button.
Available items:
. Getting Started
Describe the basics of how to operate the
NISSAN Voice Recognition system.
. Let’s Practice
Mode that allows practicing by following the
instructions of the system voice.
. Using the Address Book
Refer to Navigation System Owner’s Man-
ual.
. Finding a Street Address (if so equipped)
Refer to Navigation System Owner’s Man-
ual.
. Placing Calls
Tutorial for making a phone call by voice
command operation.
. Help on Speaking
Displays useful tips for how to correctly
speak commands in order for them to be
properly recognized by the system.
. Voice Recognition Settings
Describes the available voice recognition settings.
. Adapting the System to Your Voice
Tutorial adapting the system to your voice.
USING THE SYSTEM
Initialization
When the ignition switch is pushed to the ON
position, NISSAN Voice Recognition is initia-
lized, which may take up to one minute. When
completed, the system is ready to accept voice
commands. If the TALK
switch is pushed
before the initialization completes the display will
show the message: “System not ready.” or a
beep sounds.
Before starting
To get the best performance from NISSAN
Voice Recognition, observe the following.
. Keep the interior of the vehicle as quiet as
possible. Close the windows to eliminate the
surrounding noises (traffic noises, vibration
sounds, etc.) , which may prevent the system
from recognizing the voice commands cor-
rectly.
. When the air conditioner is in the “AUTO”
mode, the fan speed decreases automati-
cally for easy recognition.
. Wait until a tone sounds before speaking a
command.
Page 343 of 614
System malfunction .......................................................... 5-55
System maintenance ....................................................... 5-55
Back-up Collision Intervention (BCI) (if
so equipped) ........................................................................\
... 5-56
BCI system operation ..................................................... 5-58
Turning the BCI system ON/OFF ................................ 5-62
How to enable/disable the BCI system ..................... 5-62
BCI system precautions ................................................. 5-64
System temporarily unavailable ..................................... 5-65
System malfunction .......................................................... 5-66
System maintenance ....................................................... 5-66
Cruise control (if so equipped) .......................................... 5-67 Precautions on cruise control ....................................... 5-67
Cruise control operations ............................................... 5-67
Intelligent Cruise Control (ICC) (if so equipped) .......... 5-69 How to select the cruise control mode ...................... 5-71
Vehicle-to-vehicle distance control mode .................. 5-71
Conventional (fixed speed) cruise control mode ..... 5-87
Distance Control Assist (DCA) (if so equipped) ........... 5-91 DCA system operation .................................................. 5-93
Turning the DCA system ON/OFF .............................. 5-96
How to enable/disable the DCA system ................... 5-97
DCA system display and indicators ............................ 5-98
DCA system limitations ................................................... 5-98
System temporarily unavailable .................................. 5-102
System malfunction ....................................................... 5-104
System maintenance .................................................... 5-104 Forward Emergency Braking (FEB) (if
so equipped) ....................................................................... 5-105
FEB system operation ............................................... 5-107
Turning the FEB system ON/OFF .......................... 5-108
FEB system limitations .............................................. 5-109
System temporarily unavailable ............................... 5-110
System malfunction .................................................... 5-111
System maintenance .................................................. 5-111
Predictive Forward Collision Warning (PFCW) (if
so equipped) ....................................................................... 5-112 PFCW system operation ........................................... 5-114
Turning the PFCW system ON/OFF ...................... 5-115
PFCW system limitations .......................................... 5-118
System temporarily unavailable ............................... 5-119
System malfunction .................................................... 5-119
System maintenance .................................................. 5-120
Break-in schedule .............................................................. 5-121
Fuel efficient driving tips .................................................. 5-121
Increasing fuel economy ................................................... 5-122
NISSAN all-mode 4WD
�Š(if so equipped) ................. 5-123
NISSAN all-mode 4WD�Šsystem ........................... 5-123
4WD shift switch ........................................................ 5-127
4WD shift indicator .................................................... 5-128
4WD warning light ..................................................... 5-128
Hill Start Assist system ..................................................... 5-130
Parking/parking on hills ..................................................... 5-131
TOW mode ........................................................................\
.. 5-132
Page 347 of 614
5-6Starting and driving
Additional information
.Since the spare tire is not equipped with the
TPMS, the TPMS does not monitor the tire
pressure of the spare tire.
. The TPMS will activate only when the
vehicle is driven at speeds above 16 MPH
(25 km/h) . Also, this system may not detect
a sudden drop in tire pressure (for example,
a flat tire while driving) .
. The low tire pressure warning light does not
automatically turn off when the tire pressure
is adjusted. After the tire is inflated to the
recommended pressure, the vehicle must be
driven at speeds above 16 MPH (25 km/h)
to activate the TPMS and turn off the low tire
pressure warning light. Use a tire pressure
gauge to check the tire pressure.
. The CHECK TIRE PRESSURE warning
appears in the vehicle information display
when the low tire pressure warning light is
illuminated and low tire pressure is detected.
The CHECK TIRE PRESSURE warning
turns off when the low tire pressure warning
light turns off.
The CHECK TIRE PRESSURE warning
appears each time the ignition switch is
placed in the ON position as long as the low
tire pressure warning light remains illumi-
nated. The CHECK TIRE PRESSURE warning
does not appear if the low tire pressure
warning light illuminates to indicate a TPMS
malfunction.
. Tire pressure rises and falls depending on
the heat caused by the vehicle’s operation
and the outside temperature. Do not reduce
the tire pressure after driving because the
tire pressure rises after driving. Low outside
temperature can lower the temperature of
the air inside the tire which can cause a
lower tire inflation pressure. This may cause
the low tire pressure warning light to
illuminate. If the warning light illuminates in
low ambient temperature, check the tire
pressure for all four tires.
. You can also check the pressure of all tires
(except the spare tire) on the display screen.
The order of the tire pressure figures
displayed on the screen does not corre-
spond with the actual order of the tire
position. See “TIRE PRESSURE informa-
tion” (P.4-10) .
For additional information, see “Low tire pres-
sure warning light” (P.2-15) and “Tire Pressure
Monitoring System (TPMS) ” (P.6-3) .WARNING
. If the low tire pressure warning light
illuminates or LOW PRESSURE in-
formation is displayed on the moni-
tor screen while driving, avoid
sudden steering maneuvers or
abrupt braking, reduce vehicle
speed, pull off the road to a safe
location and stop the vehicle as
soon as possible. Driving with un-
der-inflated tires may permanently
damage the tires and increase the
likelihood of tire failure. Serious
vehicle damage could occur and
may lead to an accident and could
result in serious personal injury.
Check the tire pressure for all four
tires. Adjust the tire pressure to the
recommended COLD tire pressure
shown on the Tire and Loading
Information label to turn the low
tire pressure warning light OFF. If
the light still illuminates while driv-
ing after adjusting the tire pressure,
a tire may be flat or the TPMS may
be malfunctioning. If you have a flat
tire, replace it with a spare tire as
soon as possible. If no tire is flat