2017 NISSAN 370Z ROADSTER seat adjustment
[x] Cancel search: seat adjustmentPage 3 of 28

NEW SYSTEM FEATURES
RearView Monitor (if so equipped).....................................................2
Opening the Sof t Top (Roadster models)
..............................................2
USB (Universal Serial Bus) Connection Port/AUX Jack and iPod® Interface
...........2
NavTraffic and NavWeather (if so equipped)
...........................................3
ESSENTIAL INFORMATION
Tire Pressure Monitoring System (TPMS) ..............................................4
Loose Fuel Cap
........................................................................\
.5
Fuel-filler Door
.......................................................................\
..5
Clock Set/Adjustment
.................................................................6
Engine Oil Temperature Gauge
........................................................7
Automatic Power Windows . . . . . . . . . . . . . . . . . . . . . . . . . . . . . . . . . . . .\
. . . . . . . . . . . . . . . . . . . . . . . . 7
FIRST DRIVE FEATURES
Nissan Intelligent Key® System ........................................................8
Rear Hatch/Trunk Lid Release
.........................................................9
Sof t Top Operation (Roadster models)
................................................9
Power Seat Adjustments (if so equipped)
.............................................9
Manual Seat Adjustments (if so equipped)
...........................................10
Power Outside Mirror Control Switch
.................................................10
Starting/Stopping the Engine
.........................................................11
Headlight Control Switch
..............................................................11
Wiper and Washer Switch
.............................................................12
Heater and Air Conditioner (automatic)
..............................................13
FM/AM/SiriusXM® Satellite Radio with CD/DVD Player (if so equipped)
..............14
Cruise Control
........................................................................\
.15
SYSTEM GUIDE
Trip Computer .......................................................................\
.16
Bluetooth® Hands-free Phone System
...............................................17
• System Operating Tips ...........................................................17
Bluetooth® System without Navigation (if so equipped)
.............................18
Bluetooth® System with Navigation (if so equipped)
.................................19
Bluetooth® Streaming Audio with Navigation (if so equipped)
.......................21
Navigation System (if so equipped)
...................................................22
HomeLink® Universal Transceiver (if so equipped)
....................................23
TABLE OF CONTENTS
Please see your Owner’s Manual for important safety information and system
operation limitations.
• A cellular telephone should not be used for any purpose while driving so full attention may be given to vehicle operation.
• Always wear your seat belt.
• Supplemental air bags do not replace proper seat belt usage.
• Children 12 and under should always ride in the rear seat properly secured in child restraints or seat belts according to their age and weight.
• Do not drink and drive.
For more information, refer to the “Safety — Seats, seat belts and supplemental restraint system
(section 1)”, the “Center display, heater, air conditioner, audio, phone and voice recognition systems
(section 4)” and the “Starting and driving (section 5)” of your Owner’s Manual.
Additional information about your vehicle is also available in your Owner’s Manual,
Navigation System Owner’s Manual and at www.NissanUSA.com.
Page 11 of 28

9
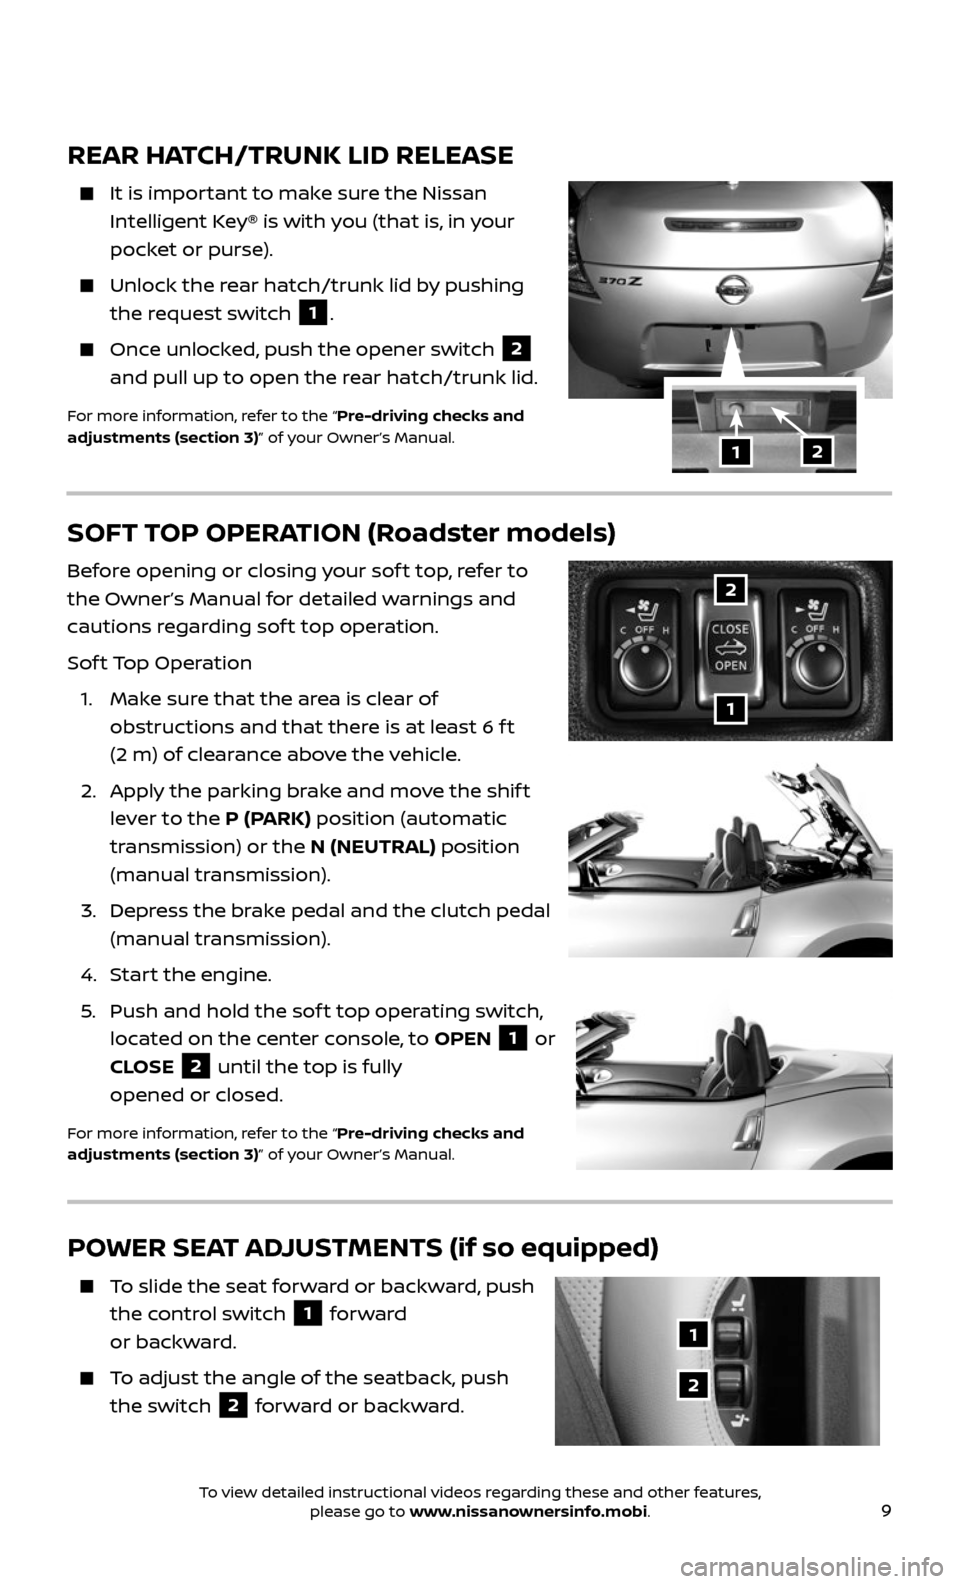
REAR HATCH/TRUNK LID RELEASE
It is important to make sure the Nissan
Intelligent Key® is with you (that is, in your
pocket or purse).
Unlock the r ear hatch/trunk lid by pushing
the request switch 1.
Once unlocked, push the opener switch 2
and pull up to open the rear hatch/trunk lid.
For more information, refer to the “Pre-driving checks and
adjustments (section 3)” of your Owner’s Manual.
12
SOFT TOP OPERATION (Roadster models)
Before opening or closing your sof t top, refer to
the Owner’s Manual for detailed warnings and
cautions regarding sof t top operation.
Sof t Top Operation
1. Make sure that the area is clear of
obstructions and that there is at least 6 f t
(2 m) of clearance above the vehicle.
2. Apply the parking brake and move the shif t
lever to the P (PARK) position (automatic
transmission) or the N (NEUTRAL) position
(manual transmission).
3. Depress the brake pedal and the clutch pedal
(manual transmission).
4. Start the engine.
5. Push and hold the sof t top operating switch,
located on the center console, to OPEN 1 or
CLOSE
2 until the top is fully
opened or closed.
For more information, refer to the “Pre-driving checks and
adjustments (section 3)” of your Owner’s Manual.
1
2
POWER SEAT ADJUSTMENTS (if so equipped)
To slide the seat forward or backward, push
the control switch 1 forward
or backward.
To adjust the angle of the seatback, push
the switch 2 forward or backward.
1
2
To view detailed instructional videos regarding these and other features, please go to www.nissanownersinfo.mobi.
Page 12 of 28

10
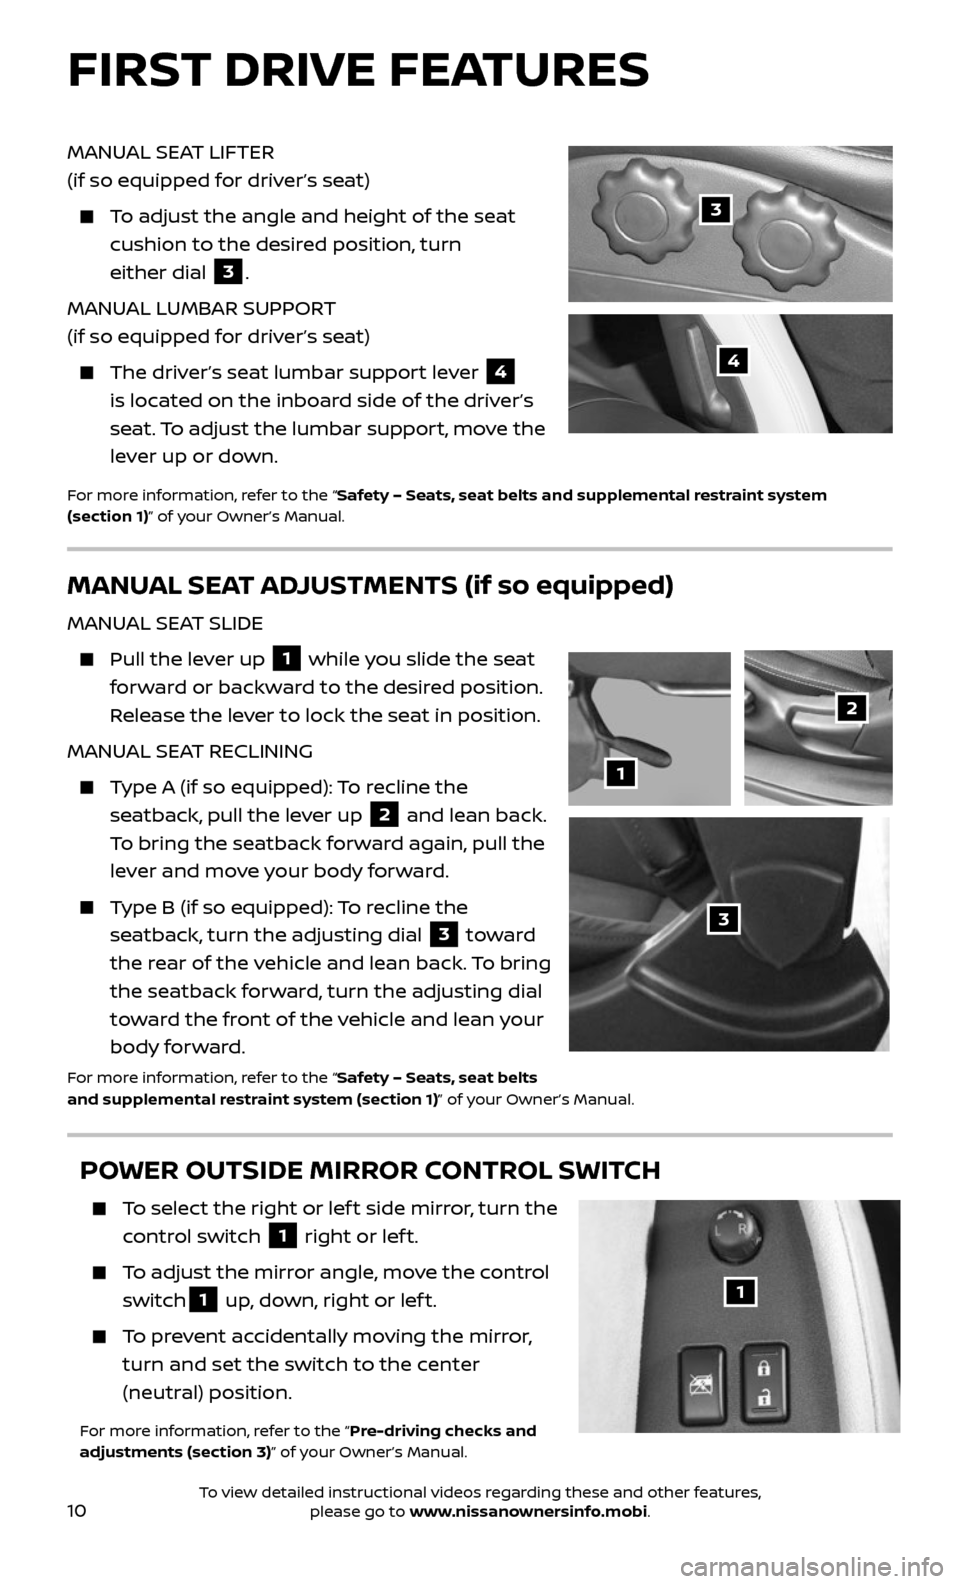
MANUAL SEAT LIFTER
(if so equipped for driver’s seat)
To adjust the angle and height of the seat
cushion to the desired position, turn
either dial
3.
MANUAL LUMBAR SUPPORT
(if so equipped for driver’s seat)
The driver’s seat lumbar support lever 4
is located on the inboard side of the driver’s
seat. To adjust the lumbar support, move the
lever up or down.
For more information, refer to the “Safety – Seats, seat belts and supplemental restraint system
(section 1)” of your Owner’s Manual.
3
4
POWER OUTSIDE MIRROR CONTROL SWITCH
To select the right or lef t side mirror, turn the
control switch 1 right or lef t.
To adjust the mirror angle, move the control
switch1 up, down, right or lef t.
To prevent accidentally moving the mirror,
turn and set the switch to the center
(neutral) position.
For more information, refer to the “Pre-driving checks and
adjustments (section 3)” of your Owner’s Manual.
1
FIRST DRIVE FEATURES
MANUAL SEAT ADJUSTMENTS (if so equipped)
MANUAL SEAT SLIDE
Pull the lever up 1 while you slide the seat
forward or backward to the desired position.
Release the lever to lock the seat in position.
MANUAL SEAT RECLINING
Type A (if so equipped): To recline the
seatback, pull the lever up
2 and lean back.
To bring the seatback forward again, pull the
lever and move your body forward.
Type B (if so equipped): To recline the
seatback, turn the adjusting dial 3 toward
the rear of the vehicle and lean back. To bring
the seatback forward, turn the adjusting dial
toward the front of the vehicle and lean your
body forward.
For more information, refer to the “Safety – Seats, seat belts
and supplemental restraint system (section 1)” of your Owner’s Manual.
3
1
2
To view detailed instructional videos regarding these and other features, please go to www.nissanownersinfo.mobi.