2017 MITSUBISHI OUTLANDER III display
[x] Cancel search: displayPage 394 of 521
Dual-zone automatic climat
e control air conditioner Comfort controls 7-11
7
On vehicles equippe
d with Mitsubishi
Multi-Communication System, screenoperations can also be
used to change the
setting. Refer to the separate owner’s manual for details.
N00703501042
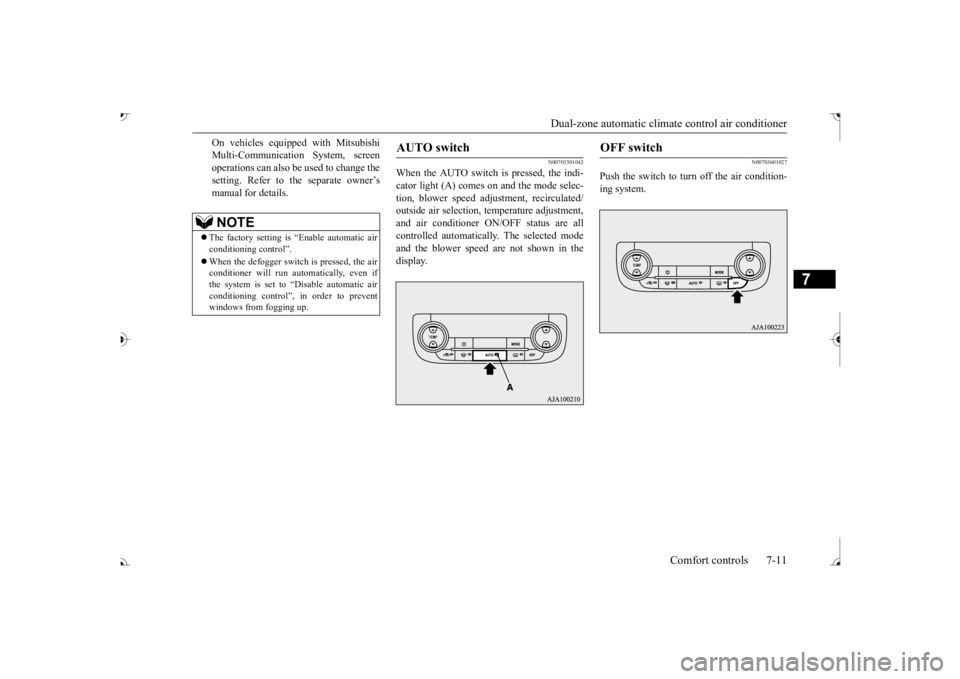
When the AUTO switch is pressed, the indi- cator light (A) comes on and the mode selec- tion, blower speed adju
stment, recirculated/
outside air selection,
temperature adjustment,
and air conditioner ON/OFF status are all controlled automatically. The selected modeand the blower speed are not shown in the display.
N00703601027
Push the switch to turn off the air condition-ing system.
NOTE
The factory setting is
“Enable automatic air
conditioning control”. When the defogger switch
is pressed, the air
conditioner will run au
tomatically, even if
the system is set to “Disable automatic air conditioning control”, in order to preventwindows from fogging up.
AUTO switch
OFF switch
BK0239700US.book 11 ページ 2016年6月16日 木曜日 午前10時58分
Page 395 of 521
Dual-zone automatic climate
control air conditioner
7-12 Comfort controls
7
N00731701443
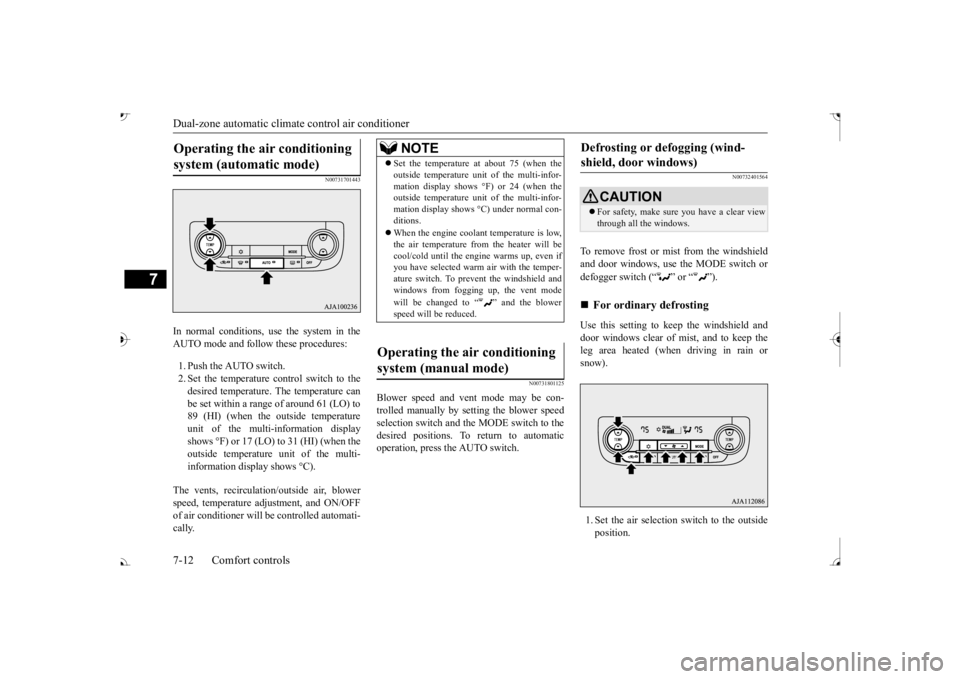
In normal conditions, use the system in the AUTO mode and follow these procedures: 1. Push the AUTO switch. 2. Set the temperature control switch to the desired temperature. The temperature can be set within a range of around 61 (LO) to89 (HI) (when the outside temperature unit of the multi-information display shows °F) or 17 (LO) to 31 (HI) (when theoutside temperature
unit of the multi-
information display shows °C).
The vents, recirculati
on/outside air, blower
speed, temperature ad
justment, and ON/OFF
of air conditioner will
be controlled automati-
cally.
N00731801125
Blower speed and vent
mode may be con-
trolled manually by setting the blower speedselection switch and the MODE switch to the desired positions. To return to automatic operation, press the AUTO switch.
N00732401564
To remove frost or mist from the windshieldand door windows, use the MODE switch or defogger switch (
Page 402 of 521
Audio Files (MP3/WMA/AAC)
Comfort controls 7-19
7
3 inches (8 cm) discs may not be used. Do not insert irregularly-shaped discs (for example, heart-shaped), as these may result in malfunction.
Additionally, discs
that have transparent portions may not beplayed back. Discs that have not
been finalized cannot
be played back. Even if recorded using the correct format on a recorder or computer, application software settings a
nd environments; disc
peculiarities, damage,
or marking; or dirt
or condensation on the lens inside theproduct may render th
e disc unplayable.
Depending on the disc, some functions may not be used, or the disc may not playback. Do not use discs with cracks or warps. If the disc has sticke
rs affixed, remains
from removed stickers
, or affixed adhe-
sive, then do not use the disc. Discs that have decora
tive labels or stick-
ers may not be used.
This product will play
back audio CDs, how-
ever please be aware of the following points regarding CD standards. Ensure that you use discs with on the label surface.
Playback of other than standard CDs is not guaranteed. Even
if the audio can be
played back, the audio quality cannot be guaranteed. When playing back other than standard CDs, the following may occur. • There may be noise during playback. • There may be jumping in the audio.• The disc may not be recognized. • The first track may not be played back. • It may take longer than usual until start of playback of tracks. • Playback may start from within thetrack. • Some parts may not be played back. • Tracks may freeze
during playback.
• Tracks may be displayed erroneously.
N00715600027
This product can play back MP3/WMA/AACformat audio files recorded on CD-ROM, CD-R/RW, and USB devices. There are limitations on the files and media that can be used, therefore read the followingprior to recording MP3/WMA/AAC format audio files on discs or USB devices.
Additionally, ensure y
ou read the user manu-
als for your CD-R/RW drive and the writingsoftware, and ensure these are used correctly. If the MP3/WMA/AAC
format audio files
includes title informati
on or other data, then
this can be displayed.
Nonstandard CDs
Audio Files (MP3/WMA/AAC)
CAUTION CD-ROM and CD-R/R
W media can only
play back MP3 format audio files. Actions such as copyi
ng audio CDs or files
and either distributing th
ese to others for free
or for charge, or uploading files via the Inter- net or other means to se
rvers is an infringe-
ment of the law. Do not append the file extensions “.mp3”,MP3/WMA/AAC format
files. Playing back
discs with these types of files recorded upon them may cause the files to be incorrectlyidentified for playba
ck, which may lead to
loud noise, resulting in
speaker damage or
accident.NOTE
Depending on the condition of the disc recorder or recording software used, correctplayback may not be pos
sible. In these cases,
refer to the user manual for your product or software.
BK0239700US.book 19 ページ 2016年6月16日 木曜日 午前10時58分
Page 404 of 521
Audio Files (MP3/WMA/AAC)
Comfort controls 7-21
7
N00715900020
MP3 is an abbreviation of “MPEG-1 Audio Layer 3”. MPEG is
an abbreviation of
“Motion Picture Experts
Group”, and this is a
video compression sta
ndard used in video
CDs, etc. MP3 is one of the audio compression meth-ods contained in the
MPEG audio standard,
and reduces the quality of sounds that are beyond the auditory resolution of the human ear and that are hidden by louder sounds, thus creating high-quality data with a lower datasize. Because this can compress CD audio to approximately 1/10 its original data size with-out perceptible loss, approximately 10 CDs can be written to a single CD-R/RW disc. Specifications for MP
3 files that can be
played are as below.
Maxi- mum file num- ber
*1
65,535 files (total number on media. Other than MP3, WMA, and AAC files not included)
File
name and folder name restric-tions
Maximum 64 bytes (for Uni- code, 32 characters), files/ fold-ers with file/ folder names longer than this will not be dis- played or played back.
USB sup- ported formats
The recommended fi
le system is
FAT32. 1 partition only
*1: Do not include other than MP3/WMA/AAC files. However, if stor- ing many tracks within the same folder,these may not be recognized even if less than the maximum number of tracks. In these cases, divide the tracks up into mul-tiple folders.
NOTE
The order in which fo
lders and audio files
are displayed on this product may be differ- ent to how they are displayed on a computer.Name
Speci- fica- tion
Explanation
What Is MP3?
CAUTION MP3 files different to the standards at right may not play back corre
ctly, or file/folder
names may not be di
splayed correctly.
Standards for MP3 Files That Can Be Played Back
Item
Details
Specification MPEG-1 AUDIO LAYER3
MPEG-2 AUDIO LAYER3
Sampling frequency [kHz]
MPEG-1: 32/44.1/48 MPEG-2: 16/22.05/24
Bit rate [kbps]
MPEG-1: 32 to 320 MPEG-2: 8 to 160
VBR (vari- able bit rate) Channel mode
Stereo/ Joint stereo/ Dual channel/ Monaural
File exten-
sion
mp3
Supported tag informa-
tion
ID3 tag Ver. 1.0, Ver. 1.1, Ver. 2.2, Ver. 2.3, Ver. 2.4 (ISO-8859-1, UTF-16 (Uni-code)), Titles, Artist name, Album name
Maximum number of characters that can be indicated on the display
64 characters
BK0239700US.book 21 ページ 2016年6月16日 木曜日 午前10時58分
Page 406 of 521
Important Points on Safety for the Customer
Comfort controls 7-23
7
N00716200020
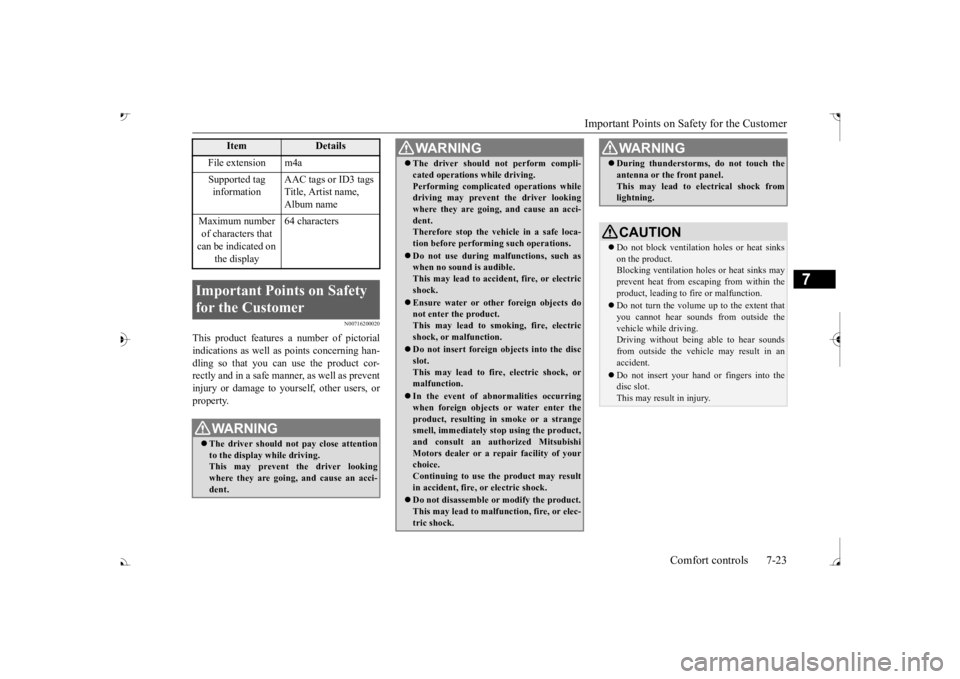
This product features
a number of pictorial
indications as well as
points concerning han-
dling so that you can use the product cor- rectly and in a safe manner, as well as preventinjury or damage to yourself, other users, or property.
File extension m4a Supported tag information
AAC tags or ID3 tags Title, Artist name, Album name
Maximum number of characters that can be indicated on
the display
64 characters
Important Points on Safety for the Customer
WA R N I N G The driver should not pay close attention to the display while driving.This may prevent the driver looking where they are going, and cause an acci- dent.
Item
Details
The driver should not perform compli- cated operations while driving.Performing complicated
operations while
driving may prevent
the driver looking
where they are going, and cause an acci- dent.Therefore stop the vehicle in a safe loca- tion before performi
ng such operations.
Do not use during malfunctions, such as when no sound is audible. This may lead to acci
dent, fire, or electric
shock. Ensure water or othe
r foreign objects do
not enter the product. This may lead to sm
oking, fire, electric
shock, or malfunction. Do not insert foreign objects into the disc slot.This may lead to fire
, electric shock, or
malfunction. In the event of abnormalities occurring when foreign objects or water enter the product, resulting in smoke or a strangesmell, immediately st
op using the product,
and consult an auth
orized Mitsubishi
Motors dealer or a re
pair facility of your
choice. Continuing to use the product may result in accident, fire, or electric shock. Do not disassemble or modify the product. This may lead to malf
unction, fire, or elec-
tric shock.WA R N I N G
During thunderstorms, do not touch the antenna or the front panel.This may lead to el
ectrical shock from
lightning.CAUTION Do not block ventilati
on holes or heat sinks
on the product. Blocking ventilation holes
or heat sinks may
prevent heat from escaping from within theproduct, leading to fire or malfunction. Do not turn the volume up to the extent that you cannot hear sounds from outside the vehicle while driving. Driving without being able to hear soundsfrom outside the vehi
cle may result in an
accident. Do not insert your hand or fingers into the disc slot. This may result in injury.WA R N I N G
BK0239700US.book 23 ページ 2016年6月16日 木曜日 午前10時58分
Page 408 of 521
Operation Keys
Comfort controls 7-25
7
N00716700113
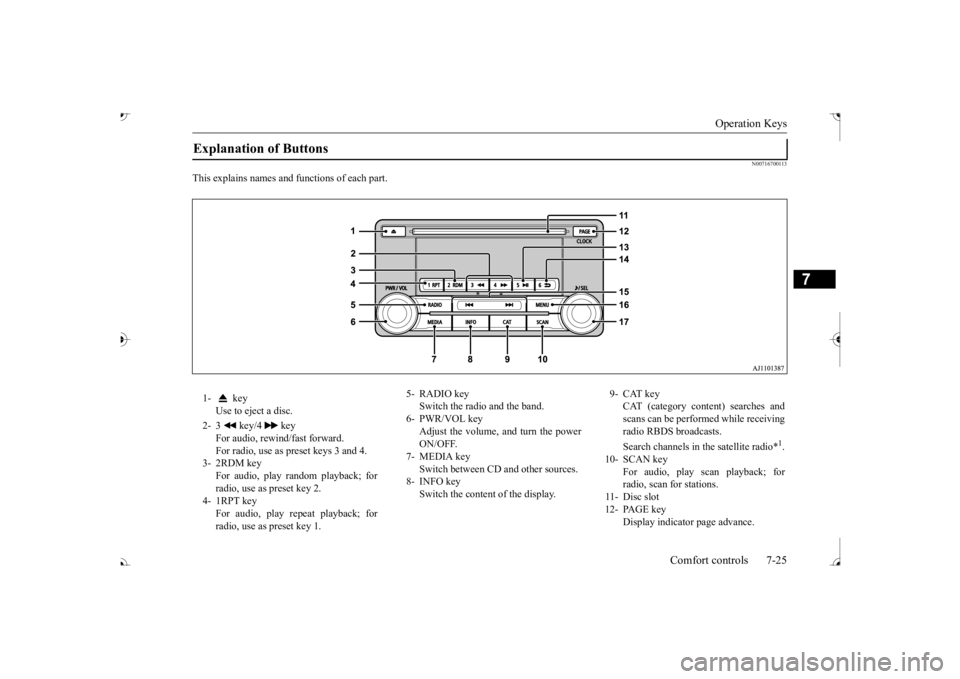
This explains names and
functions of each part.
Explanation of Buttons 1- key
Use to eject a disc.
2- 3 key/4 key
For audio, rewind/fast forward. For radio, use as preset keys 3 and 4.
3- 2RDM key
For audio, play random playback; for radio, use as preset key 2.
4- 1RPT key
For audio, play repeat playback; for radio, use as preset key 1.
5- RADIO key
Switch the radio and the band.
6- PWR/VOL key
Adjust the volume, and turn the powerON/OFF.
7- MEDIA key
Switch between CD and other sources.
8- INFO key
Switch the content of the display.
9- CAT key
CAT (category content) searches and scans can be performed while receiving radio RBDS broadcasts. Search channels in the satellite radio*
1.
10- SCAN key
For audio, play scan playback; forradio, scan for stations.
11- Disc slot 12- PAGE key
Display indicato
r page advance.
BK0239700US.book 25 ページ 2016年6月16日 木曜日 午前10時58分
Page 410 of 521
Listen to Radio
Comfort controls 7-27
7
Press the RADIO key to switch the band. Switch between AM and FM bands. The selected band is indicated on the display. *: When a satellite tuner is connected Turn the /SEL key to the frequency to lis- ten to.
Collective search for stations that can be received. Press the SCAN key. When a station is received, this is played for 5 seconds, then the product searches for thenext station. Register the broadcast st
ation in advance, and
select this at a later time. 1. Tune in to the frequency to register. 2. Hold down any of the keys from the 1RPT key to the 6 key.
A “Beep” sounds, and the preset key is registered.
During RBDS broadcast
reception, select
CAT (category content), and automaticallyscan for stations. 1. During FM reception, press the CAT key. This switches to the CAT selection mode. 2. Press the CAT key to select CAT. 3. Press the key or key. The CAT (category content) indicator will flash, and station selection will automati- cally start.When a station is received, the frequency is displayed.
To Listen to the Radio
NOTE
Bands switch in the order AM, FM1, FM2, SIR1*, SIR2*, SIR3*, and SIR4*. If no signal is received, bands will not be switched to SIR2, SIR3, or SIR4.
Manual/Seek Station Selection
/SEL key (counter- clockwise)
Reduces the frequency being received.
/SEL key (clockwise)
Increases the frequency being received.
key
(hold down)
Release the button to start seek station selection, and when a station is received, scanning stops.
key
(hold down)Scan Station Selection
NOTE
Press this button again while receiving the station to return to normal reception.
Preset Memory
NOTE
The preset memory can register a maximum of 6 stations for each band. If a preset key that al
ready has a station reg-
istered is selected, then this is overwritten with the new preset. Pressing the preset key will select the previ- ously registered frequency.
CAT Search
NOTE
This receives the station detected first.
BK0239700US.book 27 ページ 2016年6月16日 木曜日 午前10時58分
Page 411 of 521
Listen to Satellite Radio (if so equipped) 7-28 Comfort controls
7
During RBDS broadcast
reception,
select
CAT (category content) to perform a collec-tive search for stations. 1. During FM reception, press the CAT key. This switches to the CAT selection mode. 2. Press the CAT key to select CAT. 3. Press the SCAN key. When a broadcast station is received, thisis played for 5 seconds, then the product searches for the next station.
N00717000096
This section explains how to listen to satellite radio. Press the RADIO key to switch the band. Switches between SIR1, SIR2, SIR3, and SIR4 bands. The selected band is in
dicated on the display.
Press the key or key to select the sta- tion.
10 seconds after reception, CAT search mode will be cancelled. To receive a different station, press the key or key again.
CAT Scan
NOTE
Press this key again while receiving the sta- tion to return to normal reception.NOTE
Listen to Satellite Radio
(if so
equipped)
NOTE
A subscription is required to listen to satel- lite radio. Sate
llite radio cannot be received
after the free trial period has expired. If no subscription has been made when the free trial period expires, the display will alternate between
“CALL” and “888-539-
SIRI”.
NOTE
Bands switch in the order AM, FM1, FM2, SIR1, SIR2*, SIR3*, and SIR4*. Switch satellite radi
o bands by holding down
the button, button on the steering wheel audio remote control switch.
*:If no signal is received, bands will not be switched.
Select a Station
key
Go down one step from the channel being received.
key
Go up one step from the channel being received.
key
(Hold down)
While the key is held down, it will cycle down through the channels being received.
key
(Hold down)
While the key is held down, it will cycle up through the channels being received.
NOTE
When cycling up/down through channels, the channel number display
in the upper level of
the display changes. When channel number “
000” is selected, the
SIRIUS ID (12 digi
ts) is displayed.
BK0239700US.book 28 ページ 2016年6月16日 木曜日 午前10時58分