2017 MITSUBISHI iMiEV stop start
[x] Cancel search: stop startPage 148 of 296
Instrument cluster 5-40 Features and controls
5
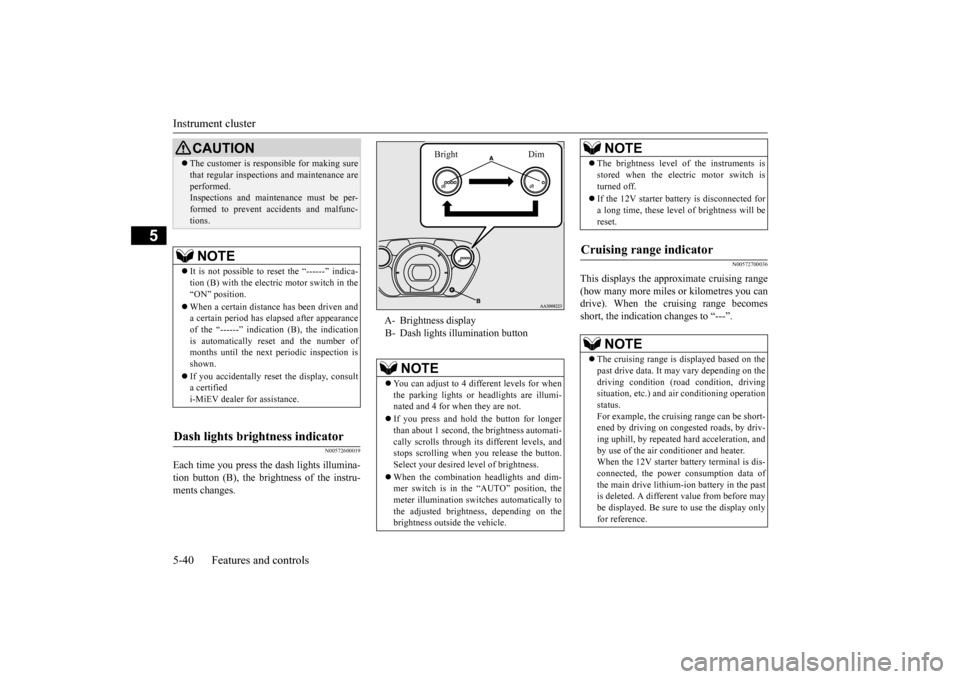
N00572600019
Each time you press the
dash lights illumina-
tion button (B), the brightness of the instru- ments changes.
N00572700036
This displays the approximate cruising range(how many more miles
or kilometres you can
drive). When the cruising range becomes short, the indicatio
n changes to “---”.
CAUTIONThe customer is responsible for making sure that regular inspections
and maintenance are
performed.Inspections and mainte
nance must be per-
formed to prevent accidents and malfunc- tions.NOTE
It is not possible to re
set the “------” indica-
tion (B) with the electric motor switch in the “ON” position. When a certain distance has been driven and a certain period has elapsed after appearance of the “------” indicati
on (B), the indication
is automatically re
set and the number of
months until the next
periodic inspection is
shown. If you accidentally reset
the display, consult
a certified i-MiEV dealer for assistance.
Dash lights brightness indicator
A- Brightness display B- Dash lights illumination button
NOTE
You can adjust to 4 different levels for when the parking lights or
headlights are illumi-
nated and 4 for when they are not. If you press and hold the button for longer than about 1 second, the brightness automati- cally scrolls through its different levels, andstops scrolling when you release the button. Select your desired
level of brightness.
When the combination headlights and dim- mer switch is in the “AUTO” position, the meter illumination switches automatically tothe adjusted brightne
ss, depending on the
brightness outsi
de the vehicle.
Bright Dim
The brightness level
of the instruments is
stored when the electric motor switch isturned off. If the 12V starter battery is disconnected for a long time, these level of brightness will bereset.
Cruising range indicator
NOTE
The cruising range is displayed based on the past drive data. It ma
y vary depending on the
driving condition (road condition, driving situation, etc.) and
air conditioning operation
status.For example, the cruising range can be short- ened by driving on congested roads, by driv- ing uphill, by repeated ha
rd acceleration, and
by use of the air cond
itioner and heater.
When the 12V starter battery terminal is dis- connected, the power consumption data of the main drive lithium-ion battery in the pastis deleted. A differen
t value from before may
be displayed. Be sure
to use the display only
for reference.NOTE
BK0220401US.book 40 ページ 2015年6月3日 水曜日 午前7時42分
Page 152 of 296
Indicators 5-44 Features and controls
5
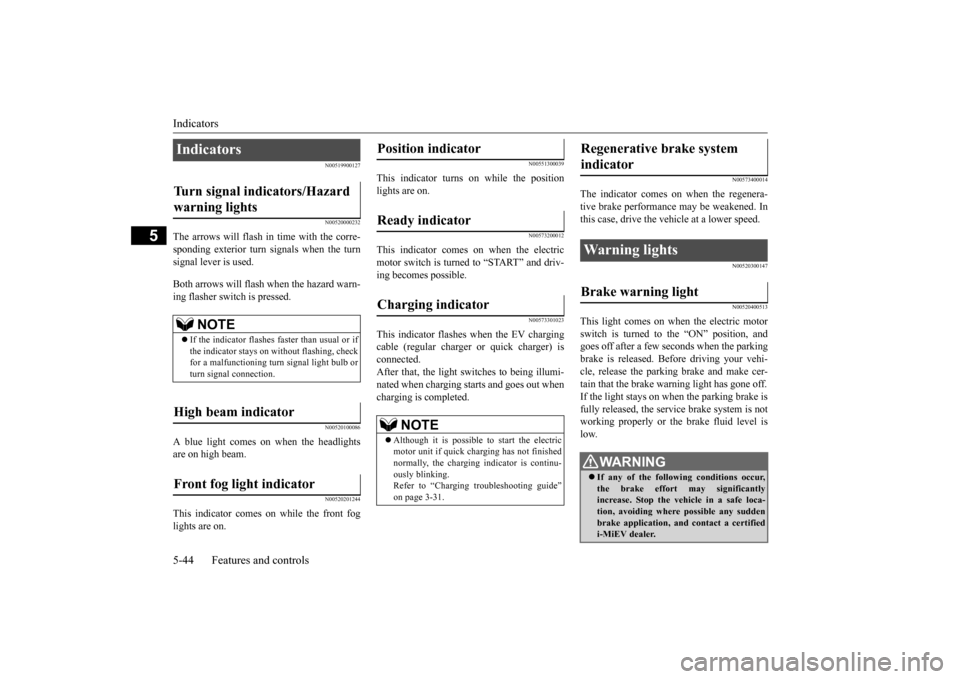
N00519900127 N00520000232
The arrows will flash in time with the corre- sponding exterior turn signals when the turnsignal lever is used. Both arrows will flash
when the hazard warn-
ing flasher swit
ch is pressed.
N00520100086
A blue light comes on when the headlights are on high beam.
N00520201244
This indicator comes on while the front foglights are on.
N00551300039
This indicator turns on while the position lights are on.
N00573200012
This indicator comes on when the electricmotor switch is turned to “START” and driv- ing becomes possible.
N00573301023
This indicator flashes when the EV chargingcable (regular charger
or quick charger) is
connected. After that, the light switches to being illumi-nated when charging starts and goes out when charging is completed.
N00573400014
The indicator comes on when the regenera- tive brake performance may be weakened. Inthis case, drive the vehicle at a lower speed.
N00520300147 N00520400513
This light comes on when the electric motor switch is turned to the “ON” position, and goes off after a few seconds when the parkingbrake is released. Befo
re driving your vehi-
cle, release the parki
ng brake and make cer-
tain that the brake warning light has gone off.If the light stays on when the parking brake is fully released, the service brake system is not working properly or the brake fluid level islow.
Indicators Turn signal indicators/Hazard warning lights
NOTE
If the indicator flashes faster than usual or if the indicator stays on wi
thout flashing, check
for a malfunctioning turn signal light bulb orturn signal connection.
High beam indicator Front fog light indicator
Position indicator Ready indicator Charging indicator
NOTE
Although it is possible to
start the electric
motor unit if quick charging has not finishednormally, the charging indicator is continu- ously blinking. Refer to “Charging
troubleshooting guide”
on page 3-31.
Regenerative brake system indicator Warning lights Brake warning light
WA R N I N G If any of the follow
ing conditions occur,
the brake effort
may significantly
increase. Stop the vehicle in a safe loca- tion, avoiding where possible any suddenbrake application, a
nd contact a certified
i-MiEV dealer.
BK0220401US.book 44 ページ 2015年6月3日 水曜日 午前7時42分
Page 153 of 296
Warning lights
Features and controls 5-45
5
N00573500028
This light will illuminate when there is a problem with the charging system for the 12Vstarter battery. Normally, when the electric motor switch is turned to the “ON” position, this light will
illuminate. Then, when the electric motor unit is started and the ready indicator illuminates,the light will go out.
N00520900316
This light comes on when any door or liftgate is open or not completely closed. When the vehicle is moving at more than 5mph (8 km/h) and any door or liftgate is open or ajar, a tone will sound 16 times and the warning light will fl
ash 16 times to inform
the driver that a door or liftgate is not prop- erly shut.
N00573600029
This warning light will illuminate when there is a problem with a high voltage component. Refer to “Service prec
autions” on page 9-2.
• The brake warning light does not come on when the electric motor switch isturned to the “ON” position.• The brake warning light does not illumi-nate while the parking brake is appliedand the electric motor switch is in the “ON” position. • The brake warning
light stays on when
the parking brake is not applied.NOTE
When the brake warning light illuminates, the warning buzzer may also sound. When the brake pedal has been repeatedly depressed over a short period of time, the brake warning light may come on and thebrake warning buzzer may sound. The ser- vice brake system is working normally, if the warning light goes out and the buzzer stopssounding in a few seconds.
12V starter battery charging system warning light
WA R N I N G
CAUTION If the warning light stays on after the ready indicator illuminates, there may be a prob-lem with the charging system for the 12V starter battery.• Immediately park your
vehicle in a safe
place and contact a cert
ified i-MiEV dealer.
• Do not charge the
12V starter battery.
Door-ajar warning light and buzzer
CAUTION Before driving, make sure that the door-ajar warning light is off.
NOTE
The flashing of the warning light and the buzzer can be disabled.For further details, plea
se contact a certified
i-MiEV dealer. When the driver’s door is open, the door-ajar warning buzzer does not sound because the electric motor reminder sounds instead.
Electric motor unit warning light
CAUTION If this light illuminates while driving, imme- diately park your vehicle in a safe place andcontact a certified i-MiEV dealer.
BK0220401US.book 45 ページ 2015年6月3日 水曜日 午前7時42分
Page 154 of 296
Combination headlights and dimmer switch 5-46 Features and controls
5
N00573700020
If the warning light illuminates when the out- side air temperature is very low, move thevehicle to a warmer location.
If the warning light illuminates after the vehi- cle has been driven continuously uphill orwhen the outside air temperature is very high, stop the vehicle in a safe place so the electric motor unit and/or the main drive lithium-ionbattery can cool down. When they have cooled down, the warning light will go off. If the warning light does not turn off, contact acertified i-MiEV dealer.
N00522501805
Rotate the switch to operate the lights.
Power down warning light
If this warning light illumi-nates, the power provided by the electric motor will be reduced and the vehicle willbe only able to move at low speeds. This warning light will illu-minate; When the energy level in the main drive lithium-ion battery is near empty. When temperature of the electric motor unit or the main drive lithium-ion battery is too high or toolow. When voltage of the main drive lithium-ion batterybecomes low.
If the energy level gauge shows 0 bar, the main drivelithium-ion battery is near empty and must be charged as soon as possible. Refer to“Charging” on page 3-13.
NOTE
When the power down warning light illumi- nates, avoid rapid st
arts and aggressive
acceleration. Illumination of the
power down warning
light does not indica
te a malfunction.
If the power down warn
ing light illuminates
while the air conditioning is used, the cool- ing or heating may stop operating and only the fan will operate.
Combination headlights and dimmer switch Headlights
NOTE
Do not leave the headli
ghts and other lights
on for a long period of time while the readyindicator is not illu
minated. A run down 12V
starter battery
could result.
When it rains, or wh
en the vehicle has been
washed, the inside of the lens sometimes becomes foggy. This is the same as whenwindow glass mists up on a humid day, and does not indicate a pr
oblem. When the light
is switched on, the heat will dry out the fog.However, if water collects inside the light, have it checked by a certified i-MiEV dealer.
BK0220401US.book 46 ページ 2015年6月3日 水曜日 午前7時42分
Page 167 of 296

Bluetooth® 2.0 interface (if so equipped)
Features and controls 5-59
5
5. The voice guide will prompt for phrase 1. Repeat the correspondi
ng phrase listed in
table “Enrollment commands” on page 5-73. The system will register your voice andthen move on to the registration of the next command. Continue the process until all phrases have been registered. 6. When all enrollment commands have been read out, the voice guide will say “Speaker enrollment is complete.” The system will then end the speaker enroll-ment process and return to the main menu.
N00564901108
You can turn a voice model registered with the speaker enrollment function on and off whenever you want. You can also retrain the system.Use the following procedure to perform these actions. 1. Press the PICK-UP button. 2. Say “Voice training.” 3. If you have completed a speaker enroll- ment process once already, the voiceguide will say eith
er “Enrollment is
enabled. Would you like to disable or retrain?” or “Enrol
lment is disabled.
Would you like to enable or retrain?” 4. When enrollment is
“enabled,” the voice
model is on; when enrollment is “dis-abled,” the voice model is off. Say the command that fits your needs. Say “Retrain” to start the speaker enroll-ment process and recreate a new voice model. (Refer to “Speaker enrollment” on page 5-58.
)
N00565001278
Before you can make
or receive hands-free
calls or play music using the Bluetooth
® 2.0
interface function, you must pair the Blue- tooth
® device and Bluetooth
® 2.0 interface.
Up to 7 Bluetooth
® devices can be paired
with the Bluetooth
® 2.0 interface.
If multiple paired Bluetooth
® devices are
available in the vehicl
e, the cellular phone or
music player most recent
ly connected is auto-
matically connected
to the Bluetooth
® 2.0
interface. You can also change a Bluetooth
® device to
be connected.
NOTE
To repeat the most recent voice training com- mand, press and release the SPEECH button. If you press the HANG-UP button anytime during the process, the
system will beep and
stop the speaker enrollment process.NOTE
Completing the speaker enrollment process will turn on the voice
model automatically.
The commands “Help” a
nd “Cancel” will not
work in this mode.
Enabling and disabling the voice model and retraining
Connecting the Bluetooth
® 2.0
interface and Bluetooth
® device
NOTE
Pairing is required only when the device is used for the first time. Once the device has been paired with
the Bluetooth
® 2.0 inter-
face, all you need is to
bring the device into
the vehicle next time
and the device will
connect to the Bluetooth
® 2.0 interface auto-
matically (if supported by the device).
BK0220401US.book 59 ページ 2015年6月3日 水曜日 午前7時42分
Page 168 of 296

Bluetooth® 2.0 interface (if so equipped) 5-60 Features and controls
5
To pair a Bluetooth
® device with the Blue-
tooth
® 2.0 interface, foll
ow the steps below.
1. Stop your vehicle in a safe area, put the selector lever in the “P” (PARK) position,and then pull the parking brake lever. 2. Press the PICK-UP button. 3. Say “Setup.” 4. Say “Pairing Options.”5. The voice guide will say “Select one of the following: pair, edit, delete, or list.”
say “Please say a 4-
digit pairing code.” Say a 4-digit number.When the confirmation function is on, the system will confirm
whether the number
said is acceptable. Answer “Yes.” selection.
7. The voice guide will say “Start pairing procedure on the device. See the device manual for instructions.” Enter in the Bluetooth
® device the 4-digit number you
have registered in Step 6.
To p a i r
NOTE
You cannot pair any Bluetooth
® device with
the Bluetooth
® 2.0 interface unless the vehi-
cle is parked. Before paring a Bluetooth
®
device with the Bluetooth
® 2.0 interface,
confirm that the vehicle is parked in a safe location.
NOTE
If 7 devices have alre
ady been paired, the
voice guide will sa
y “Maximum devices
paired” and then the system will end thepairing process. To re
gister a ne
w device,
delete one device and th
en repeat the pairing
process.(Refer to
Page 193 of 296
Vehicle preparatio
n before driving
Driving safety 6-3
6
from moving forward
and possibly interfering
with the operation of the pedals, Mitsubishigenuine floor mats are recommended.
N00628700063
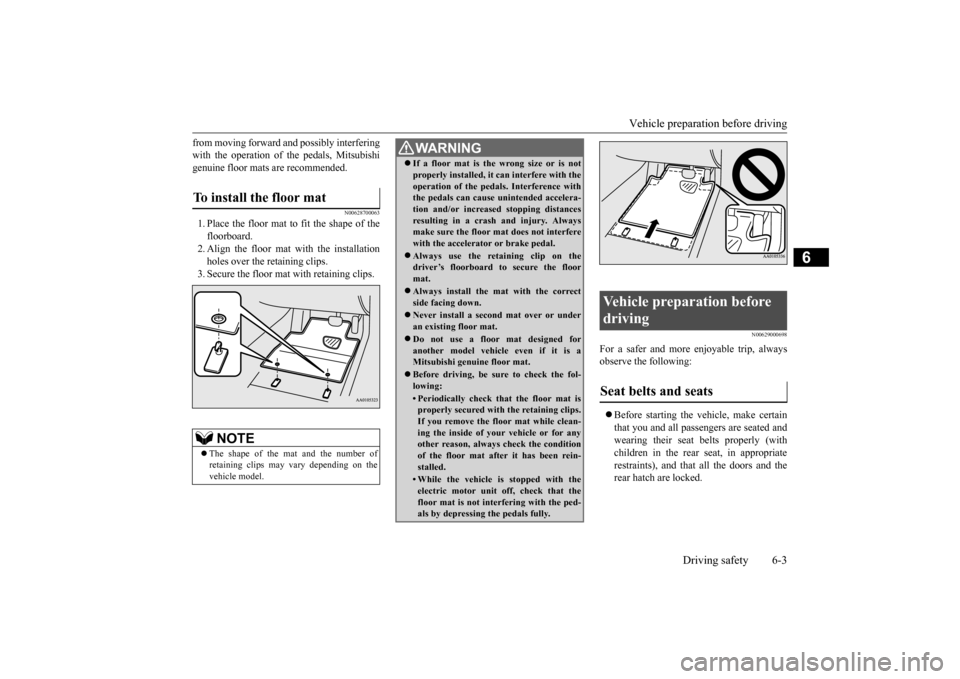
1. Place the floor mat to fit the shape of thefloorboard. 2. Align the floor mat with the installation holes over the retaining clips. 3. Secure the floor mat with retaining clips.
N00629000698
For a safer and more enjoyable trip, always observe the following: Before starting the ve
hicle, make certain
that you and all passengers are seated andwearing their seat belts properly (with children in the rear seat, in appropriate restraints), and that all the doors and therear hatch are locked.
To install the floor mat
NOTE
The shape of the mat and the number of retaining clips may
vary depending on the
vehicle model.
WA R N I N G If a floor mat is the
wrong size or is not
properly installed, it can interfere with theoperation of the pedals. Interference withthe pedals can cause unintended accelera- tion and/or increased stopping distances resulting in a cras
h and injury. Always
make sure the floor mat does not interfere with the accelerator or brake pedal. Always use the reta
ining clip on the
driver’s floorboard to secure the floor mat. Always install the mat with the correct side facing down. Never install a second
mat over or under
an existing floor mat. Do not use a floor mat designed for another model vehicle even if it is aMitsubishi genuine floor mat. Before driving, be sure to check the fol- lowing:• Periodically check that the floor mat isproperly secured with the retaining clips. If you remove the floor mat while clean- ing the inside of you
r vehicle or for any
other reason, always check the condition of the floor mat after it has been rein- stalled.• While the vehicle is stopped with theelectric motor unit off, check that thefloor mat is not interfering with the ped- als by depressing the pedals fully.
Vehicle preparation before driving Seat belts and seats
BK0220401US.book 3 ページ 2015年6月3日 水曜日 午前7時42分
Page 194 of 296

Safe driving techniques 6-4 Driving safety
6
Move the driver’s seat as far backward as possible, while still
keeping good visibil-
ity, and good control of the steering wheel, brakes, accele
rator, and controls.
Check the instrument panel indicators forany possible problem. Move the front passe
nger seat as far back
as possible. Make sure that infa
nts and small children
are properly restrained in accordance with all laws and regulations.
Check these by selecti
ng the defroster mode,
and set the blower swit
ch on high. You should
be able to feel the air blowing against the windshield. (Refer to “Defrosting or defogging the wind- shield and door windows” on page 7-9.) Check all the tires for heavy tread wear or uneven wear patterns.
Look for stones, nails,
glass, or other objects
stuck in the tread. Look
for any tread cuts or sidewall cracks. Check the wheel nuts for tightness, and the tires for proper pressures. Replace your tires beforethey are heavily worn out.
As your vehicle is equi
pped with a tire pres-
sure monitoring system, there is a risk ofdamage to the tire inflation pressure sensors when the tire is replaced on the rim. Tire replacement should, th
erefore, be performed
only by a certified i-MiEV dealer. Have someone watch while you turn all the exterior lights on and off. Also check the turn signal indicators and
high-beam indicators on
the instrument panel. Check the ground under the vehicle after parking overnight, for wa
ter, oil, or other
leaks. Make sure all the fluid levels are cor- rect.
N00629200124
Even this vehicle’s safety equipment, andyour safest driving, cannot guarantee that youcan avoid an accident or injury. However, if you give extra attention to the following areas, you can better protect yourself andyour passengers:
Drive defensively. Be aware of traffic, road and weather conditions. Leave plentyof stopping distance between your vehicle and the vehicle ahead. Before changing lanes, check your mir- rors and use your turn signal light. While driving, watch the behavior of other drivers, bicyc
lists, and pedestrians.
Always obey applicable
laws and regula-
tions. Be a polite and alert driver. Always leave room for unexpected events, such as sudden braking.
N00629400416
Check the 12V starter battery, including terminals and cables. During extremely cold weather, the 12V starter battery willnot be as strong and
its power level may
drop. Before driving the vehicle, check to see ifthe headlights are as bright as normal. Charge or replace the 12V starter battery if necessary. During extreme coldweather, it is possibl
e that a very low 12V
starter battery could freeze.
Defrosters Tires
Lights Fluid leaks Safe driving techniques
Driving during cold weather
BK0220401US.book 4 ページ 2015年6月3日 水曜日 午前7時42分