2017 MERCEDES-BENZ S CLASS fuse
[x] Cancel search: fusePage 5 of 382

Maintenance and care ...................... 312
Engine compartment ........................... 312
ASSYST PLUS ...................................... 318
Care ..................................................... 319
Breakdown assistance ..................... 327
Where will I find...? .............................. 327
Flat tire ................................................ 327
Battery (vehicle) .................................. 332
Jump-starting ....................................... 335
Towing and tow-starting ...................... 338
Fuses .................................................. .3 40
Wheels and tires ............................... 343
Important safety notes ........................ 343
Operation ............................................ 343
Winter operation .................................. 345
Tire pressure ....................................... 346
Loading the vehicle .............................. 353
All about wheels and tires ................... 356
Changing a wheel ................................ 362
Wheel-tire combination ........................ 367
Technical data ................................... 369
Information regarding technical data ... 369
Vehicle electronics .............................. 369
Identification plates ............................ .3 70
Service products and filling capaci-
ties ...................................................... 371
Vehicle data ......................................... 376 Contents 3
Page 13 of 382

Display message ............................ 228
Function/notes ................................ 71
General notes .................................. 71
Important safety information ........... 71
Trailer stabilization ........................... 72
Warning lamp ................................. 261
ETS/4ETS (Electronic Traction Sys-
tem) ...................................................... 71
Exhaust
see Exhaust pipe
Exhaust check ................................... 165
Exhaust pipe
Cleaning ......................................... 323
Exhaustive discharging (high-volt-
age battery) ....................................... 334
Exterior lighting
Cleaning ......................................... 322
Setting options .............................. 124
see Lights
Exterior mirrors
Adjusting ....................................... 117
Dipping (automatic) ....................... 118
Folding in/out (automatically) ....... 118
Folding in/out (electrically) ........... 118
Out of position (troubleshooting) ... 118
Setting ........................................... 118
Storing settings (memory func-
tion) ............................................... 120
Storing the parking position .......... 119
External audio source
Connecting .................................... 279
Eyeglasses compartment ................. 282
F
Favorites
Overview ........................................ 273
Features ............................................. 290
Filling capacities (Technical data) ... 371
Flat tire
Changing a wheel/mounting the
spare wheel ................................... 362
MOExtended tires .......................... 328
Preparing the vehicle ..................... 327
TIREFIT kit ...................................... 329
Floormats ........................................... 310
Folding table ...................................... 284 Frequencies
Mobile phone ................................. 369
Two-way radio ................................ 369
Fuel
Additives ........................................ 373
Consumption statistics .................. 215
Displaying the current consump-
tion ................................................ 214
Displaying the range ...................... 214
Driving tips .................................... 165
Fuel gauge ....................................... 35
Grade (gasoline) ............................ 372
Important safety notes .................. 372
Problem (malfunction) ................... 161
Refueling ........................................ 159
Tank content/reserve fuel ............. 372
Fuel level
Calling up the range (on-board
computer) ...................................... 214
Fuel tank
Capacity ........................................ 372
Problem (malfunction) ................... 161
Fuses
Allocation chart ............................. 340
Before changing ............................. 341
Dashboard fuse box ....................... 341
Fuse box in the engine compart-
ment .............................................. 341
Fuse box in the front-passenger
footwell .......................................... 341
Fuse box in the trunk ..................... 342
Important safety notes .................. 340
G
Garage door opener
Clearing the memory ..................... 310
General notes ................................ 307
Important safety notes .................. 308
Opening/closing the garage doo r. .3 10
Problems when programming ....... .3 09
Programming (button in the rear-
view mirror) ................................... 308
Synchronizing the rolling code ....... 309
Gasoline ............................................. 372
Gear indicator (on-board com-
puter, Mercedes-AMG vehicles) ....... 226
Genuine parts ...................................... 26Index 11
Page 139 of 382
function which has not been changed manually,
however, continues to be controlled automati-
cally. When the manually set function switches
back to automatic mode, the AUTO display
reappears in the rear-compartment display.
Adjusting the climate mode settings In automatic mode you can select the following
airflow settings for the driver's and front-
passenger areas:
FOCUS high airflow, slightly cooler setting
MEDIUM medium airflow, standard setting
DIFFUSE low airflow, slightly warmer and draft-
free settingX
To set: set the climate mode using the mul-
timedia system ( Y
page 274).
Setting the temperature
General notes
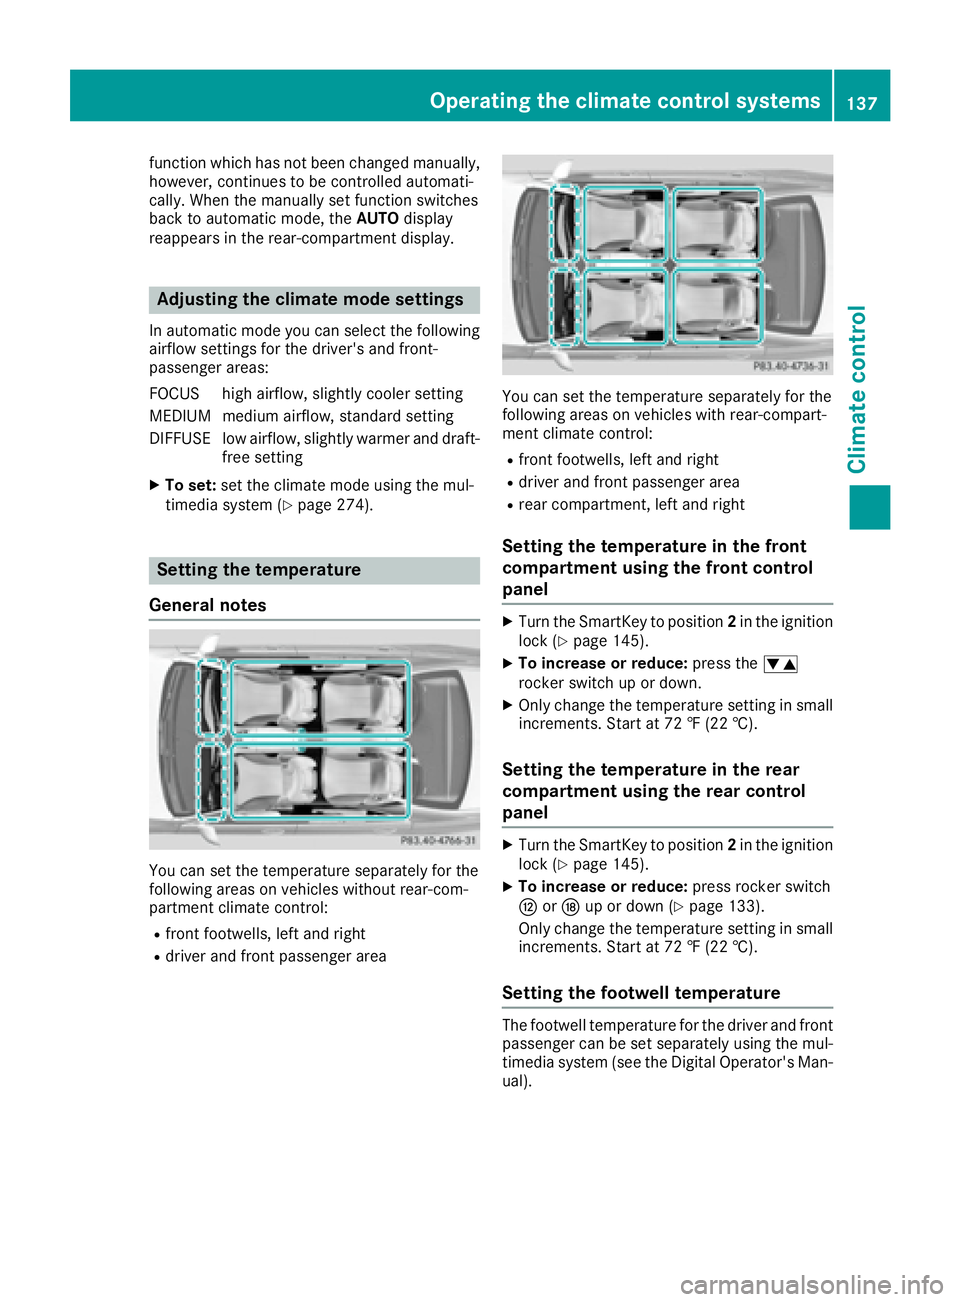
You can set the temperature separately for the
following areas on vehicles without rear-com-
partment climate control: R
front footwells, left and right R
driver and front passenger area You can set the temperature separately for the
following areas on vehicles with rear-compart-
ment climate control: R
front footwells, left and right R
driver and front passenger area R
rear compartment, left and right
Setting the temperature in the front
compartment using the front control
panel X
Turn the SmartKey to position 2 in the ignition
lock ( Y
page 145). X
To increase or reduce: press the �
Page 176 of 382
gram, the vehicle accelerates more gently. This
setting is recommended in stop-and-start traf-
fic.
Mercedes-AMG vehicles: DISTRONIC PLUS
supports a sporty driving style when you select
the S or M drive program ( Y
page 155). Accel-
eration behind the vehicle in front or to the set
speed is then noticeably more dynamic. When
you select the C drive program, the vehicle
accelerates more gently. This setting is recom-
mended in stop-and-start traffic.
Changing lanes DISTRONIC PLUS aids you when switching to
the overtaking lane, if: R
you are driving faster than 45 mph (70 km/h) R
you switch on the appropriate turn signal R
DISTRONIC PLUS does not detect a danger of
a collision
If these conditions are fulfilled, your vehicle is
accelerated. Acceleration will be interrupted if
changing lanes takes too long or if the distance
between your vehicle and the vehicle in front
becomes too small.
When you change lanes, DISTRONIC PLUS mon-
itors the left lane (on left-hand-drive vehicles) or
the right lane (on right-hand-drive vehicles).
Stopping
G WARNING
When leaving the vehicle, even if it is braked
only by DISTRONIC PLUS, it could roll away if: R
there is a malfunction in the system or in
the voltage supply. R
DISTRONIC PLUS has been deactivated
with the cruise control lever, e.g. by a vehi-
cle occupant or from outside the vehicle. R
the electrical system in the engine com-
partment, the battery or the fuses have
been tampered with. R
the battery is disconnected. R
the accelerator pedal has been depressed,
e.g. by a vehicle occupant.
There is a risk of an accident.
If you wish to exit the vehicle, always turn off
DISTRONIC PLUS and secure the vehicle
against rolling away. For further information on deactivating
DISTRONIC PLUS ( Y
page 176).
If DISTRONIC PLUS detects that the vehicle in
front has stopped, it will cause your vehicle to
brake and come to a halt.
Once your vehicle is stationary, it remains sta-
tionary and you do not need to depress the
brake.
After a time, the electric parking brake secures
the vehicle and relieves the service brake.
Depending on the specified minimum distance,
your vehicle will come to a standstill at a suffi-
cient distance behind the vehicle in front. The
specified minimum distance is set using the
control on the cruise control lever.
When DISTRONIC PLUS is activated, the trans-
mission is shifted automatically to position P if:R
the driver's seat belt is not fastened and the
driver's door is open. R
the engine is switched off, unless it is auto-
matically switched off by the ECO start/stop
function.
The electric parking brake secures the vehicle
automatically if DISTRONIC PLUS is activated
when the vehicle is stationary and: R
a system malfunction occurs. R
the power supply is not sufficient.
If a malfunction occurs, the transmission may
also shift into position P automatically.
Setting a speed X
Push the cruise control lever upwards �C for a
higher speed or down �D for a lower speed.X
To adjust the set speed in1 mphincre-
ments (1 km/hincrements): briefly push
the cruise control lever up �C or down �D to
the pressure point.
Every time the cruise control lever is pressed
up �C or down �D the last speed stored is
increased or reduced. X
To adjust the set speed in5 mphincre-
ments (10 km/hincrements): briefly push
the cruise control lever up �C or down �D
beyond the pressure point.
Every time the cruise control lever is pressed
up �C or down �D , the last speed stored is
increased or reduced.
i If you accelerate to overtake, DISTRONIC
PLUS adjusts the vehicle's speed back to the174
Driving systems
Driving and parking
Page 181 of 382
Important safety notes
G WARNIN G
When leaving th e vehicle, it can still rol l away
despit e bein g braked by th e HOLD function if:R
there is a malfunction in th e system or in
th e voltag e supply.R
th e HOLD function has been deactivated by
pressin g th e accelerato r pedal or th e brak e
pedal , e.g. by a vehicl e occupant .R
th e electrical system in th e engin e com-
partment, th e battery or th e fuses have
been tampered with. R
th e battery is disconnected
Ther e is a ris k of an accident.
If you wish to exit th e vehicle, always tur n off
th e HOLD function and secure th e vehicl e
against rollin g away.
Further information on deactivating th e HOLD
function ( Y
page 179).
! When DISTRONI C PLU S or th e HOLD func-
tion is activated, th e vehicl e brakes automat -
ically in certain situations.
To avoi d damag e to th e vehicle, deactivat e
DISTRONI C PLU S and th e HOLD function in
th e followin g or similar situations:R
when towin g th e vehicl eR
in th e car wash
Activation conditions You can activat e th e HOLD function if all of th e
followin g condition s are fulfilled :R
th e vehicl e is stationary.R
th e engin e is runnin g or if it has been auto -
matically switched off by th e ECO start/sto p
function .R
th e driver' s door is closed or your seat belt is
fastened. R
th e electric parking brak e is released.R
th e transmission is in position D , R or N .R
DISTRONI C PLU S is deactivated. Activating the HOLD function X
Mak e sur e that th e activation condition s are
met . X
Depress th e brak e pedal .X
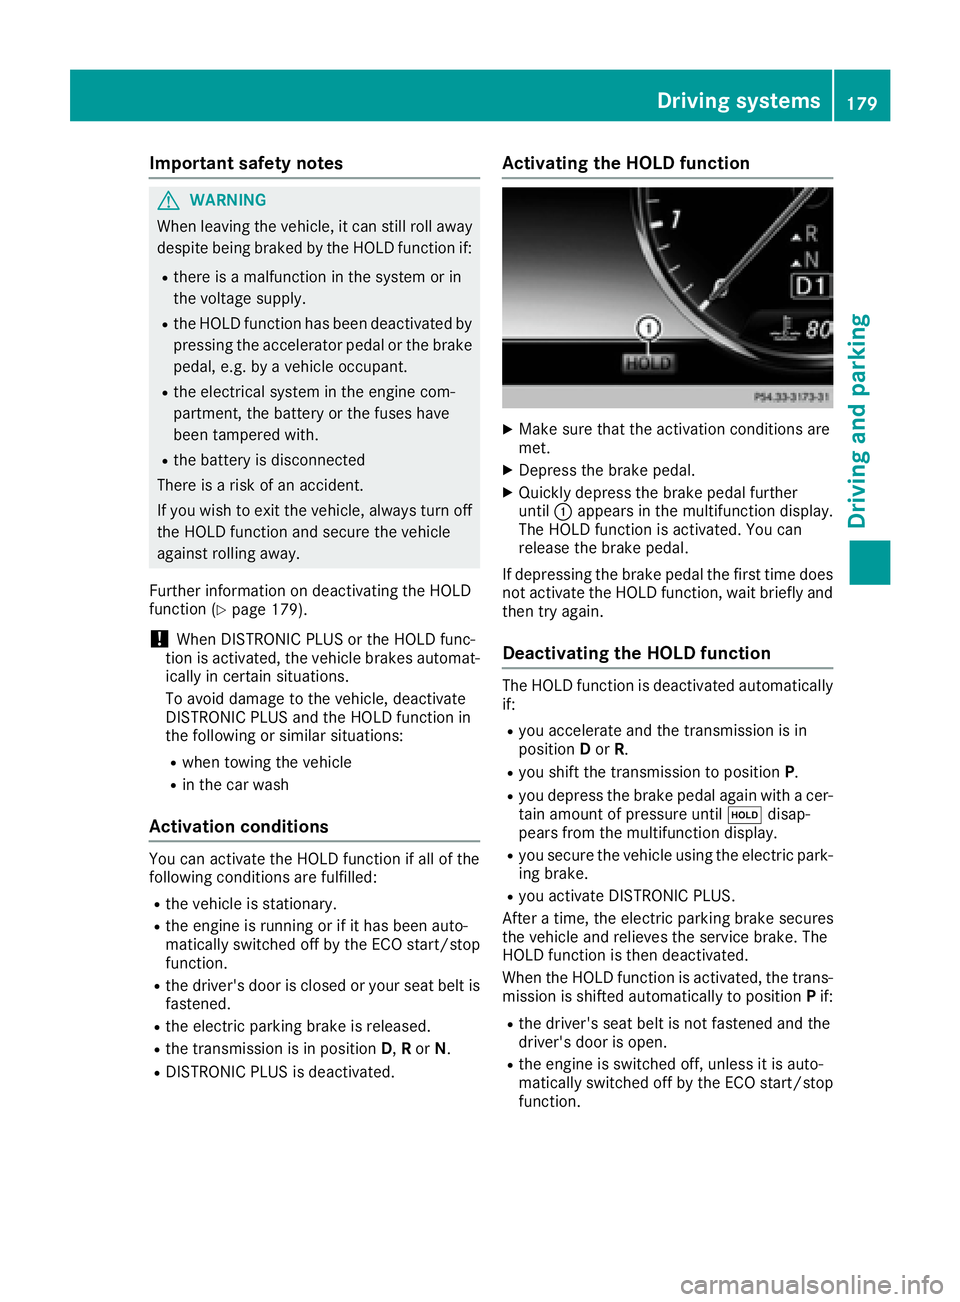
Quickly depress th e brak e pedal further
until �C appear s in th e multifunction display.
The HOLD function is activated. You can
release th e brak e pedal .
If depressing th e brak e pedal th e first time does
no t activat e th e HOLD function , wait briefly and
then tr y again .
Deactivating the HOLD function The HOLD function is deactivated automatically
if: R
you accelerate and th e transmission is in
position D or R . R
you shif t th e transmission to position P .R
you depress th e brak e pedal again wit h a cer-
tai n amoun t of pressur e until �
Page 190 of 382
Active Parking Assist will only detect parking
spaces: R
parallel or at right angles to the direction of
travel R
that are parallel to the direction of travel and
at least 59 in (1.5 m) wid eR
that are parallel to the direction of travel and
at least 39.5 in (1.0 m) longer than your vehi-
cle R
that are at right angles to the direction of
travel and at least 39.5 in (1.0 m) wider than
your vehicle
i Note that Active Parking Assist cannot
measure the size of a parking space if it is at
right angles to the direction of travel. You will
need to judge whether your vehicle will fit into
the parking space.
When driving at speeds below 19 mph
(30 km/h), you will see the parking symbol as a
status indicator in the instrument cluster. When
a parking space has been detected, an arrow
towards the right or the left also appears. By
default, Active Parking Assist only displays park-
ing spaces on the front-passenger side. Parking
spaces on the driver's side are displayed as
soon as the turn signal on the driver's side is
activated. When parking on the driver's side,
this must remain switched on until you acknowl-
edge the use of Active Parking Assist by press-
ing the �v button on the multifunction steer-
ing wheel. The system automatically determines
whether the parking space is parallel or at right
angles to the direction of travel.
A parking space is displayed while you are driv-
ing past it, and until you are approximately 50 ft
(15 m) away from it.
Parking
G WARNING
If you leave the vehicle when it is only being
braked by Active Parking Assist it could roll
away if: R
there is a malfunction in the system or in
the voltage supply. R
the electrical system in the engine com-
partment, the battery or the fuses have
been tampered with. R
the battery is disconnected. R
the accelerator pedal has been depressed,
e.g. by a vehicle occupant.
There is a risk of an accident.
Before leaving the vehicle, always secure it
against rolling away.
i When PARKTRONIC detects obstacles,
Active Parking Assist brakes automatically
during the parking process. You are respon-
sible for braking in good time. X
Stop the vehicle when the parking space sym-
bol shows the desired parking space in the
instrument cluster. X
Shift the transmission to position R .
The Start Park Assist? Yes: OK No: �8
message appears in the multifunction display. X
To cancel the procedure: press the �8
button on the multifunction steering wheel or
pull away.
or X
To park using Active Parking Assist: press
the �v button on the multifunction steering
wheel.
The Park Assist Active Accelerate
and Brake Observe Surroundings mes-
sage appears in the multifunction display. X
Let go of the multifunction steering wheel. X
Back up the vehicle, being ready to brake at all
times. When backing up, drive at a speed
below approximately 6 mph (10 km/h). Oth-
erwise Active Parking Assist will be canceled.
Active Parking Assist brakes the vehicle to a
standstill when the vehicle approaches the
rear border of the parking space.
Maneuvering may be required in tight parking
spaces.
The Park Assist Active Select D Observe
Surroundings message appears in the multi-
function display. X
Shift the transmission to position D while the
vehicle is stationary.
Active Parking Assist immediately steers in
the other direction.188
Driving systems
Driving and parking
Page 342 of 382
the combination switch, the hazard warning
lamp starts flashing again.
Transporting the vehicle
General notes
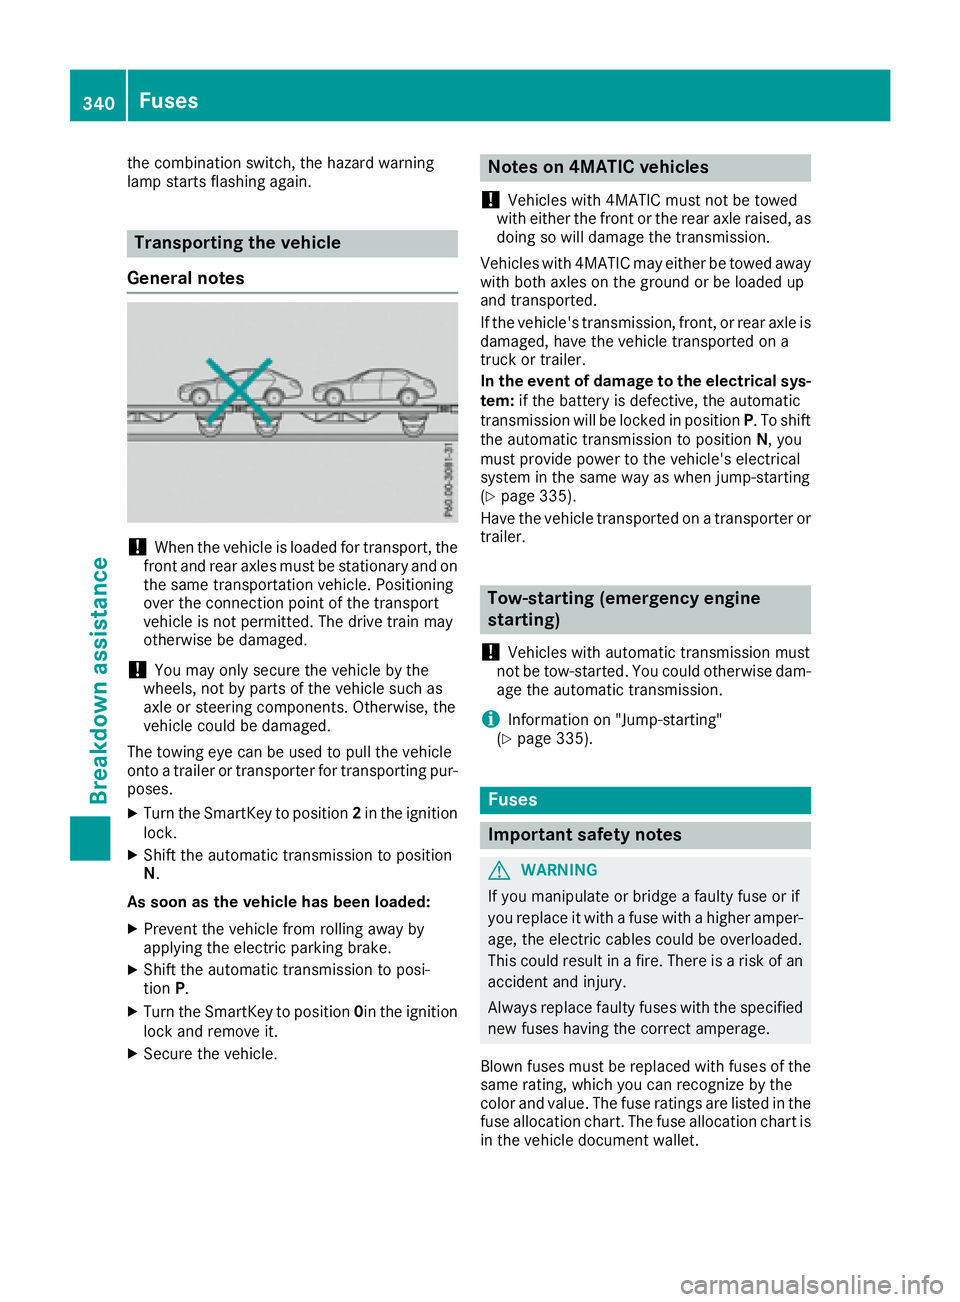
! When the vehicle is loaded for transport, the
front and rear axles must be stationary and on
the same transportation vehicle. Positioning
over the connection point of the transport
vehicle is not permitted. The drive train may
otherwise be damaged.
! You may only secure the vehicle by the
wheels, not by parts of the vehicle such as
axle or steering components. Otherwise, the
vehicle could be damaged.
The towing eye can be used to pull the vehicle
onto a trailer or transporter for transporting pur-
poses. X
Turn the SmartKey to position 2 in the ignition
lock. X
Shift the automatic transmission to position
N .
As soon as the vehicle has been loaded: X
Prevent the vehicle from rolling away by
applying the electric parking brake. X
Shift the automatic transmission to posi-
tion P .X
Turn the SmartKey to position 0 in the ignition
lock and remove it. X
Secure the vehicle. Notes on 4MATIC vehicles
! Vehicles with 4MATIC must not be towed
with either the front or the rear axle raised, as
doing so will damage the transmission.
Vehicles with 4MATIC may either be towed away
with both axles on the ground or be loaded up
and transported.
If the vehicle's transmission, front, or rear axle is
damaged, have the vehicle transported on a
truck or trailer.
In the event of damage to the electrical sys-
tem: if the battery is defective, the automatic
transmission will be locked in position P . To shift
the automatic transmission to position N , you
must provide power to the vehicle's electrical
system in the same way as when jump-starting
( Y
page 335).
Have the vehicle transported on a transporter or
trailer.
Tow-starting (emergency engine
starting)
! Vehicles with automatic transmission must
not be tow-started. You could otherwise dam-
age the automatic transmission.
i Information on "Jump-starting"
( Y
page 335).
Fuses
Important safety notes
G WARNING
If you manipulate or bridge a faulty fuse or if
you replace it with a fuse with a higher amper-
age, the electric cables could be overloaded.
This could result in a fire. There is a risk of an
accident and injury.
Always replace faulty fuses with the specified
new fuses having the correct amperage.
Blown fuses must be replaced with fuses of the
same rating, which you can recognize by the
color and value. The fuse ratings are listed in the
fuse allocation chart. The fuse allocation chart is
in the vehicle document wallet.340
Fuses
Breakdown assistance
Page 343 of 382

The fuses in your vehicle serve to close down
faulty circuits. If a fuse blows, all the compo-
nents on the circuit and their functions stop
operating.
If a newly inserted fuse also blows, have the
cause traced and rectified at a qualified special-
ist workshop, e.g. an authorized Mercedes-Benz
Center.
! Only use fuses that have been approved for
Mercedes-Benz vehicles and which have the
correct fuse rating for the system concerned.
Otherwise, components or systems could be
damaged.
! Make sure that no moisture can enter the
fuse box when the cover is open.
! When closing the cover, make sure that it is
lying correctly on the fuse box. Moisture seep-
ing in or dirt could otherwise impair the oper-
ation of the fuses.
Before changing a fuse Observe the important safety notes
( Y
page 340) X
Switch off the engine. X
Switch off all electrical consumers. X
Make sure that the ignition is switched off
( Y
page 145).
or X
When using the SmartKey, turn the SmartKey
to position 0 in the ignition lock and remove it
( Y
page 145). X
Secure the vehicle against rolling away
( Y
page 162).
All indicator lamps in the instrument cluster
must be off.
The fuses are located in various fuse boxes: R
Fuse box on the driver's side of the dashboard R
Fuse box in the front-passenger footwell R
Fuse box in the engine compartment on the
left-hand side of the vehicle, when viewed in
the direction of travel R
Fuse box in the trunk Dashboard fuse box The fuse box is under a cover on the side of the
dashboard. You can obtain further information
from an authorized Mercedes-Benz Center.
Fuse box in the front-passenger foot-
well X
Open the front-passenger door. X
Fold cover �C down and remove it.
Fuse box in the engine compartment
G WARNING
When the hood is open and the windshield
wipers are set in motion, you can be injured by
the wiper linkage. There is a risk of injury.
Always switch off the windshield wipers and
the ignition before opening the hood.
X
Open the hood ( Y
page 312).X
To open: release retaining clamps �C and
remove cover �D .Fuses 341
Breakdown assistance Z