2017 MERCEDES-BENZ S CLASS tire size
[x] Cancel search: tire sizePage 23 of 382

Maximum ....................................... 348
Not reached (TIREFIT) .................... 330
Notes ............................................. 347
Reached (TIREFIT) .......................... 331
Recommended .............................. .3 46
Using the TIREFIT kit ..................... .3 29
Tire pressure loss warning system
General notes ................................ 352
Important safety notes .................. 352
Restarting ...................................... 352
Tire pressure monitor
Checking the tire pressure elec-
tronically ........................................ 350
Function/notes ............................ .3 49
General notes ................................ 349
Important safety notes .................. 349
Radio type approval for the tire
pressure monitor ........................... 352
Restarting ...................................... 351
Warning lamp ................................. 267
Warning message .......................... 351
TIREFIT kit
Important safety notes .................. 329
Storage location ............................ 327
Tire pressure not reached .............. 330
Tire pressure reached .................... 331
Using ............................................. 329
Tires
Aspect ratio (definition) ................. 361
Average weight of the vehicle
occupants (definition) .................... 360
Bar (definition) ............................... 360
Changing a wheel .......................... 362
Characteristics .............................. 360
Checking ........................................ 343
Curb weight (definition) ................. 361
Definition of terms ......................... 360
Direction of rotation ...................... 363
Display message ............................ 252
Distribution of the vehicle occu-
pants (definition) ............................ 362
DOT (Department of Transporta-
tion) (definition) ............................. 360
DOT, Tire Identification Number
(TIN) ............................................... 360
GAWR (G ross Axl e Weight Rating)
(
definition) ..................................... 361 GVW (Gross Vehicle Weight) (def-
inition) ........................................... 361
GVWR (Gross Vehicle Weight Rat-
ing) (definition) .............................. 361
Important safety notes .................. 343
Increased vehicle weight due to
optional equipment (definition) ...... 361
Information on driving .................... 343
Kilopascal (kPa) (definition) ........... 361
Labeling (overview) ........................ 357
Load bearing index (definition) ...... 362
Load index ..................................... 359
Load index (definition) ................... 361
Maximum load on a tire (defini-
tion) ............................................... 361
Maximum loaded vehicle weight
(definition) ..................................... 361
Maximum permissible tire pres-
sure (definition) ............................. 361
Maximum tire load ......................... 359
Maximum tire load (definition) ....... 361
MOExtended tires .......................... 344
Optional equipment weight (defi-
nition) ............................................ 362
PSI (pounds per square inch) (def-
inition) ........................................... 361
Replacing ....................................... 362
Service life ..................................... 344
Sidewall (definition) ....................... 362
Snow chains .................................. 345
Speed rating (definition) ................ 361
Storing ........................................... 363
Structure and characteristics
(definition) ..................................... 360
Summer tires in winter .................. 345
Temperature .................................. 357
TIN (Tire Identification Number)
(definition) ..................................... 362
Tire bead (definition) ...................... 362
Tire pressure (definition) ................ 362
Tire pressures (recommended) ...... 361
Tire size (data) ............................... 367
Tire size designation, load-bearing
capacity, speed rating .................... 357
Tire trea d ....................................... 344
T ire
tread (definition) ..................... 362
Total load limit (definition) ............. 362
Traction ......................................... 356 Index 21
Page 26 of 382

Snow chains .................................. 345
Storing ........................................... 363
Tightening torque ........................... 367
Wheel size/tire size ....................... 367
Window curtain air bag
Display message ............................ 238
Operation ......................................... 50
Windows
see Side windows
Windshield
Defrosting ...................................... 139
Infrared reflective .......................... 311
Windshield washer fluid
see Windshield washer system
Windshield washer system
Adding washer fluid ....................... 317
Important safety notes .................. 375
Notes ............................................. 375
Windshield wipers
Problem (malfunction) ................... 131
Replacing the wiper blades ............ 129
Switching on/off ........................... 128
Winter driving
Important safety notes .................. 345
Slippery road surfaces ................... 168
Snow chains .................................. 345
Winter operation
Radiator cover ............................... 313
Summer tires ................................. 345
Winter tires
M+S tires ....................................... 345
Wiper blades
Cleaning ......................................... 322
Important safety notes .................. 129
Replacing ....................................... 129
Wooden trim (cleaning instruc-
tions) .................................................. 325
Workshop
see Qualified specialist workshop24
Index
Page 203 of 382

and any obstacles in good time. When pedes-
trian recognition is active, pedestrians recog-
nized by the system are visually highlighted in
color in the Night View Assist Plus display with
small frame corners.
In addition, an infrared camera is integrated into
radiator trim �C . The camera helps detect
pedestrians and animals. Observe the notes on
cleaning the infrared camera ( Y
page 324).
i Infrared light is not visible to the human eye
and therefore does not glare. Night View
Assist Plus can therefore remain switched on
even if there is oncoming traffic.
Important safety notes Night View Assist Plus is only an aid and is not a
substitute for attentive driving. Do not rely on
the Night View Assist Plus display. You are
responsible for the distance to the vehicle in
front, for vehicle speed and for braking in good
time. Drive carefully and always adapt your driv-
ing style to suit the prevailing road and traffic
conditions.
The system may be impaired or may not function
if: R
there is poor visibility, e.g. due to snow, rain,
fog or spray R
the windshield is dirty, fogged up or covered,
for instance by a sticker, in the vicinity of the
camera R
the infrared camera in the radiator trim is
dirty, fogged up or obscured R
on bends, hilltops or downhill gradients R
at high outside temperatures
Night View Assist Plus cannot display objects
directly in front of or beside the vehicle.
It is possible that, in addition to people and ani-
mals, other objects are also marked or highligh-
ted .
Pedestrian and animal recognition
General notes
Pedestrian or animal recognition may be
impaired or inoperative if: R
pedestrians or animals are partially or entirely
obscured by other objects, e.g. parked vehi-
cles R
the silhouette of the pedestrian or of the ani-
mal in the Night View Assist Plus display is incomplete or interrupted, e.g. by powerful
light reflections R
pedestrians or animals do not contrast with
the surroundings R
the camera system no longer recognizes
pedestrians as persons due to special cloth-
ing or other objects R
pedestrians are not in an upright position, e.g.
sitting, squatting or lying R
animals are not recognized by the system,
e.g. because of their size or shape
Pedestrian and animal recognition is deactiva-
ted at temperatures above 90 ‡ (32 †). The
spotlight function and automatic delayed
switch-off are then no longer active.
Pedestrian recognition
�C
Night View Assist Plus display �D
Readiness symbol for active pedestrian rec-
ognition �
Page 330 of 382

X
Stop the vehicle on solid, non-slippery and
level ground, as far away as possible from
traffic. X
Switch on the hazard warning lamps. X
Secure the vehicle against rolling away
( Y
page 162).X
If possible, bring the front wheels into the
straight-ahead position. X
Switch off the engine. X
Open the driver's door.
The on-board electronics now have status 0 .
This is the same as the SmartKey having been
removed. X
Remove the Start/Stop button from the igni-
tion lock ( Y
page 145).
or, if the SmartKey is inserted in the ignition
lock: X
Remove the SmartKey from the ignition lock. X
Make sure that the engine cannot be started
via your smartphone ( Y
page 147).X
Make sure that the passengers are not endan-
gered as they do so. Make sure that no one is
near the danger area while a wheel is being
changed. Anyone who is not directly assisting
in the wheel change should, for example,
stand behind the barrier. X
Get out of the vehicle. Pay attention to traffic
conditions when doing so. X
Close the driver's door.
MOExtended tires (tires with run-flat
properties)
General notes With MOExtended tires (tires with run flat char-
acteristics), you can continue to drive your vehi-
cle even if there is a total loss of pressure in one
or more tires. The affected tire must not show
any clearly visible damage.
You can recognize MOExtended tires by the
MOExtended marking which appears on the
sidewall of the tire. You will find this marking
next to the tire size designation, the load-bear-
ing capacity and the speed index ( Y
page 357).
MOExtended tires may only be used in conjunc-
tion with an active tire pressure loss warning
system or with an active tire pressure monitor. If a pressure loss warning message appears
in the multifunction display: R
observe the instructions in the display mes-
sages ( Y
page 252). R
check the tire for damage. R
if driving on, observe the following notes.
The driving distance possible in run-flat mode is
approximately 50 miles (80 km) when the vehi-
cle is partially laden. When the vehicle is fully
laden it is approximately 19 miles (30 km).
In addition to the vehicle load, the driving dis-
tance possible depends upon: R
Vehicle speed R
Road condition R
Outside temperature
The driving distance possible in run-flat mode
may be reduced by extreme driving conditions
or maneuvers, or it can be increased through a
moderate style of driving.
The driving distance possible in run-fla t mode is
co
unted from the moment the tire pressure loss
warning appears in the multifunction display.
You must not exceed a maximum permissible
speed of 50 mph (80 km/h).
When replacing one or all tires, please observe
the following specifications for your vehicle's
tires: R
size R
the type and R
the "MOExtended" mark
If a tire has gone flat and cannot be replaced
with a MOExtended tire, a standard tire may be
used as a temporary measure. Make sure that
you use the proper size and type (summer or
winter tires).
Vehicles equipped with MOExtended tires are
not equipped with a TIREFIT kit at the factory. It
is therefore recommended that you additionally
equip your vehicle with a TIREFIT kit if you mount
tires that do not feature run-flat properties, e.g.
winter tires. A TIREFIT kit may be obtained from
a qualified specialist workshop.
Important safety notes
G WARNING
When driving in emergency mode, the driving
characteristics deteriorate, e.g. when corner-
ing, accelerating quickly and when braking.
There is a risk of an accident.328
Flat tire
Breakdown assistance
Page 345 of 382

Important safety notes
G WARNIN G
If wheels and tires of th e wrong siz e are used,
th e whee l brakes or suspension component s
may be damaged. Ther e is a ris k of an acci-
dent.
Always replace wheels and tires wit h those
that fulfill th e specification s of th e original
part .
When replacing wheels, mak e sur e to use th e
correct: R
designation R
model
When replacing tires , mak e sur e to use th e
correct: R
designation R
manufacturer R
model
G WARNIN G
A flat tire severely impairs th e driving , steer -
ing and braking characteristics of th e vehicle.
Ther e is a ris k of accident.
Tires without run-flat characteristics :R
do no t driv e wit h a flat tire.R
immediately replace th e flat tire wit h your
emergenc y spar e whee l or spar e wheel, or
consult a qualified specialist workshop.
Tires wit h run-flat characteristics :R
pay attention to th e information and warn -
ing notice s on MOExtended tires (tire s wit h
run-flat characteristics).
Accessories that are no t approve d for your vehi-
cle by Mercedes-Ben z or are no t bein g used cor-
rectl y can impair th e operating safety.
Before purchasing and usin g non-approve d
accessories, visit a qualified specialist work-
sho p and inquire about :R
suitabilit yR
legal stipulation sR
factory recommendation s Information on th e sizes and types of wheels and
tires for your vehicl e can be foun d under
"Wheel/tire combinations" ( Y
page 367).
Information on tire pressur e can be found:R
on th e vehicle's Tir e and Loading Information
placard on th e B-pillar ( Y
page 353)R
in th e tire pressur e table in th e fuel filler flap
( Y
page 162) R
under "Tir e pressure" ( Y
page 346)
Operation
Information on driving Chec k th e tire pressur e when th e vehicl e is
heavily laden and adjust prio r to a trip.
While driving , pay attention to vibrations, noises
and unusual handlin g characteristics , e.g. pull-
ing to on e side . This may indicat e that th e
wheels or tires are damaged. If you suspec t that
a tire is defective, reduce your spee d immedi-
ately. Stop th e vehicl e as soo n as possible to
chec k th e wheels and tires for damage. Hidden
tire damag e could also be causing th e unusual
handlin g characteristics . If you fin d no sign s of
damage, hav e th e tires and wheels checke d at a
qualified specialist workshop.
When parking your vehicle, mak e sur e that th e
tires do no t get deformed by th e cur b or other
obstacles. If they canno t be avoided, driv e ove r
obstacles suc h as curbs slowly and at an obtuse
angle. Otherwise, you may damag e th e wheels
or tires .
Regular checking of wheels and tires
G WARNIN G
Damaged tires can caus e tire inflation pres-
sur e loss . As a result , you could lose control of
your vehicle. Ther e is a ris k of accident.
Chec k th e tires regularly for sign s of damag e
and replace any damaged tires immediately.
Chec k wheels and tires for damag e at least once
a month . Chec k wheels and tires after driving
off-road or on roug h roads. Damaged wheels
can caus e a loss of tire pressure.
Pay particular attention to damag e suc h as:R
cut s in th e tires R
punctures in th e tiresOperation 343
Wheels and tires Z
Page 349 of 382

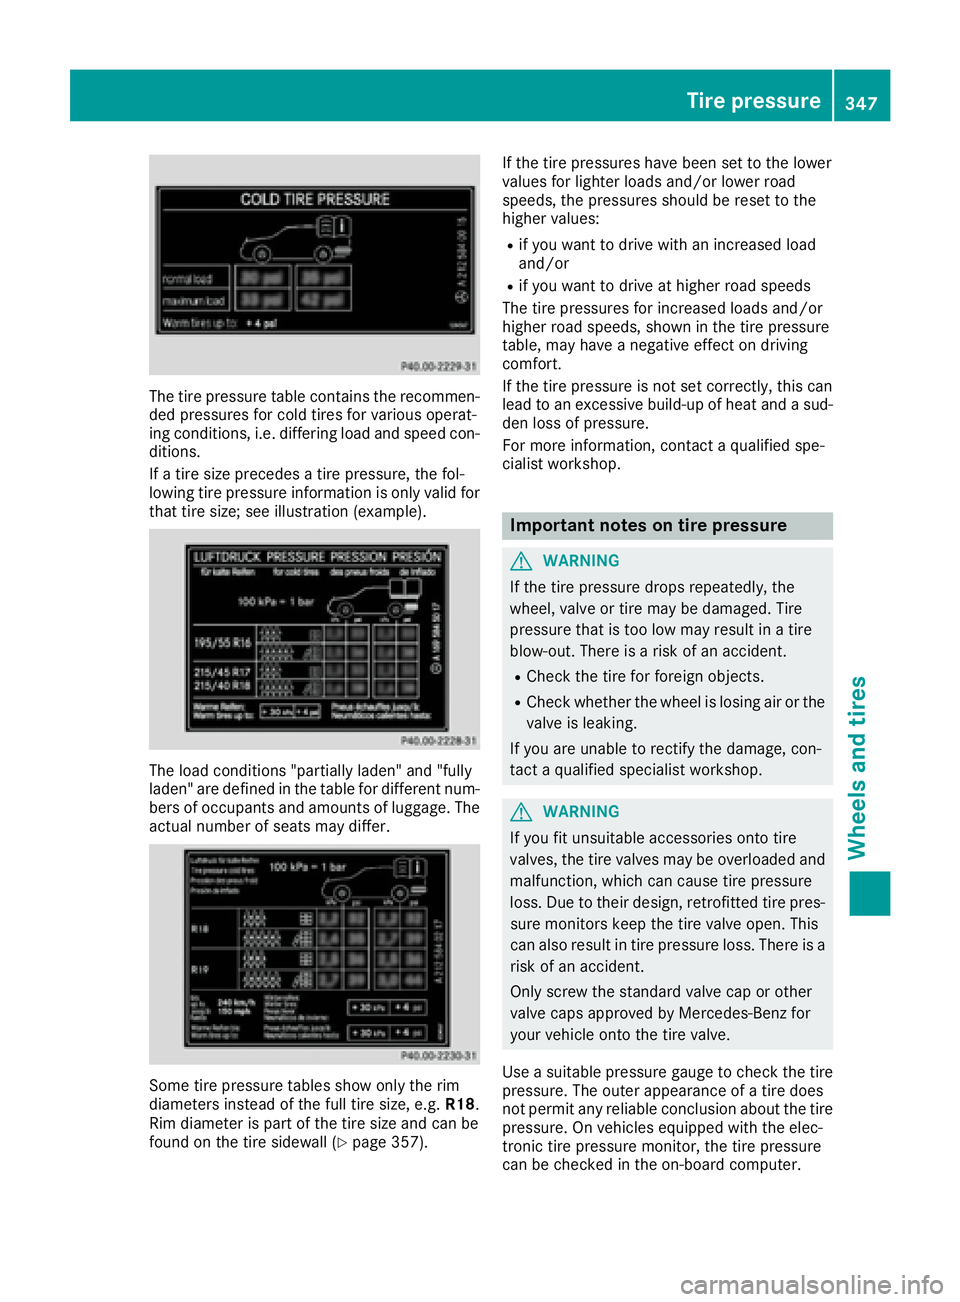
The tire pressure table contains the recommen-
ded pressures for cold tires for various operat-
ing conditions, i.e. differing load and speed con-
ditions.
If a tire size precedes a tire pressure, the fol-
lowing tire pressure information is only valid for
that tire size; see illustration (example).
The load conditions "partially laden" and "fully
laden" are defined in the table for different num-
bers of occupants and amounts of luggage. The
actual number of seats may differ.
Some tire pressure tables show only the rim
diameters instead of the full tire size, e.g. R18 .
Rim diameter is part of the tire size and can be
found on the tire sidewall ( Y
page 357). If the tire pressures have been set to the lower
values for lighter loads and/or lower road
speeds, the pressures should be reset to the
higher values: R
if you want to drive with an increased load
and/or R
if you want to drive at higher road speeds
The tire pressures for increased loads and/or
higher road speeds, shown in the tire pressure
table, may have a negative effect on driving
comfort.
If the tire pressure is not set correctly, this can
lead to an excessive build-up of heat and a sud-
den loss of pressure.
For more information, contact a qualified spe-
cialist workshop.
Important notes on tire pressure
G WARNING
If the tire pressure drops repeatedly, the
wheel, valve or tire may be damaged. Tire
pressure that is too low may result in a tire
blow-out. There is a risk of an accident. R
Check the tire for foreign objects. R
Check whether the wheel is losing air or the
valve is leaking.
If you are unable to rectify the damage, con-
tact a qualified specialist workshop.
G WARNING
If you fit unsuitable accessories onto tire
valves, the tire valves may be overloaded and
malfunction, which can cause tire pressure
loss. Due to their design, retrofitted tire pres-
sure monitors keep the tire valve open. This
can also result in tire pressure loss. There is a
risk of an accident.
Only screw the standard valve cap or other
valve caps approved by Mercedes-Benz for
your vehicle onto the tire valve.
Use a suitable pressure gauge to check the tire
pressure. The outer appearance of a tire does
not permit any reliable conclusion about the tire
pressure. On vehicles equipped with the elec-
tronic tire pressure monitor, the tire pressure
can be checked in the on-board computer. Tire pressure 347
Wheels and tires Z
Page 351 of 382

Checking the tire pressures
Important safety notes Observe the notes on tire pressure
( Y
page 346).
Information on air pressure for the tires on your
vehicle can be found: R
on the vehicle's Tire and Loading Information
placard on the B-pillar ( Y
page 353)R
in the tire pressure table in the fuel filler flap
( Y
page 162) R
in the "Tire pressure" section
Checking tire pressures manually To determine and set the correct tire pressure,
proceed as follows: X
Remove the valve cap of the tire that is to be
checked. X
Press the tire pressure gage securely onto the
valve. X
Read the tire pressure and compare it to the
recommended value on the Tire and Loading
Information placard or the tire pressure table
( Y
page 346). X
If the tire pressure is too low, increase the tire
pressure to the recommended value. X
If the tire pressure is too high, release air. To
do so, press down the metal pin in the valve,
using the tip of a pen for example. Then check
the tire pressure again using the tire pressure
checker. X
Screw the valve cap onto the valve. X
Repeat these steps for the other tires.
Tire pressure monitor
General notes If a tire pressure monitor is installed, the vehi-
cle's wheels have sensors that monitor the tire
pressures in all four tires. The tire pressure mon-
itor warns you if the pressure drops in one or
more of the tires. The tire pressure monitor only
functions if the corresponding sensors are
installed in all wheels.
Information on tire pressures is displayed in the
multifunction display. After a few minutes of
driving, the current tire pressure of each tire is shown in the Service menu of the multifunction
display; see illustration (example).
For information on the message display, refer to
the "Checking the tire pressure electronically"
section ( Y
page 350).
Important safety notes
G WARNING
Each tire, including the spare (if provided),
should be checked at least once every two
weeks when cold and inflated to the pressure
recommended by the vehicle manufacturer
on the Tire and Loading Information placard
on the driver's door B-pillar or the tire pres-
sure label on the inside of the fuel filler flap. If
your vehicle has tires of a different size than
the size indicated on the Tire and Loading
Information placard or, if available, the tire
pressure label, you should determine the
proper tire pressure for those tires.
As an added safety feature, your vehicle has
been equipped with a tire pressure monitoring
system (TPMS) that illuminates a low tire pres-
sure telltale when one or more of your tires
are significantly underinflated. Accordingly,
when the low tire pressure telltale lights up,
you should stop and check your tires as soon
as possible, and inflate them to the proper
pressure. Driving on a significantly underin-
flated tire causes the tire to overheat and can
lead to tire failure.
Underinflation also reduces fuel efficiency
and tire tread life, and may affect the vehicle's
handling and stopping ability. Please note that
the TPMS is not a substitute for proper tire
maintenance, and it is the driver's responsi-
bility to maintain correct tire pressure, eve
n if
un de rinflation has not reached the level toTire pressure 349
Wheels and tires Z
Page 355 of 382

If you wish to confirm the restart: X
Press the �v button.
The Tire Pressure Now OK? message
appears in the multifunction display. X
Press �c or �d to select Yes .X
Press the �v button.
The Run Flat Indicator Restarted mes-
sage appears in the multifunction display.
After a teach-in period, the tire pressure loss
warning system will monitor the set tire pres-
sures of all four tires.
If you wish to cancel the restart: X
Press the �8 button.
or X
If the Tire Pressure Now OK? message
appears, select Cancel by pressing �c
or �d .X
Press the �v button.
The tire pressure values stored at the last
restart will continue to be monitored.
Loading the vehicle
Instruction labels for tires and loads
G WARNING
Overloaded tires can overheat, causing a
blowout. Overloaded tires can also impair the
steering and driving characteristics and lead
to brake failure. There is a risk of accident.
Observe the load rating of the tires. The load
rating must be at least half of the GAWR of
your vehicle. Never overload the tires by
exceeding the maximum load.
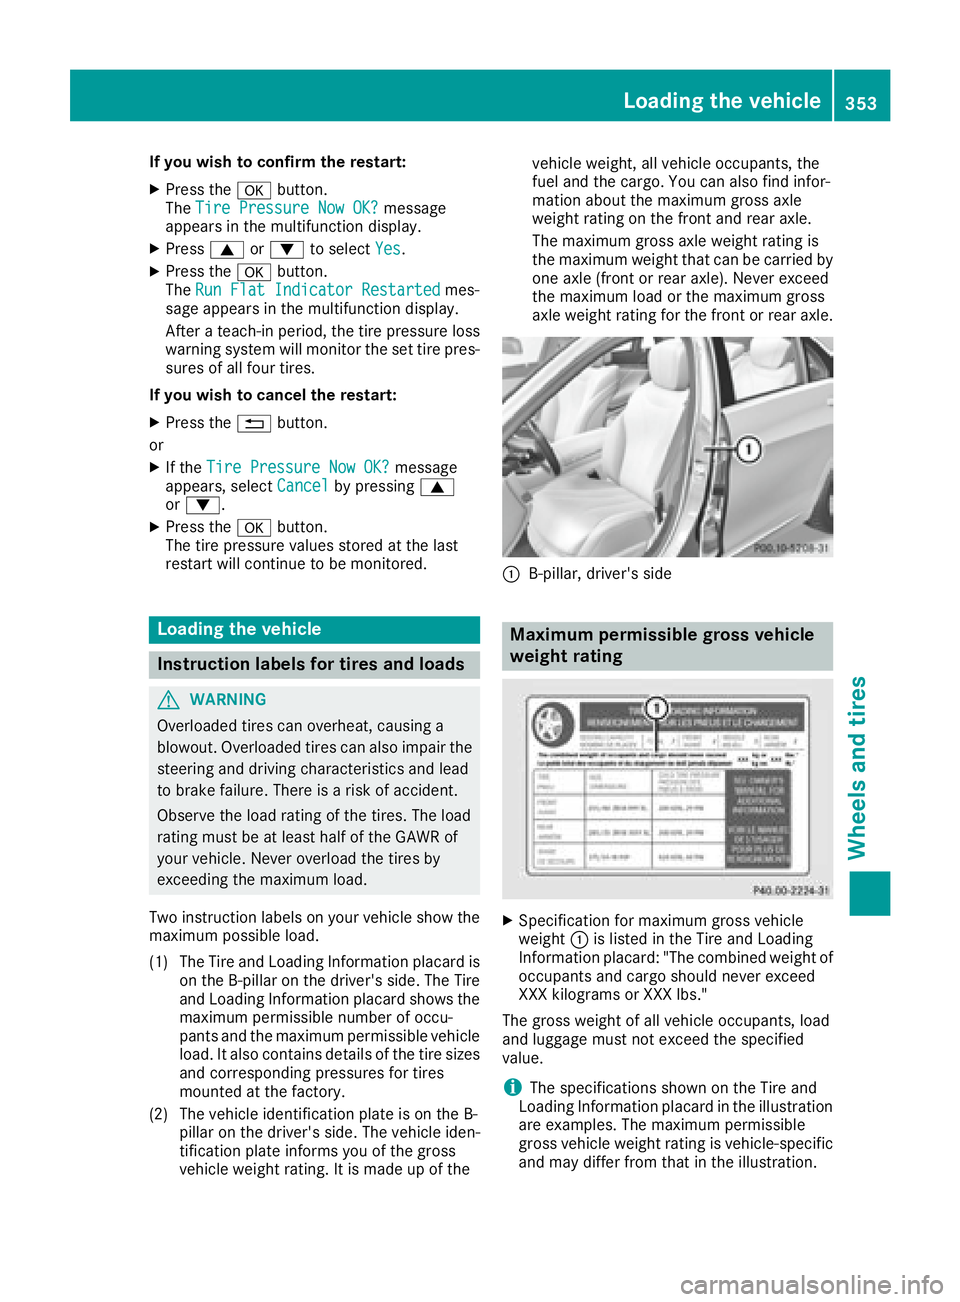
Two instruction labels on your vehicle show the
maximum possible load.
(1) The Tire and Loading Information placard is
on the B-pillar on the driver's side. The Tire
and Loading Information placard shows the
maximum permissible number of occu-
pants and the maximum permissible vehicle
load. It also contains details of the tire sizes
and corresponding pressures for tires
mounted at the factory.
(2) The vehicle identification plate is on the B-
pillar on the driver's side. The vehicle iden-
tification plate informs you of the gross
vehicle weight rating. It is made up of the vehicle weight, all vehicle occupants, the
fuel and the cargo. You can also find infor-
mation about the maximum gross axle
weight rating on the front and rear axle.
The maximum gross axle weight rating is
the maximum weight that can be carried by
one axle (front or rear axle). Never exceed
the maximum load or the maximum gross
axle weight rating for the front or rear axle.
�C
B-pillar, driver's side
Maximum permissible gross vehicle
weight rating
X
Specification for maximum gross vehicle
weight �C is listed in the Tire and Loading
Information placard: "The combined weight of
occupants and cargo should never exceed
XXX kilograms or XXX lbs."
The gross weight of all vehicle occupants, load
and luggage must not exceed the specified
value.
i The specifications shown on the Tire and
Loading Information placard in the illustration
are examples. The maximum permissible
gross vehicle weight rating is vehicle-specific
and may differ from that in the illustration.Loading the vehicle 353
Wheels and tires Z