2017 MERCEDES-BENZ S-Class MAYBACH manual transmission
[x] Cancel search: manual transmissionPage 193 of 382
Rif the camera lens fogs up, e.g. when driving
into a heated garage in winter, causing a rapid
change in temperature
Rif the camera lens is dirty or obstructed
Rif the rear of your vehicle is damaged. In this
event, have the camera position and setting
checked at a qualified specialist workshop
The field of vision and other functions of the rear
view camera may be restricted due to additional
accessories on the rear of the vehicle (e.g.
license plate holder, bicycle rack).
The guide lines on the multimedia system show
the distances to your vehicle. The distances only
apply to road level.
The rear view camera is protected from rain-
drops and dust by means of a flap. When the rear
view camera is activated, this flap opens.
The flap closes again when:
Ryou have finished the maneuvering process
Ryou switch off the engine
Ryou open the trunk
Observe the notes on cleaning (
Ypage 323).
For technical reasons, the flap may remain open
briefly after the rear view camera has been
deactivated.
Activating/deactivating the rear view
camera
XTo activate: make sure that the Activa‐
tion by R gearfunction is selected in the
multimedia system; see Digital Operator's
Manual.
XEngage reverse gear.
The rear view camera flap opens. The multi-
media system shows the area behind the vehi-
cle with guide lines.
The image from the rear view camera is avail-
able throughout the maneuvering process.
XShift the transmission to position P.
or
XDrive forwards a short distance.
Displays in the multimedia system
The rear view camera may show a distorted view
of obstacles, show them incorrectly or not at all.
The rear view camera does not show objects in
the following positions:
Rvery close to the rear bumper
Runder the rear bumper
Rin the area immediately above the handle in
the trunk lid
!Objects not at ground level may appear to
be further away than they actually are, e.g.:
Rthe bumper of a parked vehicle
Rthe drawbar of a trailer
Rthe ball coupling of a trailer tow hitch
Rthe rear section of an HGV
Ra slanted post
Use the guidelines only for orientation.
Approach objects no further than the bottom-
most guideline.
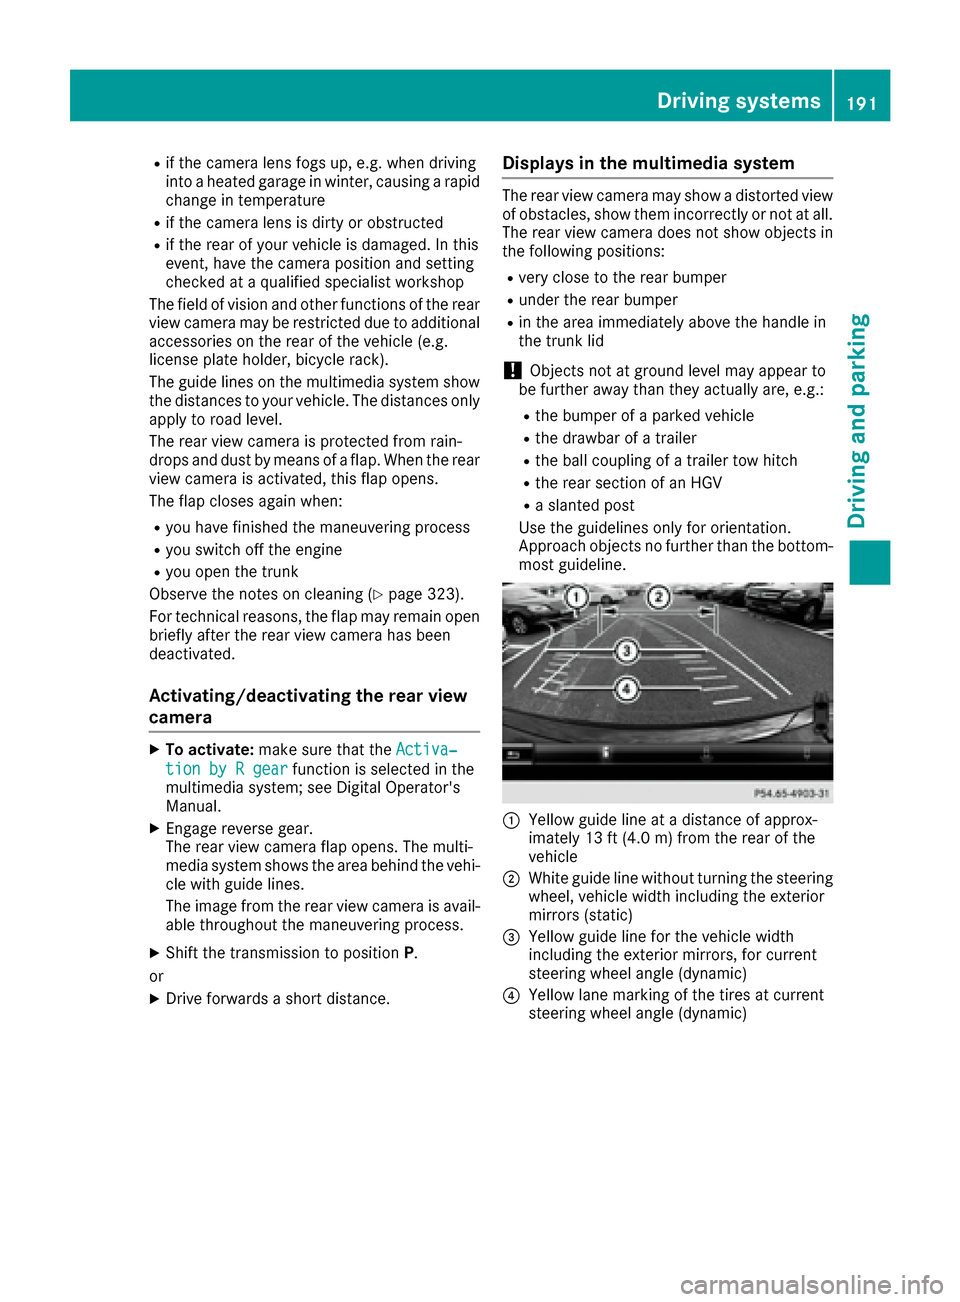
:Yellow guide line at a distance of approx-
imately 13 ft (4.0 m) from the rear of the
vehicle
;White guide line without turning the steering
wheel, vehicle width including the exterior
mirrors (static)
=Yellow guide line for the vehicle width
including the exterior mirrors, for current
steering wheel angle (dynamic)
?Yellow lane marking of the tires at current
steering wheel angle (dynamic)
Driving systems191
Driving and parking
Z
Page 196 of 382
180° view
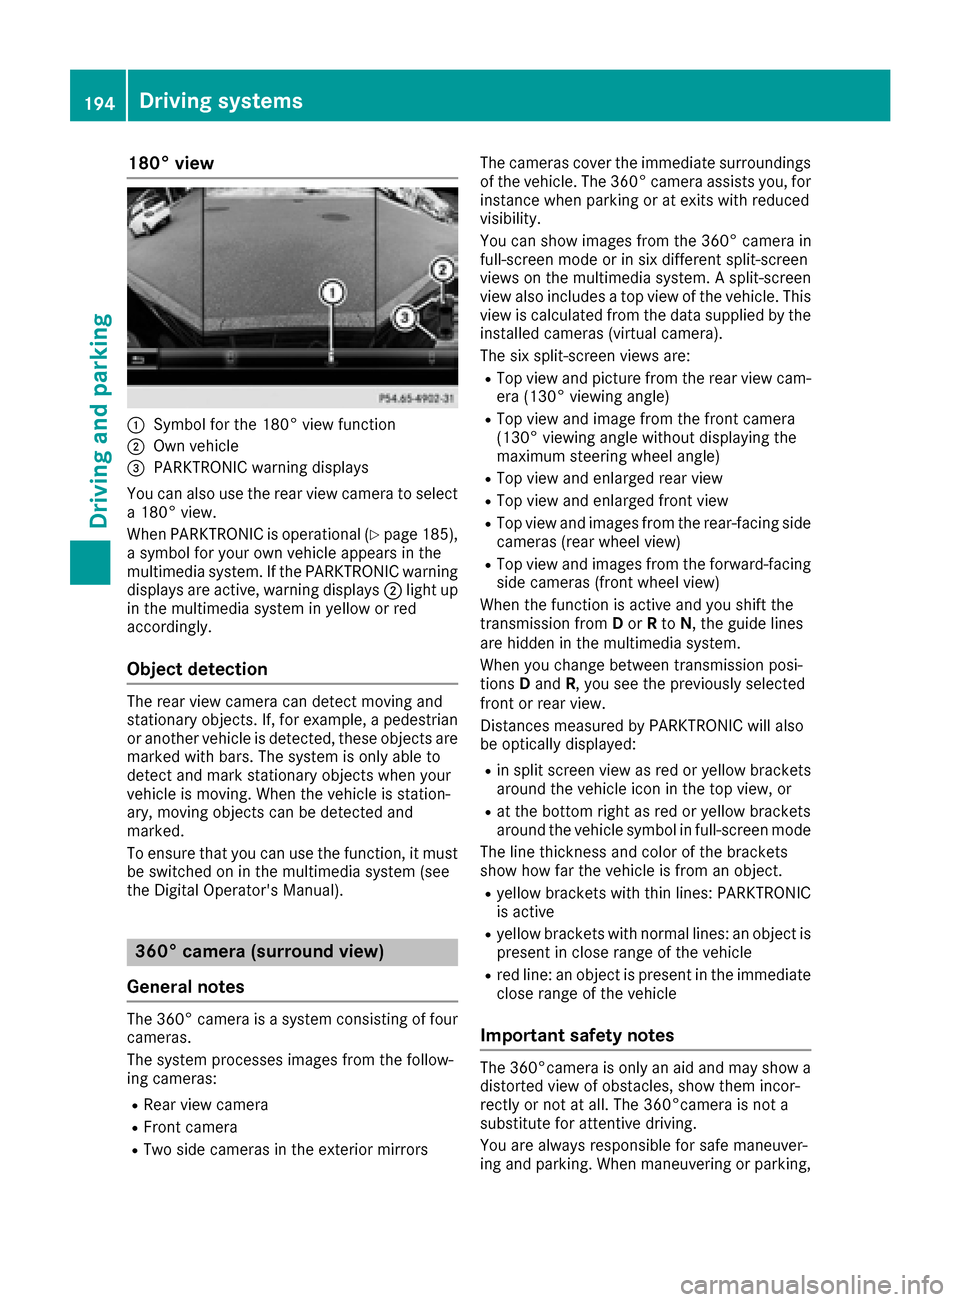
:Symbol for the 180° view function
;Own vehicle
=PARKTRONIC warning displays
You can also use the rear view camera to select
a 180° view.
When PARKTRONIC is operational (
Ypage 185),
a symbol for your own vehicle appears in the
multimedia system. If the PARKTRONIC warning
displays are active, warning displays ;light up
in the multimedia system in yellow or red
accordingly.
Object detection
The rear view camera can detect moving and
stationary objects. If, for example, a pedestrian
or another vehicle is detected, these objects are
marked with bars. The system is only able to
detect and mark stationary objects when your
vehicle is moving. When the vehicle is station-
ary, moving objects can be detected and
marked.
To ensure that you can use the function, it must
be switched on in the multimedia system (see
the Digital Operator's Manual).
360° camera (surround view)
General notes
The 360° camera is a system consisting of four
cameras.
The system processes images from the follow-
ing cameras:
RRear view camera
RFront camera
RTwo side cameras in the exterior mirrors The cameras cover the immediate surroundings
of the vehicle. The 360° camera assists you, for
instance when parking or at exits with reduced
visibility.
You can show images from the 360° camera in
full-screen mode or in six different split-screen
views on the multimedia system. A split-screen
view also includes a top view of the vehicle. This
view is calculated from the data supplied by the
installed cameras (virtual camera).
The six split-screen views are:
RTop view and picture from the rear view cam-
era (130° viewing angle)
RTop view and image from the front camera
(130° viewing angle without displaying the
maximum steering wheel angle)
RTop view and enlarged rear view
RTop view and enlarged front view
RTop view and images from the rear-facing sidecameras (rear wheel view)
RTop view and images from the forward-facing
side cameras (front wheel view)
When the function is active and you shift the
transmission from Dor Rto N, the guide lines
are hidden in the multimedia system.
When you change between transmission posi-
tions Dand R, you see the previously selected
front or rear view.
Distances measured by PARKTRONIC will also
be optically displayed:
Rin split screen view as red or yellow brackets
around the vehicle icon in the top view, or
Rat the bottom right as red or yellow brackets
around the vehicle symbol in full-screen mode
The line thickness and color of the brackets
show how far the vehicle is from an object.
Ryellow brackets with thin lines: PARKTRONIC
is active
Ryellow brackets with normal lines: an object is present in close range of the vehicle
Rred line: an object is present in the immediate
close range of the vehicle
Important safety notes
The 360°camera is only an aid and may show a
distorted view of obstacles, show them incor-
rectly or not at all. The 360°camera is not a
substitute for attentive driving.
You are always responsible for safe maneuver-
ing and parking. When maneuvering or parking,
194Driving systems
Driving and parking
Page 228 of 382
![MERCEDES-BENZ S-Class MAYBACH 2017 W222 Owners Manual XUsing:or9, select the AdditionalSpeedometer [km/h]function.
The current selection appears.
XTo activate/deactivate: pressaagain.
Restoring the factory settings
XPress òon the steering wheel to open MERCEDES-BENZ S-Class MAYBACH 2017 W222 Owners Manual XUsing:or9, select the AdditionalSpeedometer [km/h]function.
The current selection appears.
XTo activate/deactivate: pressaagain.
Restoring the factory settings
XPress òon the steering wheel to open](/manual-img/4/3654/w960_3654-227.png)
XUsing:or9, select the AdditionalSpeedometer [km/h]function.
The current selection appears.
XTo activate/deactivate: pressaagain.
Restoring the factory settings
XPress òon the steering wheel to open the
menu list.
XPress :or9 on the steering wheel to
select the Settingsmenu.
XConfirm by pressing aon the steering
wheel.
XPress :or9 to select the FactorySettingssubmenu.
XPressato confirm.
The Reset All Settings?function
appears.
XPress the :or9 button to select Noor
Yes.
XPress the abutton to confirm the selec-
tion.
If you have selected and confirmed Yes
, the
multifunction display shows a confirmation
message.
For safety reasons, the Daytime Running
Lightsfunction in theLightssubmenu is only
reset when the vehicle is stationary.
AMG menu (Mercedes-AMG vehicles)
Warm-up
:Digital speedometer
;Gear indicator
=Upshift indicator
?Transmission fluid temperature
AEngine oil temperature
XPress the òbutton on the steering wheel
to open the menu list.
XPress :or9 on the steering wheel to
select the AMGmenu.
XConfirm by pressing aon the steering
wheel.
Upshift indicator: upshift indicatorUP
=
indicates that the engine has reached the
overrevving range when in the manual drive
program.
Engine/transmission oil temperature:
when the engine and transmission are at nor-
mal operating temperature, oil tempera-
ture ?and Aare displayed in white in the
multifunction display.
If the multifunction display shows oil temper-
ature ?orA in blue, the engine or the
transmission are not yet at normal operating
temperature. Avoid driving at full engine out-
put during this time.
SETUP
:Drive program C,Sor M
;ESP®mode (ON/OFF)
=Suspension setting SPORTorCOMFORT
XPress the òbutton on the steering wheel
to open the menu list.
XPress the :or9 button on the steering
wheel to select the AMGmenu.
XConfirm by pressing aon the steering
wheel.
XPress the :or9 button until the
SETUP display appears.
226Menus and submenus
On-board computer and displays
Page 232 of 382

Display messagesPossible causes/consequences andMSolutions
T!
÷
Inoperative SeeOperator'sManual
EB D(electronic brak eforce distribution), AB Sand ES P®are malfunc -
tioning .
Other drivin gsystems and drivin gsafet ysystems may also malfunc -
tion .
In addition ,th e÷ and! warning lamp sligh tup in th einstru-
men tcluste rand awarning tone sounds.
GWARNIN G
The brak esystem continues to function normally, but without th e
function slisted above. The fron tand rear wheels could therefor eloc k
if you brak ehard, for example.
The steerabilit yand braking characteristics may be severely affected.
The braking distanc ein an emergenc ybraking situation can increase.
If ES P
®is no toperational, ES P®is unable to stabiliz eth evehicle.
There is an increased ris kof skiddin gand an accident.
XDrive on carefully.
XVisit aqualified specialist workshop immediately.
F(USA
only)
!( Canada
only)
Tur nOn the Igni‐
tio ntoReleas etheParkingBrake
The red F(USAonly) or !(Canada only) indicator lamp lights
up.
You attempte dto release th eelectric parking brak ewhile th eignition
was switched off .
XSwitchon th eignition .
F(USA
only)
!( Canada
only)
Please
Releas ePark‐ing Brake
The red F(USAonly) or !(Canada only) indicator lamp flashes
and awarning tone sounds. Acondition for automatic release of th e
electric parking brak eis no tfulfilled (
Ypage 164).
You are drivin gwit hth eelectric parking brak eapplied.
XReleas eth eelectric parking brak emanually.
The red F(USAonly) or !(Canada only) indicator lamp flashes
and awarning tone sounds.
You are usin gth eelectric parking brak efor emergenc ybraking
(
Ypage 164).
F(USA
only)
!( Canada
only)
Parkin gBrake See
Operator' sManual
The yellow !warning lamp lights up.
The electric parking brak eis malfunctioning .
To apply :
XSwitchth eignition off .
XPress theelectric parking brak ehandle for at least te nseconds.
XShift th etransmission to position P.
XConsultaqualified specialist workshop .
230Display messages
On-board computer and displays
Page 233 of 382
Display messagesPossible causes/consequences andMSolutions
The yellow!warning lamp and th ered F (USAonly) or !
(Canada only) indicator lamp ligh tup.
The electric parking brak eis malfunctioning .
To release:
XSwitc hoff th eignition and tur nit bac kon .
XReleas eth eelectric parking brak emanually.
or
XReleas eth eelectric parking brak eautomatically (Ypage 164).
If th eelectric parking brak estill canno tbe released:
XDo no tdrive on .
XConsult aqualified specialist workshop .
The redF(USAonly) or !(Canada only) indicator lamp flashes
and th eyellow !warning lamp lights up.
The electric parking brak eis malfunctioning .
To release:
XSwitc hoff th eignition and tur nit bac kon .
XReleas eth eelectric parking brak emanually.
To apply :
XSwitchoff th eignition and tur nit bac kon .
XApply th eelectric parking brak emanually.
If th ered F (USAonly) or !(Canada only) indicator lamp con-
tinue sto flash:
XDo no tdrive on .
XSecureth evehicl eagainst rollin gaway (Ypage 363).
XShift th etransmission to position P.
XTurn thefron twheels toward sth ecurb.
XConsult aqualified specialist workshop .
Display messages231
On-board computer and displays
Z
Page 234 of 382
Display messagesPossible causes/consequences andMSolutions
The yellow!warning lamp lights up. The red F(USAonly)
or ! (Canada only) indicator lamp flashes for about te nseconds
after th eelectric parking brak ehas been applie dor released. It then
goe sout or remain slit .
The electric parking brak eis malfunctioning .
XSwitchoff th eignition and tur nit bac kon .
XApply th eelectric parking brake.
If it is no tpossibl eto engage th eelectric parking brake:
XShift th etransmission to position P.
XVisitaqualified specialist workshop .
If it is no tpossibl eto release th eelectric parking brake:
XReleas eth eelectric parking brak eautomatically (Ypage 164).
If th eelectric parking brak estill canno tbe released:
XConsult aqualified specialist workshop .
The yellow!warning lamp lights up. If you manually apply or
release th eelectric parking brake, th ered F (USAonly) or !
(Canada only) indicator lamp flashes .
The electric parking brak eis malfunctioning .It is no tpossibl eto apply
th eelectric parking brak emanually.
XShift th etransmission to position P.
XVisitaqualified specialist workshop .
F(USA
only)
!( Canada
only)
Parkin gBrake Inop‐
erativ e
The yellow !warning lamp lights up. The red F(USAonly)
or ! (Canada only) indicator lamp flashes for about te nseconds
after th eelectric parking brak ehas been applie dor released. It then
goe sout or remain slit .
The electric parking brak eis malfunctioning ,e.g. because of over-
voltag eor undervoltage.
XRemove th ecaus efor th eovervoltage or undervoltage, e.g. by
charging th ebattery or restarting th eengine.
XEngage or release th eelectric parking brake.
If it remain simpossible to apply or release th eelectric parking brake:
XSwitc hoff th eignition and tur nit bac kon .
XEngage or release th eelectric parking brake.
If th eelectric parking brak estill canno tbe released:
XConsult aqualified specialist workshop .
If th eelectric parking brak estill canno tbe applied:
XVisit aqualified specialist workshop .
232Display messages
On-board computer and displays
Page 235 of 382

Display messagesPossible causes/consequences andMSolutions
The yellow!warning lamp lights up and th ered F (USAonly)
or ! (Canada only) indicator lamp flashes .
It is no tpossibl eto apply th eelectric parking brak emanually.
XShift th etransmission to position P.
XVisitaqualified specialist workshop .
$(USA
only)
J( Canada
only)
Check Brake Fluid
Level
There is no tenough brak eflui din th ebrak efluid reservoir .
In addition ,th e$ (USAonly) or J(Canada only) warning lamp
lights up in th einstrumen tcluste rand awarning tone sounds.
GWARNIN G
The braking effec tmay be impaired.
There is aris kof an accident.
XPull ove rand stop th evehicl esafely as soo nas possible, payin g
attention to roa dand traffic conditions. Do no tcontinu edrivin g
under any circumstances.
XSecur eth evehicl eagainst rollin gaway (Ypage 162).
XConsult aqualified specialist workshop .
XDo notadd brak efluid .This does no tcorrec tth emalfunction .
#
CheckBrakePadWear
The brak epads/linings hav ereached their wear limit.
US Aonly: th ered $ brakesystem warning lamp also lights up while
th eengin eis running.
XVisit aqualified specialist workshop .
G
Inoperative
Oneor mor emain features of th embrace system are malfunctioning .
XVisitaqualified specialist workshop .
Collision Preven‐tionAssist Plu sCurrently Unavaila‐ble See Operator' sManual
COLLISION PREVENTION ASSIST PLU Sis temporarily no toperational.
Possibl ecauses are:
Rth eradar sensor system is temporarily inoperative, e.g. due to elec -
tromagneti cradiation emitted by nearby TV or radi ostation sor
other source sof electromagneti cradiation
Rth esystem is outside th eoperating temperature range
Rth eon-boar dvoltag eis to olow.
Whe nth ecauses state dabov eno longer apply, th edisplay message
disappears.
COLLISION PREVENTION ASSIST PLU Sis operational again .
If th edisplay message does no tdisappear :
XPull overand stop th evehicl esafely as soo nas possible, payin g
attention to roa dand traffic conditions.
XSecur eth evehicl eagainst rollin gaway (Ypage 162).
XRestart th eengine.
Display messages23 3
On-board computer and displays
Z
Page 335 of 382
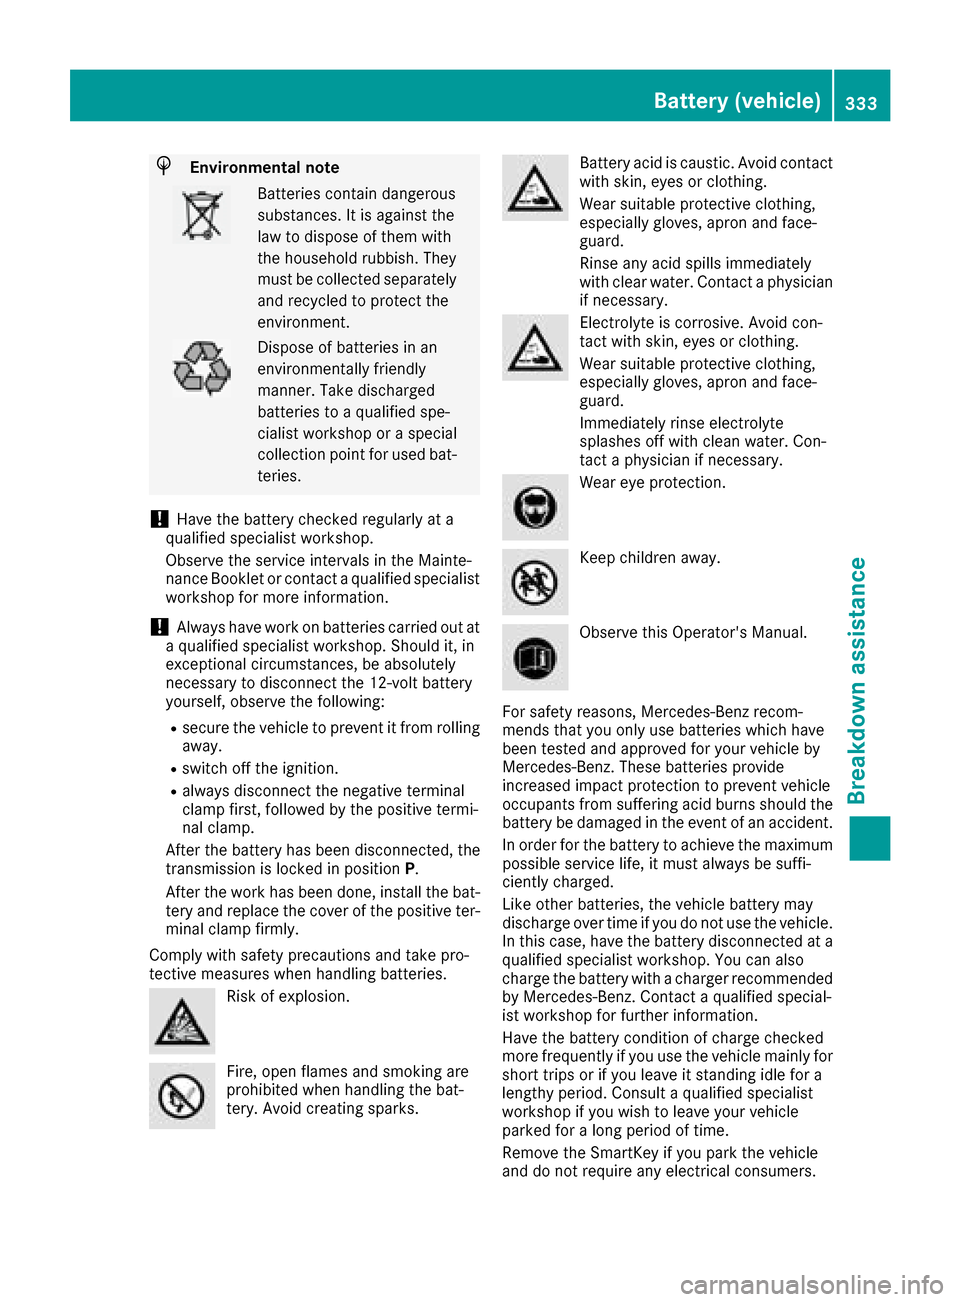
HEnvironmental note
Batteries contain dangerous
substances. It is against the
law to dispose of them with
the household rubbish. They
must be collected separatelyand recycled to protect the
environment.
Dispose of batteries in an
environmentally friendly
manner. Take discharged
batteries to a qualified spe-
cialist workshop or a special
collection point for used bat-
teries.
!Have the battery checked regularly at a
qualified specialist workshop.
Observe the service intervals in the Mainte-
nance Booklet or contact a qualified specialist
workshop for more information.
!Always have work on batteries carried out at
a qualified specialist workshop. Should it, in
exceptional circumstances, be absolutely
necessary to disconnect the 12-volt battery
yourself, observe the following:
Rsecure the vehicle to prevent it from rolling
away.
Rswitch off the ignition.
Ralways disconnect the negative terminal
clamp first, followed by the positive termi-
nal clamp.
After the battery has been disconnected, the
transmission is locked in position P.
After the work has been done, install the bat-
tery and replace the cover of the positive ter-
minal clamp firmly.
Comply with safety precautions and take pro-
tective measures when handling batteries.
Risk of explosion.
Fire, open flames and smoking are
prohibited when handling the bat-
tery. Avoid creating sparks.
Battery acid is caustic. Avoid contact
with skin, eyes or clothing.
Wear suitable protective clothing,
especially gloves, apron and face-
guard.
Rinse any acid spills immediately
with clear water. Contact a physician
if necessary.
Electrolyte is corrosive. Avoid con-
tact with skin, eyes or clothing.
Wear suitable protective clothing,
especially gloves, apron and face-
guard.
Immediately rinse electrolyte
splashes off with clean water. Con-
tact a physician if necessary.
Wear eye protection.
Keep children away.
Observe this Operator's Manual.
For safety reasons, Mercedes-Benz recom-
mends that you only use batteries which have
been tested and approved for your vehicle by
Mercedes-Benz. These batteries provide
increased impact protection to prevent vehicle
occupants from suffering acid burns should the
battery be damaged in the event of an accident.
In order for the battery to achieve the maximum
possible service life, it must always be suffi-
ciently charged.
Like other batteries, the vehicle battery may
discharge over time if you do not use the vehicle.
In this case, have the battery disconnected at a
qualified specialist workshop. You can also
charge the battery with a charger recommended
by Mercedes-Benz. Contact a qualified special-
ist workshop for further information.
Have the battery condition of charge checked
more frequently if you use the vehicle mainly for
short trips or if you leave it standing idle for a
lengthy period. Consult a qualified specialist
workshop if you wish to leave your vehicle
parked for a long period of time.
Remove the SmartKey if you park the vehicle
and do not require any electrical consumers.
Battery (vehicle)333
Breakdown assistance
Z