2017 MERCEDES-BENZ S-Class COUPE manual transmission
[x] Cancel search: manual transmissionPage 136 of 338

currently selected drive program and which gear
is engaged in the multifunction display.
XPress the program selector button
(Ypage 131) repeatedly untilMappears in
the multifunction display.
Upshifting
!In manual drive program M, the automatic
transmission does not shift up automatically
even when the engine limiting speed for the
current gear is reached. When the engine lim-
iting speed is reached, the fuel supply is cut to
prevent the engine from overrevving. Always
make sure that the engine speed does not
reach the red area of the tachometer. There is
otherwise a risk of engine damage.
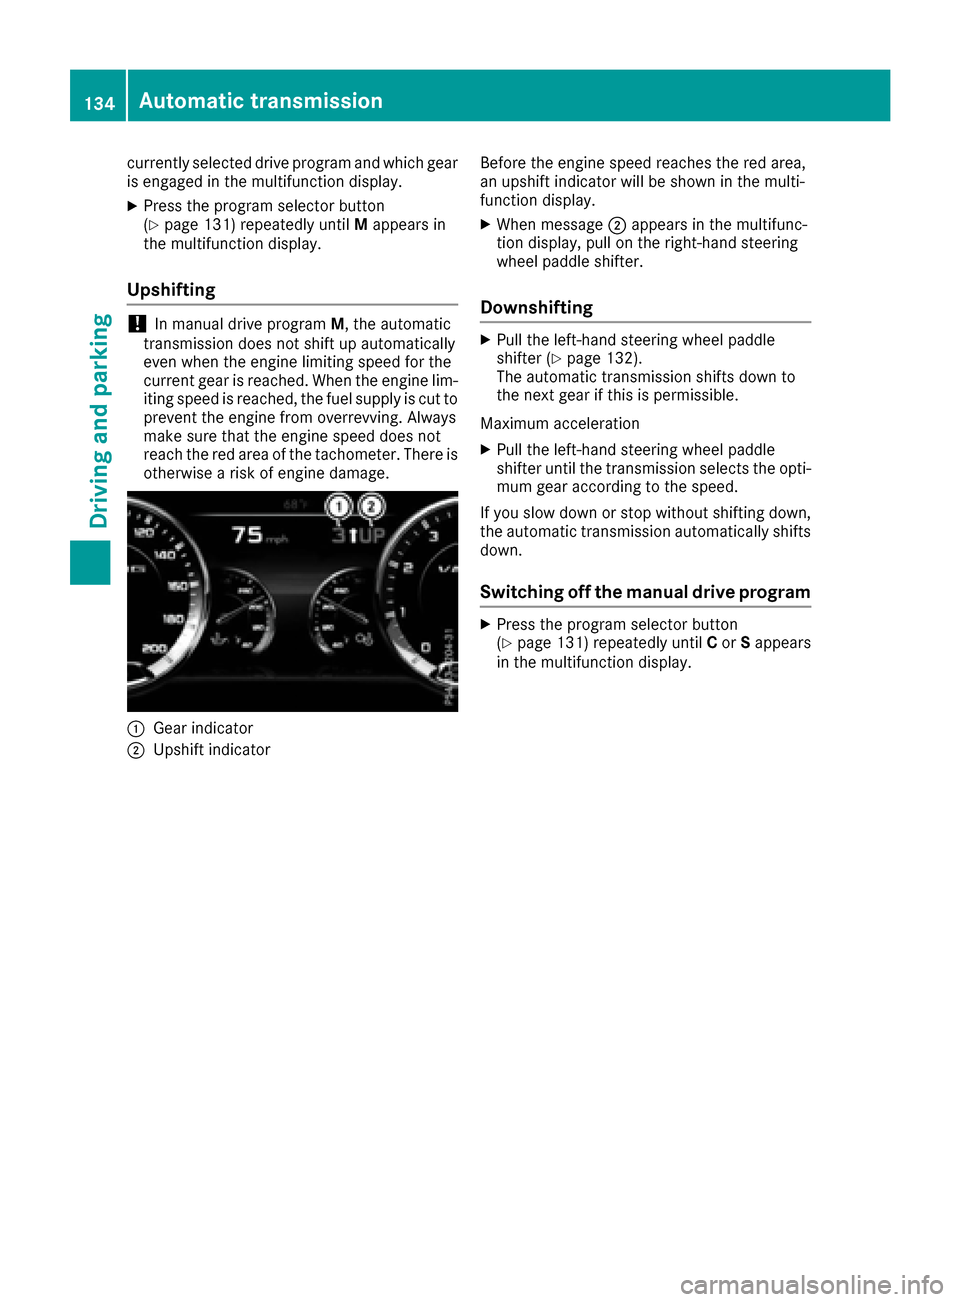
0043Gear indicator
0044Upshift indicator Before the engine speed reaches the red area,
an upshift indicator will be shown in the multi-
function display.
XWhen message
0044appears in the multifunc-
tion display, pull on the right-hand steering
wheel paddle shifter.
Downshifting
XPull the left-hand steering wheel paddle
shifter (Ypage 132).
The automatic transmission shifts down to
the next gear if this is permissible.
Maximum acceleration
XPull the left-hand steering wheel paddle
shifter until the transmission selects the opti-
mum gear according to the speed.
If you slow down or stop without shifting down,
the automatic transmission automatically shifts
down.
Switching off the manual drive program
XPress the program selector button
(Ypage 131) repeatedly until Cor Sappears
in the multifunction display.
134Automatic transmission
Driving and parking
Page 141 of 338

Electric parking brake
General notes
GWARNING
If you leave children unsupervised in the vehi-
cle, they could set it in motion by, for example:
Rrelease the parking brake.
Rshift the automatic transmission out of the
parking position P.
Rstart the engine.
In addition, they may operate vehicle equip-
ment and become trapped. There is a risk of
an accident and injury.
When leaving the vehicle, always take the
SmartKey with you and lock the vehicle. Never
leave children unsupervised in the vehicle.
The function of the electric parking brake is
dependent on the on-board voltage. If the on-
board voltage is low or there is a malfunction in
the system, it may not be possible to apply the
released parking brake.
XIf this is the case, only park the vehicle on
level ground and secure it to prevent it rolling
away.
XShift the automatic transmission to position
P.
It may not be possible to release an applied
parking brake if the on-board voltage is low or
there is a malfunction in the system. Contact a
qualified specialist workshop.
The electric parking brake performs a function
test at regular intervals while the engine is
switched off. The sounds that can be heard while
this is occurring are normal.
Applying or releasing manually
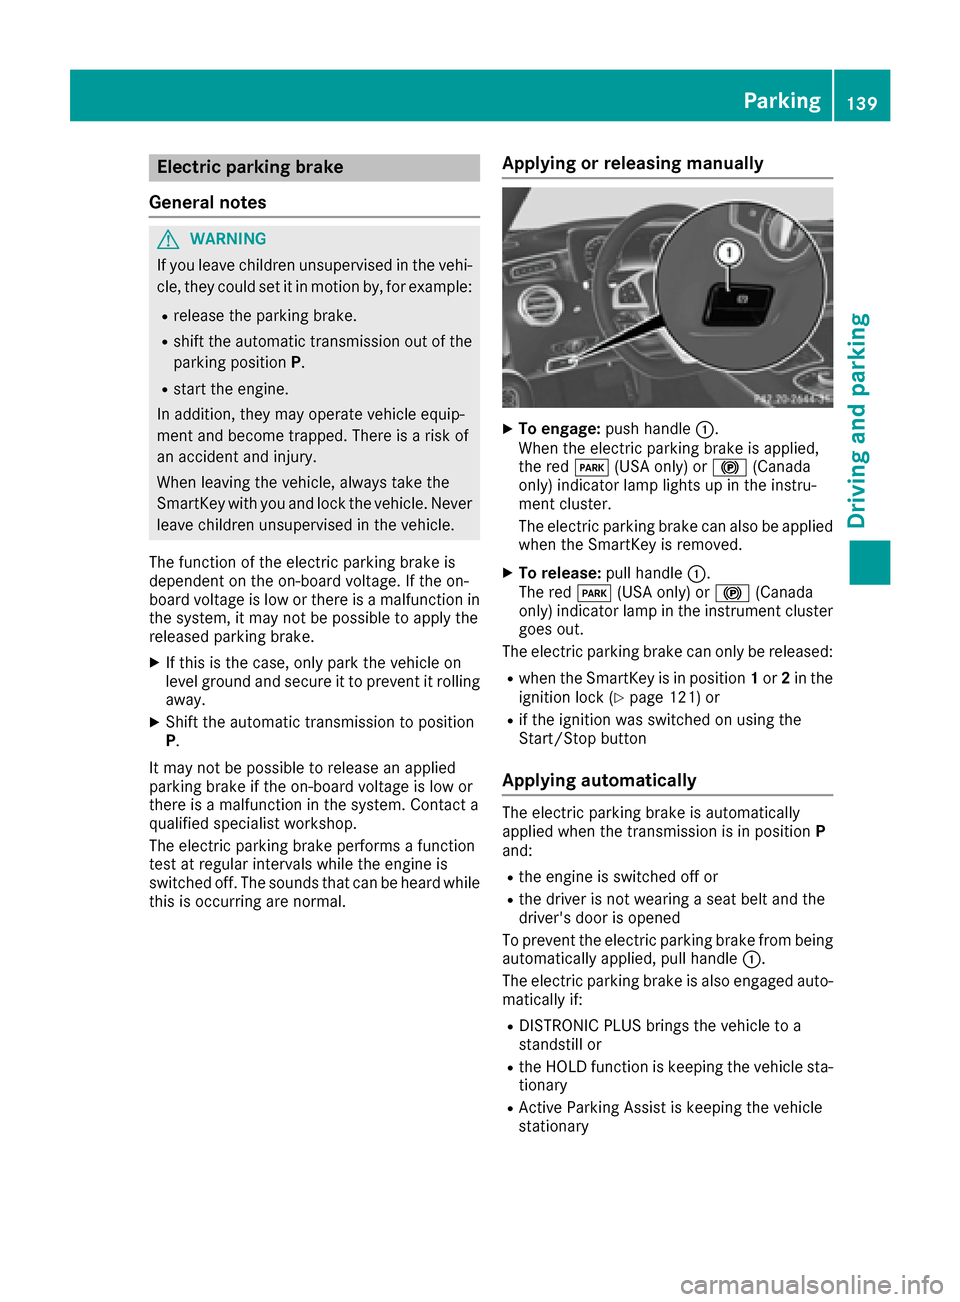
XTo engage: push handle 0043.
When the electric parking brake is applied,
the red 0049(USA only) or 0024(Canada
only) indicator lamp lights up in the instru-
ment cluster.
The electric parking brake can also be applied
when the SmartKey is removed.
XTo release: pull handle0043.
The red 0049(USA only) or 0024(Canada
only) indicator lamp in the instrument cluster
goes out.
The electric parking brake can only be released:
Rwhen the SmartKey is in position 1or 2in the
ignition lock (Ypage 121) or
Rif the ignition was switched on using the
Start/Stop button
Applying automatically
The electric parking brake is automatically
applied when the transmission is in position P
and:
Rthe engine is switched off or
Rthe driver is not wearing a seat belt and the
driver's door is opened
To prevent the electric parking brake from being
automatically applied, pull handle 0043.
The electric parking brake is also engaged auto- matically if:
RDISTRONIC PLUS brings the vehicle to a
standstill or
Rthe HOLD function is keeping the vehicle sta-
tionary
RActive Parking Assist is keeping the vehicle
stationary
Parking139
Driving and parking
Z
Page 149 of 338

RESP®intervenes or you deactivate ESP®
Ryou shift the transmission to positionNwhile
driving.
If cruise control is deactivated, you will hear a
warning tone. You will see the Cruise Con‐
trol Offmessage in the multifunction display
for approximately five seconds.
When you switch off the engine, the last speed
stored is cleared.
DISTRONIC PLUS
General notes
DISTRONIC PLUS regulates the speed and auto-
matically helps you maintain the distance from
the vehicle detected in front. Vehicles are detec-
ted with the aid of the radar sensor system.
DISTRONIC PLUS brakes automatically so that
the set speed is not exceeded.
Change into a lower gear in good time on long
and steep downhill gradients. This is especially
important if the vehicle is laden. By doing so, you
will make use of the braking effect of the engine.
This relieves the load on the brake system and
prevents the brakes from overheating and wear-
ing too quickly.
If DISTRONIC PLUS detects that there is a risk of a collision, you will be warned visually and
acoustically. DISTRONIC PLUS cannot prevent a
collision without your intervention. An intermit-
tent warning tone will then sound and the dis-
tance warning lamp will light up in the instru-
ment cluster. Brake immediately in order to
increase the distance to the vehicle in front or
take evasive action provided it is safe to do so.
DISTRONIC PLUS operates in the speed range
between 0 mph (0 km/h) and 120 mph
(200 km/h).
Do not use DISTRONIC PLUS while driving on
roads with steep gradients.
As DISTR ONIC P
LUS transmits radar waves, it
can resemble the radar detectors of the respon- sible authorities. You can refer to the relevant
chapter in the Operator's Manual if questions
are asked about this.
iUSA only: This device has been approved by
the FCC as a "Vehicular Radar System". The
radar sensor is intended for use in an auto-
motive radar system only. Removal, tamper-
ing, or altering of the device will void any war-
ranties, and is not permitted by the FCC. Do not tamper with, alter, or use in any non-
approved way.
Any unauthorized modification to this device
could void the user's authority to operate the
equipment.
iCanada only: This device complies with
RSS-210 of Industry Canada. Operation is
subject to the following two conditions:
1. This device may not cause harmful inter-
ference, and
2. This device must accept any interference
received, including interference that may
cause undesired operation of the device.
Removal, tampering, or altering of the device
will void any warranties, and is not permitted.
Do not tamper with, alter, or use in any non-
approved way.
Any unauthorized modification to this device
could voi d th
e user's authority to operate the
equipment.
Important safety notes
GWARNING
DISTRONIC PLUS does not react to:
Rpeople or animals
Rstationary obstacles on the road, e.g. stop- ped or parked vehicles
Roncoming and crossing traffic
As a result, DISTRONIC PLUS may neither give
warnings nor intervene in such situations.
There is a risk of an accident.
Always pay careful attention to the traffic sit- uation and be ready to brake.
GWARNING
DISTRONIC PLUS cannot always clearly iden-
tify other road users and complex traffic sit-
uations.
In such cases, DISTRONIC PLUS may:
Rgive an unnecessary warning and then
brake the vehicle
Rneither give a warning nor intervene
Raccelerate or brake unexpectedly
There is a risk of an accident.
Driving system s147
Driving an d parking
Z
Page 170 of 338

The flap closes again when:
Ryou have finished the maneuvering process
Ryou switch off the engine
Ryou open the trunk
Observe the notes on cleaning (
Ypage 284).
For technical reasons, the flap may remain open
briefly after the rear view camera has been
deactivated.
Activating/deactivating the rear view
camera
XTo activate: make sure that the Activa‐
tion by R gearfunction is selected in the
multimedia system; see Digital Operator's
Manual.
XEngage reverse gear.
The rear view camera flap opens. The multi-
media system shows the area behind the vehi-
cle with guide lines.
The image from the rear view camera is avail-
able throughout the maneuvering process.
XShift the transmission to position P.
or
XDrive forwards a short distance.
Displays in the multimedia system
The rear view camera may show a distorted view
of obstacles, show them incorrectly or not at all.
The rear view camera does not show objects in
the following positions:
Rvery close to the rear bumper
Runder the rear bumper
Rin the area immediately above the badge in
the trunk lid
!Objects not at ground level may appear to
be further away than they actually are, e.g.:
Rthe bumper of a parked vehicle
Rthe drawbar of a trailer
Rthe ball coupling of a trailer tow hitch
Rthe rear section of an HGV
Ra slanted post
Use the guidelines only for orientation.
Approach objects no further than the bottom-
most guideline.
0043Yellow guide line at a distance of approx-
imately 13 ft (4.0 m) from the rear of the
vehicle
0044White guide line without turning the steering
wheel, vehicle width including the exterior
mirrors (static)
0087Yellow guide line for the vehicle width
including the exterior mirrors, for current
steering wheel angle (dynamic)
0085Yellow lane marking of the tires at current
steering wheel angle (dynamic)
0083Yellow guide line at a distance of approx-
imately 3 ft (1.0 m) from the rear of the vehi-
cle
0084Vehicle center axle (marker assistance)
006BBumper
006CRed guide line at a distance of approximately
12 in (0.30 m) from the rear of the vehicle
The guide lines are shown when the transmis-
sion is in position R.
The distance specifications only apply to
objects that are at ground level.
168Driving systems
Driving and parking
Page 173 of 338

Object detection
The rear view camera can detect moving and
stationary objects. If, for example, a pedestrian
or another vehicle is detected, these objects are
marked with bars. The system is only able to
detect and mark stationary objects when your
vehicle is moving. When the vehicle is station-
ary, moving objects can be detected and
marked.
To ensure that you can use the function, it must be switched on in the multimedia system (see
the Digital Operator's Manual).
360° camera (surround view)
General notes
The 360° camera is a system consisting of four
cameras.
The system processes images from the follow-
ing cameras:
RRear view camera
RFront camera
RTwo side cameras in the exterior mirrors
The cameras cover the immediate surroundings
of the vehicle. The 360° camera assists you, for instance when parking or at exits with reduced
visibility.
You can show images from the 360° camera in
full-screen mode or in six different split-screen
views on the multimedia system. A split-screen
view also includes a top view of the vehicle. This
view is calculated from the data supplied by the
installed cameras (virtual camera).
The six split-screen views are:
RTop view and picture from the rear view cam-
era (130° viewing angle)
RTop view and image from the front camera
(130° viewing angle without displaying the
maximum steering wheel angle)
RTop view and enlarged rear view
RTop view and enlarged front view
RTop view and images from the rear-facing sidecameras (rear wheel view)
RTop view and images from the forward-facing
side cameras (front wheel view)
When the function is active and you shift the
transmission from Dor Rto N, the guide lines
are hidden in the multimedia system. When you change between transmission posi-
tions
Dand R, you see the previously selected
front or rear view.
Distances measured by PARKTRONIC will also
be optically displayed:
Rin split screen view as red or yellow brackets around the vehicle icon in the top view, or
Rat the bottom right as red or yellow brackets
around the vehicle symbol in full-screen mode
The line thickness and color of the brackets
show how far the vehicle is from an object.
Ryellow brackets with thin lines: PARKTRONIC
is active
Ryellow brackets with normal lines: an object is present in close range of the vehicle
Rred line: an object is present in the immediate
close range of the vehicle
Important safety notes
The 360°camera is only an aid and may show a
distorted view of obstacles, show them incor-
rectly or not at all. The 360°camera is not a
substitute for attentive driving.
You are always responsible for safe maneuver-
ing and parking. When maneuvering or parking,
make sure that there are no persons, animals or
objects in the area in which you are maneuver-
ing.
You are always responsible for safety, and must
always pay attention to your surroundings when
parking and maneuvering. This applies to the
areas behind, in front of and beside the vehicle.
You could otherwise endanger yourself and oth-
ers.
The 360° camera will not function or will func-
tion in a limited manner:
Rif the doors are open
Rif the exterior mirrors are folded in
Rif the trunk lid is open
Rin heavy rain, snow or fog
Rat night or in very dark places
Rif the cameras are exposed to very bright light
Rif the area is lit by fluorescent bulbs or LED
lighting (the display may flicker)
Rif the camera lenses fog up, e.g. when driving
into a heated garage in winter, causing a rapid
change in temperature
Driving systems171
Driving and parking
Z
Page 204 of 338
![MERCEDES-BENZ S-Class COUPE 2017 C217 Owners Manual XUsing0064or0063, select the AdditionalSpeedometer [km/h]function.
The current selection appears.
XTo activate/deactivate: press0076again.
Restoring the factory settings
XPress 00E2on the steering whe MERCEDES-BENZ S-Class COUPE 2017 C217 Owners Manual XUsing0064or0063, select the AdditionalSpeedometer [km/h]function.
The current selection appears.
XTo activate/deactivate: press0076again.
Restoring the factory settings
XPress 00E2on the steering whe](/manual-img/4/3653/w960_3653-203.png)
XUsing0064or0063, select the AdditionalSpeedometer [km/h]function.
The current selection appears.
XTo activate/deactivate: press0076again.
Restoring the factory settings
XPress 00E2on the steering wheel to open the
menu list.
XPress 0064or0063 on the steering wheel to
select the Settingsmenu.
XConfirm by pressing 0076on the steering
wheel.
XPress 0064or0063 to select the FactorySettingssubmenu.
XPress0076to confirm.
The Reset All Settings?function
appears.
XPress the 0064or0063 button to select Noor
Yes.
XPress the 0076button to confirm the selec-
tion.
If you have selected and confirmed Yes
, the
multifunction display shows a confirmation
message.
For safety reasons, the Daytime Running
Lightsfunction in theLightssubmenu is only
reset when the vehicle is stationary.
AMG menu (Mercedes-AMG vehicles)
Warm-up
0043Digital speedometer
0044Gear indicator
0087Upshift indicator
0085Transmission fluid temperature
0083Engine oil temperature
XPress the 00E2button on the steering wheel
to open the menu list.
XPress 0064or0063 on the steering wheel to
select the AMGmenu.
XConfirm by pressing 0076on the steering
wheel.
Upshift indicator: upshift indicatorUP
0087
indicates that the engine has reached the
overrevving range when in the manual drive
program.
Engine/transmission oil temperature:
when the engine and transmission are at nor-
mal operating temperature, oil tempera-
ture 0085and 0083are displayed in white in the
multifunction display.
If the multifunction display shows oil temper-
ature 0085or0083 in blue, the engine or the
transmission are not yet at normal operating
temperature. Avoid driving at full engine out-
put during this time.
SETUP
0043Drive program C,Sor M
0044ESP®mode (ON/OFF)
0087Suspension setting SPORTorCOMFORT
XPress the 00E2button on the steering wheel
to open the menu list.
XPress the 0064or0063 button on the steering
wheel to select the AMGmenu.
XConfirm by pressing 0076on the steering
wheel.
XPress the 0064or0063 button until the
SETUP display appears.
202Menus and submenus
On-board computer and displays
Page 208 of 338

Display messagesPossible causes/consequences and0050Solutions
007A0025
00E5
Inoperative SeeOperator'sManual
EB D(electronic brak eforce distribution), AB Sand ES P®are malfunc -
tioning .
Other drivin gsystems and drivin gsafet ysystems may also malfunc -
tion .
In addition ,th e00E5 and0025 warning lamp sligh tup in th einstru-
men tcluste rand awarning tone sounds.
GWARNIN G
The brak esystem continues to function normally, but without th e
function slisted above. The fron tand rear wheels could therefor eloc k
if you brak ehard, for example.
The steerabilit yand braking characteristics may be severely affected.
The braking distanc ein an emergenc ybraking situation can increase.
If ES P
®is no toperational, ES P®is unable to stabiliz eth evehicle.
There is an increased ris kof skiddin gand an accident.
XDrive on carefully.
XVisit aqualified specialist workshop immediately.
0049(USA
only)
0024( Canada
only)
Tur nOn the Igni‐
tio ntoReleas etheParkingBrake
The red 0049(USAonly) or 0024(Canada only) indicator lamp lights
up.
You attempte dto release th eelectric parking brak ewhile th eignition
was switched off .
XSwitchon th eignition .
0049(USA
only)
0024( Canada
only)
Please
Releas ePark‐ing Brake
The red 0049(USAonly) or 0024(Canada only) indicator lamp flashes
and awarning tone sounds. Acondition for automatic release of th e
electric parking brak eis no tfulfilled (
Ypage 140).
You are drivin gwit hth eelectric parking brak eapplied.
XReleas eth eelectric parking brak emanually.
The red 0049(USAonly) or 0024(Canada only) indicator lamp flashes
and awarning tone sounds.
You are usin gth eelectric parking brak efor emergenc ybraking
(
Ypage 140).
0049(USA
only)
0024( Canada
only)
Parkin gBrake See
Operator' sManual
The yellow 0024warning lamp lights up.
The electric parking brak eis malfunctioning .
To apply :
XSwitchth eignition off .
XPress theelectric parking brak ehandle for at least te nseconds.
XShift th etransmission to position P.
XConsultaqualified specialist workshop .
206Display messages
On-board computer and displays
Page 209 of 338

Display messagesPossible causes/consequences and0050Solutions
The yellow0024warning lamp and th ered 0049 (USAonly) or 0024
(Canada only) indicator lamp ligh tup.
The electric parking brak eis malfunctioning .
To release:
XSwitc hoff th eignition and tur nit bac kon .
XReleas eth eelectric parking brak emanually.
or
XReleas eth eelectric parking brak eautomatically (Ypage 140).
If th eelectric parking brak estill canno tbe released:
XDo no tdrive on .
XConsult aqualified specialist workshop .
The red0049(USAonly) or 0024(Canada only) indicator lamp flashes
and th eyellow 0024warning lamp lights up.
The electric parking brak eis malfunctioning .
To release:
XSwitc hoff th eignition and tur nit bac kon .
XReleas eth eelectric parking brak emanually.
To apply :
XSwitchoff th eignition and tur nit bac kon .
XApply th eelectric parking brak emanually.
If th ered 0049 (USAonly) or 0024(Canada only) indicator lamp con-
tinue sto flash:
XDo no tdrive on .
XSecureth evehicl eagainst rollin gaway (Ypage 322).
XShift th etransmission to position P.
XTurn thefron twheels toward sth ecurb.
XConsult aqualified specialist workshop .
Display messages207
On-board computer and displays
Z