2017 MERCEDES-BENZ GLS light
[x] Cancel search: lightPage 167 of 390
This helps you to avoid overheating the
brakes and wearing them out excessively.
When you take advantage of engine braking, a
drive wheel may not turn for some time, e.g.
on a slippery road surface. This could cause
damage to the drive train. This type of damage
is not covered by the Mercedes-Benz war-
ranty.
Do not depress the brake pedal continuously
while the vehicle is in motion, e.g. causing the
brakes to rub by constantly applying light pres-
sure to the pedal. This results in excessive and
premature wear to the brake pads.
Use the left-hand steering wheel paddle shifter
to shift into a lower gear in good time on long
and steep downhill gradients. This is especially
important if the vehicle is laden.
This also applies if you have activated cruise
control, the speed limiter or Distance Pilot
DISTRONIC.
This will use the braking effect of the engine, so
that less braking will be required to maintain the
speed. This relieves the load on the brake sys-
tem and prevents the brakes from overheating
and wearing too quickly.
Heavy and light loads
G WARNING
If you rest your foot on the brake pedal while
driving, the braking system can overheat. This
increases the stopping distance and can even
cause the braking system to fail. There is a
risk of an accident.
Never use the brake pedal as a footrest. Never
depress the brake pedal and the accelerator
pedal at the same time.
! Depressing the brake pedal constantly
results in excessive and premature wear to
the brake pads.
If the brakes have been subjected to a heavy
load, do not stop the vehicle immediately. Drive
on for a short while. This allows the airflow to
cool the brakes more quickly.
Wet roads
If you have driven for a long time in heavy rain
without braking, there may be a delayed reac-
tion from the brakes when braking for the first time. This may also occur after the vehicle has
been washed or driven through deep water.
You then have to depress the brake pedal more
firmly. Maintain a greater distance from the
vehicle in front.
After driving on a wet road or having the vehicle
washed, brake firmly while paying attention to
the traffic conditions. This will warm up the
brake discs, thereby drying them more quickly
and protecting them against corrosion.
Limited braking performance on salt-
treated roads If you drive on salted roads, a layer of salt resi-
due may form on the brake discs and brake
pads. This can result in a significantly longer
braking distance. R
Brake occasionally to remove any possible
salt residue. Make sure that you do not
endanger other road users when doing so. R
Carefully depress the brake pedal and the
beginning and end of a journey. R
Maintain a greater distance to the vehicle
ahead.
Servicing the brakes
! The brake fluid level may be too low, if: R
if the red brake warning lamp lights up in
the instrument cluster and R
you hear a warning tone while the engine is
running
Observe additional warning messages in the
multifunction display.
The brake fluid level may be too low due to
brake pad wear or leaking brake lines.
Have the brake system checked immediately.
Consult a qualified specialist workshop to
arrange this.
! A function or performance test should only
be carried out on a 2-axle dynamometer. If
you wish to operate the vehicle on such a
dynamometer, please consult a qualified spe-
cialist workshop in advance. You could oth-
erwise damage the drive train or the brake
system.
! Because ESP ®
is an automatic system, the
engine and ignition must be switched off
(SmartKey in position 0 or 1 or Start/Stop
button in position 0 or 1 ) when the electricDriving tips 165
Driving and parking Z
Page 171 of 390
R
LOW RANGE offroad gear (vehicles with the
Offroad Engineering package) ( Y
page 219)R
Differential lock (vehicles with the Off-Road
Engineering package) ( Y
page 218)R
Off-road ABS ( Y
page 64)R
Off-road 4ETS ( Y
page 67)R
Off-road ESP ®
( Y
page 68)R
AIRMATIC package (vehicle level)
( Y
page 186) R
DSR (Downhill Speed Regulation)
( Y
page 216)
Observe the following notes: R
Stop the vehicle before starting to drive along
an off-road route. If necessary, select the off-
road program ( Y
page 218) or shift to the
LOW RANGE off-road gear ( Y
page 219).R
Select a vehicle level that is suitable for the
terrain. To avoid damaging the vehicle, make
sure there is always sufficient ground clear-
ance. R
Check that items of luggage and loads are
stowed safely and are well secured
( Y
page 299). R
Always keep the engine running and in gear
when driving on a downhill gradient. Activate
DSR ( Y
page 216).R
Always keep the engine running and in gear
when driving on a slope. R
Adapt your speed to the terrain. The rougher,
steeper or more ruts on the terrain, the slower
your speed should be. R
Do not jump with the vehicle as this will inter-
rupt the vehicle's propulsion. R
Drive with extreme care on unfamiliar off-road
routes where visibility is poor. For safety rea-
sons, get out of the vehicle first and survey
the off-road route. R
Look out for obstacles, such as rocks, holes,
tree stumps and furrows. R
Always keep the doors, the tailgate, the side
windows and the sliding sunroof closed while
the vehicle is in motion. R
Do not shift the automatic transmission to
transmission position N .R
Observe the notes on off-road fording
( Y
page 167).
i Do not use the HOLD function when driving
off-road, on steep uphill or downhill gradients
or on slippery or loose surfaces. The HOLD function cannot hold the vehicle on such sur-
faces.
Checklist before driving off-road
! If the engine oil warning lamp lights up while
the vehicle is in motion, stop the vehicle in a
safe place as soon as possible. Check the
engine oil level. The engine oil warning lamp
warning must not be ignored. Continuing the
journey while the symbol is displayed could
lead to engine damage. X
Engine oil level: check the engine oil level
and add oil if necessary.
When driving on steep gradients, the engine
oil level must be sufficiently high to ensure a
correct oil supply in the vehicle. X
DEF tank (BlueTEC vehicles): check the
level and add if necessary ( Y
page 156).X
Tire-changing tool kit: check that the jack is
working and make sure you have the lug
wrench, a robust tow cable and a folding
spade in the vehicle. X
Wheels and tires: check the tire tread depth
and tire pressure. X
Check for damage and remove any foreign
objects, e.g. small stones, from the wheels/
tires. X
Replace any missing valve caps. X
Replace dented or damaged wheels. X
Rims: dented or bent rims can result in a loss
of tire pressure and damage the tire bead.
Before driving off-road, check the wheels and
replace them if necessary.
Checklist after driving off-road
! If you detect damage to the vehicle after
driving off-road, have the vehicle checked
immediately at a qualified specialist work-
shop.
Driving over rough terrain places greater
demands on your vehicle than driving on normal
roads. After driving off-road, check the vehicle.
This allows you to detect damage promptly and
reduce the risk of an accident to yourself and
other road users. X
If the Offroad or Offroad Plus drive program
is selected: select the Individual , Sport ,Driving tips 169
Driving and parking Z
Page 172 of 390
Comfort or Slippery drive program
( Y
page 145).X
Deactivate the LOW RANGE off-road gear
( Y
page 219).X
Deactivate DSR ( Y
page 216).X
Lower the vehicle level again to a level suita-
ble to the road conditions, e.g. to the normal
level. X
Clean the headlamps and rear lights and
check for damage. X
Clean the front and rear license plates. X
Clean the wheels and tires with a water jet
and remove any foreign objects. X
Clean the wheels, wheel housings and the
vehicle underside with a water jet; check for
any foreign objects and damage. X
Check whether twigs or other parts of plants
have become trapped. These increase the risk
of fire and can damage fuel pipes, brake
hoses or the rubber bellows of the axle joints
and propeller shafts. X
After the trip, examine without fail the entire
undercarriage, wheels, tires, brakes, body-
work structure, steering, chassis and exhaust
system for damage. X
After driving for extended periods across
sand, mud, gravel, water or in similarly dirty
conditions, have the brake discs, wheels,
brake pads/linings and axle joints checked
and cleaned. X
If you detect strong vibrations after off-road
travel, check for foreign objects in the wheels
and drive train and remove them if necessary.
Foreign objects can disturb the balance and
cause vibrations.
Driving on sand Observe the following rules when driving on
sand: R
Select the Offroad drive program (vehicles
without Off-Road Engineering package)
( Y
page 217).R
Select the Offroad drive program (vehicles
with Off-Road Engineering package)
( Y
page 218).R
Select a higher vehicle level. R
Avoid high engine speeds. R
Use the left-hand steering wheel paddle
shifter to shift to a lower gear appropriate to
the terrain. R
Drive quickly to overcome the rolling resist-
ance. Otherwise the vehicle's wheels could
become stuck in loose ground. R
Drive in the tracks of other vehicles if possi-
ble. Make sure that: -
the tire ruts are not too deep. -
the sand is sufficiently firm. -
the ground clearance of the vehicle is suf-
ficient.
Tire ruts and gravel roads
! Check that the ruts are not too deep and
that your vehicle has sufficient clearance.
Otherwise, your vehicle could be damaged or
bottom out and get stuck.
Observe the following rules when driving along
ruts in off-road terrain or on roads with loose
gravel: R
Select the Offroad drive program (vehicles
without Off-Road Engineering package)
( Y
page 217). R
Select the Offroad drive program (vehicles
with Off-Road Engineering package)
( Y
page 218). R
Select a higher vehicle level. R
Avoid high engine speeds. R
Shift to a lower gear using the left-hand steer-
ing wheel paddle shifter. R
Drive slowly. R
Where ruts are too deep, drive with the
wheels of one side on the center grassy area,
if possible.
Driving over obstacles
! Obstacles could damage the floor of the
vehicle or components of the chassis. Ask
passengers for guidance when driving over
large obstacles. The passenger should always
keep a safe distance from the vehicle when
doing so in order to avoid injury as a result of
unexpected vehicle movements. After driving
off-road or over obstacles, check the vehicle
for possible damage, especially to the under-
body and the components of the chassis.170
Driving tips
Driving and parking
Page 173 of 390
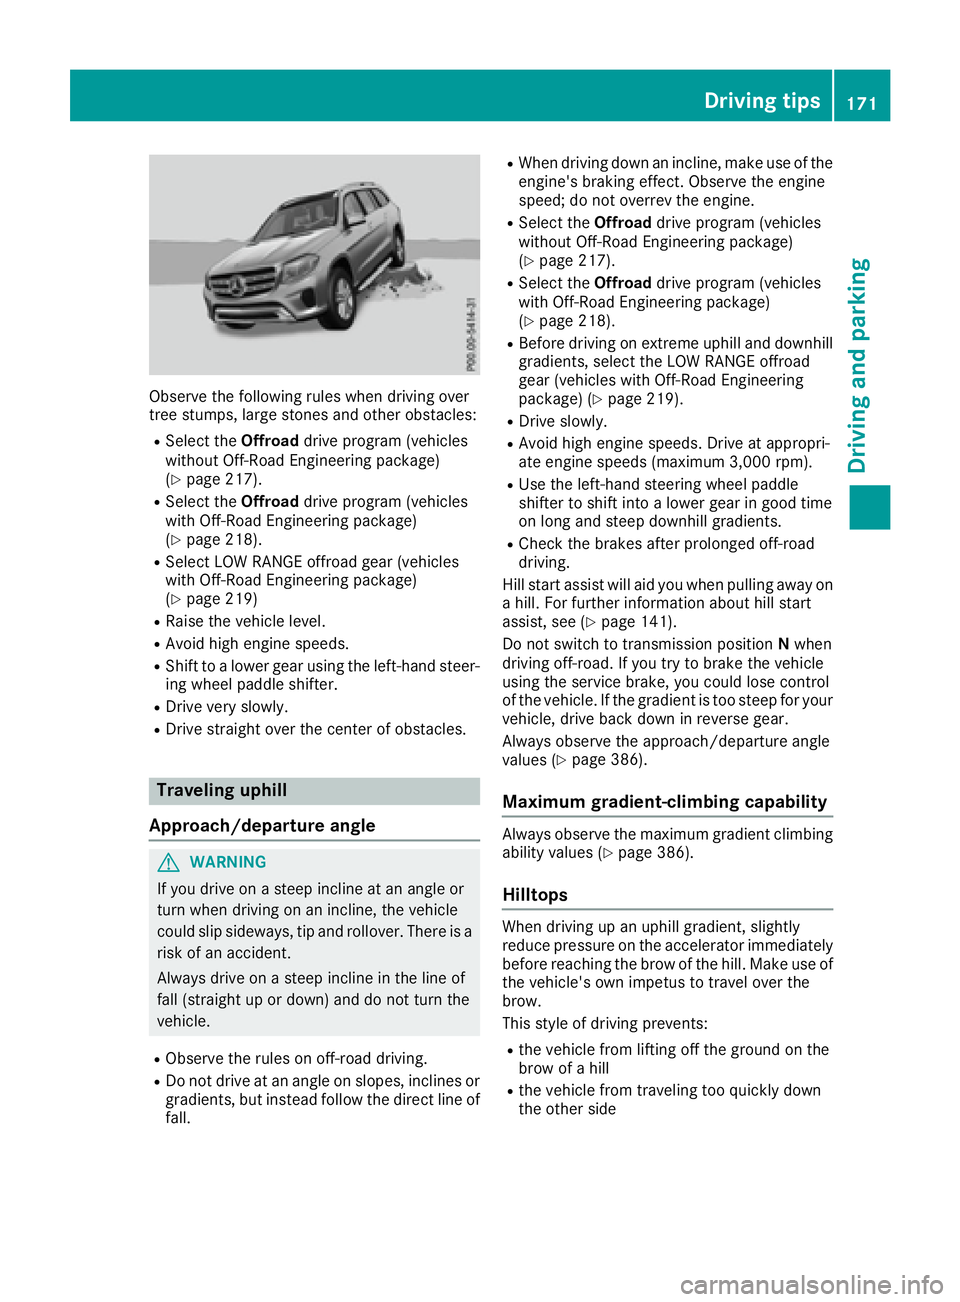
Observe the following rules when driving over
tree stumps, large stones and other obstacles: R
Select the Offroad drive program (vehicles
without Off-Road Engineering package)
( Y
page 217). R
Select the Offroad drive program (vehicles
with Off-Road Engineering package)
( Y
page 218). R
Select LOW RANGE offroad gear (vehicles
with Off-Road Engineering package)
( Y
page 219) R
Raise the vehicle level. R
Avoid high engine speeds. R
Shift to a lower gear using the left-hand steer-
ing wheel paddle shifter. R
Drive very slowly. R
Drive straight over the center of obstacles.
Traveling uphill
Approach/departure angle
G WARNING
If you drive on a steep incline at an angle or
turn when driving on an incline, the vehicle
could slip sideways, tip and rollover. There is a
risk of an accident.
Always drive on a steep incline in the line of
fall (straight up or down) and do not turn the
vehicle. R
Observe the rules on off-road driving. R
Do not drive at an angle on slopes, inclines or
gradients, but instead follow the direct line of
fall. R
When driving down an incline, make use of the
engine's braking effect. Observe the engine
speed; do not overrev the engine. R
Select the Offroad drive program (vehicles
without Off-Road Engineering package)
( Y
page 217). R
Select the Offroad drive program (vehicles
with Off-Road Engineering package)
( Y
page 218). R
Before driving on extreme uphill and downhill
gradients, select the LOW RANGE offroad
gear (vehicles with Off-Road Engineering
package) ( Y
page 219). R
Drive slowly. R
Avoid high engine speeds. Drive at appropri-
ate engine speeds (maximum 3,000 rpm). R
Use the left-hand steering wheel paddle
shifter to shift into a lower gear in good time
on long and steep downhill gradients. R
Check the brakes after prolonged off-road
driving.
Hill start assist will aid you when pulling away on
a hill. For further information about hill start
assist, see ( Y
page 141).
Do not switch to transmission position N when
driving off-road. If you try to brake the vehicle
using the service brake, you could lose control
of the vehicle. If the gradient is too steep for your
vehicle, drive back down in reverse gear.
Always observe the approach/departure angle
values ( Y
page 386).
Maximum gradient-climbing capability Always observe the maximum gradient climbing
ability values ( Y
page 386).
Hilltops When driving up an uphill gradient, slightly
reduce pressure on the accelerator immediately
before reaching the brow of the hill. Make use of
the vehicle's own impetus to travel over the
brow.
This style of driving prevents: R
the vehicle from lifting off the ground on the
brow of a hill R
the vehicle from traveling too quickly down
the other side Driving tips 171
Driving and parking Z
Page 182 of 390
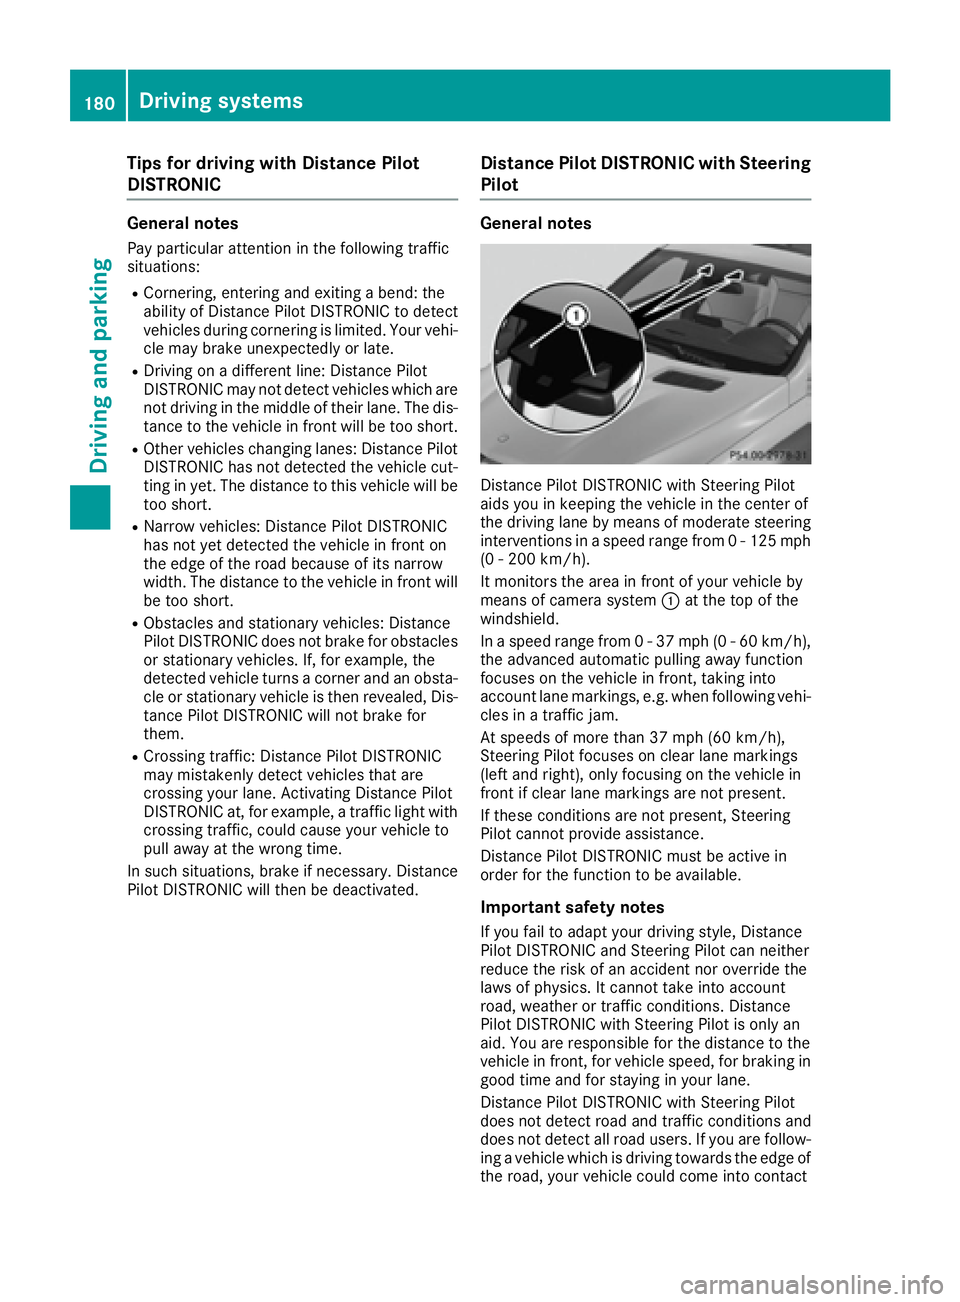
Tips for driving with Distance Pilot
DISTRONIC General notes Pay particular attention in the following traffic
situations: R
Cornering, entering and exiting a bend: the
ability of Distance Pilot DISTRONIC to detect
vehicles during cornering is limited. Your vehi-
cle may brake unexpectedly or late. R
Driving on a different line: Distance Pilot
DISTRONIC may not detect vehicles which are
not driving in the middle of their lane. The dis-
tance to the vehicle in front will be too short. R
Other vehicles changing lanes: Distance Pilot
DISTRONIC has not detected the vehicle cut-
ting in yet. The distance to this vehicle will be
too short. R
Narrow vehicles: Distance Pilot DISTRONIC
has not yet detected the vehicle in front on
the edge of the road because of its narrow
width. The distance to the vehicle in front will
be too short. R
Obstacles and stationary vehicles: Distance
Pilot DISTRONIC does not brake for obstacles
or stationary vehicles. If, for example, the
detected vehicle turns a corner and an obsta-
cle or stationary vehicle is then revealed, Dis-
tance Pilot DISTRONIC will not brake for
them. R
Crossing traffic: Distance Pilot DISTRONIC
may mistakenly detect vehicles that are
crossing your lane. Activating Distance Pil ot
DIST
RONIC at, for example, a traffic light with
crossing traffic, could cause your vehicle to
pull away at the wrong time.
In such situations, brake if necessary. Distance
Pilot DISTRONIC will then be deactivated. Distance Pilot DISTRONIC with Steering
Pilot General notes
Distance Pilot DISTRONIC with Steering Pilot
aids you in keeping the vehicle in the center of
the driving lane by means of moderate steering
interventions in a speed range from 0 - 125 mph
(0 - 200 km/h).
It monitors the area in front of your vehicle by
means of camera system �C at the top of the
windshield.
In a speed range from 0 - 37 mph (0 - 60 km/h),
the advanced automatic pulling away function
focuses on the vehicle in front, taking into
account lane markings, e.g. when following vehi-
cles in a traffic jam.
At speeds of more than 37 mph (60 km/h),
Steering Pilot focuses on clear lane markings
(left and right), only focusing on the vehicle in
front if clear lane markings are not present.
If these conditions are not present, Steering
Pilot cannot provide assistance.
Distance Pilot DISTRONIC must be active in
order for the function to be available.
Important safety notes
If you fail to adapt your driving style, Distance
Pilot DISTRONIC and Steering Pilot can neither
reduce the risk of an accident nor override the
laws of physics. It cannot take into account
road, weather or traffic conditions. Distance
Pilot DISTRONIC with Steering Pilot is only an
aid . You are responsible for the distance to the
ve
hicle in front, for vehicle speed, for braking in
good time and for staying in your lane.
Distance Pilot DISTRONIC with Steering Pilot
does not detect road and traffic conditions and
does not detect all road users. If you are follow-
ing a vehicle which is driving towards the edge of
the road, your vehicle could come into contact180
Driving system s
Dr ivi ng an d parking
Page 183 of 390
with the curb or other road boundaries. Be par-
ticularly aware of other road users, e.g. cyclists,
that are directly next to your vehicle.
Obstacles such as traffic pylons on the lane or
projecting out into the lane are not detected.
An inappropriate steering intervention, e.g. after
intentionally driving over a lane marking, can be
corrected at any time if you steer slightly in the
opposite direction.
DISTRONIC PLUS with Steering Pilot cannot
continuously keep your vehicle in lane. In some
cases, the steering intervention is not sufficient
to bring the vehicle back to the lane. In such
cases, you must steer the vehicle yourself to
ensure that it does not leave the lane.
The support provided by the system can be
impaired if: R
there is poor visibility, e.g. due to insufficient
illumination of the road, or due to snow, rain,
fog or spray R
there is glare, e.g. from oncoming traffic, the
sun or reflections (e.g. when the road surface
is wet) R
the windshield is dirty, fogged up, damaged or
covered, for instance by a sticker, in the vicin-
ity of the camera R
there are no, several or unclear lane markings
for a lane, e.g. in areas with road construction
work R
the lane markings are worn away, dark or cov-
ered up, e.g. by dirt or snow R
the distance to the vehicle in front is too small
and the lane markings thus cannot be detec-
ted R
the lane markings change quickly, e.g. lanes
branch off, cross on e another or mergeR
the road is narrow and winding R
there are strong shadows cast on the road
The system is switched to passive and no longer
assists you by performing steering interventions
if: R
you actively change lane R
you switch on the turn signal R
take your hands off the steering wheel or do
not steer for a prolonged period of time
i After you have finished changing lanes,
Steering Pilot is automatically active once
more. Steering Pilot cannot provide assistance: R
on very sharp corners R
when towing a trailer R
when a loss of tire pressure or a defective tire
has been detected and displayed
Observe the important safety notes on Distance
Pilot DISTRONIC ( Y
page 174).
The steering interventions are carried out with a
limited steering moment. The system requires
the driver to keep his hands on the steering
wheel and to steer himself.
If you do not steer yourself or if you take your
hands off the steering wheel for a prolonged
period of time, the system will first alert you with
a visual warning. A steering wheel symbol
appears in the multifunction display. If you have
still not started to steer and have not taken hold
of the steering wheel after five seconds at the
latest, a warning tone also sounds to remind you
to take control of the vehicle. Steering Pilot is
then switched to passive. Distance Pilot
DISTRONIC remains active.
Activating Steering Pilot X
Activate Distance Pilot DISTRONIC with
Steering Pilot using the on-board computer
( Y
page 237).
The Steering Pilot On message appears in
the multifunction display. Steering Pilot is
activated.
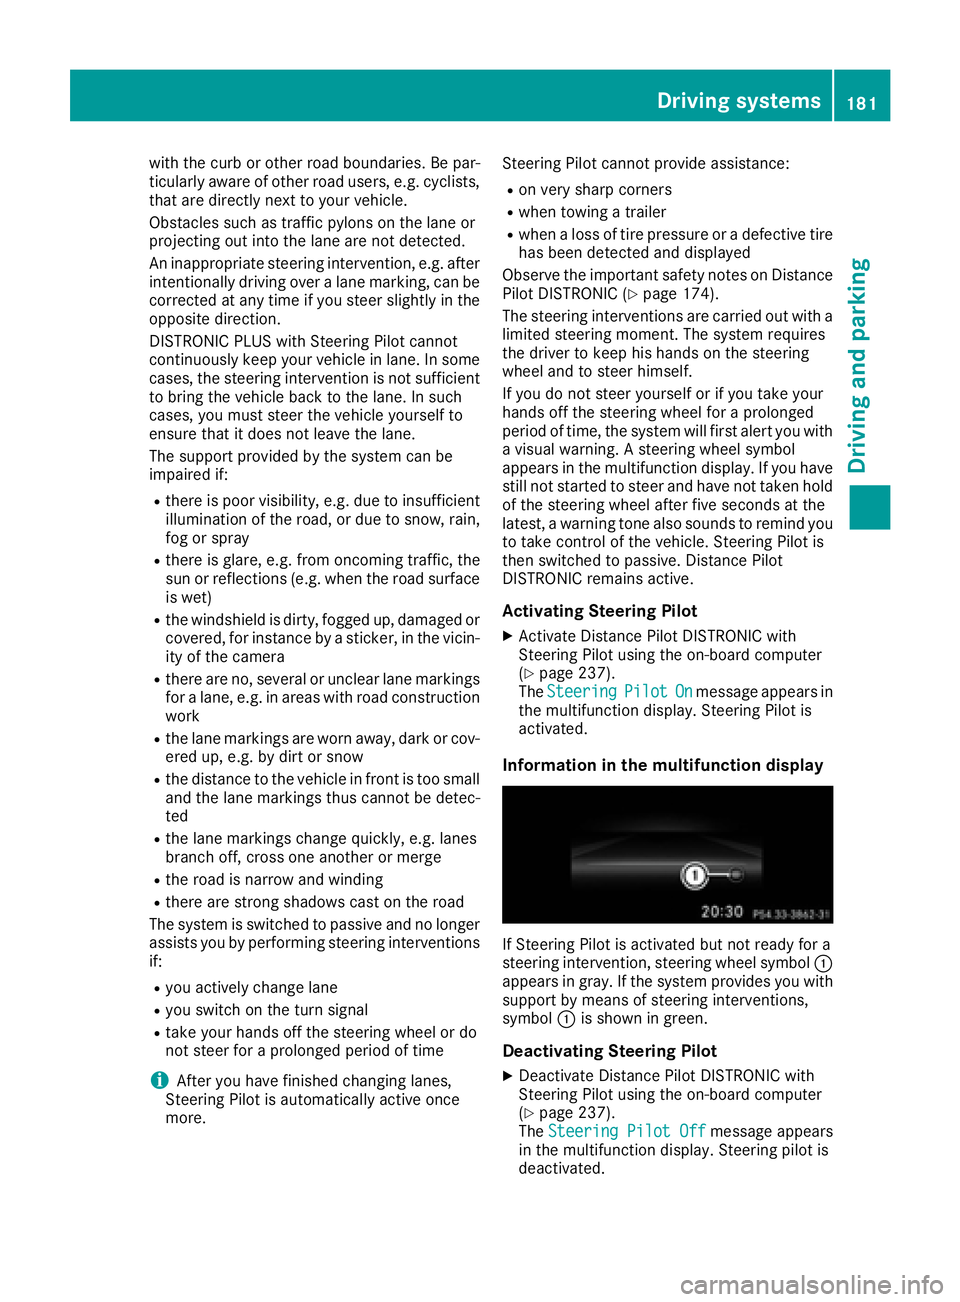
Information in the multifunction display
If Steering Pilot is activated but not ready for a
steering intervention, steering wheel symbol �C
appears in gray. If the system provides you with
support by means of steering interventions,
symbol �C is shown in green.
Deactivating Steering Pilot X
Deactivate Distance Pilot DISTRONIC with
Steering Pilot using the on-board computer
( Y
page 237).
The Steering Pilot Off message appears
in the multifunction display. Steering pilot is
deactivated.Driving systems 181
Driving and parking Z
Page 191 of 390
Vehicles with a trailer coupled: below a speed
of 19 mph (30 km/h), you can choose between
the normal and raised vehicle level.
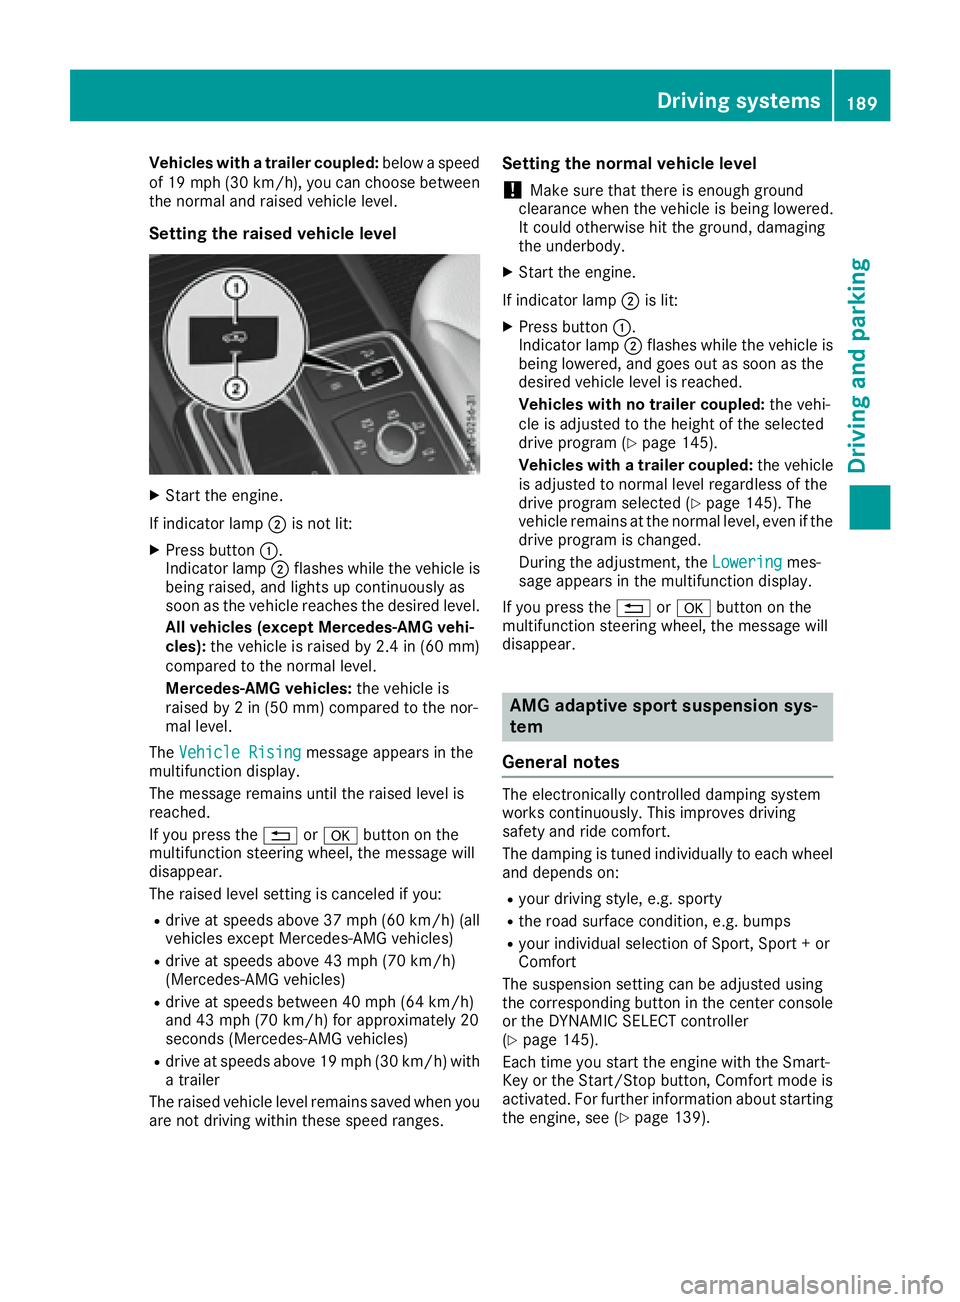
Setting the raised vehicle level X
Start the engine.
If indicator lamp �D is not lit:X
Press button �C .
Indicator lamp �D flashes while the vehicle is
being raised, and lights up continuously as
soon as the vehicle reaches the desired level.
All vehicles (except Mercedes-AMG vehi-
cles): the vehicle is raised by 2.4 in (60 mm)
compared to the normal level.
Mercedes-AMG vehicles: the vehicle is
raised by 2 in (50 mm) compared to the nor-
mal level.
The Vehicle Rising
message appears in the
multifunction display.
The message remains until the raised level is
reached.
If you press the �8 or �v button on the
multifunction steering wheel, the message will
disappear.
The raised level setting is canceled if you: R
drive at speeds above 37 mph (60 km/h) (all
vehicles except Mercedes-AMG vehicles) R
drive at speeds above 43 mph (70 km/h)
(Mercedes-AMG vehicles) R
drive at speeds between 40 mph (64 km/h)
and 43 mph (70 km/h) for approximately 20
seconds (Mercedes-AMG vehicles) R
drive at speeds above 19 mph (30 km/h) with
a trailer
The raised vehicle level remains saved when you
are not driving within these speed ranges. Setting the normal vehicle level
! Make sure that there is enough ground
clearance when the vehicle is being lowered.
It could otherwise hit the ground, damaging
the underbody. X
Start the engine.
If indicator lamp �D is lit: X
Press button �C .
Indicator lamp �D flashes while the vehicle is
being lowered, and goes out as soon as the
desired vehicle level is reached.
Vehicles with no trailer coupled: the vehi-
cle is adjusted to the height of the selected
drive program ( Y
page 145).
Vehicles with a trailer coupled: the vehicle
is adjusted to normal level regardless of the
drive p rogram selected ( Y
page 145). The
vehicle remains at the normal level, even if the
drive program is changed.
During the adjustment, the Lowering mes-
sage appears in the multifunction display.
If you press the �8 or �v button on the
multifunction steering wheel, the message will
disappear.
AMG adaptive sport suspension sys-
tem
General notes The electronically controlled damping system
works continuously. This improves driving
safety and ride comfort.
The damping is tuned individually to each wheel
and depends on: R
your driving style, e.g. sporty R
the road surface condition, e.g. bumps R
your individual selection of Sport, Sport + or
Comfort
The suspension setting can be adjusted using
the corresponding button in the center console
or the DYNAMIC SELECT controller
( Y
page 145).
Each time you start the engine with the Smart-
Key or the Start/Stop button, Comfort mode is
activated. For further information about starting
the engine, see ( Y
page 139).Driving systems 189
Driving and parking Z
Page 193 of 390

Range of the sensors General notes Parking Assist PARKTRONIC does not take into
account obstacles located: R
below the detection range, e.g. people, ani-
mals or objects. R
above the detection range, e.g. overhanging
loads, truck overhangs or loading ramps.
�C
Sensors in the front bumper, left-hand side
(example)
The sensors must be free from dirt, ice or slush.
They can otherwise not function correctly. Clean
the sensors regularly, taking care not to scratch
or damage them ( Y
page 328). Range
Front sensors
Center Approx. 40 in (approx.
100 cm)
Corners Approx. 24 in (approx.
60 cm)
Rear sensors
Center Approx. 48 in (approx.
120 cm)
Corners Approx. 32 in (approx.
80 cm)
Minimum distance
Center Approx. 8 in (approx. 20 cm)
Corners Approx. 6 in (approx. 15 cm)
If there is an obstacle within this range, the rel-
evant warning displays light up and a warning
tone sounds. If the distance falls below the min-
imum, the distance may no longer be shown.Driving systems 191
Driving and parking Z