2017 MERCEDES-BENZ GLE43AMG SUV air condition
[x] Cancel search: air conditionPage 326 of 366

To avoid hazardous situations:
Rnever install snow chains to the front
wheels
Ralways install snow chains in pairs to the
rear wheels.
!You must drive at raised vehicle level (height
1) if snow chains have been installed. The
vehicle may otherwise be damaged.
!Vehicles with ADS (Adaptive Damping
System): do not use the sport mode when
driving with snow chains mounted. The vehi-
cle may otherwise be damaged.
For safety reasons, Mercedes-Benz recom-
mends that you only use snow chains that have
been specially approved for your vehicle by
Mercedes-Benz, or are of a corresponding
standard of quality. For more information,
please contact a qualified specialist workshop.
Install the snow chains on all driven wheels for
maximum tractive power and driving stability. If
you own snow chains for two driven wheels only,
install the snow chains to the wheels on the rear
axle. The vehicle then remains more stable
under braking.
If you intend to mount snow chains, please bear
the following points in mind:
RSnow chains may not be mounted on all
wheel/tire combinations. Permissible
wheel/tire combinations (
Ypage 345).
ROnly use snow chains when driving on roads
completely covered by snow. Remove the
snow chains as soon as possible when you
come to a road that is not snow-covered.
RLocal regulations may restrict the use of snow chains. Observe the appropriate regulations if
you wish to mount snow chains.
RDo not exceed the maximum permissible
speed of 30 mph (50 km/h).
RNever use Parking Pilot when snow chains are
installed (Ypage 177).
You may wish to deactivate ESP®when pulling
away with snow chains installed (Ypage 65).
You can thereby allow the wheels to spin in a
controlled manner, achieving an increased driv-
ing force (cutting action).
Information about driving with an emergency
spare wheel (
Ypage 346).
Tire pressure
Tire pressure specifications
Important safety notes
GWARNING
Underinflated or overinflated tires pose the
following risks:
Rthe tires may burst, especially as the load
and vehicle speed increase.
Rthe tires may wear excessively and/or
unevenly, which may greatly impair tire
traction.
Rthe driving characteristics, as well as steer-
ing and braking, may be greatly impaired.
There is a risk of an accident.
Follow recommended tire inflation pressures
and check the pressure of all the tires includ-
ing the spare wheel:
Rmonthly, at least
Rif the load changes
Rbefore beginning a long journey
Runder different operating conditions, e.g.
off-road driving
If necessary, correct the tire pressure.
The data on the Tire and Loading Information
placard and tire pressure table shown here are
examples. Tire pressure specifications are vehi-
cle-specific and may deviate from the data
shown here. The tire pressure specifications
that are valid for your vehicle can be found on
the Tire and Loading Information placard and
tire pressure table on the vehicle.
General notes
The recommended tire pressures for the tires
mounted at the factory can be found on the
labels described here.
Operation with emergency spare wheel:
Information on operation with the emergency
spare wheel can be found under "Emergency
spare wheel" (
Ypage 346).
Operation with a trailer: the applicable value
for the rear axle is the maximum tire pressure
value stated in the table inside the fuel filler flap.
324Tire pressure
Wheels and tires
Page 328 of 366

Important notes on tire pressure
GWARNING
If th etire pressur edrops repeatedly, th e
wheel, valv eor tire may be damaged. Tir e
pressur ethat is to olow may result in atire
blow-out .Ther eis aris kof an accident.
RChec kth etire for foreign objects .
RCheckwhether th ewhee lis losing air or th e
valv eis leaking .
If you are unable to rectify th edamage, con-
tac t a qualified specialist workshop.
GWARNIN G
If you fit unsuitable accessories onto tire
valves, th etire valves may be overloaded and
malfunction ,whic hcan caus etire pressur e
loss .Due to their design ,retrofitte dtire pres-
sur emonitors keep th etire valv eopen .This
can also result in tire pressur eloss .Ther eis a
ris kof an accident.
Only screw th estandard valv ecap or other
valv ecap sapprove dby Mercedes-Ben zfor
your vehicl eonto th etire valve.
Use asuitable pressur egauge to chec kth etire
pressure. The outer appearanc eof atire does
no tpermit any reliable conclusio nabout th etire
pressure. On vehicles equipped wit hth eelec -
tronic tire pressur emonitor, th etire pressur e
can be checke din th eon-board computer.
The tire temperature and pressur eincreas e
when th evehicl eis in motion .This is dependen t
on th edriving spee dand th eload.
Therefore, you should only correc ttire pres-
sures when th etires are cold.
The tires are cold:
Rif th evehicl ehas been parked wit hth etires
out of direct sunligh tfor at least three hour s
and
Rif th evehicl ehas no tbeen driven further than
1 mile (1. 6km)
The tire temperature changes depending on th e
outside temperature, th evehicl espee dand th e
tire l
oad. If th etire temperature changes by
18 ‡(10 †), th etire pressur echanges by
approximately 10 kP a(0. 1bar/1.5 psi) .Tak e
this int oaccoun twhen checkin gth epressur eof
warm tires .Only correc tth etire pressur eif it is to
olow for th ecurren toperating conditions. If
you chec kth etire pressur ewhen th etires are
warm ,th eresulting value will be higher than if
th etires were cold. This is normal. Do no t
reduce th etire pressur eto th evalue specifie d
for cold tires .The tire pressur ewould otherwise
be to olow.
Observ eth erecommended tire pressures for
cold tires :
Ron theTir eand Loading Information placard
on th eB-pillar on th edriver' sside
Rin th etire pressur etable in th efuel filler flap
(Ypage 141)
Rprinte din yellow on th erim of th eemer-
gency/collapsible spar ewhee l(dependin gon
vehicl eequipment)
Underinflated or overinflated tires
Underinflated tires
GWARNIN G
Tires wit hpressur ethat is to olow can over-
heat and burs tas aconsequence .In addition ,
they also suffer from excessiv eand/o rirreg-
ular wear ,whic hcan severely impair th ebrak -
ing properties and th edriving characteristics .
Ther eis aris kof an accident.
Avoid tire pressures that are to olow in all th e
tires ,includin gth espar ewheel.
Underinflated tires may:
Roverheat, leadin gto tire defects
Radversely affec thandlin g
Rwear excessively and/o runevenly
Rhav ean adverse effec ton fuel consumption
Overinflated tires
GWARNIN G
Tires wit hexcessively high pressur ecan burs t
because they are damaged mor eeasil yby
road debris, pothole setc. In addition ,they
also suffer from irregular wear ,whic hcan
severely impair th ebraking properties and th e
driving characteristics .Ther eis aris kof an
accident.
326Tire pressure
Wheels and tires
Page 333 of 366
You can find more tire pressure values for
various operating conditions in the tire pres-
sure table inside the fuel filler flap
(
Ypage 324).
XMake sure that the tire pressure is correct on
all four wheels.
XMake sure that the SmartKey is in position2
in the ignition lock.
XPress the =or; button on the steering
wheel to select the Serv.menu.
XPress the9or: button to select
Tire Pressure.
XPress the abutton.
The multifunction display shows the current
tire pressure for the individual tires or the
Tire pressure will be displayed
after driving a few minutesmessage.
XPress the :button.
The UseCurrentPressuresasNewRef‐erenceValuesmessage appears in the mul-
tifunction display.
If you wish to confirm the restart:
XPress the abutton.
The TirePress.MonitorRestartedmes-
sage appears in the multifunction display.
After driving for a few minutes, the system
checks whether the current tire pressures are
within the specified range. The new tire pres-
sures are then accepted as reference values
and monitored.
If you wish to cancel the restart:
XPress the %button.
The tire pressure values stored at the last
restart will continue to be monitored.
Radio type approval for the tire pres-
sure monitor
CountryRadio type approval number
USAFCC ID: MRXMW2433A
FCC ID: MRXGG4
FCC ID: MRXMC34MA4
CanadaIC: 2546A-MW2433A
IC: 2546A-GG4
IC: 2546A-MC34MA4
Loading the vehicle
Instruction labels for tires and loads
GWARNING
Overloaded tires can overheat, causing a
blowout. Overloaded tires can also impair the steering and driving characteristics and lead
to brake failure. There is a risk of accident.
Observe the load rating of the tires. The load
rating must be at least half of the GAWR of
your vehicle. Never overload the tires by
exceeding the maximum load.
Two instruction labels on your vehicle show the maximum possible load.
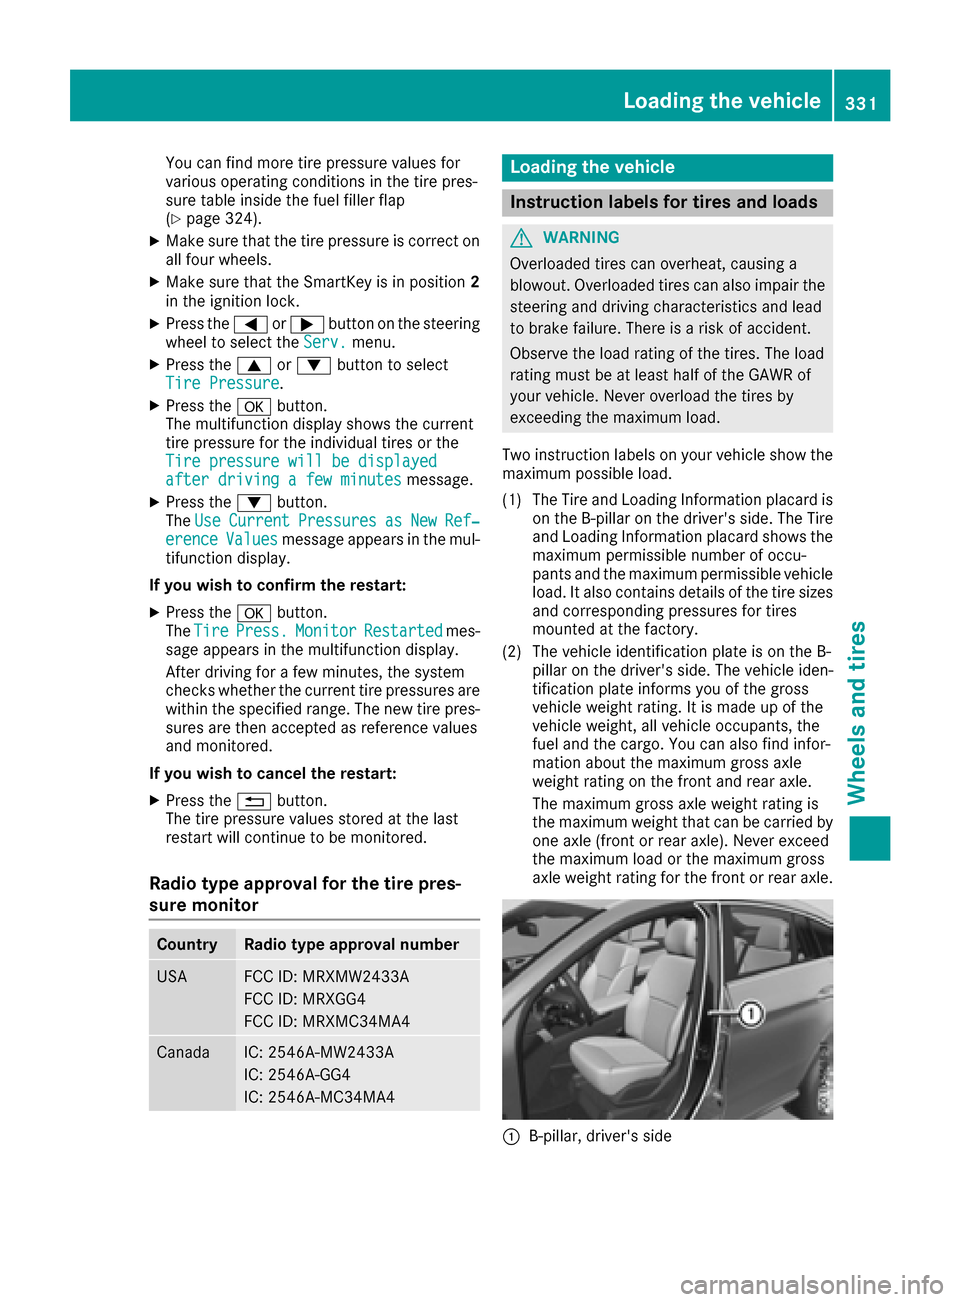
(1) The Tire and Loading Information placard is on the B-pillar on the driver's side. The Tire
and Loading Information placard shows the
maximum permissible number of occu-
pants and the maximum permissible vehicle
load. It also contains details of the tire sizes
and corresponding pressures for tires
mounted at the factory.
(2) The vehicle identification plate is on the B- pillar on the driver's side. The vehicle iden-
tification plate informs you of the gross
vehicle weight rating. It is made up of the
vehicle weight, all vehicle occupants, the
fuel and the cargo. You can also find infor-
mation about the maximum gross axle
weight rating on the front and rear axle.
The maximum gross axle weight rating is
the maximum weight that can be carried by
one axle (front or rear axle). Never exceed
the maximum load or the maximum gross
axle weight rating for the front or rear axle.
:B-pillar, driver's side
Loading the vehicle331
Wheels and tires
Z
Page 341 of 366

Bar
Metric unit for tire pressure. 14.5038 pounds
per square inch (psi) and 100 kilopascals (kPa)
are the equivalent of 1 bar.
DOT (Department of Transportation)
DOT-marked tires fulfill the requirements of the
U S Department of Transportation.
Normal occupant weight
The number of occupants for which the vehicle
is designed multiplied by 68 kilograms (150 lbs).
Uniform Tire Quality Grading Standards
A uniform standard to grade the quality of tires
with regards to tread quality, tire traction and
temperature characteristics. The quality grad-
ing assessment is made by the manufacturer
following specifications from the U.S. govern-
ment. The ratings are molded into the sidewall of
the tire.
Recommended tire pressures
The recommended tire pressure applies to the
tires mounted at the factory.
The Tire and Loading Information placard con-
tains the recommended tire pressures for cold
tires on a fully loaded vehicle and for the maxi-
mum permissible vehicle speed.
The tire pressure table contains the recommen-
ded pressures for cold tires for various operat-
ing conditions, i.e. differing load and speed con-
ditions.
Increased vehicle weight due to optional
equipment
The combined weight of all standard and
optional equipment available for the vehicle,
regardless of whether it isactua
lly installed on
the vehicle or not.
Rim
This is the part of the wheel on which the tire is
mounted.
GAWR (Gross Axle Weight Rating)
The GAWR is the maximum gross axle weight
rating. The actual load on an axle must never
exceed the gross axle weight rating. The gross
axle weight rating can be found on the vehicle
identification plate on the B-pillar on the driver's
side.
Speed rating
The speed rating is part of the tire identification.
It specifies the speed range for which the tire is
approved.
GTW (Gross Trailer Weight)
The GTW is the weight of a trailer including the
weight of the load, luggage, accessories etc. on
the trailer.
GVW (Gross Vehicle Weight)
The gross vehicle weight includes the weight of the vehicle including fuel, tools, the spare wheel,
accessories installed, occupants, luggage and
the drawbar noseweight, if applicable. The gross
vehicle weight must not exceed the gross vehi-
cle weight rating GVWR as specified on the vehi-
cle identification plate on the B-pillar on the
driver's side.
GVWR (Gross Vehicle Weight Rating)
The GVWR is the maximum permissible gross
weight of a fully loaded vehicle (the weight of the
vehicle including all accessories, occupants,
fuel, luggage and the drawbar nosew
eight, if
applicable). The gross vehicle weight rating is
specified on the vehicle identification plate on
the B-pillar on the driver's side.
Maximum loaded vehicle weight
The maximum weight is the sum of:
Rthe curb weight of the vehicle
Rthe weight of the accessories
Rthe load limit
Rthe weight of the factory installed optional
equipment
Kilopascal (kPa)
Metric unit for tire pressure. 6.9 kPa corre-
sponds to 1 psi. Another unit for tire pressure is
bar. 100 kilopascals (kPa) are the equivalent of
1 bar.
Load index
In addition to the load-bearing index, the load
index may also be imprinted on the sidewall of
the tire. This specifies the load-bearing capacity
more precisely.
Curb weight
The weight of a vehicle with standard equipment
including the maximum capacity of fuel, oil and
coolant. It also includes the air-conditioning sys-
All about wheels and tires339
Wheels and tires
Z
Page 343 of 366
Changing a wheel
Flat tire
The "Breakdown assistance" section
(Ypage 306) contains information and notes on
how to deal with a flat tire. Information on driv-
ing with MOExtended tires in the event of a flat
tire can be found under "MOExtended tires (tires
with run-flat characteristics" (
Ypage 307).
Vehicles with an emergency spare wheel: in
the event of a flat tire, mount the emergency
spare wheel according to the description under "Mounting a wheel" (
Ypage 341).
Rotating the wheels
GWARNING
Interchanging the front and rear wheels may
severely impair the driving characteristics if
the wheels or tires have different dimensions. The wheel brakes or suspension components
may also be damaged. There is a risk of acci-
dent.
Rotate front and rear wheels only if the wheels and tires are of the same dimensions.
!On vehicles equipped with a tire pressure
monitor, electronic components are located
in the wheel.
Tire-mounting tools should not be used near
the valve. This could damage the electronic
components.
Only have tires changed at a qualified spe-
cialist workshop.
Always observe the instructions and safety
notes in the "Mounting a wheel" section
(
Ypage 341).
The wear patterns on the front and rear tires
differ, depending on the operating conditions.
Rotate the wheels before a clear wear pattern
has formed on the tires. Front tires typically
wear more on the shoulders and the rear tires in
the center.
On vehicles that have the same size front and
rear wheels, you can rotate the wheels accord-
ing to the intervals in the tire manufacturer's
warranty book in your vehicle documents. If no
warranty book is available, the tires should be
rotated every 3,000 to 6,000 miles (5,000to
10,
000 km). Depending on tire wear, this may be required earlier. Do not change the direction
of wheel rotation.
Clean the contact surfaces of the wheel and the
brake disc thoroughly every time a wheel is rota-
ted. Check the tire pressure and, if necessary,
restart the tire pressure loss warning system or
the tire pressure monitor (
Ypage 328).
Direction of rotation
Tires with a specified direction of rotation have
additional benefits, e.g. if there is a risk of hydro-
planing. These advantages can only be gained if
the tires are installed corresponding to the
direction of rotation.
An arrow on the sidewall of the tire indicates its
correct direction of rotation.
Storing wheels
Store wheels that are not being used in a cool,
dry and preferably dark place. Protect the tires
from oil, grease, gasoline and diesel.
Mounting a wheel
Preparing the vehicle
XVehicle with emergency spare wheel:
when mounting the emergency spare wheel in
the event of a flat tire, follow the additional
notes on vehicle preparation under "Flat tire"
(
Ypage 306).
XStop the vehicle on solid, non-slippery and
level ground.
XApply the electric parking brake manually.
XBring the front wheels into the straight-ahead position.
XVehicles with automatic transmission:
shift the automatic transmission to position
P .
XVehicles with the AIRMATIC package:
make sure that the normal vehicle level is
selected (
Ypage 171).
XSwitch off the engine.
XVehicles without KEYLESS-GO: remove the
SmartKey from the ignition lock.
Changing a wheel341
Wheels an d tires
Z
Page 348 of 366

you haveno information about their previous
usage .
The recommended pressures for various oper -
ating condition scan be found :
Ron theTir eand Loadin gInformation placard
on th eB-pillar on th edriver's side
Rin th etire pressur etable in th efuel filler flap
Observ eth enote son recommended tire pres-
sures under various operating condition s
(
Ypage 324).
Chec ktire pressures regularly, and only when
th etires are cold. Comply wit hth emaintenance
recommendation sof th etire manufacturer in
th evehicl edocumen twallet .
Notes on th evehicl eequipmen t –always equip
th evehicle:
Rwit htires of th esam esiz eon agiven axl e(lef t
and right )
Rwithth esam etyp eof tires at agiven time
(summer tires ,winte rtires ,MOExtended
tires )
Vehicles equipped wit hMOExtended tires are
no tequipped wit h aTIREFI Tki tat th efactory. It
is therefor erecommended that you additionally
equip your vehicl ewit h a TIREFI Tki tif you moun t
tires that do no tfeature run-flat properties, e.g.
winte rtires . ATIREFI Tki tmay be obtained from
a qualified specialist workshop .
Emergency spare wheel
Impor tant safety notes
GWARNIN G
The whee lor tire siz eas well as th etire typ eof
th espar ewhee lor emergenc yspar ewhee l
and th ewhee lto be replaced may differ .
Mounting an emergenc yspar ewhee lmay
severely impair th edrivin gcharacteristics .
There is aris kof an accident.
To avoid hazardous situations:
Radapt your drivin gstyle accordingly and
drive carefully.
Rnever moun tmor ethan on espar ewhee lor
emergenc yspar ewhee lthat differ sin size.
Ronly use aspar ewhee lor emergenc yspar e
whee lof adifferen tsiz ebriefly.
Rdo no tswitch ES P®off.
Rhav e a spar ewhee lor emergenc yspar e
whee lof adifferen tsiz ereplaced at th e
neares tqualified specialist workshop .
Observ ethat th ewhee land tire dimension s
as well as th etire typ emus tbe correct.
!Mercedes-AMG vehicles wit h
"Minispare" emergency spar ewheel :only
use th e"Minispare" emergenc yspar ewhee l
on th erea raxle .If you moun tth e
"Minispare" emergenc yspar ewhee lon th e
fron taxle, this could result in damage to th e
brak esystem.
If atire on th efron taxl eis defective, an intac t
whee lfrom th erear axl emus tfirst be
replaced wit hth e"Minispare" emergenc y
spar ewheel. The damaged whee lon th efron t
axl ecan then be replaced by th eundamaged
whee lfrom th erear axle.
Mak esur eto note th eplacard on th e
"Minispare" emergenc yspar ewheel.
Whe nusin gan emergenc yspar ewhee lor spar e
whee lof adifferen tsize, you mus tno texceed
th emaximum speed of 50 mph (80 km/h).
Snow chain smus tno tbe mounte don emer-
gency spar ewheels.
Gene ral notes
You can ask for information regarding permitte d
emergenc yspar ewheels at an authorized
Mercedes-Ben zCenter.
Mounting th eemergenc yspar ewhee lis descri-
bed under "Mounting awheel" (
Ypage 341).
You should regularl ychec kth epressur eof th e
emergenc yspar ewheel, particularly prior to
lon gtrips, and correc tth epressur eas neces-
sar y (
Ypage 324). The value on th ewhee lis
valid.
An emergenc yspar ewhee lmay also be moun -
te dagainst th edirection of rotation .Observ e
th etime restriction on use as well as th espeed
limitation specified on th eemergenc yspar e
wheel.
Replac eth etires after six years at th elatest ,
regardless of wear .This also applie sto th e
emergenc yspar ewheel.
Whe nyou are drivin gwit hth ecollapsible spar e
whee lmounted, th etire pressur eloss warnin g
system or th etire pressur emonitor canno tfunc-
346Emergency spare wheel
Wheels and tires
Page 360 of 366

R-134arefrigerant. Otherwise, th eclimat e
control system may be damaged.
Service work, suc has refillin gwit hrefrigeran tor
replacing component parts, may only be carrie d
out by aqualified specialist workshop. All appli-
cable regulations, as well as SA Estandard J639,
mus tbe adhered to .
Always hav ewor kon th eclimat econtrol system
carrie dout at aqualified specialist workshop.
Refrigerant instruction label
Example: refrigeran tinstruction label
:
Warning symbol
;Refrigerant filling capacit y
=Applicable standards
?PAGoil part number
AType of refrigeran t
Warning symbol :advises you about :
RPossibledanger s
RHaving servic ewor kcarrie dout at aqualified
specialist workshop
Filling capacities
All modelsCapacit y
Refrigerant37.0±0. 4oz
(1050 ±10 g)
PAG oil3.9 ± 0.4 oz
(110 ± 10 g)
Vehicle data
General notes
Please note that for the specified vehicle data:
Rthe heights specified may vary as a result of
-tires
-load
-condition of the suspension
-optional equipment
Roptional equipment reduces the maximum
payload.
Observe the information relating to level con-
trol:
RAIRMATIC package (Ypage 171)
Dimensions and weights
:
Opening height
;
Max.
headroom
Mercedes-
AMG GLE 63 S
4MATIC Coupe77.6 in
(1971 mm)
All other mod-
els with::
Opening height
;
Max.
headroom
Steel suspen-
sion90.4 in
(2296 mm)78.2 in
(1986 mm)
AIRMATIC
package89.3 in - 91.8 in
(2267 mm - 2332 mm)76.7 in -79.6 in
(1947 mm - 2022 mm)
358Vehicle data
Technical data
Page 361 of 366

Mercedes‑AMG GLE 63
Vehicle length193.6 in
(4918 mm)
Vehicle height67.6 in
(1718 mm)
Vehicle width including
exterior mirrors83.8 in
(2129 mm)
Wheelbase114.8 in
(2915 mm)
Minimum ground clear-
ance8.0 in
(202 mm)
Turning radius38.7 ft
(11.80 m)
Maximum roof load165.3 lb (75 kg)
All other models
Vehicle length,
Mercedes-AMG GLE 43
4MATIC Coupe192.6 in
(4891 mm)
Vehicle length, all other
models192.9 in
(4900 mm)
Vehicle width including
exterior mirrors83.8 in
(2129 mm)
Maximum vehicle height
(steel suspension)68.1 in
(1731 mm)
Maximum vehicle height
(AIRMATIC package)69.6 in
(1769 mm)
Minimum vehicle height
(AIRMATIC package)67.7 in
(1719 mm)
Wheelbase114.8 in
(2915 mm)
Maximum ground clear-
ance (steel suspension)8.1 in
(206 mm)
Maximum ground clear-
ance (AIRMATIC package)9.8 in
(248 mm)
Minimum ground clear-
ance (AIRMATIC package)6.8 in
(173 mm)
All other models
Turning radius38.7 ft
(11.80 m)
Maximum roof load165.3 lb (75 kg)
Vehicle width to the outer tire side-
walls
Missing values were not available at time of
going to print.
:
Vehicle width to the outer tire
sidewalls (rear axle)
All-round tires
Mixed size tires
The vehicle widths specified may differ depend-
ing on:
Rtires
Rload
Rcondition of the suspension
Vehicle data for off-road driving
Fording depth
!
The depth of water must not exceed the
value specified in the table. Note that the
possible fording depth is less in flowing water.
Vehicle data for off-road driving359
Technical data
Z