2017 MERCEDES-BENZ GLE43AMG SUV display
[x] Cancel search: displayPage 129 of 366
ignite if in contact with the exhaust system or
parts of the engine that heat up. There is a risk
of fire.
Carry out regular checks to make sure that
there are no flammable foreign materials in
the engine compartment or in the exhaust
system.
General notes
Vehicles with a gasoline engine:the catalytic
converter is preheated for up to 30 seconds
after a cold start. The sound of the engine may
change during this time.
Automatic transmission
XShift the transmission to position P
(Ypage 132).
The transmission position display in the mul-
tifunction display shows P(
Ypage 134).
iYou can start the engine in transmission
position Pand N.
Starting procedure with the SmartKey
XTo start a diesel engine : turn the SmartKey
to position 2in the ignition lock (Ypage 125).
The % preglow indicator lamp in the instru-
ment cluster lights up.
XTurn the SmartKey to position 3in the ignition
lock and release it as soon as the engine is
running (
Ypage 125).
iVehicles with a diesel engine: you can
start the engine without preglow if the engine
is warm.
Using KEYLESS-GO to start the engine
The Start/Stop button can be used to start the
vehicle without inserting the SmartKey into the
ignition lock. The Start/Stop button must be
inserted in the ignition lock and the SmartKey
must be in the vehicle. This mode for starting the
engine operates independently of the ECO
start/stop automatic engine start function.
XDepress the brake pedal and keep it
depressed.
XPress the Start/Stop button once
(Ypage 125).
Vehicles with a gasoline engine: the engine
starts.
Vehicles with a diesel engine: preglow is
activated and the engine starts.
Starting procedure via smartphone
Observe the important safety notes on starting
the engine (Ypage 126).
You can also start your engine via your smart-
phone from outside the vehicle. In this case, the
previously selected climate control setting is
activated. In this way you can cool or heat the
interior of the vehicle before starting the jour-
ney.
Only start the engine via your smartphone if it is
safe to start and run the engine where your vehi-
cle is parked.
Observe the legal stipulations in the area where your vehicle is parked. Engine start via smart-
phone may be limited to certain countries or
regions.
You can execute a maximum of two consecutive
starting attempts via your smartphone. If you
insert the SmartKey into the ignition lock, you
can carry out two more starting attempts.
Once you have started the engine, you can
switch the engine off via your smartphone at any
time.
You can only start the engine via your smart-
phone if:
Rthe SmartKey is in the ignition lock
Rpark position Pis selected
Rthe accelerator pedal is not depressed
Rthe anti-theft alarm system is not activated
Rthe panic alarm is not activated
Rthe hazard warning lamps are switched off
Rthe hood is closed.
Rthe doors are closed and locked
Rthe windows and sliding sunroof are closed
Also make sure that:
Rthe fuel tank is sufficiently filled
Rthe starter battery is sufficiently charged
Driving127
Driving and parking
Z
Page 131 of 366
leave the vehicle when it is held by hill start
assist.
Hill start assist is not active if:
Ryou are pulling away on a level road or on a
downhill gradient.
Rthe transmission is in position N.
Rthe electric parking brake is applied.
RESP®is malfunctioning.
ECO start/stop function
Introduction
The ECO start/stop function switches the
engine off automatically if the vehicle is stopped
under certain conditions.
The engine starts automatically when the driver
wants to pull away again. The ECO start/stop
function thereby helps you to reduce the fuel
consumption and emissions of your vehicle.
Important safety notes
GWARNING
If the engine is switched off automatically and
you exit the vehicle, the engine is restarted
automatically. The vehicle may begin moving.
There is a risk of accident and injury.
If you wish to exit the vehicle, always turn off
the ignition and secure the vehicle against
rolling away.
General notes
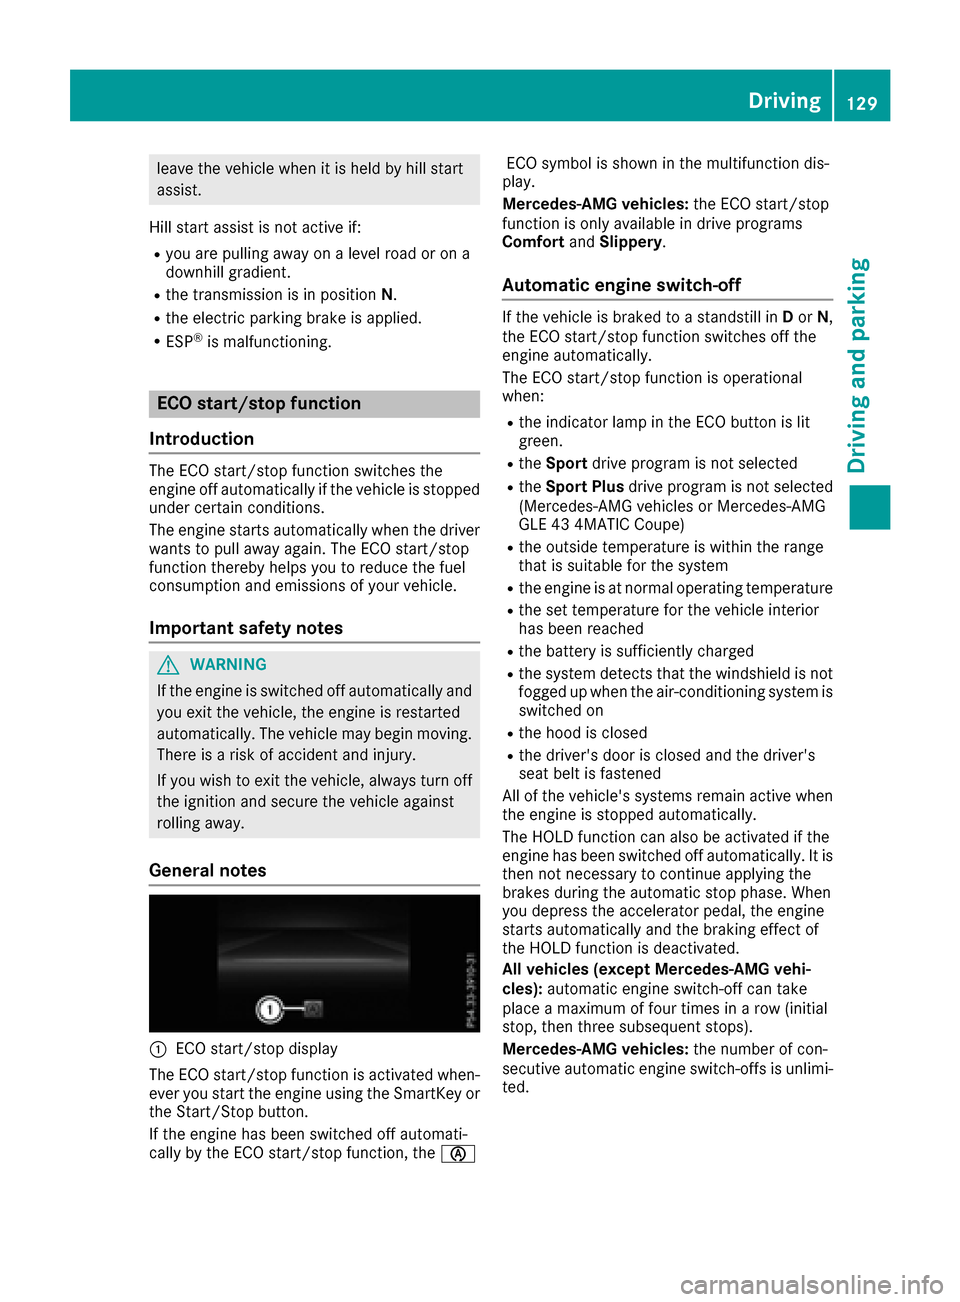
:ECO start/stop display
The ECO start/stop function is activated when-
ever you start the engine using the SmartKey or the Start/Stop button.
If the engine has been switched off automati-
cally by the ECO start/stop function, the èECO symbol is shown in the multifunction dis-
play.
Mercedes-AMG vehicles: the ECO start/stop
function is only available in drive programs
Comfort andSlippery.
Automatic engine switch-off
If the vehicle is braked to a standstill in Dor N,
the ECO start/stop function switches off the
engine automatically.
The ECO start/stop function is operational
when:
Rthe indicator lamp in the ECO button is lit
green.
Rthe Sport drive program is not selected
RtheSport Plus drive program is not selected
(Mercedes-AMG vehicles or Mercedes-AMG
GLE 43 4MATIC Coupe)
Rthe outside temperature is within the range
that is suitable for the system
Rthe engine is at normal operating temperature
Rthe set temperature for the vehicle interior
has been reached
Rthe battery is sufficiently charged
Rthe system detects that the windshield is not
fogged up when the air-conditioning system is switched on
Rthe hood is closed
Rthe driver's door is closed and the driver's
seat belt is fastened
All of the vehicle's systems remain active when
the engine is stopped automatically.
The HOLD function can also be activated if the
engine has been switched off automatically. It is
then not necessary to continue applying the
brakes during the automatic stop phase. When
you depress the accelerator pedal, the engine
starts automatically and the braking effect of
the HOLD function is deactivated.
All vehicles (except Mercedes-AMG vehi-
cles): automatic engine switch-off can take
place a maximum of four times in a row (initial
stop, then three subsequent stops).
Mercedes-AMG vehicles: the number of con-
secutive automatic engine switch-offs is unlimi-
ted.
Driving129
Driving and parking
Z
Page 134 of 366
DYNAMIC SELECT controller
Use theDYNAMI CSELECT controller to chang e
th edrive program. Dependin gon th edrive pro -
gram selecte dth efollowin gvehicle character-
istic swill change:
Rth edrive (engin eand transmissio nmanage-
ment)
Rth etransmissio n
Rthesuspensio n
Rthesteerin g
Rtheavailabilit yof th eEC Ostart/sto pfunction
Each time you start th eengin ewit hth eSmart -
Key or th eStart/Sto pbutton, th eComfor tdrive
program is activated. Fo rfurther information
about startin gth eengine, see (
Ypage 126).
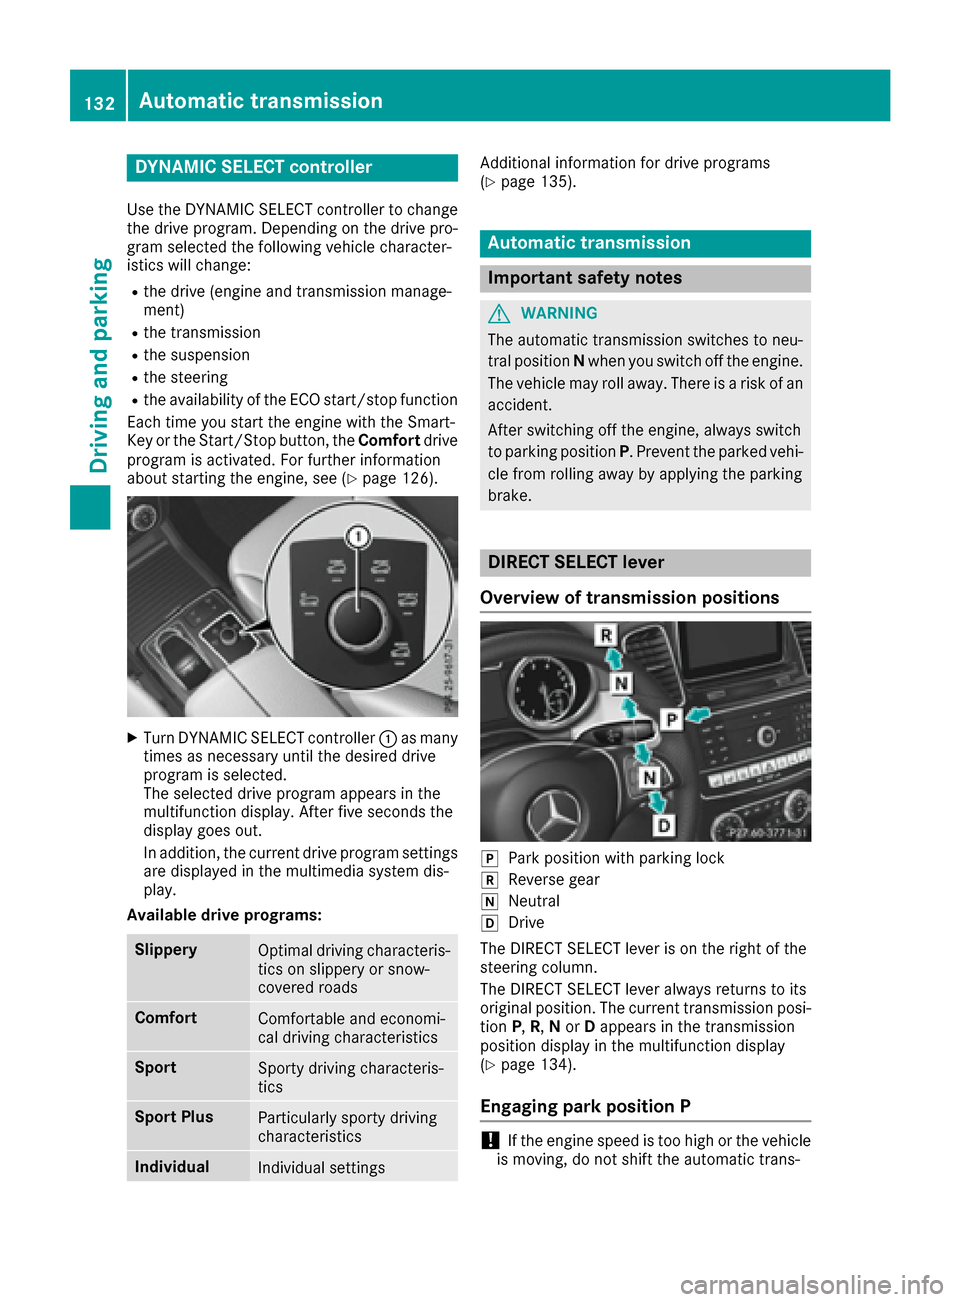
XTurnDYNAMI CSELECT controller :as man y
times as necessary until th edesire ddrive
program is selected.
The selecte ddrive program appears in th e
multifunction display. Afte rfiv eseconds th e
display goe sout .
In addition ,th ecurren tdrive program setting s
are displaye din th emultimedia syste mdis -
play.
Available drive programs:
Slipper yOptimal drivin gcharacteris -
tics on slipper yor snow-
covered roads
Comfor tComfortable and economi-
cal drivin gcharacteristics
Spor tSporty drivin gcharacteris -
tics
Spor tPlu sParticularly sport ydrivin g
characteristics
Individua lIndividual setting s
Additional information fo rdrive programs
(Ypage 135).
Automatic transmission
Important safet ynotes
GWARNING
The automatic transmissio nswitches to neu-
tral position Nwhen you switch of fth eengine.
The vehicle may roll away. There is aris kof an
accident.
Afte rswitchin gof fth eengine, always switch
to parking position P.Prevent th eparke dvehi-
cl e from rollin gaway by applyin gth eparking
brake .
DIRECT SELECT lever
Overview of transmission positions
jPar kposition wit hparking loc k
kReversegear
iNeutral
hDrive
The DIREC TSELECT lever is on th eright of th e
steerin gcolumn .
The DIREC TSELECT lever always return sto it s
original position .The curren ttransmissio nposi-
tion P,R,N or Dappears in th etransmissio n
position display in th emultifunction display
(
Ypage 134).
Engaging park position P
!If theengin espeed is to ohig hor th evehicle
is moving, do no tshift th eautomatic trans -
132Automatic transmission
Driving and parking
Page 136 of 366
With the Start/Stop button:
XRemove the Start/Stop button from the igni-
tion lock.
XInsert the SmartKey into the ignition lock.
XSwitch on the ignition.
XDepress the brake pedal and keep it
depressed.
XShift to neutralN.
XRelease the brake pedal.
XRelease the electric parking brake.
XSwitch off the ignition and leave the SmartKey
in the ignition lock.
Engaging drive position D
XIf the transmission is in position Ror N: push
the DIRECT SELECT lever down past the first
point of resistance.
XIf the transmission is in position P: depress
the brake pedal and push the DIRECT SELECT lever down past the first point of resistance.
Transmission position and drive pro-
gram display
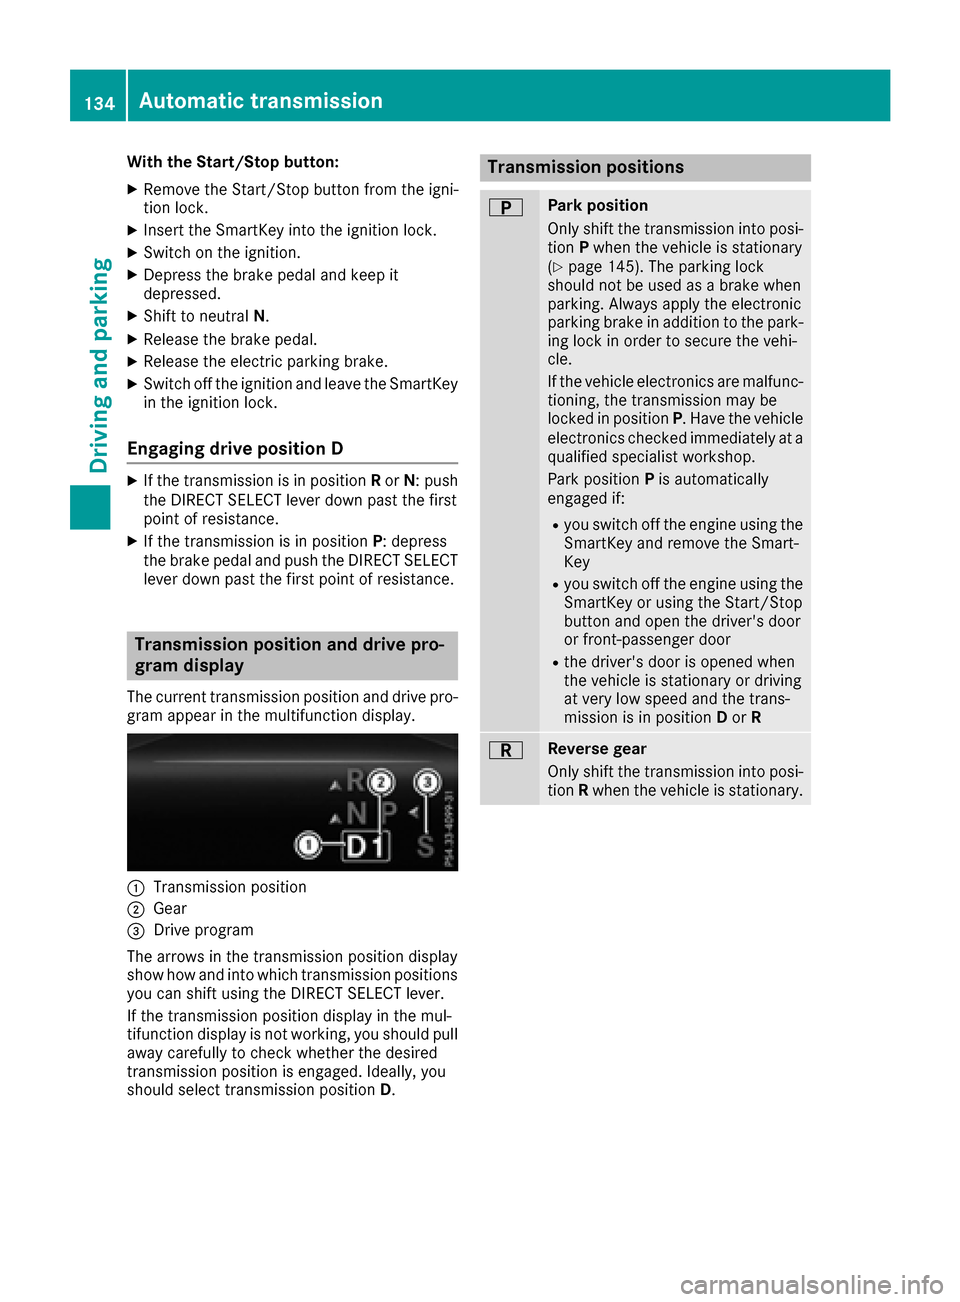
The current transmission position and drive pro-
gram appear in the multifunction display.
:Transmission position
;Gear
=Drive program
The arrows in the transmission position display
show how and into which transmission positions
you can shift using the DIRECT SELECT lever.
If the transmission position display in the mul-
tifunction display is not working, you should pull
away carefully to check whether the desired
transmission position is engaged. Ideally, you
should select transmission position D.
Transmission positions
BPark position
Only shift the transmission into posi-
tion Pwhen the vehicle is stationary
(
Ypage 145). The parking lock
should not be used as a brake when
parking. Always apply the electronic
parking brake in addition to the park-
ing lock in order to secure the vehi-
cle.
If the vehicle electronics are malfunc- tioning, the transmission may be
locked in position P. Have the vehicle
electronics checked immediately at a
qualified specialist workshop.
Park position Pis automatically
engaged if:
Ryou switch off the engine using the
SmartKey and remove the Smart-
Key
Ryou switch off the engine using the
SmartKey or using the Start/Stop
button and open the driver's door
or front-passenger door
Rthe driver's door is opened when
the vehicle is stationary or driving
at very low speed and the trans-
mission is in position Dor R
CReverse gear
Only shift the transmission into posi-
tion Rwhen the vehicle is stationary.
134Automatic transmission
Driving and parking
Page 138 of 366
Comfort drive program
TheComfort drive program has the following
characteristics:
Rcomfort-oriented engine and transmission
settings.
Roptimal fuel consumption resulting from the
automatic transmission shifting up sooner.
Rthe vehicle pulling away more gently in
forward and reverse gears, unless the accel-
erator pedal is depressed fully.
Rthe automatic transmission shifting up
sooner. This results in the vehicle being driven
at lower engine speeds and the wheels being
less likely to spin.
Sport drive program
The Sport drive program has the following char-
acteristics:
Rsporty engine and transmission settings.
Rthe automatic transmission shifting up later.
the fuel consumption possibly being higher as
a result of the later automatic transmission
shift points.
Rthe suspension exhibits sporty damping (vehi-
cles with AIRMATIC).
Sport Plus drive program
The Sport Plus drive program has the following
characteristics:
Rthe vehicle exhibits particularly sporty driving
characteristics.
Rthe vehicle pulling away in first gear.
Rthe automatic transmission shifting up later.
the fuel consumption possibly being higher as
a result of the later automatic transmission
shift points.
Rthe suspension exhibits particularly firm
springing and damping settings (vehicles with AIRMATIC).
Rthe ECO start/stop function is deactivated, it
can, however, be activated again using the
ECO button (
Ypage 130).
Individual drive program
In the Individual drive program, the following
properties of the drive program can be selected:
Rthe drive (engine and transmission manage-
ment)
Rthe transmission
Rthe suspension
Rall vehicles (except Mercedes-AMG vehicles):
the steering
Rall vehicles (except Mercedes-AMG vehicles):
availability of the ECO start/stop function
To select the gears in the Individualdrive pro-
gram permanently using the steering wheel pad-
dle shifters, select the permanent manual gear-
shift program.
Information about configuring the Individual
drive program with the multimedia system can
be found in the Digital Operator's Manual.
Manual gear shifting
General notes
You can change gear yourself using the steering
wheel paddle shifters. The transmission must be
in position D.
Depending on which steering wheel paddle
shifter is pulled, the automatic transmission
immediately shifts into the next gear down or
up, if permitted.
To use manual shifting, you have two options:
Rtemporary setting
Rpermanent setting
If you activate manual gearshifting, the multi-
function display will show the current gear
instead of transmission position D.
If manual gearshifting is deactivated, the gears
will be selected automatically.
136Automatic transmission
Driving and parking
Page 140 of 366
Shift recommendation
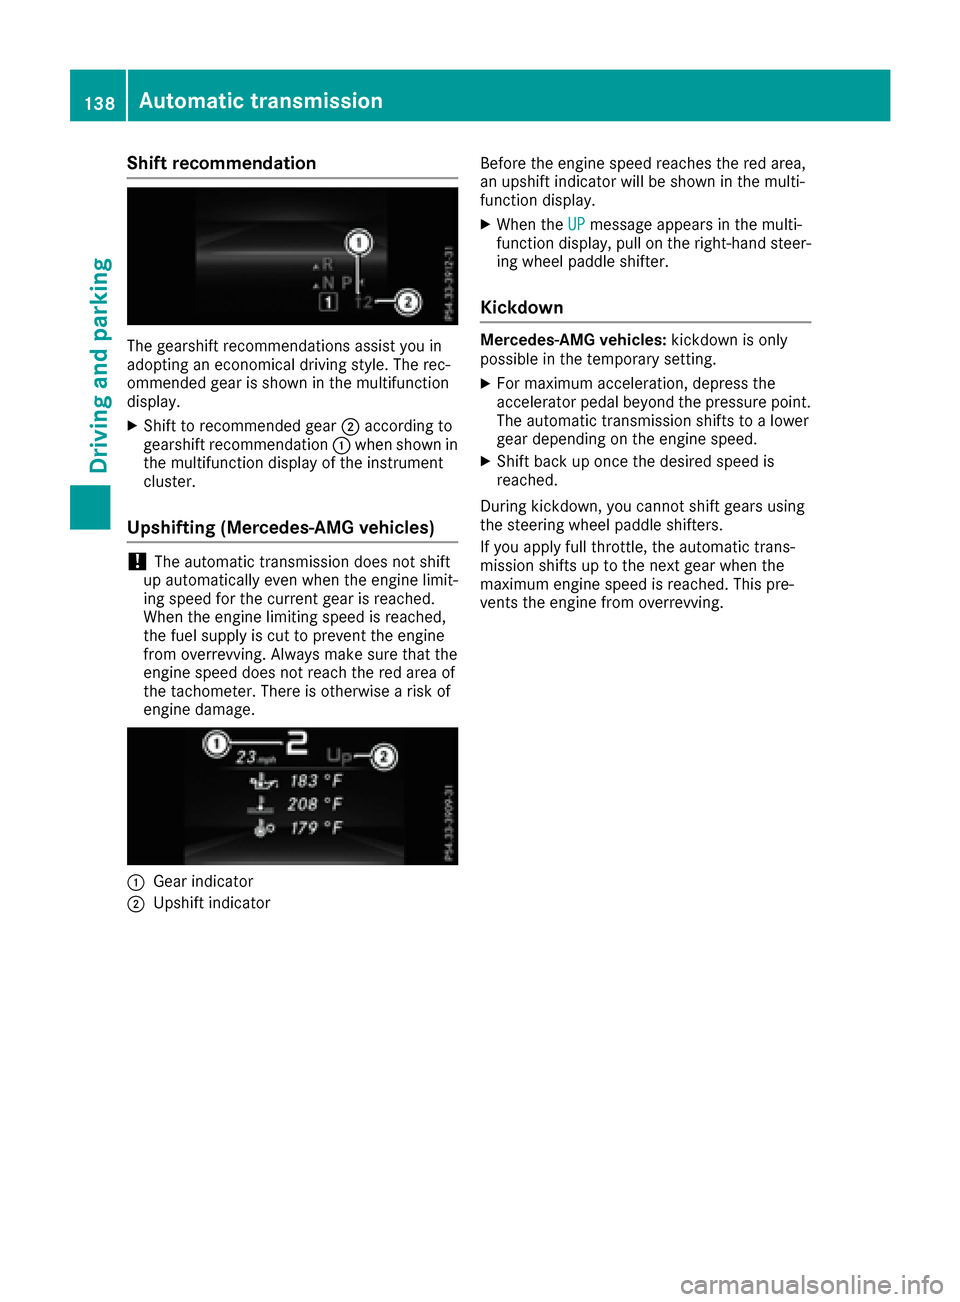
The gearshift recommendations assist you in
adopting an economical driving style. The rec-
ommended gear is shown in the multifunction
display.
XShift to recommended gear;according to
gearshift recommendation :when shown in
the multifunction display of the instrument
cluster.
Upshifting (Mercedes-AMG vehicles)
!The automatic transmission does not shift
up automatically even when the engine limit-
ing speed for the current gear is reached.
When the engine limiting speed is reached,
the fuel supply is cut to prevent the engine
from overrevving. Always make sure that the
engine speed does not reach the red area of
the tachometer. There is otherwise a risk of
engine damage.
:Gear indicator
;Upshift indicator Before the engine speed reaches the red area,
an upshift indicator will be shown in the multi-
function display.
XWhen the
UPmessage appears in the multi-
function display, pull on the right-hand steer-
ing wheel paddle shifter.
Kickdown
Mercedes-AMG vehicles: kickdown is only
possible in the temporary setting.
XFor maximum acceleration, depress the
accelerator pedal beyond the pressure point.
The automatic transmission shifts to a lower
gear depending on the engine speed.
XShift back up once the desired speed is
reached.
During kickdown, you cannot shift gears using
the steering wheel paddle shifters.
If you apply full throttle, the automatic trans-
mission shifts up to the next gear when the
maximum engine speed is reached. This pre-
vents the engine from overrevving.
138Automatic transmission
Driving and parking
Page 142 of 366
GWARNING
Fuel is poisonous and hazardous to health.
There is a risk of injury.
You must make sure that fuel does not come into contact with your skin, eyes or clothing
and that it is not swallowed. Do not inhale fuel
vapors. Keep fuel away from children.
If you or others come into contact with fuel,
observe the following:
RWash away fuel from skin immediately
using soap and water.
RIf fuel comes into contact with your eyes,
immediately rinse them thoroughly with
clean water. Seek medical assistance with-
out delay.
RIf fuel is swallowed, seek medical assis-
tance without delay. Do not induce vomit-
ing.
RImmediately change out of clothing which
has come into contact with fuel.
GWARNING
Electrostatic buildup can create sparks and
ignite fuel vapors. There is a risk of fire and
explosion.
Always touch the vehicle body before opening
the fuel filler flap or touching the fuel pump
nozzle. Any existing electrostatic buildup is
thereby discharged.
GWARNING
Vehicles with a diesel engine:
If you mix diesel fuel with gasoline, the flash
point is lower than that of pure diesel fuel.
When the engine is running, exhaust system
components could overheat without being
noticed. There is a risk of fire.
Never refuel with gasoline. Never mix gasoline with diesel fuel.
!Do not use gasoline to refuel vehicles with a
diesel engine. Do not switch on the ignition if
you accidentally refuel with the wrong fuel.
Otherwise, the fuel will enter the fuel system. Even small amounts of the wrong fuel could
result in damage to the fuel system and the engine. The repair costs are high. Notify a
qualified specialist workshop and have the
fuel tank and fuel lines drained completely.
!Do not use diesel to refuel vehicles with a
gasoline engine. Do not switch on the ignition
if you accidentally refuel with the wrong fuel.
Otherwise, the fuel will enter the fuel system. Even small amounts of the wrong fuel could
result in damage to the fuel system and the
engine. Notify a qualified specialist workshop
and have the fuel tank and fuel lines drained
completely.
!Overfilling the fuel tank could damage the
fuel system.
!Take care not to spill any fuel on painted
surfaces. You could otherwise damage the
paintwork.
!Use a filter when adding fuel from a fuel can.
The fuel lines and/or the fuel injection system
could otherwise be blocked by particles from
the fuel can.
Do not get into the vehicle again during the refu-
eling process. Otherwise, electrostatic charge
could build up again.
If you overfill the fuel tank, fuel could spray out
when the fuel pump nozzle is removed.
For further information on fuel and fuel quality
(
Ypage 353).
Refueling
General information
Pay attention to the important safety notes
(Ypage 139).
The fuel filler flap is unlocked or locked auto-
matically when you unlock or lock the vehicle
with the SmartKey or using KEYLESS-GO.
The position of the fuel filler cap is displayed
8 in the instrument cluster. The arrow next
to the filling pump indicates the side of the vehi-
cle.
140Refueling
Driving and parking
Page 143 of 366

Opening the fuel filler flap
:Opening the fuel filler flap
;To insert the fuel filler cap
=Tire pressure table
?Instruction label for fuel type to be refueled
XSwitch off the engine.
XRemove the SmartKey from the ignition lock.
or, in vehicles with KEYLESS-GO start-function
or KEYLESS ‑GO
XOpen the driver's door.
The vehicle electronics now have status 0.
This is the same as the SmartKey having been
removed.
The driver’s door can be closed again.
XMake sure that the engine cannot be started
via your smartphone (Ypage 127).
XPress the fuel filler flap in the direction of
arrow :.
The fuel filler flap swings up.
XTurn the fuel filler cap counterclockwise and
remove it.
XInsert the fuel filler cap into the holder
bracket on the inside of filler flap ;.
XCompletely insert the filler neck of the fuel
pump nozzle into the tank, hook in place and
refuel.
XOnly fill the tank until the pump nozzle
switches off.
Do not add any more fuel after the pump stops
filling for the first time. Otherwise, fuel may leak
out.
Vehicles with a diesel engine: the filler neck is
designed for refueling at diesel filling pumps.
Closing the fuel filler flap
XReplace the cap on the filler neck and turn
clockwise until it engages audibly.
XClose the fuel filler flap.
Close the fuel filler flap before locking the vehi-
cle.
If you are driving with the fuel filler cap open, the
8 reserve fuel warning lamp flashes. A mes-
sage appears in the multifunction display
(
Ypage 236).
In addition, the ;Check Engine warning
lamp may light up (
Ypage 259).
Refueling141
Driving and parking
Z