2017 MERCEDES-BENZ GLE43AMG SUV cooling
[x] Cancel search: coolingPage 122 of 366
iYou can use 3-zone automatic climate con-
trol to set the airflow in the rear compartment
separately.
Switching the ZONE function on/off
XTo activate: press theábutton.
The indicator lamp above the ábutton
lights up.
Dual-zone automatic climate control: the tem-
perature setting for the driver's side is not
adopted for the front-passenger side.
3-zone automatic climate control: the tem-
perature setting for the driver's side is not
adopted for the front-passenger side and the rear compartment.
XTo deactivate: press theábutton.
The indicator lamp above the ábutton
goes out.
Dual-zone automatic climate control: the tem-
perature setting for the driver's side is adop-
ted for the front-passenger side.
3-zone automatic climate control: the tem-
perature setting for the driver's side is adop-
ted for the front-passenger side and the rear
compartment.
Defrosting the windshield
General notes
You can use this function to defrost the wind-
shield or to clear a fogged up windshield or front
side windows on the inside.
Switch off the "Windshield defrosting" function
as soon as the windshield is clear again.
Activating/deactivating
XTurn the SmartKey to position 2in the ignition
lock (Ypage 125).
XTo activate: press the¬button.
The indicator lamp in the ¬button lights
up.
The climate control system switches to the
following settings:
Rhigh airflow
Rhigh temperature
Rair distribution to the windshield and front
side windows
Rair-recirculation mode off
XTo deactivate: press the¬button.
The indicator lamp in the ¬button goes
out. The previously selected settings are
restored. Air-recirculation mode remains
deactivated.
MAX COOL maximum cooling
The MAX COOL function is only available in vehi-
cles for the USA.
MAX COOL is only operational when the engine
is running.
XTo activate: press theÙbutton.
The indicator lamp in the Ùbutton lights
up.
XTo deactivate: press theÙbutton.
The indicator lamp in the Ùbutton goes
out. The previously selected settings are
restored.
When you activate MAX COOL, climate control
switches to the following functions:
Rmaximum cooling
Rmaximum airflow
Rair-recirculation mode on
Defrosting the windows
Windows fogged up on the inside
XActivate the ¿orÁ cooling with air
dehumidification function.
XActivate automatic mode Ã.
XIf the windows continue to fog up, activate the
"windshield defrosting" function
(
Ypage 120).
iYou should only select this setting until the
windshield is clear again.
Windows fogged up on the outside
XActivate the windshield wipers.
XPress the _button repeatedly until the
P orO symbol appears in the display.
iYou should only select this setting until the
windshield is clear again.
120Operating the climate control systems
Climate control
Page 123 of 366
iIf you clean the windows regularly, they do
not fog up so quickly.
Rear window defroster
General notes
The rear window defroster has a high current
draw. You should therefore switch it off as soon
as the rear window is clear. Otherwise, the rear
window defroster switches off automatically
after several minutes. If the battery voltage is too low, the rear window
defroster may switch off.
Switching on/off
XTurn the SmartKey to position 2in the ignition
lock (Ypage 125).
XPress the ¤button.
The indicator lamp in the ¤button lights
up or goes out.
Problems with the rear window defroster
ProblemPossible causes/consequences and MSolutions
The rear window
defroster has deactiva-
ted prematurely or can-
not be activated.The battery has not been sufficiently charged.
XSwitch off any consumers that are not required, e.g. reading lamps,
interior lighting or the seat heating.
When the battery is sufficiently charged, the rear window defroster
can be activated again.
Switching air-recirculation mode
on/off
General notes
You can deactivate the flow of fresh air if
unpleasant odors are entering the vehicle from
outside. The air already inside the vehicle will
then be recirculated.
If you switch on air-recirculation mode, the win-
dows can fog up more quickly, in particular at
low temperatures. Only use air-recirculation
mode briefly to prevent the windows from fog-
ging up.
Switching on/off
XTurn the SmartKey to position 2in the ignition
lock (Ypage 125).
XTo activate: press thedbutton.
The indicator lamp in the dbutton lights
up.
iIn the event of high pollution levels (3-zone
automatic climate control only) or at high out-
side temperatures, air-recirculation mode is
automatically activated. When air-recircula-
tion mode is activated automatically, the indi-
cator lamp in the dbutton is not lit. Outside air is added after about 30 minutes.
XTo deactivate:
press thedbutton.
The indicator lamp in the dbutton goes
out.
iAir-recirculation mode deactivates auto-
matically:
Rafter approximately five minutes at outside
temperatures below approximately 41 ‡
(5 †)
Rafter approximately five minutes if cooling
with air dehumidification is deactivated
Rafter approximately 30 minutes at outside
temperatures above approximately 41 ‡
(5 †) if the "Cooling with air dehumidifica-
tion" function is activated
Switching the residual heat on or off
General notes
The residual heat function is only available on
vehicles for Canada.
It is possible to make use of the residual heat of
the engine to continue heating the stationary
vehicle for up to 30 minutesafter the engine has
Operating the climate control systems121
Climate control
Page 125 of 366
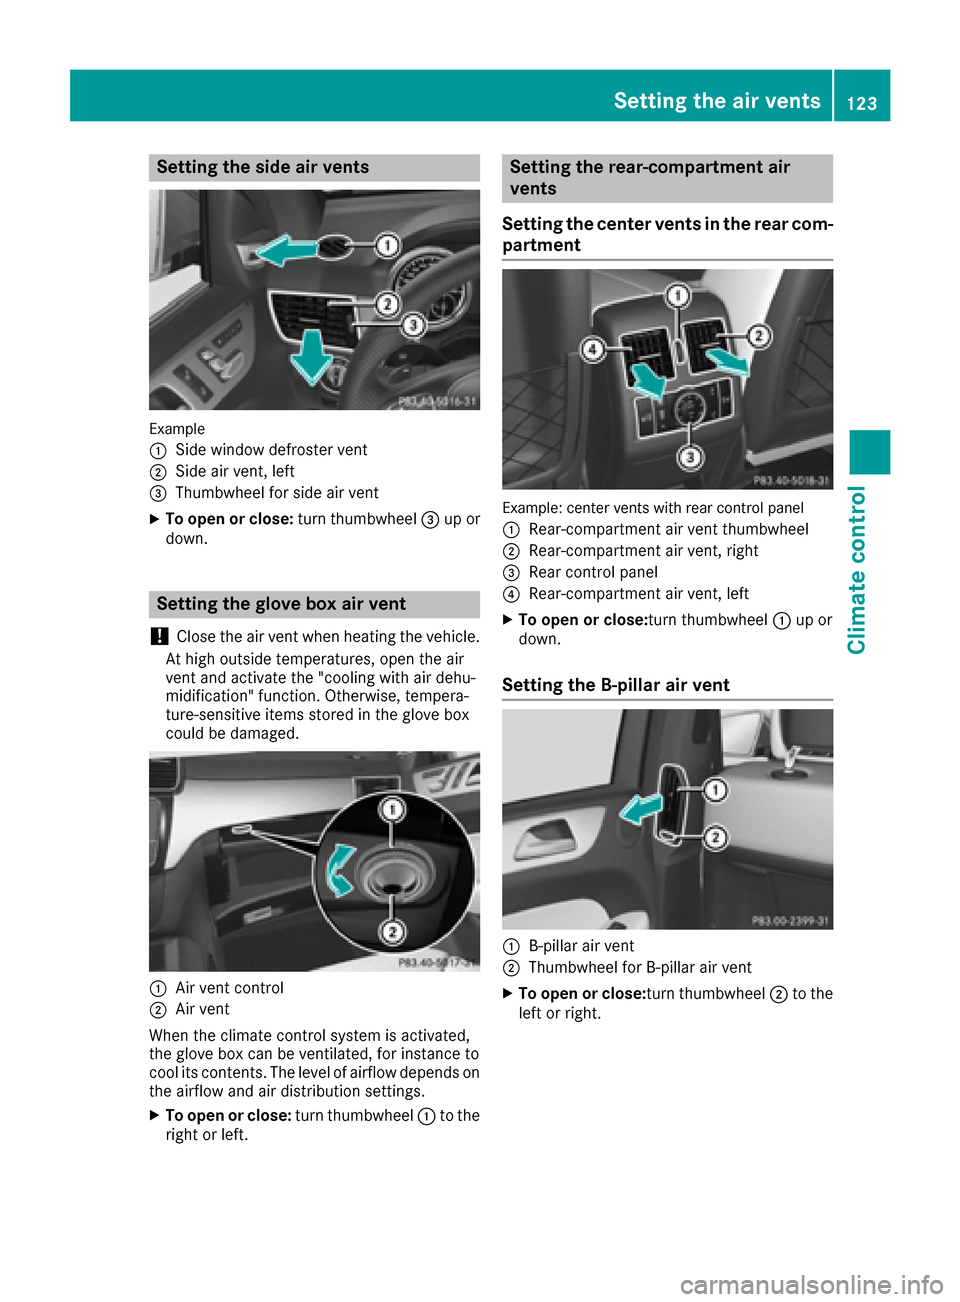
Setting the side air vents
Example
:
Side window defroster vent
;Side air vent, left
=Thumbwheel for side air vent
XTo open or close:turn thumbwheel=up or
down.
Setting the glove box air vent
!
Close the air vent when heating the vehicle.
At high outside temperatures, open the air
vent and activate the "cooling with air dehu-
midification" function. Otherwise, tempera-
ture-sensitive items stored in the glove box
could be damaged.
:Air vent control
;Air vent
When the climate control system is activated,
the glove box can be ventilated, for instance to
cool its contents. The level of airflow depends on the airflow and air distribution settings.
XTo open or close: turn thumbwheel:to the
right or left.
Setting the rear-compartment air
vents
Setting the center vents in the rear com-
partment
Example: center vents with rear control panel
:
Rear-compartment air vent thumbwheel
;Rear-compartment air vent, right
=Rear control panel
?Rear-compartment air vent, left
XTo open or close: turn thumbwheel:up or
down.
Setting the B-pillar air vent
:B-pillar air vent
;Thumbwheel for B-pillar air vent
XTo open or close: turn thumbwheel;to the
left or right.
Setting the air vents123
Climate control
Z
Page 202 of 366

Please observe the manufacturer's operating
instructions for the trailer coupling if a detach-
able trailer coupling is used.
Couple and uncouple the trailer carefully. If you
do not couple the trailer to the towing vehicle
correctly, the trailer could become detached.
Make sure that the following values are not
exceeded:
Rthe permissible trailer drawbar noseweight
Rthe permissible trailer load
Rthe permissible rear axle load of the towing
vehicle
Rthe maximum permissible gross vehicle
weight of both the towing vehicle and the
trailer
The applicable permissible values, which must
not be exceeded, can be found:
Rin the vehicle documents
Ron the identification plates for the trailer tow
hitch and the trailer
Ron the vehicle identification plate
If the values differ, the lowest value applies.
When towing a trailer, your vehicle's handling
characteristics will be different in comparison
with when driving without a trailer.
The vehicle/trailer combination:
Ris heavier
Ris restricted in its acceleration and gradient-
climbing capability
Rhas an increased braking distance
Ris affected more by strong crosswinds
Rdemands more sensitive steering
Rhas a larger turning circle
This could impair the handling characteristics.
When towing a trailer, always adjust your speed
to the current road and weather conditions. Do
not exceed the maximum permissible speed for
your vehicle/trailer combination.
Notes on towing a trailer
General notes
!If you have a trailer tow hitch retrofitted,
changes to the cooling system and drive train
may be necessary, depending on the vehicle
type. If you have a trailer tow hitch retrofitted,
observe the anchorage points on the chassis
frame.
RDo not exceed the legally prescribed maxi-
mum speed for vehicle/trailer combinations
in the relevant country.
This lowers the risk of an accident.
ROnly install an approved trailer coupling on
your vehicle.
Further information on availability and on
installation is available from any authorized
Mercedes-Benz Center.
RThe bumpers of your vehicle are not suitable
for installing detachable trailer couplings.
RDo not install hired trailer couplings or other
detachable trailer couplings on the bumpers
of your vehicle.
RIf you no longer need the ball coupling,
remove it from the ball coupling recess. This
will reduce the risk of damage to the ball cou-
pling.
When towing a trailer, set the tire pressure on
the rear axle of the towing vehicle for the max-
imum load. You will find the values in the tire
pressure table in the fuel filler flap of the vehicle (
Ypage 339).
Please note that when towing a trailer, the fol-
lowing driving systems have limited availability
or are not available at all:
RParking Assist PARKTRONIC (Ypage 174)
RBlind Spot Assist (Ypage 191)
RActive Lane Keeping Assist (Ypage 197)
On vehicles without level control, the height of
the ball coupling will alter according to the load
placed on the vehicle. If necessary, use a trailer
with a height-adjustable drawbar.
You will find installing dimensions and loads
under "Technical data" (
Ypage 361).
Driving tips
Observe the information on ESP®trailer stabili-
zation (Ypage 66) and on pulling away with a
trailer (Ypage 128).
The maximum permissible speed for vehicle/
trailer combinations depends on the type of
trailer. Before beginning the journey, check the
trailer's documents to see what the maximum
permissible speed is. Observe the legally pre-
scribed maximum speed in the relevant country.
200Towing a trailer
Driving and parking
Page 262 of 366
Warning/
indicator
lampNSignal type
Possible causes/consequences and M
Solutions
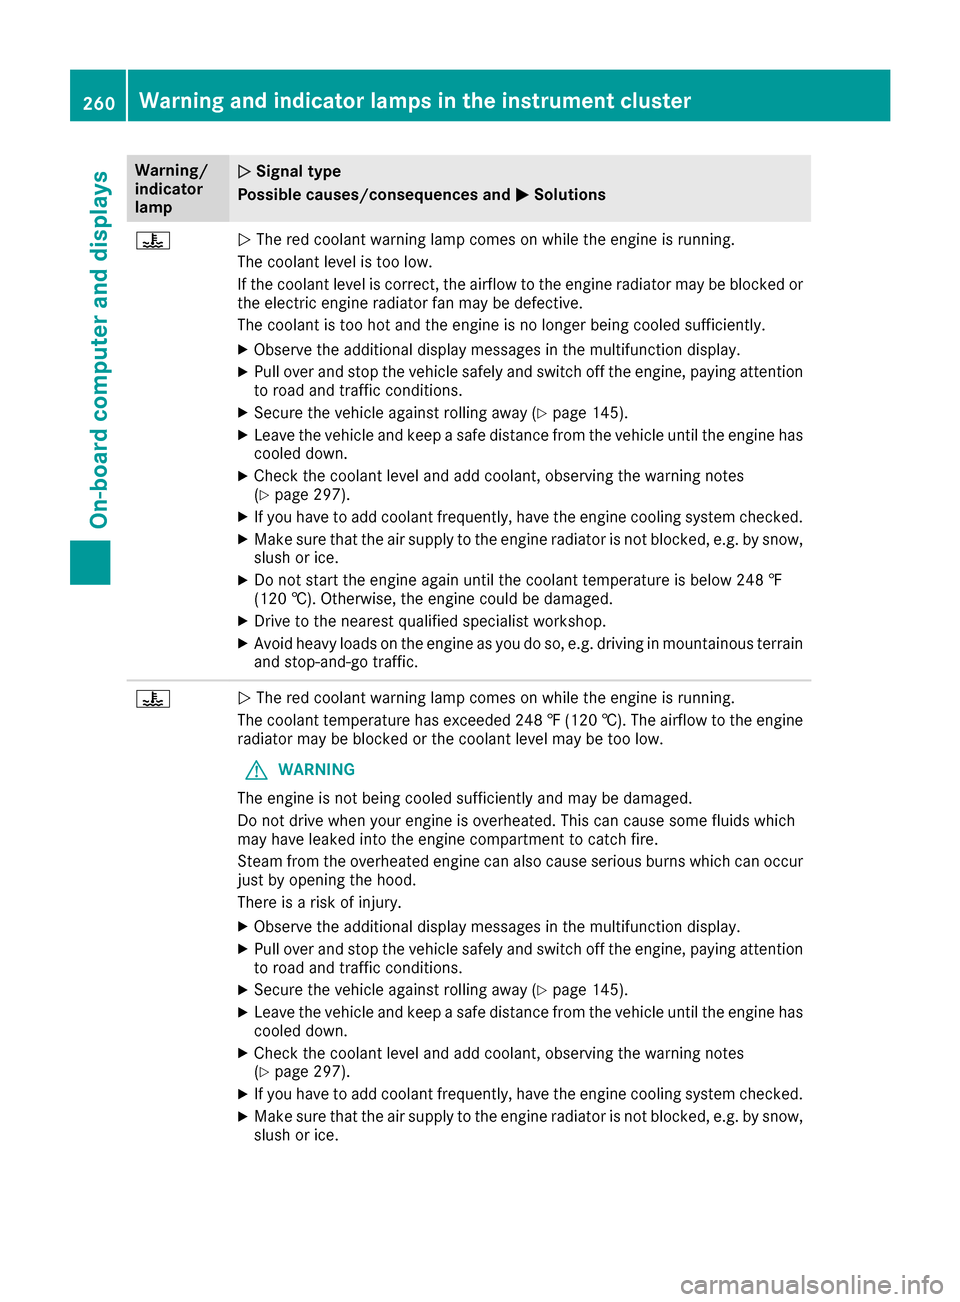
?NThe red coolant warning lamp comes on while the engine is running.
The coolant level is too low.
If the coolant level is correct, the airflow to the engine radiator may be blocked or
the electric engine radiator fan may be defective.
The coolant is too hot and the engine is no longer being cooled sufficiently.
XObserve the additional display messages in the multifunction display.
XPull over and stop the vehicle safely and switch off the engine, paying attention
to road and traffic conditions.
XSecure the vehicle against rolling away (Ypage 145).
XLeave the vehicle and keep a safe distance from the vehicle until the engine has cooled down.
XCheck the coolant level and add coolant, observing the warning notes
(Ypage 297).
XIf you have to add coolant frequently, have the engine cooling system checked.
XMake sure that the air supply to the engine radiator is not blocked, e.g. by snow,
slush or ice.
XDo not start the engine again until the coolant temperature is below 248 ‡
(120 †). Otherwise, the engine could be damaged.
XDrive to the nearest qualified specialist workshop.
XAvoid heavy loads on the engine as you do so, e.g. driving in mountainous terrain
and stop-and-go traffic.
?N The red coolant warning lamp comes on while the engine is running.
The coolant temperature has exceeded 248 ‡ (120 †). The airflow to the engine
radiator may be blocked or the coolant level may be too low.
GWARNING
The engine is not being cooled sufficiently and may be damaged.
Do not drive when your engine is overheated. This can cause some fluids which
may have leaked into the engine compartment to catch fire.
Steam from the overheated engine can also cause serious burns which can occur
just by opening the hood.
There is a risk of injury.
XObserve the additional display messages in the multifunction display.
XPull over and stop the vehicle safely and switch off the engine, paying attention
to road and traffic conditions.
XSecure the vehicle against rolling away (Ypage 145).
XLeave the vehicle and keep a safe distance from the vehicle until the engine has
cooled down.
XCheck the coolant level and add coolant, observing the warning notes
(Ypage 297).
XIf you have to add coolant frequently, have the engine cooling system checked.
XMake sure that the air supply to the engine radiator is not blocked, e.g. by snow,
slush or ice.
260Warning and indicator lamps in the instrument cluster
On-board computer and displays
Page 280 of 366

RAlways stow objects in such a way that they
cannot be tossed about in these or similar
situations.
RAlways make sure that objects do not pro-
trude out of the stowage spaces, luggage
nets or stowage nets.
REnsure that closable stowage spaces are
shut before beginning your journey.
RAlways stow and secure heavy, hard, poin-
ted, sharp-edged, fragile or large objects in
the cargo compartment.
Observe the loading guidelines (
Ypage 270).
!Only use the cup holders for containers of
the right size and which have lids. The drinks
could otherwise spill.
!Do not expose drinks bottles in the cup
holder in the center console to continuous,
strong and direct sunlight. The passenger
compartment in the area of the center con-
sole can otherwise be damaged by the con-
centrated and reflected sunlight.
Do not keep the KEYLESS-GO key in the tem-
perature-controlled cup holder (
Ypage 278).
Otherwise, the KEYLESS-GO key will not be rec-
ognized.
The stowage compartments in the doors provide
space for bottles with a capacity of up to
34 fl. oz. (1.0 l).
The bottles are not secured or prevented from
tipping over. Therefore, do not place any open
drink containers in the stowage compartments.
Cup holder in the front-compartment
center console
:Cover
;Cup holder
XTo open: slide cover :to its foremost posi-
tion.
XTo close: pull cover :back as far as it will go.
You can remove the cup holder's rubber mat for
cleaning. Clean with clear, lukewarm water only.
Temperature-controlled cup holder in
the front-compartment center console
:Cup holder
;Residual heat indicator lamp
=Switch
The temperature-controlled cup holder can be
used to keep cold drinks cool and warm drinks
warm.
XTurn the SmartKey to position 2in the ignition
lock.
XTo switch on the cooling function: press
and hold button =until the blue indicator
lamp on the button lights up.
XTo switch on the heating function: press
and hold button =until the red indicator
lamp on the button lights up.
XTo switch off the function: press and hold
button =until the indicator lamp on the but-
ton goes out.
When the heating function is used, the metal
insert of the cup holder is heated. Once a certain
temperature is reached, residual heat indicator
lamp ;lights up. This means that the metal
insert of the cup holder is hot. For this reason,
you must not reach into the cup holder metal
insert.
Do not use hard or sharp objects to clean the
cup holder. Use only a soft cloth to clean it.
278Features
Stowage and features
Page 284 of 366
Rthe maximum wattage of the device to be
connected must not exceed 150 watts.
Rthe on-board power supply is within a permis-sible voltage range.
Rthe 12 V sockets in the rear compartment and
the cargo compartment are operational.
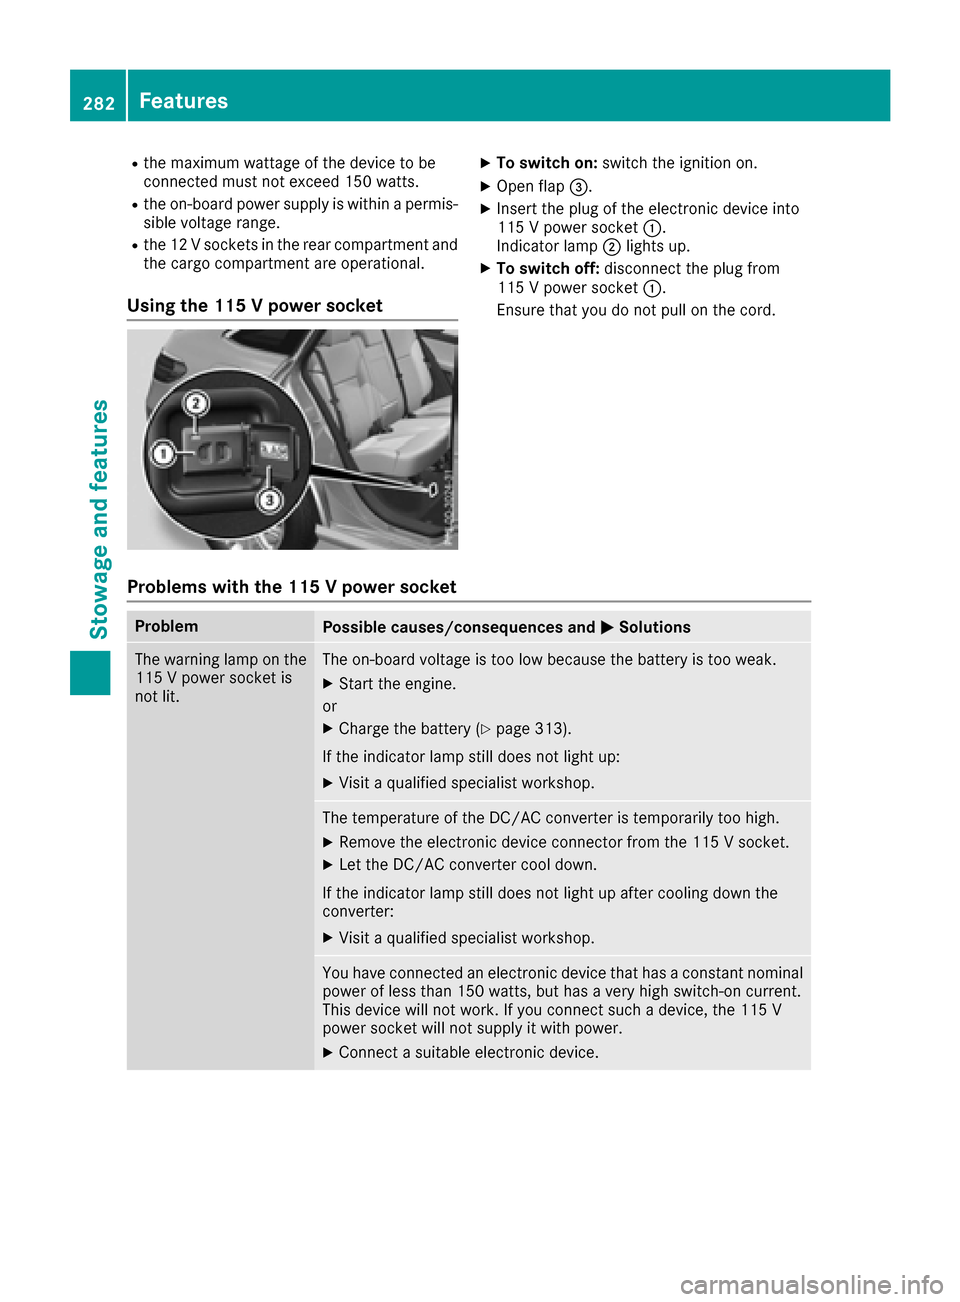
Using the 115 V power socket
XTo switch on: switch the ignition on.
XOpen flap=.
XInsert the plug of the electronic device into
115 Vpower socket :.
Indicator lamp ;lights up.
XTo switch off: disconnect the plug from
115 V power socket :.
Ensure that you do not pull on the cord.
Problems with the 115 V power socket
ProblemPossible causes/consequences and MSolutions
The warning lamp on the
115 V power socket is
not lit.The on-board voltage is too low because the battery is too weak.
XStart the engine.
or
XCharge the battery (Ypage 313).
If the indicator lamp still does not light up:
XVisit a qualified specialist workshop.
The temperature of the DC/AC converter is temporarily too high.
XRemove the electronic device connector from the 115 V socket.
XLet the DC/AC converter cool down.
If the indicator lamp still does not light up after cooling down the
converter:
XVisit a qualified specialist workshop.
You have connected an electronic device that has a constant nominal
power of less than 150 watts, but has a very high switch-on current.
This device will not work. If you connect such a device, the 115 V
power socket will not supply it with power.
XConnect a suitable electronic device.
282Features
Stowage and features
Page 299 of 366
Working in the engine compartment poses a
risk of injury.
Where possible, let the engine cool down andtouch only the components described in the
following.
GWARNING
The cooling system is pressurized, particularly
when the motor is warm. If you open the cap,
you could be scalded if hot coolant sprays out.
There is a risk of injury.
Let the engine cool down before you open the
cap. Wear gloves and eye protection. Slowly
open the cap to relieve pressure.
GWARNING
Windshield washer concentrate could ignite if it comes into contact with hot engine compo-
nents or the exhaust system. There is a risk of
fire and injury.
Make sure that no windshield washer con-
centrate is spilled next to the filler neck.
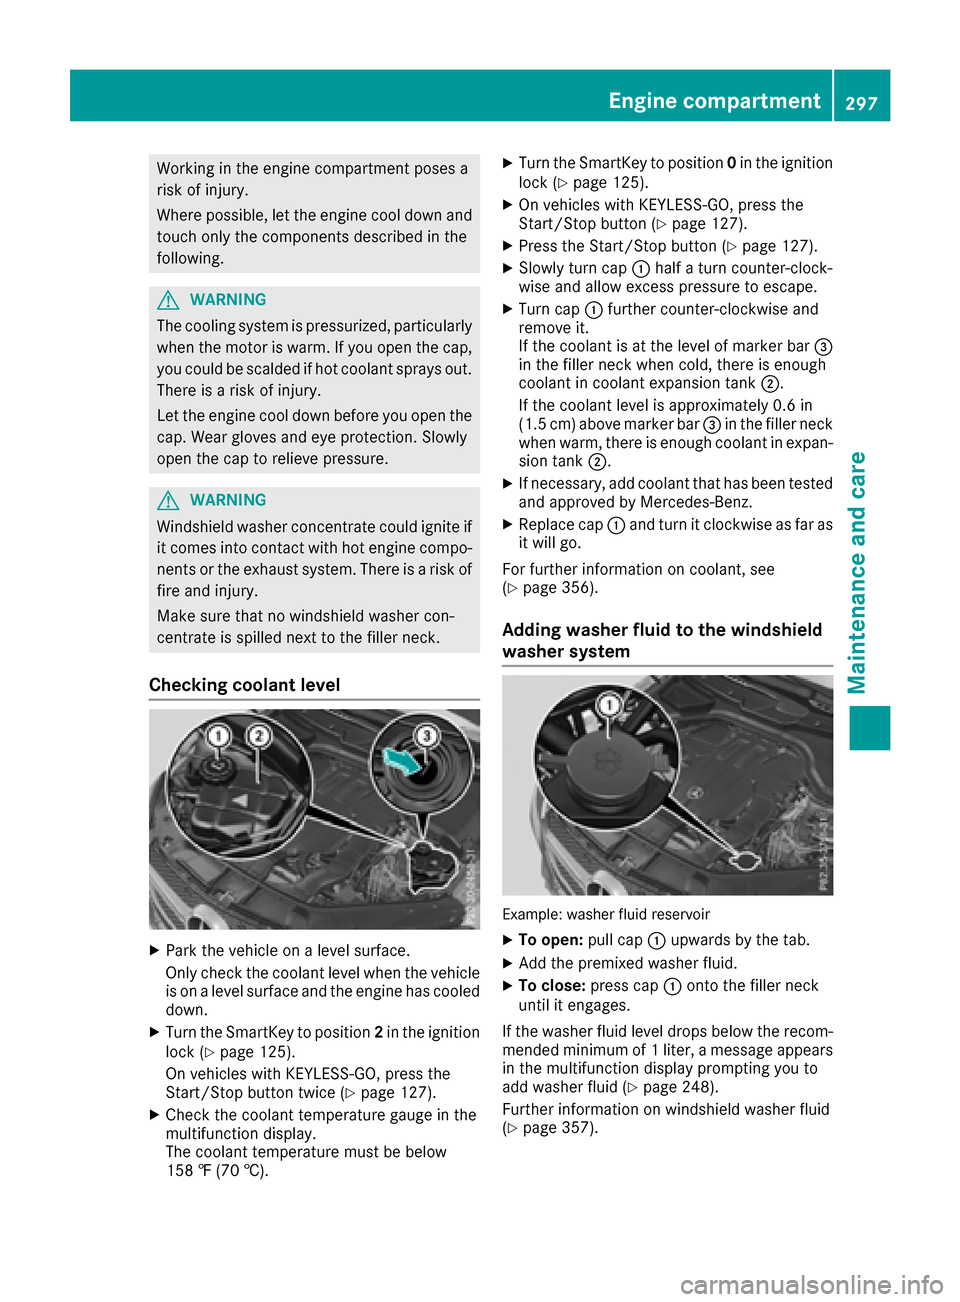
Checking coolant level
XPark the vehicle on a level surface.
Only check the coolant level when the vehicle
is on a level surface and the engine has cooled
down.
XTurn the SmartKey to position 2in the ignition
lock (Ypage 125).
On vehicles with KEYLESS-GO, press the
Start/Stop button twice (
Ypage 127).
XCheck the coolant temperature gauge in the
multifunction display.
The coolant temperature must be below
158 ‡ (70 †).
XTurn the SmartKey to position 0in the ignition
lock (Ypage 125).
XOn vehicles with KEYLESS-GO, press the
Start/Stop button (Ypage 127).
XPress the Start/Stop button (Ypage 127).
XSlowly turn cap :half a turn counter-clock-
wise and allow excess pressure to escape.
XTurn cap :further counter-clockwise and
remove it.
If the coolant is at the level of marker bar =
in the filler neck when cold, there is enough
coolant in coolant expansion tank ;.
If the coolant level is approximately 0.6 in
(1.5 cm) above marker bar =in the filler neck
when warm, there is enough coolant in expan-
sion tank ;.
XIf necessary, add coolant that has been tested
and approved by Mercedes-Benz.
XReplace cap :and turn it clockwise as far as
it will go.
For further information on coolant, see
(
Ypage 356).
Adding washer fluid to the windshield
washer system
Example: washer fluid reservoir
XTo open: pull cap:upwards by the tab.
XAdd the premixed washer fluid.
XTo close: press cap :onto the filler neck
until it engages.
If the washer fluid level drops below the recom-
mended minimum of 1 liter, a message appears
in the multifunction display prompting you to
add washer fluid (
Ypage 248).
Further information on windshield washer fluid
(
Ypage 357).
Engine compartment297
Maintenance and care
Z