2017 MERCEDES-BENZ GLC SUV License plate
[x] Cancel search: License platePage 15 of 374

High-beam headlampsAdaptive Highbeam Assist ............. 113
Display message ............................ 239
Replacing bulbs ............................. 117
Switching on/off ........................... 112
Hill start assist .................................. 136
HOLD function
Activating ....................................... 172
Activation conditions .....................1 72
Deactivating ................................... 172
Display message ............................ 247
Function/notes .............................1 71
General notes ................................ 171
Home address
see also Digital Operator's Man-
ual ..................................................2 68
Hood
Closing ...........................................3 07
Display message ............................ 254
Important safety notes .................. 306
Opening ......................................... 306
Horn ...................................................... 35
HUD
see Head-up display
Hydroplaning ..................................... 161
I
Ignition lock
see Key positions
Immobilizer .......................................... 76
Indicator and warning lamps
COLLISION PREVENTION ASSIST
PLUS .............................................. 265
Indicator lamps
see Warning and indicator lamps
Indicators
see Turn signals
Insect protection on the radiator .... 307
Instrument cluster
Overview .......................................... 36
Warning and indicator lamps ........... 36
Instrument cluster lighting .............. 208
Interior lighting
Automatic control .......................... 115
Control ...........................................1 15
Overview ........................................ 115
Reading lamp ................................. 115 iPod
®
see also Digital Operator's Man-
ual ..................................................2
68
J
Jack
Using ............................................. 357
Jump starting (engine) ......................328
K
Key positions
SmartKey ....................................... 132
Start/Stop button .......................... 133
KEYLESS-GO
Activating ......................................... 78
Convenience closing feature ............ 92
Deactivation ..................................... 78
Locking ............................................ 78
Removing the Start/Stop button ... 133
Start function ................................... 79
Unlocking ......................................... 78
Kickdown
Driving tips ....................................1 44
Manual gearshifting ....................... 147
Knee bag .............................................. 50
L
Lamps
see Warning and indicator lamps
Lane Keeping Assist
Activating/deactivating ................. 196
Activating/deactivating (on-
board computer) ............................ 221
Display message ............................ 245
Function/information .................... 195
see Active Lane Keeping Assist
Lane Tracking package ..................... 193
Lap time (RACETIMER) ...................... 225
LATCH-type (ISOFIX) child seat
anchors ................................................ 61
Level control
Display message ............................ 245
see AIR BODY CONTROL
License plate lamp (display mes-
sage) ................................................... 239
Index13
Page 113 of 374

Exterior lighting
General notes
USA only: if you wish to drive during the daytime
without lights, switch off theDaytime Run‐
ning Lightsfunction via the on-board com-
puter (Ypage 223).
Setting the exterior lighting
Setting options
Exterior lighting can be set using the:
Rlight switch (Ypage 111)
Rcombination switch (Ypage 112)
Ron-board computer (Ypage 223)
Light switch
Operation
1 WLeft-hand standing lamps
2XRight-hand standing lamps
3TParking lamps, license plate and
instrument cluster lighting
4ÃAutomatic headlamp mode, controlled
by the light sensor
5 LLow-beam/high-beam headlamps
BRRear fog lamp
If you hear a warning tone when you leave the
vehicle, the lights may still be switched on.
XTurn the light switch to the Ãposition.
The exterior lighting (except the parking/stand-
ing lamps) switches off automatically if you:
Rremove the SmartKey from the ignition lock
Ropen the driver's door with the SmartKey in
position u
Automatic headlamp mode
GWARNING
When the light switch is set to Ã, the low-
beam headlamps may not be switched on
automatically if there is fog, snow or other
causes of poor visibility due to the weather
conditions such as spray. There is a risk of an
accident.
In such situations, turn the light switch to
L.
The automatic headlamp feature is only an aid.
The driver is responsible for the vehicle's light-
ing at all times.
à is the favored light switch setting.
The light setting is automatically selected
according to the brightness of the ambient light,
but not in the event of poor visibility due to
weather conditions such as fog, snow or spray.
RWith the SmartKey in position 1in the igni-
tion lock, the parking lamps are switched on
or off automatically depending on the bright-
ness of the ambient light.
RUSA only: if you have switched on the Day‐time Running Lightsfunction via the on-
board computer, and the engine is running,
the daytime running lamps or the parking
lamps and low-beam headlamps are switched
on or off automatically depending on the
ambient light.
RCanada only: depending on the ambient light,
the daytime running lamps or the parking and
low-beam headlamps are switched on/off
automatically when the engine is running.
XTo switch on the automatic headlamps:
turn the light switch to the Ãposition.
USA only: The daytime running lamps improve
the visibility of your vehicle during the day. Here,
the Daytime Running Lights
function must
be switched on via the on-board computer
(
Ypage 223).
If the engine is running and you turn the light
switch to the TorL position, the manual
settings take precedence over the daytime run-
ning lamps.
Canada only: The daytime running lamps
improve the visibility of your vehicle during the
day. The daytime running lamps function is
required by law in Canada. It cannot therefore
be deactivated.
Exterior lighting111
Lights and windshield wipers
Z
Page 185 of 374

Rif there is a sudden change in temperature,
e.g. when driving into a heated garage in win-ter
Rif the camera lens is dirty or obstructed
Observe the notes on cleaning
(
Ypage 316)
Rif the rear of your vehicle is damaged. In this
case, have the camera position and setting
checked at a qualified specialist workshop
The field of vision and other functions of the rear
view camera may be restricted due to additional
accessories on the rear of the vehicle (e.g.
license plate holder, rear bicycle rack).
The rear view camera is protected from rain-
drops and dust by means of a flap. When the rear view camera is activated, this flap opens.
The flap closes again when:
Ryou have finished the maneuvering process
Ryou switch off the engine
Ryou open the cargo compartment
Observe the notes on cleaning (
Ypage 316).
For technical reasons, the flap may remain open
briefly after the rear view camera has been
deactivated.
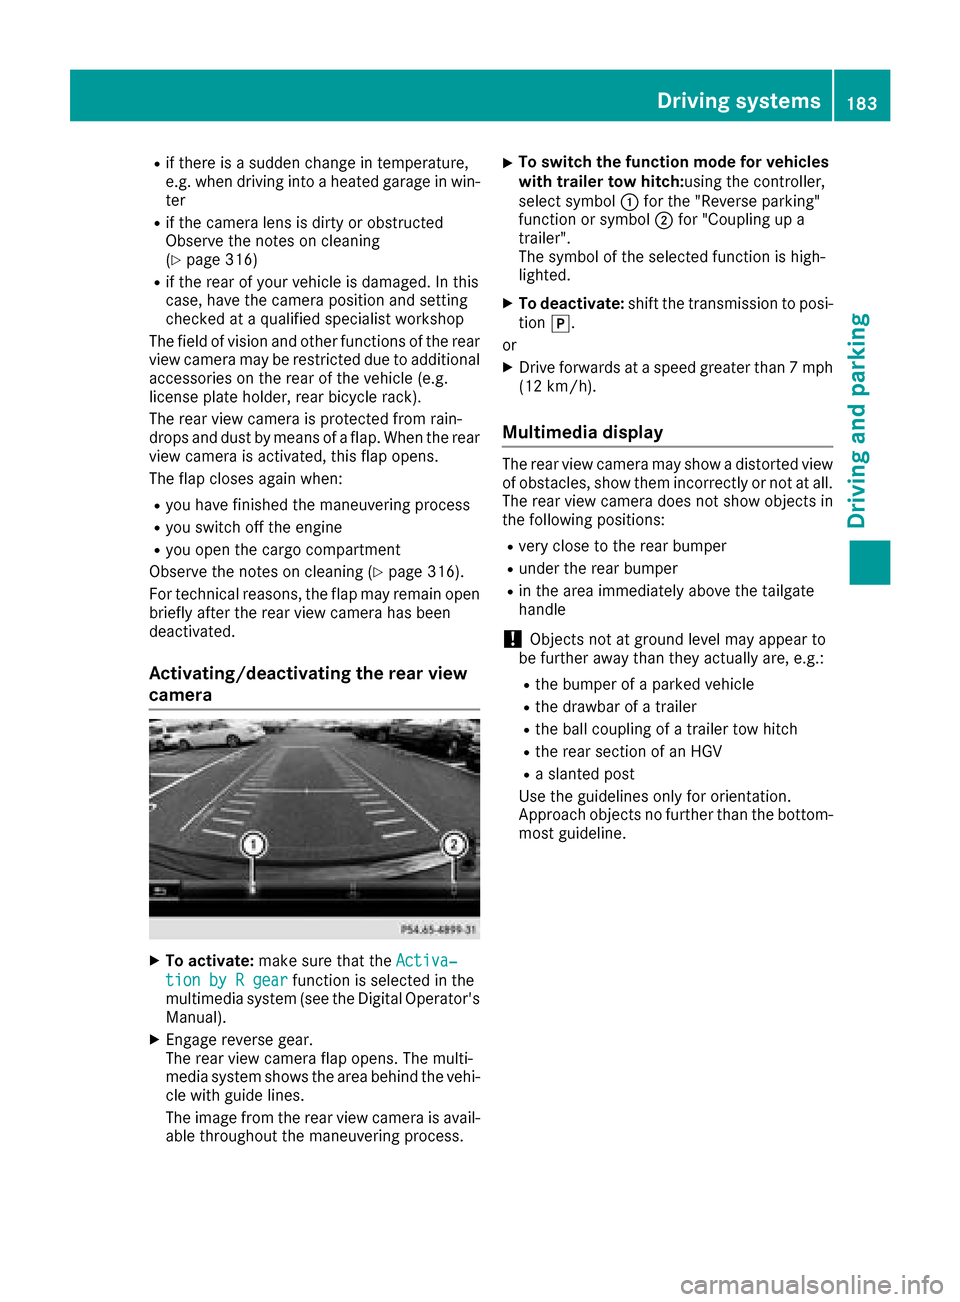
Activating/deactivating the rear view
camera
XTo activate: make sure that the Activa‐
tion by R gearfunction is selected in the
multimedia system (see the Digital Operator's
Manual).
XEngage reverse gear.
The rear view camera flap opens. The multi-
media system shows the area behind the vehi-
cle with guide lines.
The image from the rear view camera is avail- able throughout the maneuvering process.
XTo switch the function mode for vehicles
with trailer tow hitch: using the controller,
select symbol :for the "Reverse parking"
function or symbol ;for "Coupling up a
trailer".
The symbol of the selected function is high-
lighted.
XTo deactivate: shift the transmission to posi-
tion j.
or
XDrive forwards at a speed greater than 7 mph
(12 km/h).
Multimedia display
The rear view camera may show a distorted view
of obstacles, show them incorrectly or not at all.
The rear view camera does not show objects in
the following positions:
Rvery close to the rear bumper
Runder the rear bumper
Rin the area immediately above the tailgate
handle
!Objects not at ground level may appear to
be further away than they actually are, e.g.:
Rthe bumper of a parked vehicle
Rthe drawbar of a trailer
Rthe ball coupling of a trailer tow hitch
Rthe rear section of an HGV
Ra slanted post
Use the guidelines only for orientation.
Approach objects no further than the bottom-
most guideline.
Driving systems183
Driving and parking
Z
Page 190 of 374

The camera in the rear area is protected by
means of a flap. This flap opens when the 360°
camera is activated. Observe the notes on
cleaning (
Ypage 316). For technical reasons,
the flap may remain open briefly after the 360°
camera has been deactivated.
The field of vision and other functions of the
camera system may be restricted due to addi-
tional attachments (e.g. license plate holder,
rear bicycle carrier).
On vehicles with height-adjustable chassis,
depending on technical conditions, leaving the
standard height can result in:
Rinaccuracies in the guide lines
Rinaccuracies in the display of generated
images (top view)
Activation conditions
The image from the 360° camera appears if:
Rthe multimedia system is switched on
Rthe 360° Camerafunction is switched on
If you are driving faster than at a moderate
speed and you turn on the 360° camera, a warn-
ing message appears.
The warning message disappears if:
Ryou are again driving at a moderate speed The
360° camera is then activated
Rthe message is confirmed with the %but-
ton
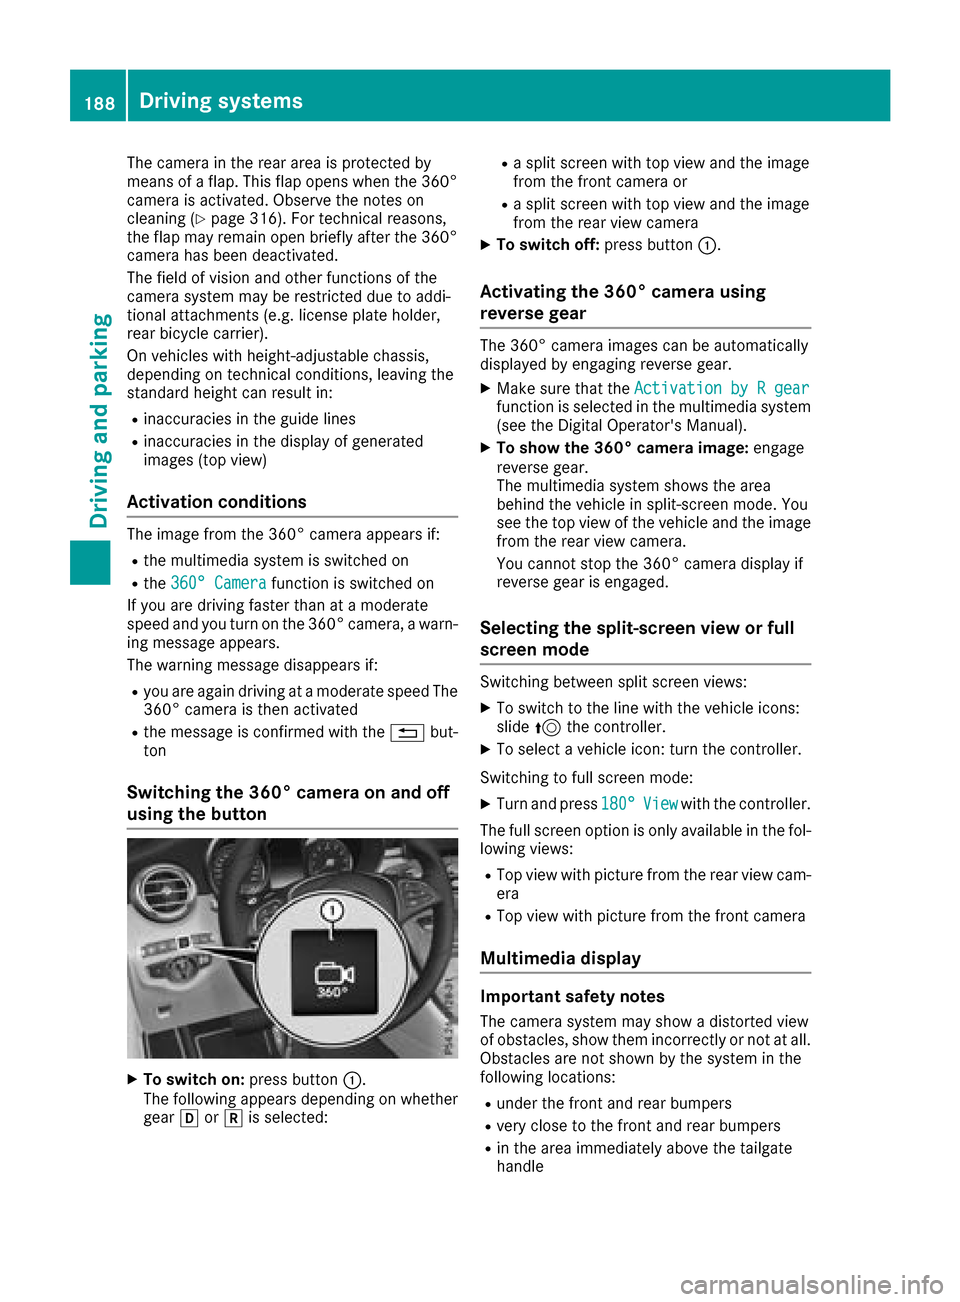
Switching the 360° camera on and off
using the button
XTo switch on: press button:.
The following appears depending on whether
gear hork is selected:
Ra split screen with top view and the image
from the front camera or
Ra split screen with top view and the image
from the rear view camera
XTo switch off: press button:.
Activating the 360° camera using
reverse gear
The 360° camera images can be automatically
displayed by engaging reverse gear.
XMake sure that the Activation by R gearfunction is selected in the multimedia system
(see the Digital Operator's Manual).
XTo show the 360° camera image: engage
reverse gear.
The multimedia system shows the area
behind the vehicle in split-screen mode. You
see the top view of the vehicle and the image
from the rear view camera.
You cannot stop the 360° camera display if
reverse gear is engaged.
Selecting the split-screen view or full
screen mode
Switching between split screen views:
XTo switch to the line with the vehicle icons:
slide 5the controller.
XTo select a vehicle icon: turn the controller.
Switching to full screen mode:
XTurn and press 180°Viewwith the controller.
The full screen option is only available in the fol-
lowing views:
RTop view with picture from the rear view cam-
era
RTop view with picture from the front camera
Multimedia display
Important safety notes
The camera system may show a distorted view
of obstacles, show them incorrectly or not at all.
Obstacles are not shown by the system in the
following locations:
Runder the front and rear bumpers
Rvery close to the front and rear bumpers
Rin the area immediately above the tailgate
handle
188Driving systems
Driving and parking