2017 MERCEDES-BENZ GLC SUV rear door
[x] Cancel search: rear doorPage 87 of 374

could enter the passenger compartment.
There is a risk of poisoning.
Turn off the engine before opening the tail-
gate. Never drive with the tailgate open.
GWARNING
If objects, luggage or loads are not secured or
not secured sufficiently, they could slip, tip
over or be flung around and thereby hit vehicle
occupants. There is a risk of injury, particu-
larly in the event of sudden braking or a sud-
den change in direction.
Always store objects so that they cannot be
flung around. Secure objects, luggage or
loads against slipping or tipping before the
journey.
!The tailgate swings upwards and to the rear
when opened. Therefore, make sure that
there is sufficient clearance above and behind
the tailgate.
The opening dimensions of the tailgate can be
found in the "Vehicle data" section
(
Ypage 370).
You can limit the opening angle of the tailgate
(
Ypage 89).
Do not leave the SmartKey in the cargo com-
partment. You could otherwise lock yourself
out.
You should preferably place luggage or loads in
the cargo compartment. Observe the loading
guidelines (
Ypage 278).
Tailgate obstruction detection with
reversing feature
Vehicles with remote tailgate closing:
The tailgate is equipped with automatic obstruc- tion detection with reversing feature. If a solid
object blocks or restricts the tailgate when auto-
matically opening, this procedure is stopped. If a
solid object blocks or restricts the tailgate when
automatically closing, the tailgate automatically
opens again slightly. The automatic obstruction
detection with reversing feature is only an aid. It
is not a substitute for your attentiveness when
opening and closing the tailgate.
GWARNING
The reversing feature does not respond:
Rto soft, light and thin objects, e.g. fingers
Rover the last Óin (8 mm) of the closing
movement
The reversing feature cannot prevent some-
one from becoming trapped in these situa-
tions in particular. There is a risk of injury.
Make sure that no body parts are in close
proximity during the closing procedure.
If somebody becomes trapped:
Rpress the Fbutton on the SmartKey, or
Rpull or press the remote operating switch
on the driver's door or
Rpress the closing or locking button on the
tailgate or
Rpull the handle on the tailgate
Vehicles with HANDS-FREE ACCESS:
It is also possible to stop the closing process by
performing a kicking movement under the rear
bumper.
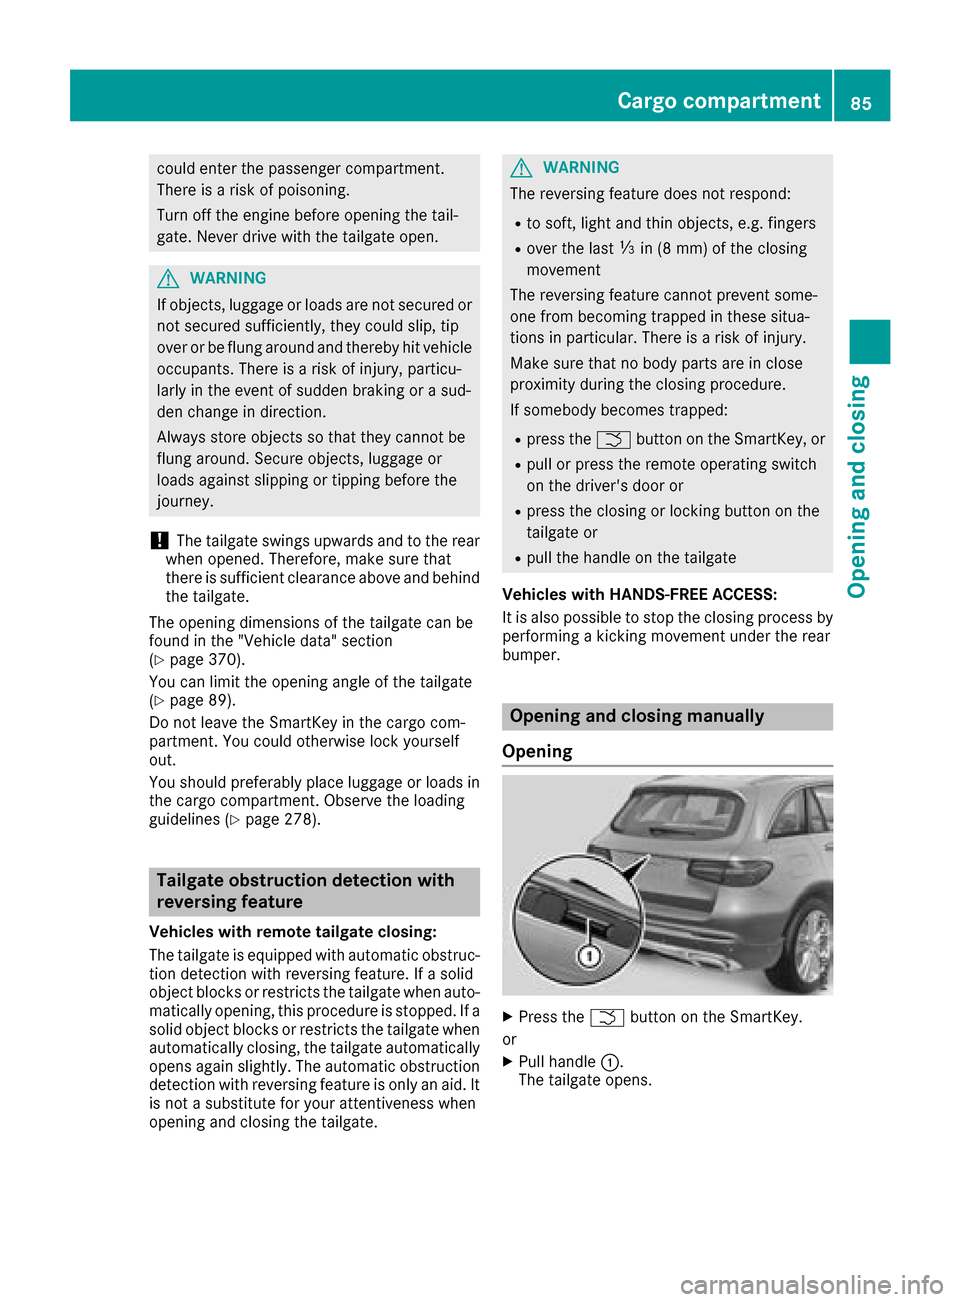
Opening and closing manually
Opening
XPress the Fbutton on the SmartKey.
or
XPull handle :.
The tailgate opens.
Cargo compartment85
Opening and closing
Z
Page 88 of 374

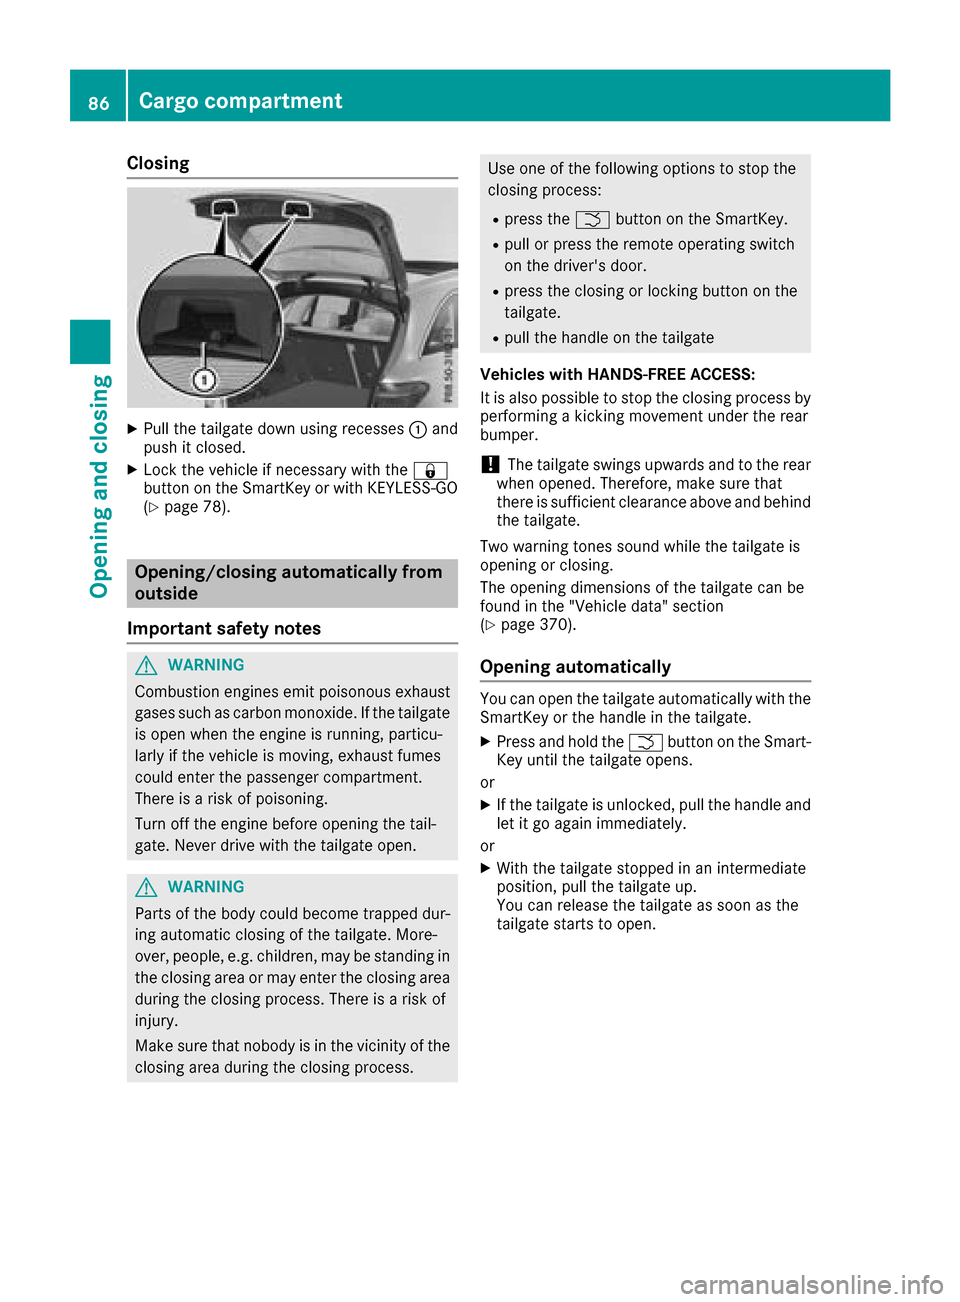
Closing
XPull the tailgate down using recesses:and
push it closed.
XLock the vehicle if necessary with the &
button on the SmartKey or with KEYLESS-GO
(
Ypage 78).
Opening/closing automatically from
outside
Important safety notes
GWARNING
Combustion engines emit poisonous exhaust
gases such as carbon monoxide. If the tailgate is open when the engine is running, particu-
larly if the vehicle is moving, exhaust fumes
could enter the passenger compartment.
There is a risk of poisoning.
Turn off the engine before opening the tail-
gate. Never drive with the tailgate open.
GWARNING
Parts of the body could become trapped dur-
ing automatic closing of the tailgate. More-
over, people, e.g. children, may be standing in the closing area or may enter the closing area
during the closing process. There is a risk of
injury.
Make sure that nobody is in the vicinity of the
closing area during the closing process.
Use one of the following options to stop the
closing process:
Rpress the Fbutton on the SmartKey.
Rpull or press the remote operating switch
on the driver's door.
Rpress the closing or locking button on the
tailgate.
Rpull the handle on the tailgate
Vehicles with HANDS-FREE ACCESS:
It is also possible to stop the closing process by
performing a kicking movement under the rear
bumper.
!The tailgate swings upwards and to the rear
when opened. Therefore, make sure that
there is sufficient clearance above and behind
the tailgate.
Two warning tones sound while the tailgate is
opening or closing.
The opening dimensions of the tailgate can be
found in the "Vehicle data" section
(
Ypage 370).
Opening automatically
You can open the tailgate automatically with the
SmartKey or the handle in the tailgate.
XPress and hold the Fbutton on the Smart-
Key until the tailgate opens.
or
XIf the tailgate is unlocked, pull the handle and
let it go again immediately.
or
XWith the tailgate stopped in an intermediate
position, pull the tailgate up.
You can release the tailgate as soon as the
tailgate starts to open.
86Cargo compartment
Opening and closing
Page 89 of 374

Closing automatically
:Closing button
;Locking button
XPress closing button:in the tailgate.
or
XPull the tailgate down slightly.
You can release the tailgate as soon as the
tailgate starts to close.
When the driver's door is closed, you can simul-
taneously close the tailgate and lock the vehicle.
The KEYLESS-GO key must be in the rear detec- tion range of the vehicle.
XPress locking button ;in the tailgate.
If KEYLESS-GO detects a SmartKey outside
the vehicle, the tailgate closes. The vehicle is
locked.
or
XVehicles with EASY-PACK tailgate and
KEYLESS-GO or KEYLESS-GO start func-
tion: if the SmartKey is located in the imme-
diate vicinity of the vehicle, press the F
button on the SmartKey.
You can release the button as soon as the
tailgate starts to close.
If KEYLESS-GO detects a SmartKey in the cargo
compartment, the tailgate is unlocked again
after closing.
If KEYLESS-GO detects a second SmartKey out-
side the vehicle, the tailgate remains locked.
If KEYLESS-GO detects a SmartKey in the cargo
compartment before the closing procedure
starts, the tailgate remains open.
HANDS-FREE ACCESS
General notes
With KEYLESS-GO and HANDS-FREE ACCESS,
you can open or close the tailgate or stop the
procedure without using your hands. This is use-
ful if you have your hands full. To do this, make
a kicking movement under the bumper with your
foot.
Observe the following points:
RCarry your KEYLESS-GO key about your per-
son. The KEYLESS-GO key must be in the rear
detection range of the vehicle.
RWhen making the kicking movement, make
sure that you are standing firmly on the
ground and that there is sufficient clearance
to the rear of the vehicle. You could otherwise
lose your balance, for example on ice.
RAlways ensure that you only make the kicking
movement within the detection range of sen-
sors :.
RStand at least 12 in (30 cm) away from the
rear area while doing so.
RDo not come into contact with the bumper
while making the kicking movement. Other-
wise, the sensors may not function correctly.
RHANDS-FREE ACCESS does not function
when the engine is started.
RDirt caused by road salt or snow around sen-
sors:may restrict functionality.
Using the HANDS-FREE ACCESS with a pros-
thetic leg may restrict functionality.
RIf a KEYLESS-GO key is within the rear detec-
tion range of KEYLESS-GO, HANDS-FREE
ACCESS could be triggered. The tailgate
Cargo compartment87
Opening and closing
Z
Page 91 of 374

dren, during the closing procedure. There is a
risk of injury.
Make sure that nobody is in the vicinity of the
closing area during the closing process.
Release the remote operating switch imme-
diately if somebody becomes trapped. To re-
open the tailgate pull on the remote operating
switch.
Vehicles with HANDS-FREE ACCESS:
It is also possible to stop the closing process by
performing a kicking movement under the rear
bumper.
!The tailgate swings upwards and to the rear
when opened. Therefore, make sure that
there is sufficient clearance above and behind
the tailgate.
Two warning tones sound while the tailgate is
opening or closing.
The opening dimensions of the tailgate can be
found in the "Vehicle data" section
(
Ypage 370).
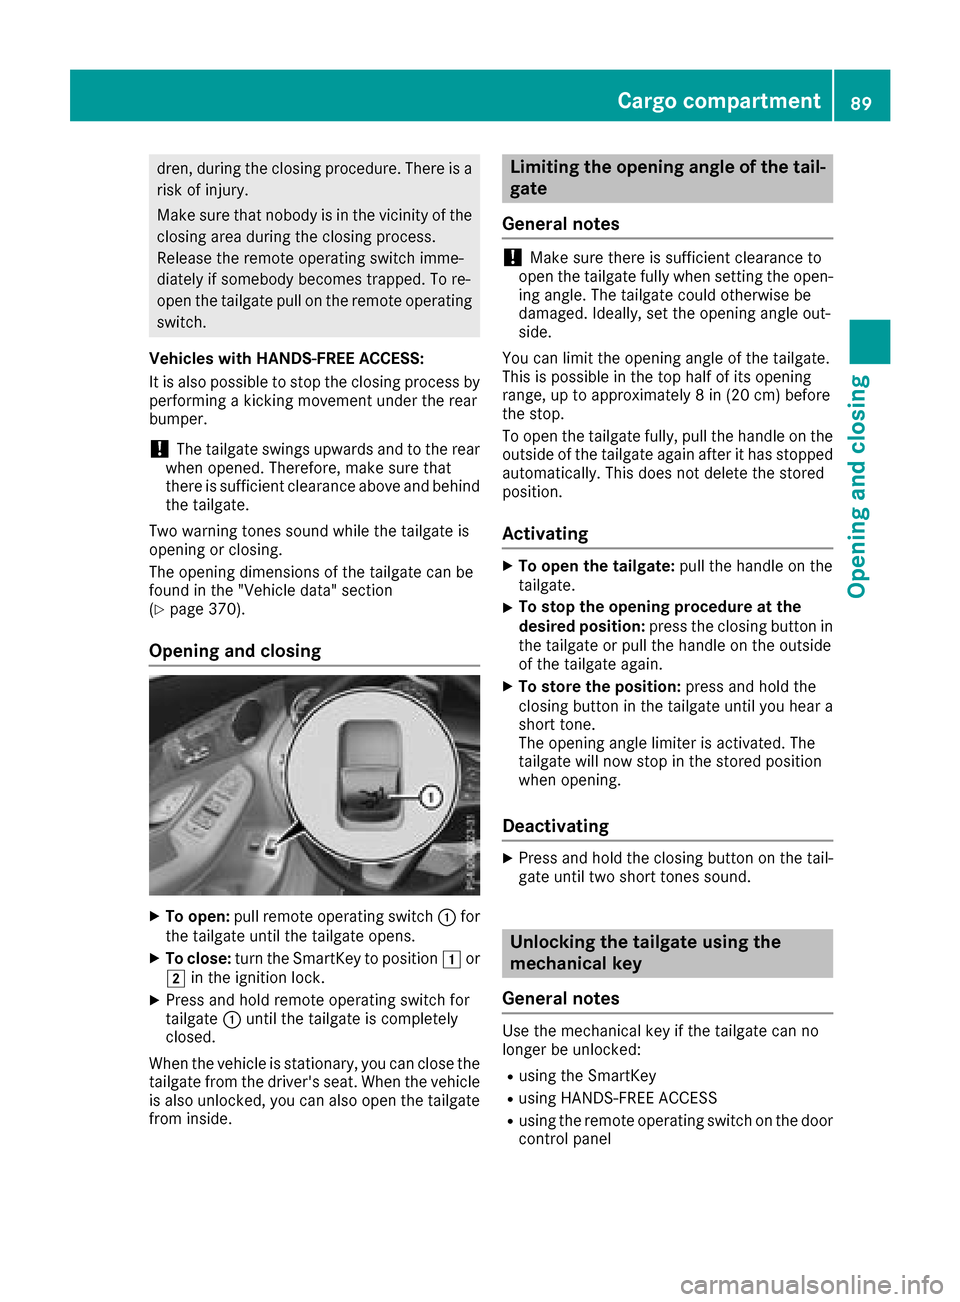
Opening and closing
XTo open: pull remote operating switch :for
the tailgate until the tailgate opens.
XTo close: turn the SmartKey to position 1or
2 in the ignition lock.
XPress and hold remote operating switch for
tailgate :until the tailgate is completely
closed.
When the vehicle is stationary, you can close the
tailgate from the driver's seat. When the vehicle is also unlocked, you can also open the tailgate
from inside.
Limiting the opening angle of the tail-
gate
General notes
!Make sure there is sufficient clearance to
open the tailgate fully when setting the open-
ing angle. The tailgate could otherwise be
damaged. Ideally, set the opening angle out-
side.
You can limit the opening angle of the tailgate.
This is possible in the top half of its opening
range, up to approximately 8 in (20 cm) before
the stop.
To open the tailgate fully, pull the handle on the
outside of the tailgate again after it has stopped
automatically. This does not delete the stored
position.
Activating
XTo open the tailgate: pull the handle on the
tailgate.
XTo stop the opening procedure at the
desired position: press the closing button in
the tailgate or pull the handle on the outside
of the tailgate again.
XTo store the position: press and hold the
closing button in the tailgate until you hear a
short tone.
The opening angle limiter is activated. The
tailgate will now stop in the stored position
when opening.
Deactivating
XPress and hold the closing button on the tail-
gate until two short tones sound.
Unlocking the tailgate using the
mechanical key
General notes
Use the mechanical key if the tailgate can no
longer be unlocked:
Rusing the SmartKey
Rusing HANDS-FREE ACCESS
Rusing the remote operating switch on the door
control panel
Cargo compartment89
Opening and closing
Z
Page 92 of 374

!The tailgate swings upwards and to the rear
when opened. Therefore, make sure that
there is sufficient clearance above and behind
the tailgate.
Unlocking
XRemove cargo compartment cover
(Ypage 285).
XFold the rear seat backrest forward
(Ypage 281).
XInsert mechanical key ;into opening :in
the paneling and push it in.
XOpen the tailgate.
When you lock the vehicle, the cargo compart-
ment is also locked again.
Side windows
Important safety notes
GWARNING
While opening the side windows, body parts
could become trapped between the side win-
dow and the door frame as the side window
moves. There is a risk of injury.
Make sure that nobody touches the side win-
dow during the opening procedure. If some-
body becomes trapped, release the switch or
pull the switch to close the side window again.
GWARNING
While closing the side windows, body parts in
the closing area could become trapped. There is a risk of injury.
When closing make sure that no parts of the
body are in the closing area. If somebody
becomes trapped, release the switch or press
the switch to open the side window again.
GWARNING
If children operate the side windows they
could become trapped, particularly if they are left unsupervised. There is a risk of injury.
Activate the override feature for the rear side
windows. When leaving the vehicle, always
take the SmartKey with you and lock the vehi-
cle. Never leave children unsupervised in the
vehicle.
Side window reversing feature
The side windows are equipped with an auto-
matic reversing feature. If a solid object blocks
or restricts a side window from traveling
upwards during the automatic closing process,
the side window opens again automatically. Dur-
ing the manual closing process, the side windowonly opens again automatically after the corre-
sponding switch is released. The automatic
reversing feature is only an aid and is no substi-
tute for your attention when closing a side win-
dow.
GWARNING
The reversing feature does not react:
Rto soft, light and thin objects, e.g. small fin-
gers
Rwhile resetting
This means that the reversing feature cannot
prevent someone being trapped in these sit-
uations. There is a risk of injury.
Make sure that no body parts are in close
proximity during the closing procedure. If
someone becomes trapped, press the switch
to open the side window again.
Opening and closing the side win-
dows
The switches for all side windows are located on the driver's door. There is also a switch on each
door for the corresponding side window.
90Side windows
Opening and closing
Page 93 of 374

The switches on the driver's door take prece-
dence.
:Front left
;Front right
=Rear right
?Rear left
XTurn the SmartKey to position1or2 in the
ignition lock.
XTo open manually: press and hold the cor-
responding switch.
XTo open fully: press the switch beyond the
pressure point and release it.
Automatic operation is started.
XTo close manually: pull the corresponding
switch and hold it.
XTo close fully: pull the switch beyond the
pressure point and release it.
Automatic operation is started.
XTo interrupt automatic operation: press/
pull the corresponding switch again.
If you press the switch beyond the pressure
point and release, automatic operation is star-
ted in the corresponding direction. You can stop
automatic operation by pressing/pulling the
switch again.
You can continue to operate the side windows
after you switch off the engine or remove the
SmartKey. This function remains active for five
minutes or until you open a front door.
When the override feature for the side windows
is activated, the side windows cannot be oper-
ated from the rear (
Ypage 64).
Information on opening and closing the roller
sunblinds on the rear side windows
(
Ypage 291).
Convenience opening
General notes
If the SmartKey is in close proximity to the vehi-
cle, the convenience opening function is availa-
ble.
Vehicles with KEYLESS-GO or KEYLESS-GO
start function: you can ventilate the vehicle
before you start driving.
To do this, the SmartKey is used to carry out the
following functions simultaneously:
Runlock the vehicle
Ropen the side windows
Ropen the panorama roof with power tilt/slid-
ing panel and the roller sunblind
Rswitch on the seat ventilation for the driver's
seat
The "convenience opening" feature is also avail-
able when the vehicle is unlocked.
Convenience opening
XPress and hold the %button on the Smart-
Key until the side windows and the panorama
roof with power tilt/sliding panel are in the
desired position.
If the roller sunblinds of the panorama roof
with power tilt/sliding panel are closed, the
roller sunblinds are opened first.
XPress and hold the %button again until the
panorama roof with power tilt/sliding panel is
in the desired position.
XTo interrupt convenience opening: release
the % button.
Convenience closing feature
Important safety notes
GWARNING
When the convenience closing feature is oper- ating, parts of the body could become trapped
in the closing area of the side window and the
sliding sunroof. There is a risk of injury.
Observe the complete closing procedure
when the convenience closing feature is oper-
ating. Make sure that no body parts are in
close proximity during the closing procedure.
Side windows91
Opening and closing
Z
Page 97 of 374

the vehicle interior is reduced as a result. At low
speeds it raises again automatically.
You can also temporarily deactivate automatic
lowering. To do so, press the3switch. The
panorama roof with power tilt/sliding panel rai-
ses again automatically.
You can continue to operate the panorama roof
with power tilt/sliding panel after you switch off
the engine or remove the SmartKey. This func-
tion remains active for five minutes or until you
open a front door.
When a roof carrier is mounted the panorama
roof with power tilt/sliding panel cannot be
opened. The panorama roof with power tilt/slid-
ing panel can still be raised to allow ventilation
of the vehicle interior. If the panorama roof with
power tilt/sliding panel makes contact with a
roof carrier approved by Mercedes-Benz, the
sunroof will lower slightly but remain raised at
the rear.
Rain-closing feature
The raised panorama roof with power tilt/sliding panel automatically lowers when driving if it
starts to rain. The sliding sunroof is lowered
depending on:
Rthe road speed
Rthe intensity of the rain
You can manually cancel the automatic closing
procedure. Press or pull the 3switch in any
direction.
To raise the panorama roof with power tilt/slid- ing panel again, press the 3switch in direc-
tion :.
The rain-closing feature is then deactivated until
you:
Rpress or pull the 3switch in any direction
or
Rturn the SmartKey to another position in the
ignition lock (Ypage 132)
Operating the roller sunblinds for the
panorama roof with power tilt/sliding
panel
Important safety notes
GWARNING
Parts of the body could become trapped
between the roller sunblind and frame or slid-
ing sunroof during automatic opening or clos-
ing. There is a risk of injury.
When opening or closing, make sure that no
body parts are in the sweep of the roller sun-
blind.
If somebody becomes trapped:
Rrelease the switch immediately, or
Rduring automatic operation, push the
switch briefly in any direction
The opening or closing procedure will be stop- ped.
The roller sunblinds shield the vehicle interior
from sunlight. The roller sunblinds can only be
opened and closed when the panorama roof
with power tilt/sliding panel is closed.
Roller sunblind reversing feature
The roller sunblinds are equipped with an auto-
matic reversing feature. If a solid object blocks
or restricts a roller sunblind during the closing
process, the roller sunblind opens again auto-
matically. However, the automatic reversing
feature is only an aid and is not a substitute of
your attentiveness when closing the roller sun-
blind.
GWARNING
The reversing feature does not react in par-
ticular to soft, light and thin objects, e.g. small
fingers. This means that the reversing feature
cannot prevent someone being trapped in
these situations. There is a risk of injury.
When closing the roller sunblind, make sure
that no body parts are in the sweep area.
Panorama roof withpower tilt/sliding panel95
Opening and closing
Z
Page 113 of 374

Exterior lighting
General notes
USA only: if you wish to drive during the daytime
without lights, switch off theDaytime Run‐
ning Lightsfunction via the on-board com-
puter (Ypage 223).
Setting the exterior lighting
Setting options
Exterior lighting can be set using the:
Rlight switch (Ypage 111)
Rcombination switch (Ypage 112)
Ron-board computer (Ypage 223)
Light switch
Operation
1 WLeft-hand standing lamps
2XRight-hand standing lamps
3TParking lamps, license plate and
instrument cluster lighting
4ÃAutomatic headlamp mode, controlled
by the light sensor
5 LLow-beam/high-beam headlamps
BRRear fog lamp
If you hear a warning tone when you leave the
vehicle, the lights may still be switched on.
XTurn the light switch to the Ãposition.
The exterior lighting (except the parking/stand-
ing lamps) switches off automatically if you:
Rremove the SmartKey from the ignition lock
Ropen the driver's door with the SmartKey in
position u
Automatic headlamp mode
GWARNING
When the light switch is set to Ã, the low-
beam headlamps may not be switched on
automatically if there is fog, snow or other
causes of poor visibility due to the weather
conditions such as spray. There is a risk of an
accident.
In such situations, turn the light switch to
L.
The automatic headlamp feature is only an aid.
The driver is responsible for the vehicle's light-
ing at all times.
à is the favored light switch setting.
The light setting is automatically selected
according to the brightness of the ambient light,
but not in the event of poor visibility due to
weather conditions such as fog, snow or spray.
RWith the SmartKey in position 1in the igni-
tion lock, the parking lamps are switched on
or off automatically depending on the bright-
ness of the ambient light.
RUSA only: if you have switched on the Day‐time Running Lightsfunction via the on-
board computer, and the engine is running,
the daytime running lamps or the parking
lamps and low-beam headlamps are switched
on or off automatically depending on the
ambient light.
RCanada only: depending on the ambient light,
the daytime running lamps or the parking and
low-beam headlamps are switched on/off
automatically when the engine is running.
XTo switch on the automatic headlamps:
turn the light switch to the Ãposition.
USA only: The daytime running lamps improve
the visibility of your vehicle during the day. Here,
the Daytime Running Lights
function must
be switched on via the on-board computer
(
Ypage 223).
If the engine is running and you turn the light
switch to the TorL position, the manual
settings take precedence over the daytime run-
ning lamps.
Canada only: The daytime running lamps
improve the visibility of your vehicle during the
day. The daytime running lamps function is
required by law in Canada. It cannot therefore
be deactivated.
Exterior lighting111
Lights and windshield wipers
Z