2017 MERCEDES-BENZ GLC SUV lighting
[x] Cancel search: lightingPage 117 of 374
Interior lighting
Overview of interior lighting
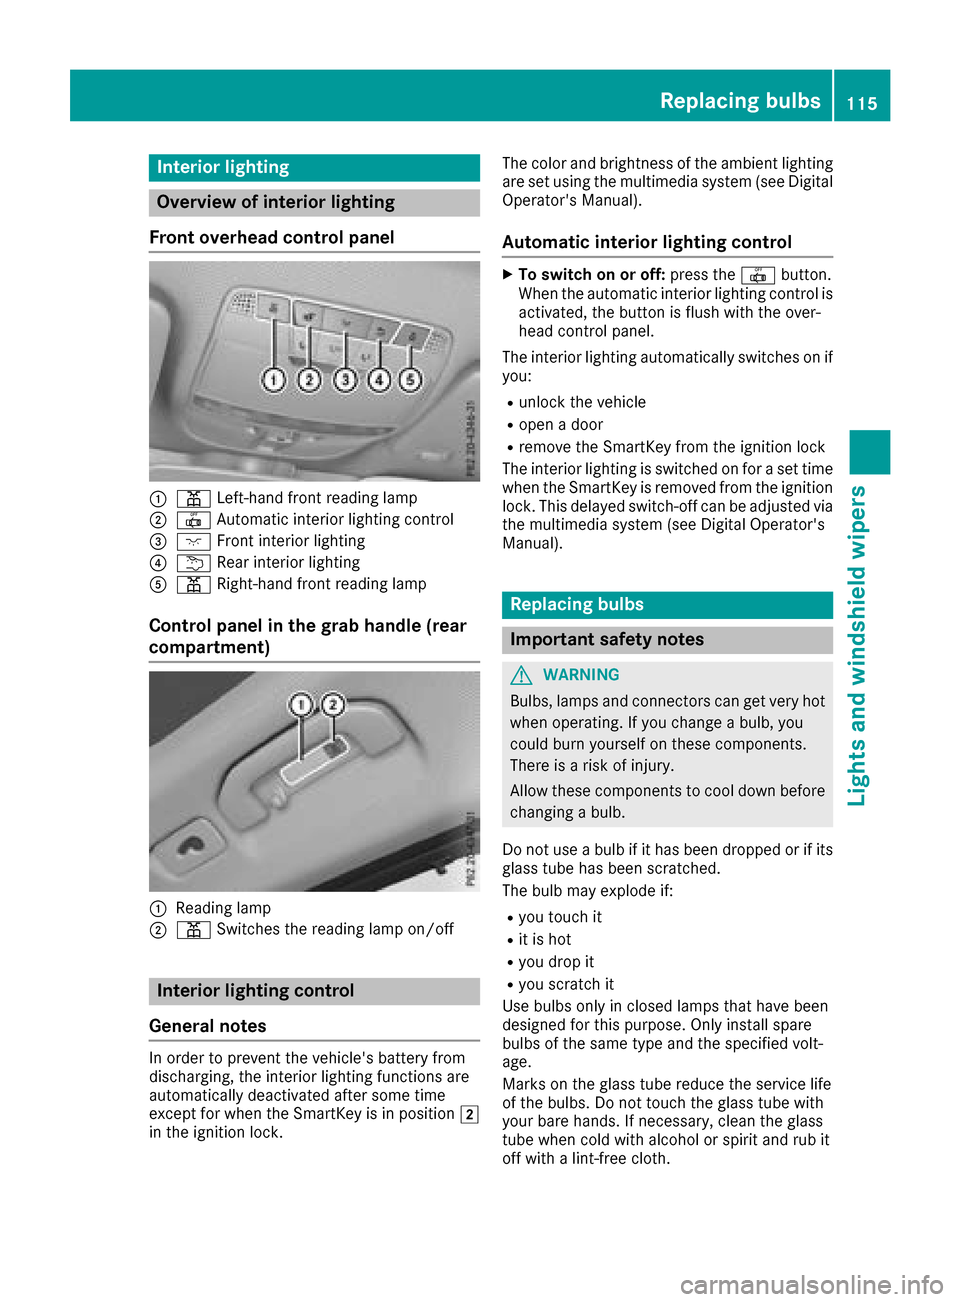
Front overhead control panel
:p Left-han dfron treading lamp
;| Automatic interio rlighting control
=c Frontinterio rlighting
?u Rear interio rlighting
Ap Right-hand fron treading lamp
Control panel in the grab handle (rear
compartment)
:Readin glamp
;p Switches th ereading lamp on/off
Interior lighting control
General notes
In order to preven tth evehicle's battery from
discharging ,th einterio rlighting function sare
automatically deactivated after som etime
except for when th eSmartKey is in position 2
in th eignition lock. The color and brightness of th
eambien tlighting
are set usin gth emultimedia system (see Digital
Operator's Manual).
Automatic interior lighting control
XTo switch on or off :press th e| button.
When th eautomatic interior lighting control is
activated, th ebutto nis flus hwit hth eover-
head control panel.
The interior lighting automatically switches on if
you:
Runlock th evehicl e
Ropenadoor
Rremove th eSmartKey from th eignition loc k
The interior lighting is switched on for aset time
when th eSmartKey is remove dfrom th eignition
lock. This delaye dswitch-off can be adjusted via
th emultimedia system (see Digital Operator's
Manual).
Replacing bulbs
Important safety notes
GWARNIN G
Bulbs, lamp sand connectors can get ver yhot
when operating .If you chang e abulb, you
could burn yourself on these components.
Ther eis aris kof injury.
Allow these component sto cool down before
changing abulb.
Do no tuse abulb if it has been dropped or if it s
glass tub ehas been scratched.
The bulb may explod eif:
Ryou touch it
Rit is hot
Ryou dro pit
Ryou scratch it
Use bulbs only in closed lamp sthat hav ebeen
designed for this purpose .Only instal lspar e
bulbs of th esam etyp eand th especifie dvolt-
age.
Mark son th eglass tub ereduce th eservic elife
of th ebulbs .Do no ttouch th eglass tub ewit h
your bare hands. If necessary, clean th eglass
tub ewhen cold wit halcohol or spirit and rub it
off wit h alint-free cloth .
Replacing bulbs115
Lights and windshield wipers
Z
Page 120 of 374

Replacing rear bulbs (vehicles with
halogen headlamps)
Opening and closing the side trim pan-
els
Example: right-hand side paneling
You must open the side trim panel in the cargo
compartment before you can replace the bulbs
in the tail lamps.
XTo open: release right or left side trim
panel :at the top and fold it down in the
direction of the arrow.
XTo close: insert side trim panel :.
Rear lamp cluster
Changing the backup lamp
Due to their location, have the bulbs in the
backup lamp in the tailgate replaced at a quali-
fied specialist workshop.
XSwitch off the lights.
XOpen the tailgate.
Example: right-hand side handle
XIn recess?on the inside of the closing han-
dle, pry off and remove the upper section of handle
=with a flat, smooth object, e.g. a
screwdriver.
XPull the lower section of handle :with a
strong tug to remove it from the trim and then place it to one side.
XReach under the right-hand side of trim B
and lightly tug along the entire length of the
trim in order to unclip it.
XPull out connector Cof the surround lighting
by releasing the latches.
XVehicles with EASY-PACK tailgate: pull out the
plug connector for the switch at the top right
of the trim.
XVehicles with electric fold-out trailer tow
hitch: unlock and pull out the plug connector
for the switch at the top left of the trim.
XPlace trim Bto one side.
XUnclip the remaining part of trim Dfrom the
assembly on the corresponding side using a
sudden, sharp movement, until bulb holder
E is accessible.
118Replacing bulbs
Lights and windshield wipers
Page 121 of 374

XPull the defective bulb out of bulb holderE.
XInsert the new bulb into bulb holderE.
XPosition trimDand engage it in place by
tapping it with your hand.
XCheck that all the metal clips are inserted in
the parts that were placed to one side: two
clips ;in the upper section of handle =and
four clips Ain trim B.
XIf not, remove the missing metal clips from
the metal openings in the tailgate and insert
them in the appropriate places.
XGrasp trim Band connect plug connector C
to the surround lighting.
iThe surround lighting only illuminates when
the tailgate has been shut and reopened.
XVehicles with EASY-PACK tailgate: insert the
plug connector for the switch at the top right
of the trim.
XVehicles with electric fold-out trailer tow
hitch: insert the plug connector for the switch
at the top left of the trim.
XPosition trim Band engage it in place by
tapping it with your hand, starting from the
outside.
XClip in the lower section of handle :again.
XInsert and engage the upper section of handle
=into lower section :.
Windshield wipers
Switching the windshield wipers
on/off
!
Do not operate the windshield wipers when
the windshield is dry, as this could damage
the wiper blades. Moreover, dust that has col-
lected on the windshield can scratch the glass
if wiping takes place when the windshield is
dry. If it is necessary to switch on the windshield
wipers in dry weather conditions, always use
washer fluid when operating the windshield
wipers.
!If the windshield wipers leave smears on the
windshield after the vehicle has been washed
in an automatic car wash, wax or other resi-
dues may be the reason for this. Clean the
windshield using washer fluid after washing
the vehicle in an automatic car wash.
!Intermittent wiping with rain sensor: due to
optical influences and the windshield becom-
ing dirty in dry weather conditions, the wind-
shield wipers may be activated inadvertently.
This could then damage the windshield wiper
blades or scratch the windshield.
For this reason, you should always switch off
the windshield wipers in dry weather.
1$ Windshield wiper off
2ÄIntermittent wipe, normal
3ÅIntermittent wipe, frequent
4°Continuous wipe, slow
5¯Continuous wipe, fast
BíSingle wipe
î Wipe with washer fluid
XSwitch on the ignition.
XTurn the combination switch to the corre-
sponding position.
Vehicles with a rain sensor: in theÅor
Ä position, the appropriate wipe frequency
is automatically set according to the intensity of
the rain. In the Åposition, the rain sensor is
more sensitive than in the Äposition, caus-
ing the windshield wiper to wipe more fre-
quently.
If the wiper blades are worn, the windshield will
no longer be wiped properly. This could prevent
you from observing the traffic conditions.
Windshield wipers119
Lights and windshield wipers
Z
Page 129 of 374
The climate control system switches to the
following functions:
Rhigh airflow
Rhigh temperature
Rair distribution to the windshield and front
side windows
Rair-recirculation mode off
iIf necessary, the "Cooling with air dehumid-
ification" function is activated. In this case,
the indicator lamp above the ¿rocker
switch remains switched off.
XTo switch off: press rocker switch ¬up or
down.
The indicator lamp above the ¬rocker
switch goes out. The previously selected set-
tings are restored. Air-recirculation mode
remains deactivated.
Defrosting the windows
Windows fogged up on the inside
XActivate the "Cooling with air dehumidifica-
tion" function with the ¿rocker switch.
XSwitch on automatic mode using the Ã
rocker switch.
XIf the windows continue to fog up, activate the "Windshield defrosting" function using the
¬ rocker switch.
iYou should only select this setting until the
windshield is clear again.
Windows fogged up on the outside
XActivate the windshield wipers.
XSwitch on automatic mode using the Ã
rocker switch.
iIf you clean the windows regularly, they do
not fog up so quickly.
Rear window defroster
General notes
The rear window defroster has a high current
draw. You should therefore switch it off as soon
as the rear window is clear. Otherwise, the rear
window defroster switches off automatically
after several minutes.
If the battery voltage is too low, the rear window defroster may switch off.
Activating/deactivating
XTurn the SmartKey to position 2in the igni-
tion lock (Ypage 132).
XPress rocker switch ¤up or down.
The indicator lamp above rocker switch ¤
lights up or goes out.
Problems with the rear window defroster
ProblemPossible causes/consequences and MSolutions
The rear window
defroster has deactiva-
ted prematurely or can-
not be activated.The battery has not been sufficiently charged.
XSwitch off any consumers that are not required, e.g. reading lamps,
interior lighting or the seat heating.
When the battery is sufficiently charged, the rear window defroster
can be activated again.
Switching air-recirculation mode
on/off
General notes
You can also temporarily deactivate the flow of
fresh air manually if unpleasant odors are enter-
ing the vehicle from outside. The air already
inside the vehicle will then be recirculated. If you switch on air-recirculation mode, the win-
dows can fog up more quickly, in particular at
low temperatures. Only use air-recirculation
mode briefly to prevent the windows from fog-
ging up.
Operating the climate control systems127
Climate control
Page 184 of 374
Surroundingsmessage appears on the mul-
tifunction display.
iYou will achieve the best results by waiting
for the steering procedure to complete before
pulling away.
If you back up after activation, the steering
wheel is moved to the straight-ahead posi-
tion.
XDrive forward and back up as prompted by the
PARKTRONIC warning displays, several times
if necessary.
Once you have exited the parking space com-
pletely, the steering wheel is moved to the
straight-ahead position. You hear a tone and the Park
AssistSwitchedOffmessage appears
on the multifunction display. You will then have
to steer and merge into traffic on your own.
PARKTRONIC is still available. You can take over
the steering before the vehicle has exited the
parking space completely. This is useful if you
recognize that it is already possible to pull out of
the parking space.
Canceling Active Parking Assist
XStop the movement of the multifunction
steering wheel or steer yourself.
Active Parking Assist will be canceled at once.
The Park Assist Canceled
message
appears in the multifunction display.
or
XPress the PARKTRONIC button (Ypage 177).
PARKTRONIC is switched off and Active Park-
ing Assist is immediately canceled. The Park
Assist Canceledmessage appears in the
multifunction display.
Active Parking Assist is canceled automatically
if:
Rthe electric parking brake is engaged
Rtransmission position jis selected
Rparking using Active Parking Assist is no lon-
ger possible
Ryou are driving faster than 6 mph (10 km/h)
Ra wheel spins, ESP®intervenes or fails. In
such cases the ÷warning lamp lights up in
the instrument cluster
A warning tone sounds. The parking symbol dis-
appears and the multifunction display shows the
Park Assist Canceled
message.
When Active Parking Assist is canceled, you
must steer and brake again yourself. If a system malfunction occurs, the vehicle is
braked to a standstill. To drive on, depress the
accelerator again.
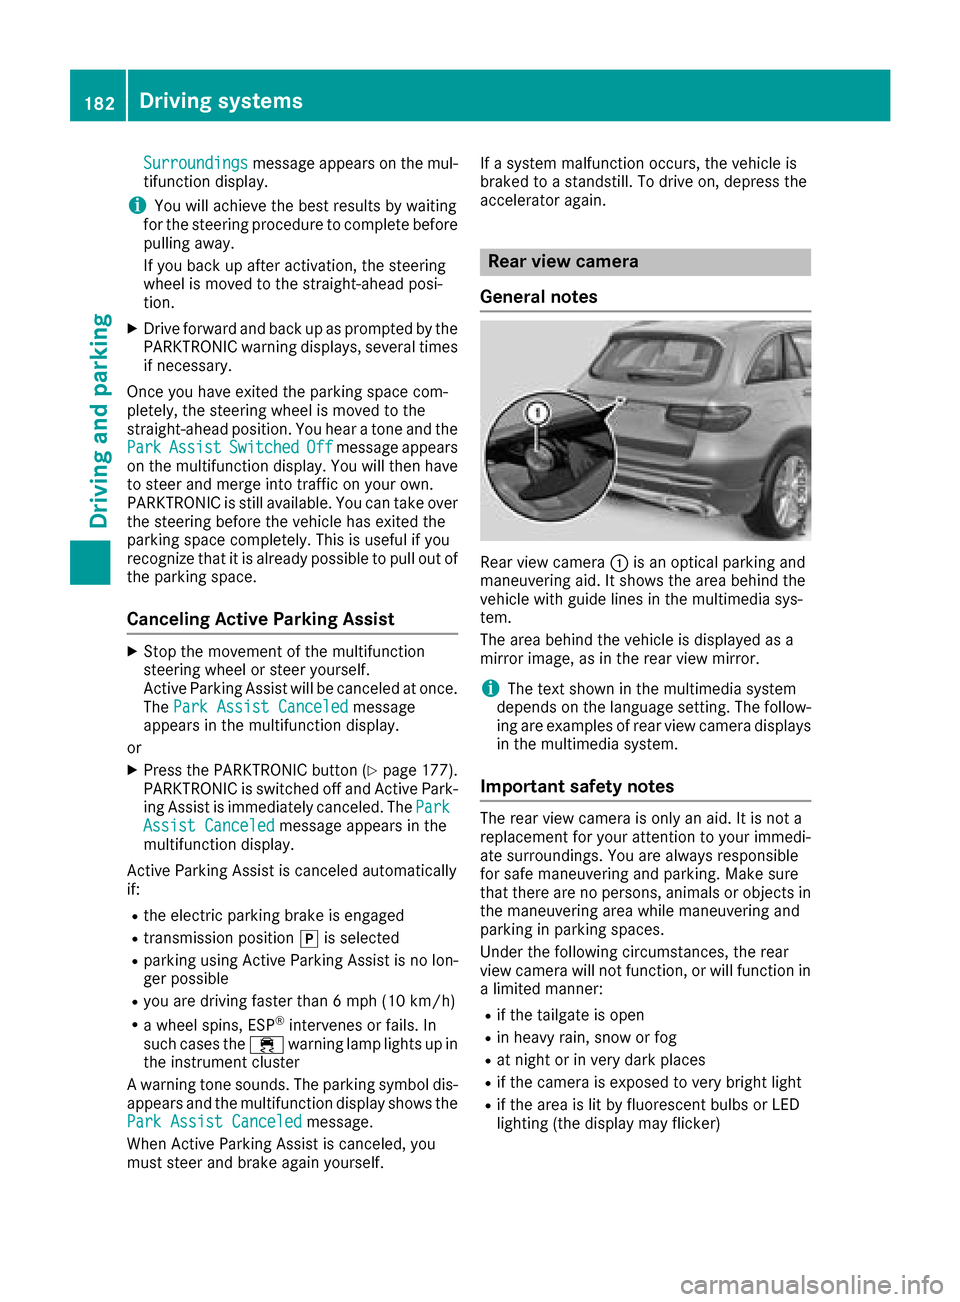
Rear view camera
General notes
Rear view camera :is an optical parking and
maneuvering aid. It shows the area behind the
vehicle with guide lines in the multimedia sys-
tem.
The area behind the vehicle is displayed as a
mirror image, as in the rear view mirror.
iThe text shown in the multimedia system
depends on the language setting. The follow-
ing are examples of rear view camera displays
in the multimedia system.
Important safety notes
The rear view camera is only an aid. It is not a
replacement for your attention to your immedi-
ate surroundings. You are always responsible
for safe maneuvering and parking. Make sure
that there are no persons, animals or objects in
the maneuvering area while maneuvering and
parking in parking spaces.
Under the following circumstances, the rear
view camera will not function, or will function in
a limited manner:
Rif the tailgate is open
Rin heavy rain, snow or fog
Rat night or in very dark places
Rif the camera is exposed to very bright light
Rif the area is lit by fluorescent bulbs or LED
lighting (the display may flicker)
182Driving systems
Driving and parking
Page 189 of 374
360° camera
General notes
The 360° camera is a system consisting of four
cameras.
The system processes images from the follow-
ing cameras:
RRear view camera
RFront camera
RTwo side cameras in the exterior mirrors
The cameras cover the immediate surroundings
of the vehicle. The system supports you, for
example when parking or if vision is restricted at
an exit.
You can show images from the 360° camera in
full-screen mode or in seven different split-
screen views on the multimedia system. A split- screen view also includes a top view of the vehi-
cle. This view is calculated from the data sup-
plied by the installed cameras (virtual camera).
The seven split-screen views are:
RTop view and picture from the rear view cam-
era (130° viewing angle)
RTop view and image from the front camera
(130° viewing angle without displaying the
maximum steering wheel angle)
RTop view and enlarged rear view
RTop view and enlarged front view
RTop view and trailer view (vehicles with trailer
tow hitch)
RTop view and images from the rear-facing side
cameras (rear wheel view)
RTop view and images from the forward-facing
side cameras (front wheel view)
When the function is active and you shift the
transmission from hork toi, the guide
lines are hidden in the multimedia system.
When you change between transmission posi-
tions hand k, you see the previously selec-
ted front or rear view.
Distances measured by PARKTRONIC will also
be optically displayed:
Rin split screen view as red or yellow brackets
around the vehicle icon in the top view, or
Rat the bottom right as red or yellow brackets
around the vehicle symbol in full-screen mode
The line thickness and color of the brackets
show how far the vehicle is from an object.
Ryellow brackets with thin lines: PARKTRONIC
is active
Ryellow brackets with normal lines: an object is present in close range of the vehicle
Rred line: an object is present in the immediate
close range of the vehicle
Important safety notes
The 360°camera is only an aid and may show a
distorted view of obstacles, show them incor-
rectly or not at all. The 360°camera is not a
substitute for attentive driving.
You are always responsible for safe maneuver-
ing and parking. Make sure that there are no
persons, animals or objects in the maneuvering
area while maneuvering and parking in parking
spaces.
You are always responsible for safety, and must
always pay attention to your surroundings when
parking and maneuvering. This applies to the
areas behind, in front of and beside the vehicle. You could otherwise endanger yourself and oth-
ers.
The 360° camera will not function or will func-
tion in a limited manner:
Rif the doors are open
Rif the exterior mirrors are folded in
Rif the tailgate is open
Rin heavy rain, snow or fog
Rat night or in very dark places
Rif the cameras are exposed to very bright light
Rif the area is lit by fluorescent bulbs or LED
lighting (the display may flicker)
Rif the camera lenses fog up, e.g. when driving
into a heated garage in winter, causing a rapid
change in temperature
Rif the camera lenses are dirty or covered
Rif the vehicle components in which the cam-
eras are installed are damaged. In this case,
have the camera position and setting checked
at a qualified specialist workshop
Do not use the 360° camera in this case. You
can otherwise injure others or cause damage to
objects or the vehicle.
The guide lines in the multimedia system display
show the distances to your vehicle. The distan-
ces only apply to road level.
In trailer mode, the guide lines are shown at the
level of the trailer tow hitch.
Driving systems187
Driving and parking
Z
Page 197 of 374
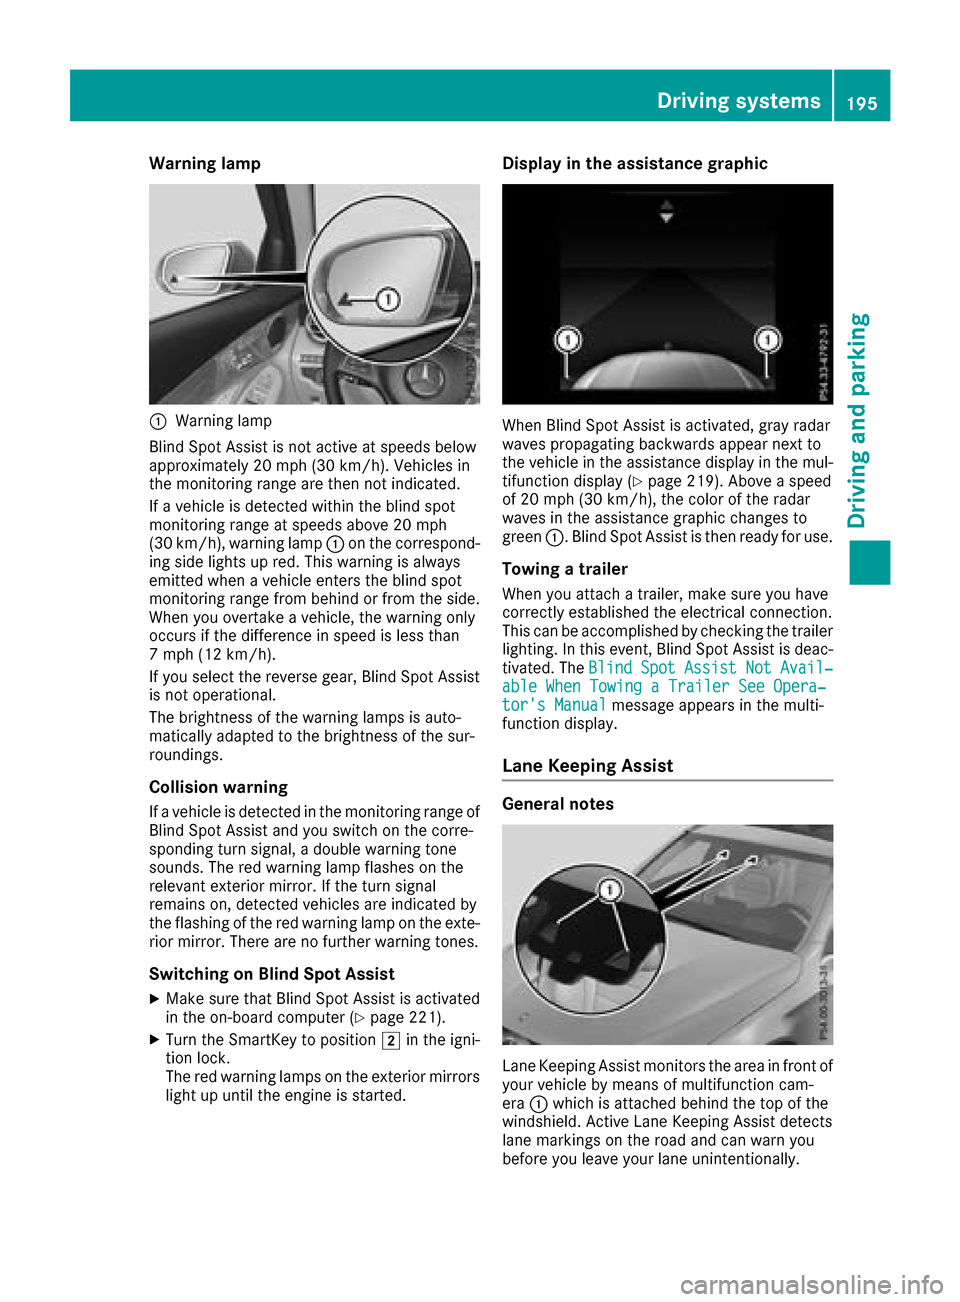
Warning lamp
:Warning lamp
Blind Spot Assist is not active at speeds below
approximately 20 mph (30 km/h). Vehicles in
the monitoring range are then not indicated.
If a vehicle is detected within the blind spot
monitoring range at speeds above 20 mph
(30 km/h), warning lamp :on the correspond-
ing side lights up red. This warning is always
emitted when a vehicle enters the blind spot
monitoring range from behind or from the side.
When you overtake a vehicle, the warning only
occurs if the difference in speed is less than
7 mph (12 km/h).
If you select the reverse gear, Blind Spot Assist is not operational.
The brightness of the warning lamps is auto-
matically adapted to the brightness of the sur-
roundings.
Collision warning
If a vehicle is detected in the monitoring range of
Blind Spot Assist and you switch on the corre-
sponding turn signal, a double warning tone
sounds. The red warning lamp flashes on the
relevant exterior mirror. If the turn signal
remains on, detected vehicles are indicated by
the flashing of the red warning lamp on the exte-
rior mirror. There are no further warning tones.
Switching on Blind Spot Assist
XMake sure that Blind Spot Assist is activated
in the on-board computer (Ypage 221).
XTurn the SmartKey to position 2in the igni-
tion lock.
The red warning lamps on the exterior mirrors
light up until the engine is started.
Display in the assistance graphic
When Blind Spot Assist is activated, gray radar
waves propagating backwards appear next to
the vehicle in the assistance display in the mul-
tifunction display (
Ypage 219). Above a speed
of 20 mph (30 km/h), the color of the radar
waves in the assistance graphic changes to
green :. Blind Spot Assist is then ready for use.
Towing a trailer
When you attach a trailer, make sure you have
correctly established the electrical connection.
This can be accomplished by checking the trailer
lighting. In this event, Blind Spot Assist is deac-
tivated. The Blind
SpotAssistNotAvail‐able When Towing a Trailer See Opera‐tor's Manualmessage appears in the multi-
function display.
Lane Keeping Assist
General notes
Lane Keeping Assist monitors the area in front of
your vehicle by means of multifunction cam-
era :which is attached behind the top of the
windshield. Active Lane Keeping Assist detects
lane markings on the road and can warn you
before you leave your lane unintentionally.
Driving systems195
Driving and parking
Z
Page 204 of 374

the lines in the assistance graphic
(Ypage 219) appear in green. Active Lane
Keeping Assist is ready for use.
XTo deactivate: press button;.
Indicator lamp :goes out. The Active Lane
Keeping Assist is deactivated. The Lane
Keeping Assist Offmessage appears on
the multifunction display.
Selecting Standard or Adaptive setting
XIn the DriveAssistmenu on the on-board
computer, select the Active Lane Keep‐
ing Assistfunction (Ypage 221).
XSelect settingStandardorAdaptive.
When Standardis selected, no warning vibra-
tion occurs if:
Ryou switch on the turn signals. In this event,
the warnings are suppressed for a certain
period of time.
Ra driving safety system intervenes, such as
ABS, BAS or ESP®.
When Adaptive
is selected, no warning vibra-
tion occurs if:
Ryou switch on the turn signals. In this event,
the warnings are suppressed for a certain
period of time.
Ra driving safety system intervenes, e.g.
ABS, BAS or ESP®.
Ryou accelerate hard, e.g. kickdown.
Ryou brake hard.
Ryou steer actively, e.g. swerve to avoid an
obstacle or change lanes quickly.
Ryou cut the corner on a sharp bend.
In order that you are warned only when neces-
sary and in good time if you cross the lane mark-
ing, the system recognizes certain conditions
and warns you accordingly.
The warning vibration occurs earlier if:
Ryou approach the outer lane marking on a
bend.
Rthe road has very wide lanes, e.g. a highway.
Rthe system detects solid lane markings.
The warning vibration occurs later if:
Rthe road has narrow lanes.
Ryou cut the corner on a bend.
Towing a trailer
When you attach a trailer, make sure you have
correctly established the electrical connection. This can be accomplished by checking the trailer
lighting.
Towing a trailer
Important safety notes
GWARNING
Installing an unsuitable ball coupling may
result in overloading of the trailer tow hitch
and the rear axle. This applies especially if the ball coupling in question is longer or angled
differently. This could seriously impair the
driving characteristics and the trailer can
come loose. There is a risk of an accident.
You should only ever install a ball coupling
that has the permissible dimensions and that
is designed to meet your trailer-towing
requirements. Do not modify the ball coupling
or the trailer tow hitch.
You will find the values approved by the manu-
facturer on the vehicle identification plates and
those for the towing vehicle under "Technical
data" (
Ypage 371).
GWARNING
When the vehicle/trailer combination begins
to lurch, you could lose control of it. The vehi- cle/trailer combination could even rollover.
There is a risk of an accident.
On no account should you attempt to
straighten up the vehicle/trailer combination
by increasing the speed. Reduce vehicle
speed and do not countersteer. Apply the
brake as necessary.
!If you have a trailer tow hitch retrofitted,
changes to the engine cooling system may be
necessary, depending on the vehicle type.
If you have a trailer tow hitch retrofitted,
observe the anchorage points on the chassis
frame.
The installation of a trailer tow hitch is only per-
missible if a towing weight is specified in your
vehicle documents. If this is not the case, then
the vehicle is not approved for the towing of a
trailer.
202Towing a trailer
Driving an d parking