2017 MERCEDES-BENZ GLC SUV display
[x] Cancel search: displayPage 319 of 374
XBefore cleaning the display, make sure that it
is switched off and has cooled down.
XClean the display surface using a commer-
cially available microfiber cloth and TFT/LCD
display cleaner.
XDry the display surface using a dry microfiber
cloth.
Cleaning the plastic trim
GWARNING
Care products and cleaning agents containing solvents cause surfaces in the cockpit to
become porous. As a result, plastic parts may
come loose in the event of air bag deploy-
ment. There is a risk of injury.
Do not use any care products and cleaning
agents to clean the cockpit.
!Never attach the following to plastic surfa-
ces:
Rstickers
Rfilms
Rperfume oil container or similar
You could otherwise damage the plastic.
!Do not allow cosmetics, insect repellent or
sunscreen to come into contact with the plas-
tic trim. This maintains the high-quality look of
the surfaces.
XWipe the plastic trim with a damp, lint-free
cloth, e.g. a microfiber cloth.
XHeavy soiling: use care and cleaning prod-
ucts recommended and approved by
Mercedes-Benz.
The surface may change color temporarily.
Wait until the surface is dry again.
Cleaning the steering wheel and selec-
tor lever
XThoroughly wipe with a damp cloth or use
leather care agents that have been recom-
mended and approved by Mercedes-Benz.
Cleaning genuine wood and trim ele-
ments
!Do not use solvent-based cleaning agents
such as tar remover, wheel cleaners, polishes or waxes. There is otherwise a risk of damag-
ing the surface.
!Do not use chrome polish on trim pieces.
The trim pieces have a chrome look but are
mostly made of anodized aluminum and can
lose their shine if chrome polish is used. Use
a damp, lint-free cloth instead when cleaning
the trim pieces.
If the chrome-plated trim pieces are very
dirty, you can use a chrome polish. If you are unsure as to whether the trim pieces are
chrome-plated or not, consult an authorized
Mercedes-Benz Center.
XWipe the wooden trim and trim pieces with a
damp, lint-free cloth, e.g. a microfiber cloth.
XTrim elements with piano black finish:
wipe with a soft, damp cotton cloth. Use clean
water.
XHeavy soiling: use care and cleaning prod-
ucts recommended and approved by
Mercedes-Benz.
Cleaning the seat covers
General notes
!Do not use a microfiber cloth to clean covers
made out of real leather, artificial leather or
DINAMICA. If used often, these can damage
the cover.
Note that regular care is essential to ensure that
the appearance and comfort of the covers is
retained over time.
Genuine leather seat covers
!To retain the natural appearance of the
leather, observe the following cleaning
instructions:
RClean genuine leather covers carefully with a damp cloth and then wipe the covers
down with a dry cloth.
RMake sure that the leather does not
become soaked. It may otherwise become
rough and cracked.
ROnly use leather care agents that have
been tested and approved by Mercedes-
Benz. You can obtain these from a qualified
specialist workshop.
Leather is a natural product.
It exhibits natural surface characteristics, for
example:
Care317
Maintenance and care
Z
Page 323 of 374
Flat tire
Preparing the vehicle
Your vehiclemay be equipped with:
RMOExtended tires (tires wit hrun-flat proper -
ties) (Ypage 321)
Vehicl epreparation is no tnecessar yon vehi-
cle swit hMOExtended tires
RaTIREFI Tkit (Ypage 320)
Vehicles equipped wit hMOExtended tires are
no tequipped wit h aTIREFI Tkit at th efactory. It
is therefor erecommended that you additionally
equip your vehicl ewit h a TIREFI Tkit if you moun t
tires that do no tfeature run-flat properties, e.g.
winte rtires . ATIREFI Tkit may be obtained from
a qualified specialist workshop.
Information on changing and mounting wheels
(
Ypage 357).
XStop th evehicl eon solid, non-slippery and
leve lground ,as far away as possible from
traffic.
XSwitc hon th ehazard warning lamps.
XSecur eth evehicl eagainst rollin gaway
(Ypage 154).
XIf possible ,brin gth efron twheels int oth e
straight-ahead position .
XSwitchoff th eengine.
XRemove th eSmartKey from th eignition lock.
or, in vehicles wit hKEYLESS-GO start-function
or KEYLESS‑ GO
XOpen thedriver' sdoor .
The vehicl eelectronics are no win position
u. This means: "Key removed".
XRemove th eStart/Sto pbutto nfrom th eigni-
ti on loc k (Ypage 133).
XMakesure that th eengin ecanno tbe started
via your smartphon e (Ypage 134).
XMakesure that th epassenger sare no tendan -
gered as they do so. Mak esure that no on eis
near th edanger area while awhee lis bein g
changed. Anyon ewho is no tdirectly assisting
in th ewhee lchang eshould, for example ,
stand behind th ebarrier.
XGet out of th evehicle. Pay attention to traffic
condition swhen doin gso.
XClose th edriver' sdoor .
Vehicles with MOExtended tires (tires
with run-flat characteristics)
General notes
Wit hMOExtended tires (tires wit hrun flat char-
acteristics), you can continue to driv eyour vehi-
cle eve nif there is atotal loss of pressur ein on e
or mor etires .The affected tire must no tsho w
any clearly visible damage.
You can recognize aMOExtended tire by th e
MOExtended markin gwhic happear son th e
sidewall of th etire. You will fin dthis markin g
next to th etire siz edesignation ,th eload-bear -
ing capacit yand th espee dindex (
Ypage 351).
MOExtended tires may only be used in conjunc -
tion wit han active tire pressur eloss warning
system or wit han active tire pressur emonitor.
If apressure loss warning messag eappears
in th emultifunction display:
Robserv eth einstruction sin th edisplay mes -
sage s (Ypage 250).
Rcheck th etire for damag e
Rif driving on,observ eth efollowin gnote s
The driving distanc epossible in run-flat mod eis
approximately 50 mile s(80 km) when th evehi-
cle is partially laden .When th evehicl eis fully
laden it is approximately 19 mile s(30 km).
In addition to th evehicl eload, th edriving dis-
tance possible depend supon :
RVehicl espee d
RRoad condition
ROutside temperature
The driving distanc epossible in run-flat mod e
may be reduce dby extreme driv ing condi
tion
s
or maneuvers, or it can be increased throug h a
moderat estyle of driving .
The driving distanc epossible in run-flat mod eis
counted from th emomen tth etire pressur eloss
warning appear sin th emultifunction display.
You must no texcee d amaximum permissible
spee dof 50 mph (80 km/h).
When replacing on eor all tires ,pleas eobserv e
th efollowin gspecification sfor your vehicle's
tires :
Rsize
Rthetyp eand
Rth e"MOExtended" markin g
If atire has gon eflat and canno tbe replace d
wit h a MOExtended tire, astandard tire may be
used as atemporar ymeasure. Mak esure that
Flat tire321
Breakdown assistance
Page 344 of 374
Overinflated tires may:
Rincrease the braking distance
Radversely affect handling
Rwear excessively and/or unevenly
Rhave an adverse effect on ride comfort
Rbe more susceptible to damage
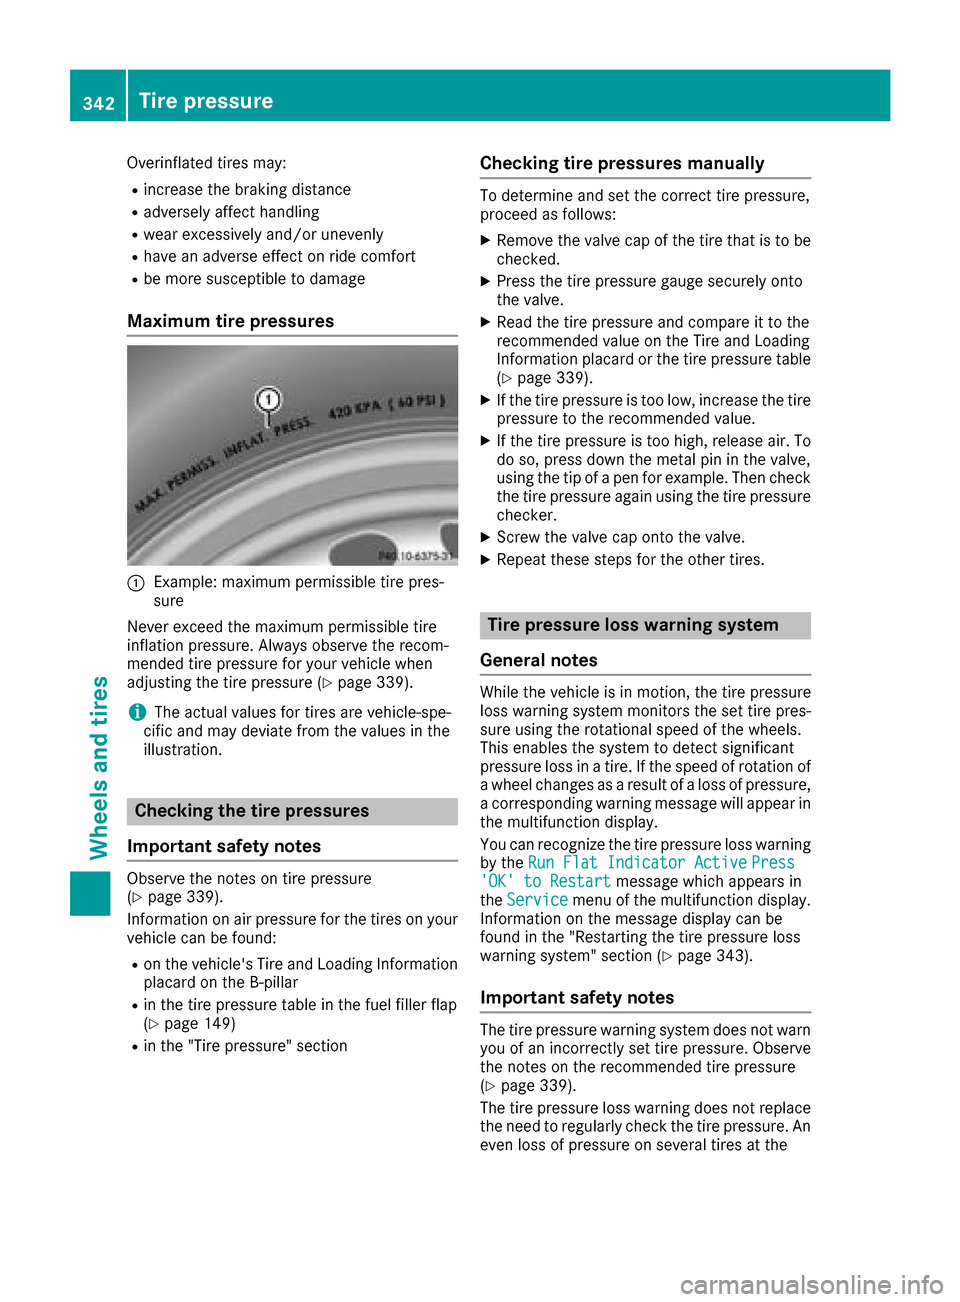
Maximum tire pressures
:Example: maximum permissible tire pres-
sure
Never exceed the maximum permissible tire
inflation pressure. Always observe the recom-
mended tire pressure for your vehicle when
adjusting the tire pressure (
Ypage 339).
iThe actual values for tires are vehicle-spe-
cific and may deviate from the values in the
illustration.
Checking the tire pressures
Important safety notes
Observe the notes on tire pressure
(Ypage 339).
Information on air pressure for the tires on your
vehicle can be found:
Ron the vehicle's Tire and Loading Information
placard on the B-pillar
Rin the tire pressure table in the fuel filler flap
(Ypage 149)
Rin the "Tire pressure" section
Checking tire pressures manually
To determine and set the correct tire pressure,
proceed as follows:
XRemove the valve cap of the tire that is to be
checked.
XPress the tire pressure gauge securely onto
the valve.
XRead the tire pressure and compare it to the
recommended value on the Tire and Loading
Information placard or the tire pressure table (
Ypage 339).
XIf the tire pressure is too low, increase the tire
pressure to the recommended value.
XIf the tire pressure is too high, release air. To
do so, press down the metal pin in the valve,
using the tip of a pen for example. Then check
the tire pressure again using the tire pressure
checker.
XScrew the valve cap onto the valve.
XRepeat these steps for the other tires.
Tire pressure loss warning system
General notes
While the vehicle is in motion, the tire pressure
loss warning system monitors the set tire pres-
sure using the rotational speed of the wheels.
This enables the system to detect significant
pressure loss in a tire. If the speed of rotation of
a wheel changes as a result of a loss of pressure,
a corresponding warning message will appear in
the multifunction display.
You can recognize the tire pressure loss warning
by the Run Flat Indicator Active
Press'OK' to Restartmessage which appears in
the Servicemenu of the multifunction display.
Information on the message display can be
found in the "Restarting the tire pressure loss
warning system" section (
Ypage 343).
Important safety notes
The tire pressure warning system does not warn you of an incorrectly set tire pressure. Observe
the notes on the recommended tire pressure
(
Ypage 339).
The tire pressure loss warning does not replace
the need to regularly check the tire pressure. An
even loss of pressure on several tires at the
342Tire pressure
Wheels and tires
Page 345 of 374

same time cannot be detected by the tire pres-
sure loss warning system.
The tire pressure monitor is not able to warn you
of a sudden loss of pressure, e.g. if the tire is
penetrated by a foreign object. In the event of a
sudden loss of pressure, bring the vehicle to a
halt by braking carefully. Avoid abrupt steering
movements.
The function of the tire pressure loss warning
system is limited or delayed if:
Rsnow chains are mounted on your vehicle's
tires.
Rroad conditions are wintry.
Ryou are driving on sand or gravel.
Ryou adopt a very sporty driving style (corner-
ing at high speeds or driving with high rates ofacceleration).
Ryou are towing a very heavy or large trailer.
Ryou are driving with a heavy load (in the vehi-cle or on the roof).
Restarting the tire pressure loss warn-
ing system
Restart the tire pressure loss warning system if
you have:
Rchanged the tire pressure
Rchanged the wheels or tires
Rmounted new wheels or tires
XBefore restarting, make sure that the tire
pressures are set properly on all four tires for
the respective operating conditions.
The recommended tire pressure can be found
on the Tire and Loading Information placard
on the B-pillar. Additionally, a tire pressure
table is attached to the fuel filler flap. The tire
pressure loss warning system can only give
reliable warnings if you have set the correct
tire pressure. If an incorrect tire pressure is
set, these incorrect values will be monitored.
XAlso observe the notes in the section on tire
pressures (Ypage 339).
XMake sure that the SmartKey is in position 2
in the ignition lock (Ypage 132).
XPress òon the steering wheel to call up
the menu list.
XPress 9or: on the steering wheel to
select the Servicemenu.
XConfirm by pressing aon the steering
wheel.
XPress 9or: to select Tire Pres‐sure.
XPressato confirm.
The Run Flat Indicator ActivePress'OK' to Restartmessage is shown in the
multifunction display.
If you wish to confirm the restart:
XPress the abutton.
The Tire Pressure Now OK?message is
shown on the multifunction display.
XPress 9or: to select Yes.
XPressato confirm.
The Run Flat Indicator Restartedmes-
sage is shown on the multifunction display.
After a teach-in period, the tire pressure loss
warning system will monitor the set tire pres-
sures of all four tires.
If you wish to cancel the restart:
XPress the %button.
or
XIf the Tire Pressure Now OK?message
appears, press 9or: to select Can‐
cel.
XPressato confirm.
The tire pressure values stored at the last
restart will continue to be monitored.
Tire pressure monitor
General notes
If a tire pressure monitor is installed, the vehi-
cle's wheels have sensors that monitor the tire
pressures in all four tires. The tire pressure mon-
itor warns you if the pressure drops in one or
more of the tires. The tire pressure monitor only
functions if the corresponding sensors are
installed in all wheels.
Information on tire pressures is displayed in the
multifunction display. After a few minutes of
driving, the current tire pressure of each tire is
shown in the Service
menu of the multifunction
display; see illustration (example).
Tire pressure343
Wheels and tires
Z
Page 346 of 374
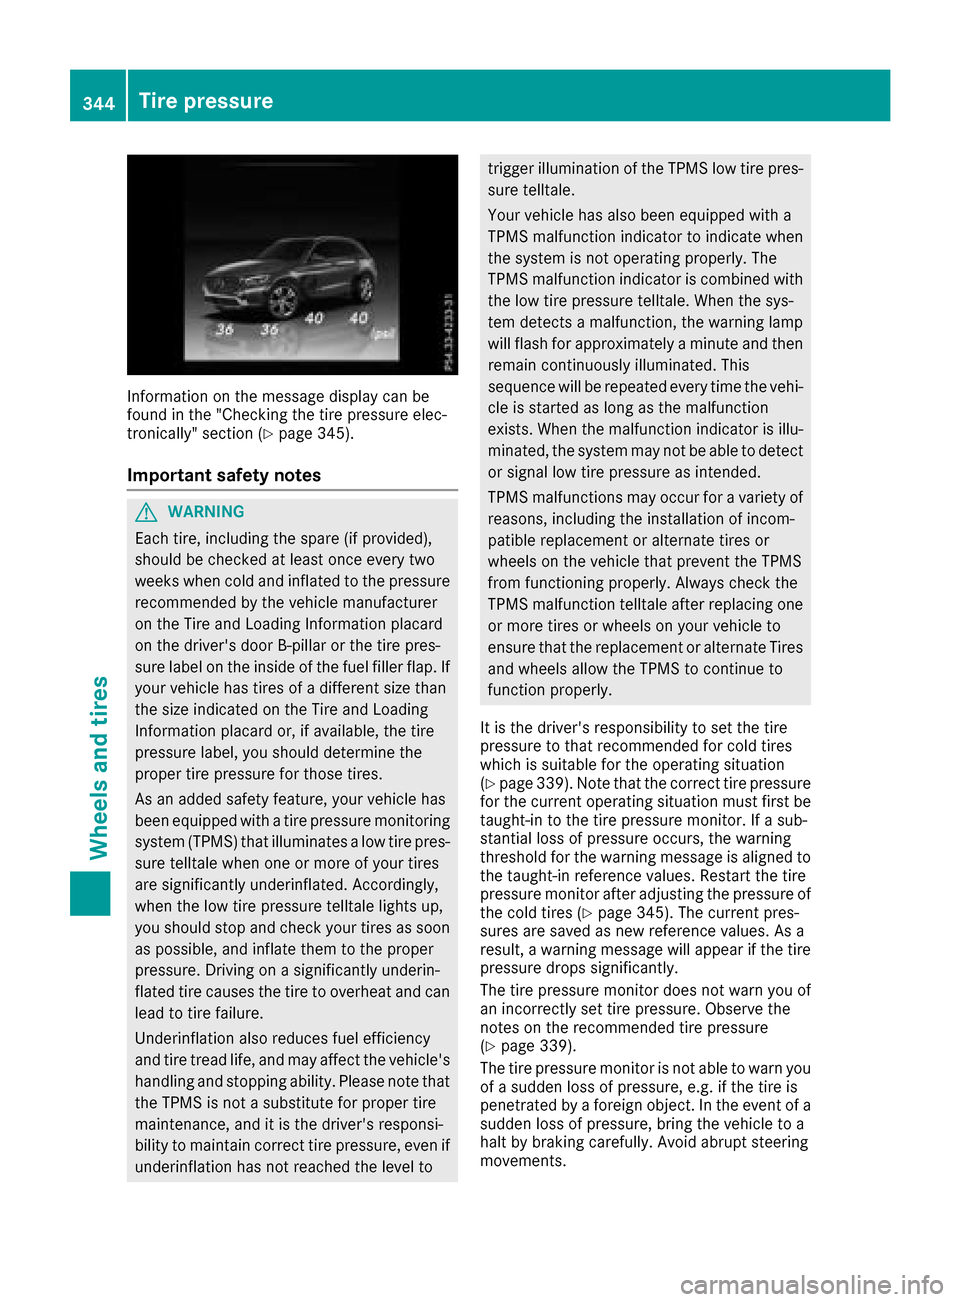
Information on the message display can be
found in the "Checking the tire pressure elec-
tronically" section (
Ypage 345).
Important safety notes
GWARNING
Each tire, including the spare (if provided),
should be checked at least once every two
weeks when cold and inflated to the pressure recommended by the vehicle manufacturer
on the Tire and Loading Information placard
on the driver's door B-pillar or the tire pres-
sure label on the inside of the fuel filler flap. If
your vehicle has tires of a different size than
the size indicated on the Tire and Loading
Information placard or, if available, the tire
pressure label, you should determine the
proper tire pressure for those tires.
As an added safety feature, your vehicle has
been equipped with a tire pressure monitoring
system (TPMS) that illuminates a low tire pres-
sure telltale when one or more of your tires
are significantly underinflated. Accordingly,
when the low tire pressure telltale lights up,
you should stop and check your tires as soon
as possible, and inflate them to the proper
pressure. Driving on a significantly underin-
flated tire causes the tire to overheat and can
lead to tire failure.
Underinflation also reduces fuel efficiency
and tire tread life, and may affect the vehicle's
handling and stopping ability. Please note thatthe TPMS is not a substitute for proper tire
maintenance, and it is the driver's responsi-
bility to maintain correct tire pressure, even if
underinflation has not reached the level to
trigger illumination of the TPMS low tire pres-sure telltale.
Your vehicle has also been equipped with a
TPMS malfunction indicator to indicate when
the system is not operating properly. The
TPMS malfunction indicator is combined with
the low tire pressure telltale. When the sys-
tem detects a malfunction, the warning lamp
will flash for approximately a minute and thenremain continuously illuminated. This
sequence will be repeated every time the vehi-
cle is started as long as the malfunction
exists. When the malfunction indicator is illu-
minated, the system may not be able to detect
or signal low tire pressure as intended.
TPMS malfunctions may occur for a variety of
reasons, including the installation of incom-
patible replacement or alternate tires or
wheels on the vehicle that prevent the TPMS
from functioning properly. Always check the
TPMS malfunction telltale after replacing one
or more tires or wheels on your vehicle to
ensure that the replacement or alternate Tires
and wheels allow the TPMS to continue to
function properly.
It is the driver's responsibility to set the tire
pressure to that recommended for cold tires
which is suitable for the operating situation
(
Ypage 339). Note that the correct tire pressure
for the current operating situation must first be
taught-in to the tire pressure monitor. If a sub-
stantial loss of pressure occurs, the warning
threshold for the warning message is aligned to
the taught-in reference values. Restart the tire
pressure monitor after adjusting the pressure of
the cold tires (
Ypage 345). The current pres-
sures are saved as new reference values. As a
result, a warning message will appear if the tire pressure drops significantly.
The tire pressure monitor does not warn you of
an incorrectly set tire pressure. Observe the
notes on the recommended tire pressure
(
Ypage 339).
The tire pressure monitor is not able to warn you
of a sudden loss of pressure, e.g. if the tire is
penetrated by a foreign object. In the event of a
su
dden loss of pressure, bring the vehicle to a
halt by braking carefully. Avoid abrupt steering
movements.
344Tire pressure
Wheels and tires
Page 347 of 374

The tire pressure monitor has a yellow warning
lamp in the instrument cluster for indicating
pressure loss or a malfunction. Whether the
warning lamp flashes or lights up indicates
whether a tire pressure is too low or the tire
pressure monitor is malfunctioning:
Rif the warning lamp is lit continuously, the tire
pressure on one or more tires is significantly
too low. The tire pressure monitor is not mal-functioning.
Rif the warning lamp flashes for around a
minute and then remains lit constantly, the
tire pressure monitor is malfunctioning.
In addition to the warning lamp, a message
appears in the multifunction display. Observe
the information on display messages
(
Ypage 250).
It may take up to ten minutes for a malfunction of the tire pressure monitor to be indicated. A
malfunction will be indicated by the tire pres-
sure warning lamp flashing for approximately
one minute and then remaining lit. When the
malfunction has been rectified, the tire pressure
warning lamp goes out after a few minutes of
driving.
The tire pressure values indicated by the on-
board computer may differ from those meas-
ured at a gas station with a pressure gauge. The
tire pressures shown by the on-board computer
refer to those measured at sea level. At high
altitudes, the tire pressure values indicated by a
pressure gauge are higher than those shown by the on-board computer. In this case, do not
reduce the tire pressures.
The operation of the tire pressure monitor can
be affected by interference from radio transmit-
ting equipment (e.g. radio headphones, two-way
radios) that may be being operated in or near the vehicle.
Checking the tire pressure electroni-
cally
XMake sure that the SmartKey is in position 2
(Ypage 132) in the ignition lock.
XPress òon the steering wheel to call up
the menu list.
XPress 9or: on the steering wheel to
select the Servicemenu.
XConfirm by pressing aon the steering
wheel.
XPress 9or: to select Tire Pres‐sure.
XPressato confirm.
The multifunction display shows the current
tire pressure of each wheel.
If the vehicle was parked for longer than
20 minutes, the following message appears:
Tire
pressurewillbedisplayedafterdriving a few minutes.
After a teach-in process, the tire pressure mon- itor automatically detects new wheels or new
sensors. As long as a clear allocation of the tire
pressure value to the individual wheels is not
possible, the Tire
PressureMonitorActivemessage is shown instead of the tire pressure
display. The tire pressures are already being
monitored.
Tire pressure monitor warning mes-
sages
If the tire pressure monitor detects a pressure
loss in one or more tires, a warning message is
shown in the multifunction display. The yellow
tire pressure warning lamp then lights up.
RIf thePlease Correct Tire Pressuremessage appears in the multifunction display,
the tire pressure in at least one tire is too low.
The tire pressure must be corrected when the
opportunity arises.
RIf the Check Tiresmessage appears in the
multifunction display, the tire pressure in one
or more tires has dropped significantly. The
tires must be checked.
RIf the WarningTireMalfunctionmessage
appears in the multifunction display, the tire
pressure in one or more tires has dropped
suddenly. The tires must be checked.
Be sure to observe the instructions and safety
notes in the display messages in the "Tires" sec-
tion (
Ypage 250).
If the wheel positions on the vehicle are rotated, the tire pressures may be displayed for the
wrong positions for a short time. This is rectified
after a few minutes of driving, and the tire pres-
sures are displayed for the correct positions.
Restarting the tire pressure monitor
When you restart the tire pressure monitor, all
existing warning messages are deleted and the
warning lamps go out. The monitor uses the cur-
rently set tire pressures as the reference values
Tire pressure345
Wheels and tires
Z
Page 348 of 374
for monitoring. In most cases, the tire pressure
monitor will automatically detect the new refer-
ence values after you have changed the tire
pressure. However, you can also set reference
values manually as described here. The tire
pressure monitor then monitors the new tire
pressure values.
XSet the tire pressure to the value recommen-
ded for the corresponding driving situation on
the Tire and Loading Information placard on
the B-pillar on the driver's side.
You can find more tire pressures for various
operating conditions in the tire pressure table
inside the filler flap.
Observe the information on tire pressure
when doing so (
Ypage 339).
XMake sure that the tire pressure is correct on
all four wheels.
XMake sure that the SmartKey is in position 2
in the ignition lock (Ypage 132).
XPress òon the steering wheel to call up
the menu list.
XPress 9or: on the steering wheel to
select the Servicemenu.
XConfirm by pressing aon the steering
wheel.
XPress 9or: to select Tire Pres‐sure.
XPressato confirm.
The multifunction display shows the current
tire pressure of each wheel or the Tire
pressure will be displayed afterdriving a few minutesmessage.
XPress the:button.
The UseCurrentPressuresasNewRef‐erence Valuesmessage is shown on the
multifunction display.
If you wish to confirm the restart:
XPress the abutton.
The TirePress.MonitorRestartedmes-
sage is shown on the multifunction display.
After driving for a few minutes, the system
checks whether the current tire pressures are
within the specified range. The new tire pres-
sures are then accepted as reference values
and monitored.
If you wish to cancel the restart:
XPress the %button.
The tire pressure values stored at the last
restart will continue to be monitored.
Radio type approval for the tire pres-
sure monitor
CountryRadio type approval number
USAFCC ID: MRXGG4
FCC ID: MRXMC34MA4
CanadaIC: 2546A-GG4
Loading the vehicle
Instruction labels for tires and loads
GWARNING
Overloaded tires can overheat, causing a
blowout. Overloaded tires can also impair the steering and driving characteristics and lead
to brake failure. There is a risk of accident.
Observe the load rating of the tires. The load
rating must be at least half of the GAWR of
your vehicle. Never overload the tires by
exceeding the maximum load.
Two instruction labels on your vehicle show the maximum possible load.
(1) The Tire and Loading Information placard is on the B-pillar on the driver's side. The Tire
and Loading Information placard shows the
maximum permissible number of occu-
pants and the maximum permissible vehicle
load. It also contains details of the tire sizes
and corresponding pressures for tires
mounted at the factory.
(2) The vehicle identification plate is on the B- pillar on the driver's side. The vehicle iden-
tification plate informs you of the gross
vehicle weight rating. It is made up of the
vehicle weight, all vehicle occupants, the
fuel and the cargo. You can also find infor-
mation about the maximum gross axle
weight rating on the front and rear axle.
The maximum gross axle weight rating is
the maximum weight that can be carried by
one axle (front or rear axle). Never exceed
the maximum load or the maximum gross
axle weight rating for the front or rear axle.
346Loading the vehicle
Wheels and tires
Page 369 of 374

You will usually find information about the fuel
quality on the pump. If you cannot find the label
on the fuel pump, ask the gas station staff.
Information on refueling (
Ypage 149).
Low outside temperatures
iDiesel fuel with improved cold flow proper-
ties is available during the winter months.
Further information about fuel properties can
be obtained from oil companies, e.g. at gas
stations.
DEF
Important safety notes
Comply with the important safety notes for ser-
vice products when handling DEF (Ypage 364).
DEF is a water-soluble fluid for the exhaust gas
aftertreatment of diesel engines. It is:
Rnot poisonous
Rcolorless and odorless
Rnot flammable
When you open the DEF container, small
amounts of ammonia vapor may be released.
Ammonia vapors have a pungent odor and are
particularly irritating to the skin, to mucous
membranes and to the eyes. You may experi-
ence a burning sensation in your eyes, nose and
throat. Coughing and watering of the eyes are
possible.
Do not inhale ammonia vapors. Fill the DEF tank only in well-ventilated areas.
Low outside temperatures
DEF freezes at a temperature of approximately
-11 †. The vehicle is delivered from the factory
equipped with a DEF preheating system. Winter
operation can thus be guaranteed even at tem-
peratures below -11 †.
Additives
!Only use DEF in accordance with ISO
22241. Do not use additives with DEF and do
not dilute DEF with water. This may destroy
the BlueTEC exhaust gas aftertreatment sys-
tem.
Purity
!Impurities in DEF (e.g. due to other service
products, cleaning agents or dust) lead to:
Rincreased emission values
Rdamage to the catalytic converter
Rengine damage
Rmalfunctions in the BlueTEC exhaust gas
aftertreatment system
Assuring the purity of DEF is particularly impor- tant with respect to avoiding malfunctions in the
BlueTEC exhaust gas aftertreatment system.
If DEF is pumped out of the DEF tank, e.g. during
repair work, it must not be returned to the tank.
The purity of the fluid can no longer be guaran-
teed.
Filling capacities
ModelTotal capacity
All models29.1 US qt (27.5 l)
Engine oil
General notes
!Do not use engine oil or an oil filter with
specifications deviating from those expressly
required for the prescribed service intervals.
Do not change the engine oil or oil filter in
order to set replacement intervals longer than those prescribed. This could otherwise cause
damage to the engine or exhaust gas after-
treatment.
Follow the instructions on the service interval
display for changing the engine oil. This could
Service products and filling capacities367
Technical data
Z