2017 MERCEDES-BENZ GLC ignition
[x] Cancel search: ignitionPage 317 of 374

! Clean the water drainage channels of the
windshield and the rear window at regular
intervals. Deposits such as leaves, petals and
pollen may under certain circumstances pre-
vent water from draining away. This can lead
to corrosion damage and damage to elec-
tronic components. X
Clean the inside and outside of the windows
with a damp cloth and a cleaning product that
is recommended and approved by Mercedes-
Benz.
Cleaning wiper blades
G WARNING
You could become trapped by the windshield
wipers if they start moving while cleaning the
windshield or wiper blades. There is a risk of
injury.
Always switch off the windshield wipers and
the ignition before cleaning the windshield or
wiper blades.
! Do not pull the wiper blade. Otherwise, the
wiper blade could be damaged.
! Do not clean wiper blades too often and do
not rub them too hard. Otherwise, the graph-
ite coating could be damaged. This could
cause wiper noise.
! Hold the wiper arm securely when folding
back. The windshield could be damaged if the
wiper arm smacks against it suddenly. X
Fold the windshield wiper arms away from the
windshield ( Y
page 120).X
Carefully clean the wiper blades with a damp
cloth. X
Fold the windshield wiper arms back again
before switching on the ignition.
Cleaning the exterior lighting
! Only use cleaning agents or cleaning cloths
which are suitable for plastic light lenses.
Unsuitable cleaning agents or cleaning cloths
could scratch or damage the plastic light len-
ses. X
Clean the plastic lenses of the exterior light-
ing using a wet sponge and a mild cleaning
agent, e.g. Mercedes-Benz car shampoo or
cleaning cloths. Cleaning the mirror turn signals
! Only use cleaning agents or cleaning cloths
that are suitable for plastic lenses. Unsuitable
cleaning agents or cleaning cloths could
scratch or damage the plastic lenses of the
mirror turn signals. X
Clean the plastic lenses of the mirror turn sig-
nals in the exterior mirror housing using a wet
sponge and mild cleaning agent, e.g.
Mercedes-Benz car shampoo or cleaning
cloths.
Cleaning the side running board
! Do not clean the aluminum inserts of the
side running board with alkaline or acidic
cleaners, such as wheel cleaner. Do not use
acidic wheel cleaners to remove brake dust.
The aluminum inserts could otherwise be
damaged.
Cleaning the sensors
! If you clean the sensors with a power
washer, make sure that you keep a distance
of at least 11.8 in (30 cm) between the vehicle
and the power washer nozzle. Information
about the correct distance is available from
the equipment manufacturer.
X
Clean sensors �C of the driving systems with
water, car shampoo and a soft cloth. Care 315
Maintenance and care Z
Page 318 of 374
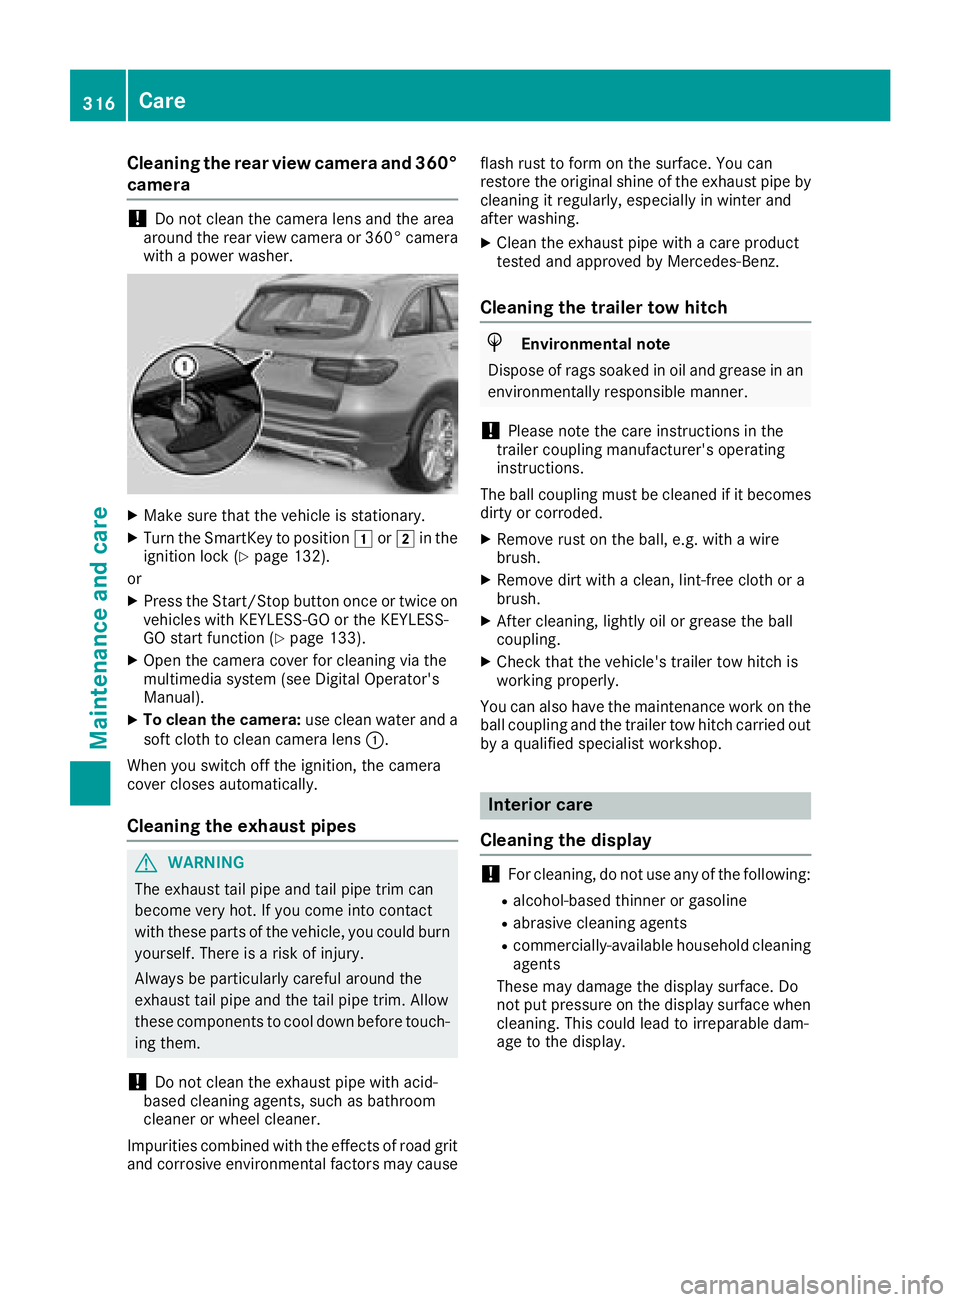
Cleaning the rear view camera and 360°
camera
! Do not clean the camera lens and the area
around the rear view camera or 360° camera
with a power washer.
X
Make sure that the vehicle is stationary. X
Turn the SmartKey to position �G or �H in the
ignition lock ( Y
page 132).
or X
Press the Start/Stop button once or twice on
vehicles with KEYLESS-GO or the KEYLESS-
GO start function ( Y
page 133).X
Open the camera cover for cleaning via the
multimedia system (see Digital Operator's
Manual). X
To clean the camera: use clean water and a
soft cloth to clean camera lens �C .
When you switch off the ignition, the camera
cover closes automatically.
Cleaning the exhaust pipes
G WARNING
The exhaust tail pipe and tail pipe trim can
become very hot. If you come into contact
with these parts of the vehicle, you could burn
yourself. There is a risk of injury.
Always be particularly careful around the
exhaust tail pipe and the tail pipe trim. Allow
these components to cool down before touch-
ing them.
! Do not clean the exhaust pipe with acid-
based cleaning agents, such as bathroom
cleaner or wheel cleaner.
Impurities combined with the effects of road grit
and corrosive environmental factors may cause flash rust to form on the surface. You can
restore the original shine of the exhaust pipe by
cleaning it regularly, especially in winter and
after washing. X
Clean the exhaust pipe with a care product
tested and approved by Mercedes-Benz.
Cleaning the trailer tow hitch
H Environmental note
Dispose of rags soaked in oil and grease in an
environmentally responsible manner.
! Please note the care instructions in the
trailer coupling manufacturer's operating
instructions.
The ball coupling must be cleaned if it becomes
dirty or corroded. X
Remove rust on the ball, e.g. with a wire
brush. X
Remove dirt with a clean, lint-free cloth or a
brush. X
After cleaning, lightly oil or grease the ball
coupling. X
Check that the vehicle's trailer tow hitch is
working properly.
You can also have the maintenance work on the
ball coupling and the trailer tow hitch carried out
by a qualified specialist workshop.
Interior care
Cleaning the display
! For cleaning, do not use any of the following: R
alcohol-based thinner or gasoline R
abrasive cleaning agents R
commercially-available household cleaning
agents
These may damage the display surface. Do
not put pressure on the display surface when
cleaning. This could lead to irreparable dam-
age to the display.316
Care
Maintenance and care
Page 323 of 374
Flat tire
Preparing the vehicle Your vehicl e may be equipped with:R
MOExtended tires (tires wit h run-flat proper -
ties) ( Y
page 321)
Vehicl e preparation is no t necessar y on vehi-
cle s wit h MOExtended tiresR
a TIREFI T kit ( Y
page 320)
Vehicles equipped wit h MOExtended tires are
no t equipped wit h a TIREFI T kit at th e factory. It
is therefor e recommended that you additionally
equip your vehicl e wit h a TIREFI T kit if you moun t
tires that do no t feature run-flat properties, e.g.
winte r tires . A TIREFI T kit may be obtained from
a qualified specialist workshop.
Information on changing and mounting wheels
( Y
page 357). X
Stop th e vehicl e on solid, non-slippery and
leve l ground , as far away as possible from
traffic. X
Switc h on th e hazard warning lamps.X
Secur e th e vehicl e against rollin g away
( Y
page 154). X
If possible , brin g th e fron t wheels int o th e
straight-ahead position .X
Switc h off th e engine.X
Remove th e SmartKey from th e ignition lock.
or, in vehicles wit h KEYLESS-GO start-function
or KEYLESS ‑ GOX
Open th e driver' s door .
The vehicl e electronics are no w in position
�
Page 328 of 374
R
It is particularly important to observe the
described order when connecting and dis-
connecting the jumper cables. R
Never connect or disconnect the battery
terminals while the engine is running.
G WARNING
Battery acid is caustic. There is a risk of injury.
Avoid contact with skin, eyes or clothing. Do
not inhale any battery gases. Do not lean over
the battery. Keep children away from batter-
ies. Wash away battery acid immediately with
plenty of clean water and seek medical atten-
tion.
All vehicles:
H Environmental note
Batteries contain dangerous
substances. It is against the
law to dispose of them with
the household rubbish. They
must be collected separately
and recycled to protect the
environment.
Dispose of batteries in an
environmentally friendly
manner. Take discharged
batteries to a qualified spe-
cialist workshop or a special
collection point for used bat-
teries.
! Have the battery checked regularly at a
qualified specialist workshop.
Observe the service intervals in the Mainte-
nance Booklet or contact a qualified specialist
workshop for more information.
! Always have work on batteries carried out at
a qualified specialist workshop. Should it, in exceptional circumstances, be
absolutely necessary to disconnect the 12-
volt battery yourself, please observe the fol-
lowing: R
Secure the vehicle to prevent it from rolling
away. R
Switch off the ignition. R
Disconnect the negative terminal first and
then the positive terminal.
The transmission is locked in position �]
after disconnecting the battery.
After the work has been done, install the bat-
tery and replace the cover of the positive ter-
minal clamp firmly.
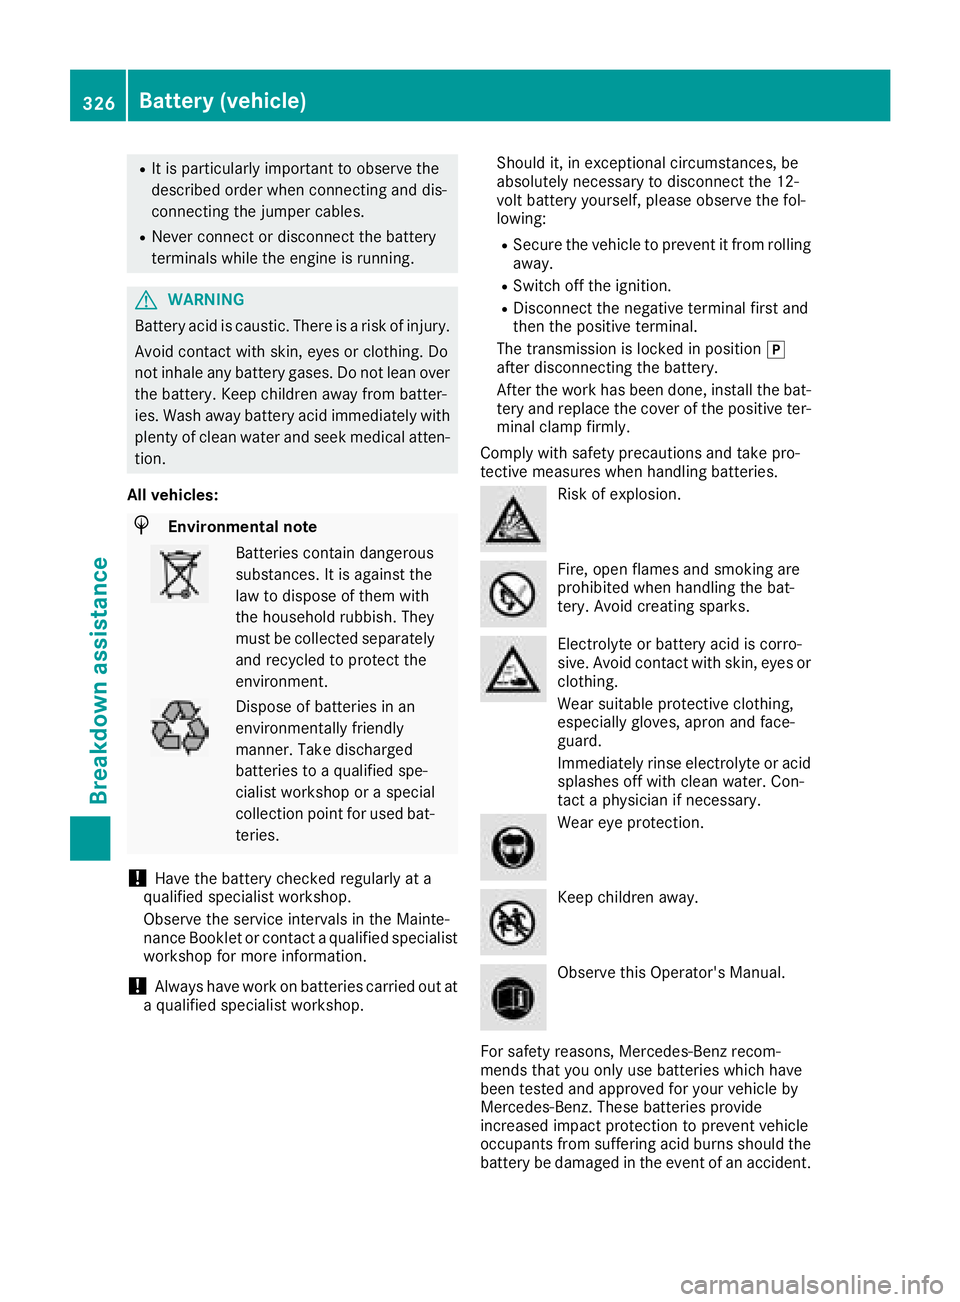
Comply with safety precautions and take pro-
tective measures when handling batteries.
Risk of explosion.
Fire, open flames and smoking are
prohibited when handling the bat-
tery. Avoid creating sparks.
Electrolyte or battery acid is corro-
sive. Avoid contact with skin, eyes or
clothing.
Wear suitable protective clothing,
especially gloves, apron and face-
guard.
Immediately rinse electrolyte or acid
splashes off with clean water. Con-
tact a physician if necessary.
Wear eye protection.
Keep children away.
Observe this Operator's Manual.
For safety reasons, Mercedes-Benz recom-
mends that you only use batteries which have
been tested and approved for your vehicle by
Mercedes-Benz. These batteries provide
increased impact protection to prevent vehicle
occupants from suffering acid burns should the
battery be damaged in the event of an accident.326
Battery (vehicle)
Breakdown assistance
Page 331 of 374
Do not start the vehicle using a rapid charging device. If your vehicle's battery is discharged, the
engine can be jump-started from another vehicle or from a second battery using jumper cables.
Observe the following points: R
The battery is not accessible in all vehicles. If the other vehicle's battery is not accessible, jump-
start the vehicle using a second battery or a jump-starting device. R
Vehicles with a gasoline engine: only jump-start the vehicle when the engine and exhaust
system are cold. R
All vehicles except vehicles with a lithium-ion battery: do not start the engine if the battery
is frozen. Let the battery thaw first. R
Jump-starting may be performed only using batteries with a nominal voltage of 12 V. R
Only use jumper cables which have a sufficient cross-section and insulated terminal clamps. R
If the battery is fully discharged, leave the battery that is being used to jump-start connected for
a few minutes before attempting to start. This charges the battery slightly. R
Make sure that the two vehicles do not touch.
Make sure that: R
The jumper cables are not damaged. R
Bare parts of the terminal clamp do not come into contact with other metal parts while the jumper
ca bles are connected to the battery. R
The jumper cables cannot come into contact with parts that can move when the engine is running,
such as the V-belt pulley or the fan. X
Secure the vehicle by applying the electric parking brake. X
Shift the transmission to position �] .X
Make sure that the ignition is switched off. All indicator lamps in the instrument cluster must be
off. When using the SmartKey, turn the SmartKey to position �
Page 333 of 374
! Do not use the trailer tow hitch for recovery
or towing. Do not use the towing eye for
recovery. this could damage the vehicle. If in
doubt, have the vehicle recovered using a
crane.
! When towing, pull away slowly and
smoothly. If the tractive power is too high, the
vehicles could be damaged.
! Shift the automatic transmission to position
�\\ and do not open the driver's or front pas-
senger's door during towing. The automatic
transmission may otherwise shift to position
�] , which could damage the transmission.
! Do not tow with sling-type equipment. This
could damage the vehicle.
! The vehicle can be towed a maximum of
30 miles (50km). The towing speed of 30 mph
(50 km/h) must not be exceeded.
If the vehicle has to be towed more than
30 miles (50km), the entire vehicle must be
raised and transported.
It is better to have the vehicle transported than
to have it towed away.
If the vehicle has suffered transmission damage,
have it transported on a transporter or trailer.
The automatic transmission must be in position
�\\ when the vehicle is being towed. If the auto-
matic transmission cannot be shifted to position
�\\ , have the vehicle transported on a trans-
porter or trailer.
The battery must be connected and charged.
Otherwise, you: R
cannot turn the SmartKey to position �H in
the ignition lock R
cannot release the electric parking brake R
cannot shift the automatic transmission to
position �\\
Disarm the automatic locking feature before the
vehicle is towed ( Y
page 84). You could other-
wise be locked out when pushing or towing the
vehicle. Installing/removing the towing eye
Installing the towing eye
G WARNING
The exhaust tail pipe may be very hot. There is
a risk of burns when removing the rear cover.
Do not touch the exhaust pipe. Take particular
care when removing the rear cover.
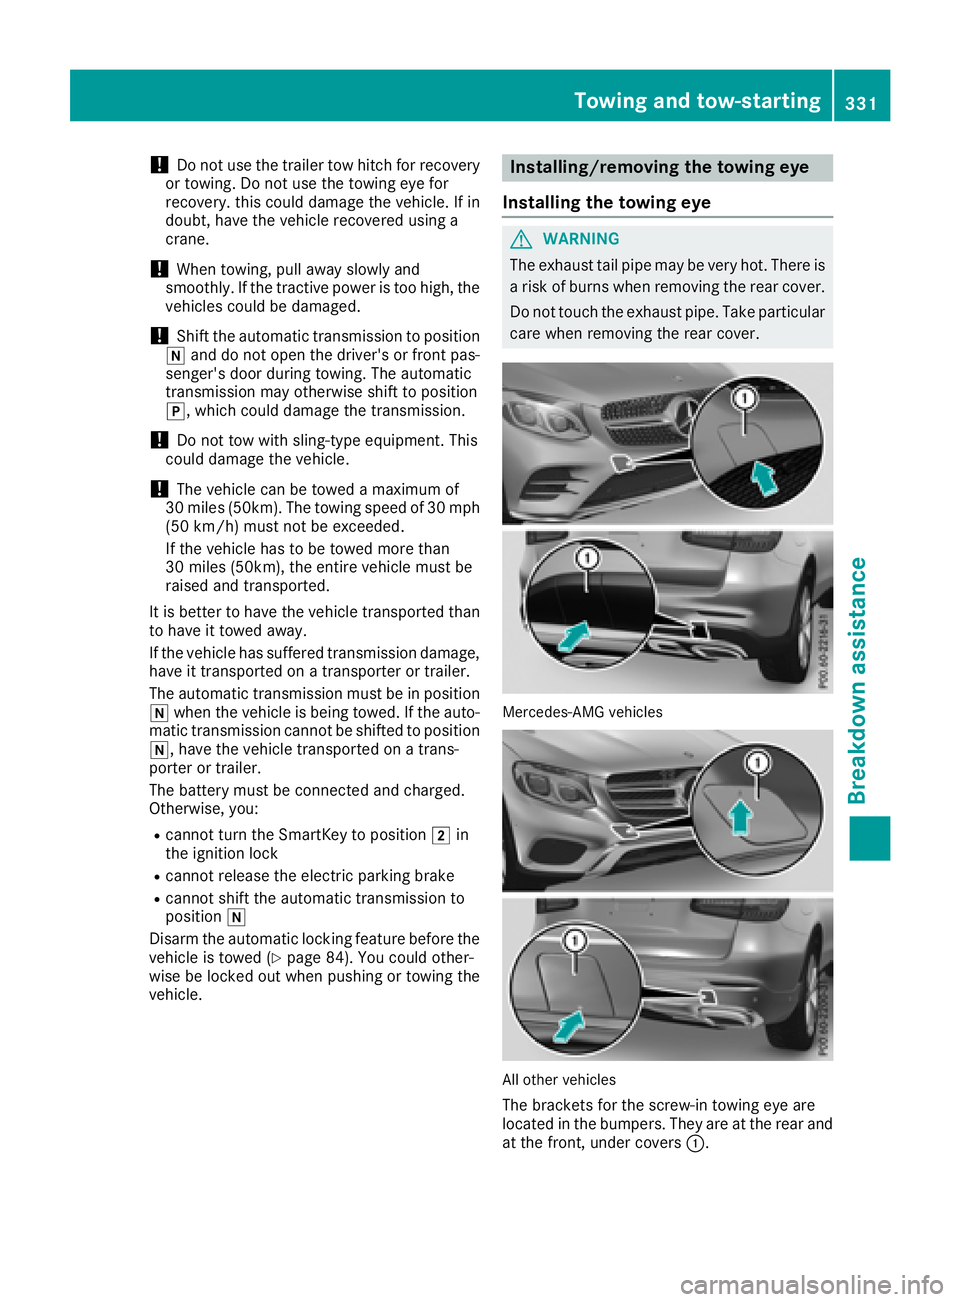
Mercedes-AMG vehicles
All other vehicles
The brackets for the screw-in towing eye are
located in the bumpers. They are at the rear and
at the front, under covers �C .Towing and tow-starting 331
Breakdown assistance Z
Page 334 of 374
X
Remove th e towin g eye from th e retainer
( Y
page 320).X
Mercedes-AM G vehicles: use a suitable
object, e.g. a screwdriver, to pry off cover �C
on th e fron t bumper from underneath. Tak e
th e cover from th e opening , but do no t
remove it .
Press th e mar k on cover �C on th e rear
bumper inward and remove .X
All other vehicles: press th e mar k on
cover �C inward and remove .X
Screw in th e towin g eye clockwise as far as it
will go and tighten it .
Vehicles wit h a trailer to w hitch do no t hav e a
bracke t for th e screw-in towin g eye at th e back.
Connect th e towbar to th e trailer to w hitch
( Y
page 204).
Removing the towing eye X
Unscrew and remove th e towin g eye.X
Attac h cover �C to th e bumper and press until
it engages.
Towing a vehicle with both axles on
the ground The automatic transmission automatically shifts
to position �] when you open th e driver' s or
front-passenger door or when you remove th e
SmartKey from th e ignition lock. It is essential to
observ e th e followin g steps to ensur e that th e
automatic transmission remain s in position �\\
during towing. X
Mak e sur e that th e vehicl e is stationary.X
Turn th e SmartKey to position �H in th e igni-
tion lock. X
Depress and hold th e brak e pedal .X
Shift th e automatic transmission to position
�\\ .X
Leav e th e SmartKey in position �H in th e igni-
tion lock. X
Releas e th e brak e pedal .X
Releas e th e electric parking brake.X
Switc h on th e hazard warning lamp s
( Y
page 113).
In order to signal a chang e of direction when
towin g th e vehicl e wit h th e hazard warning
lamp s switched on , use th e combination switch
as usual. In this case, only th e indicator lamp s for th e direction of travel flash. Afte r resetting
th e combination switch , th e hazard warning
lamp start s flashin g again .
Transporting the vehicle
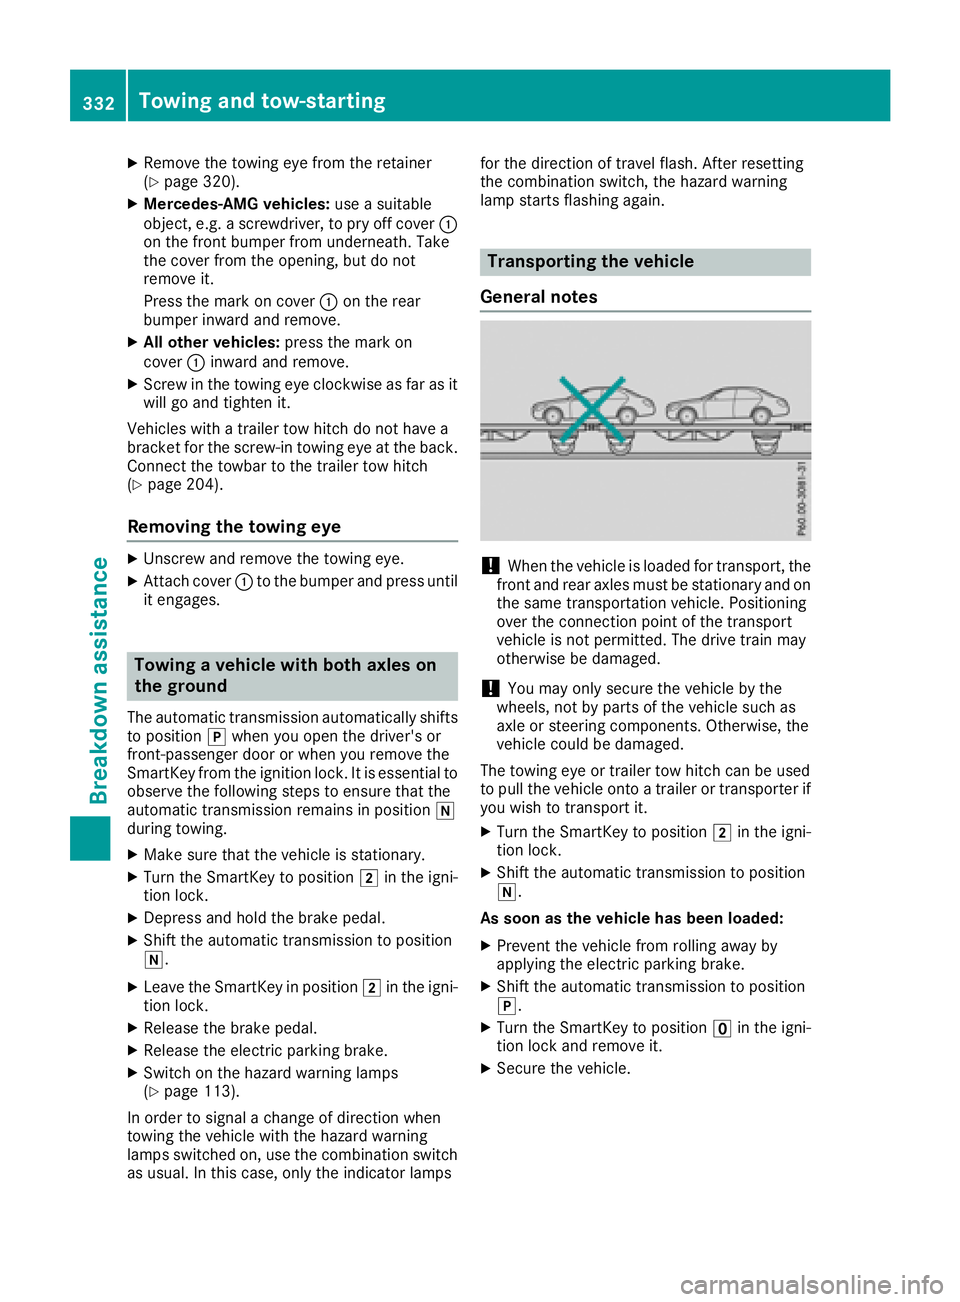
General notes
! When th e vehicl e is loade d for transport, th e
fron t and rear axles mus t be stationary and on
th e sam e transportation vehicle. Positioning
ove r th e connection poin t of th e transpor t
vehicl e is no t permitted. The driv e train may
otherwise be damaged.
! You may only secure th e vehicl e by th e
wheels, no t by part s of th e vehicl e suc h as
axl e or steering components. Otherwise, th e
vehicl e could be damaged.
The towin g eye or trailer to w hitch can be used
to pull th e vehicl e onto a trailer or transporte r if
you wish to transpor t it .X
Turn th e SmartKey to position �H in th e igni-
tion lock. X
Shift th e automatic transmission to position
�\\ .
As soon as th e vehicle ha s been loaded:X
Preven t th e vehicl e from rollin g away by
applyin g th e electric parking brake. X
Shift th e automatic transmission to position
�] . X
Turn th e SmartKey to position �
Page 335 of 374
Notes on 4MATIC vehicles
! Vehicles with 4MATIC must not be towed
with either the front or the rear axle raised, as
doing so will damage the transmission.
Vehicles with 4MATIC may either be towed away
with both axles on the ground or be loaded up
and transported.
If the vehicle's transmission, front, or rear axle is
damaged, have the vehicle transported on a
truck or trailer.
In the event of damage to the electrical sys-
tem: if the battery is defective, the automatic
transmission will be locked in position P . To shift
the automatic transmission to position N , you
must provide power to the vehicle's electrical
system in the same way as when jump-starting
( Y
page 328).
Have the vehicle transported on a transporter or
trailer.
Tow-starting (emergency engine
starting)
! Vehicles with automatic transmission must
not be tow-started. You could otherwise dam-
age the automatic transmission.
i You can find information on "Jump-starting"
under ( Y
page 328).
Fuses
Important safety notes
G WARNING
If you manipulate or bridge a faulty fuse or if
you replace it with a fuse with a higher amper-
age, the electric cables could be overloaded.
This could result in a fire. There is a risk of an
accident and injury.
Always replace faulty fuses with the specified
new fuses having the correct amperage.
Blown fuses must be replaced with fuses of the
same rating, which you can recognize by the
color and value. The fuse ratings are listed in the
fuse allocation chart.
The fuse allocation chart is on the fuse box in the
cargo compartment ( Y
page 334). If a newly inserted fuse also blows, have the
cause traced and rectified at a qualified special-
ist workshop, e.g. an authorized Mercedes-Benz
Center.
! Only use fuses that have been approved for
Mercedes-Benz vehicles and which have the
correct fuse rating for the system concerned.
Otherwise, components or systems could be
damaged.
! Make sure that no moisture can enter the
fuse box when the cover is open.
! When closing the cover, make sure that it is
lying correctly on the fuse box. Moisture seep-
ing i n or dirt could otherwise impair the oper-
a
tion of the fuses.
The fuses in your vehicle serve to close down
faulty circuits. If a fuse blows, all the compo-
nents on the circuit and their functions stop
operating.
Before changing a fuse Observe the important safety notes
( Y
page 333) X
Switch off the engine. X
Switch off all electrical consumers. X
Make sure that the ignition is switched off
( Y
page 133).
or X
When using the SmartKey, turn the SmartKey
to position �