2017 MERCEDES-BENZ GLC COUPE tire pressure
[x] Cancel search: tire pressurePage 156 of 370
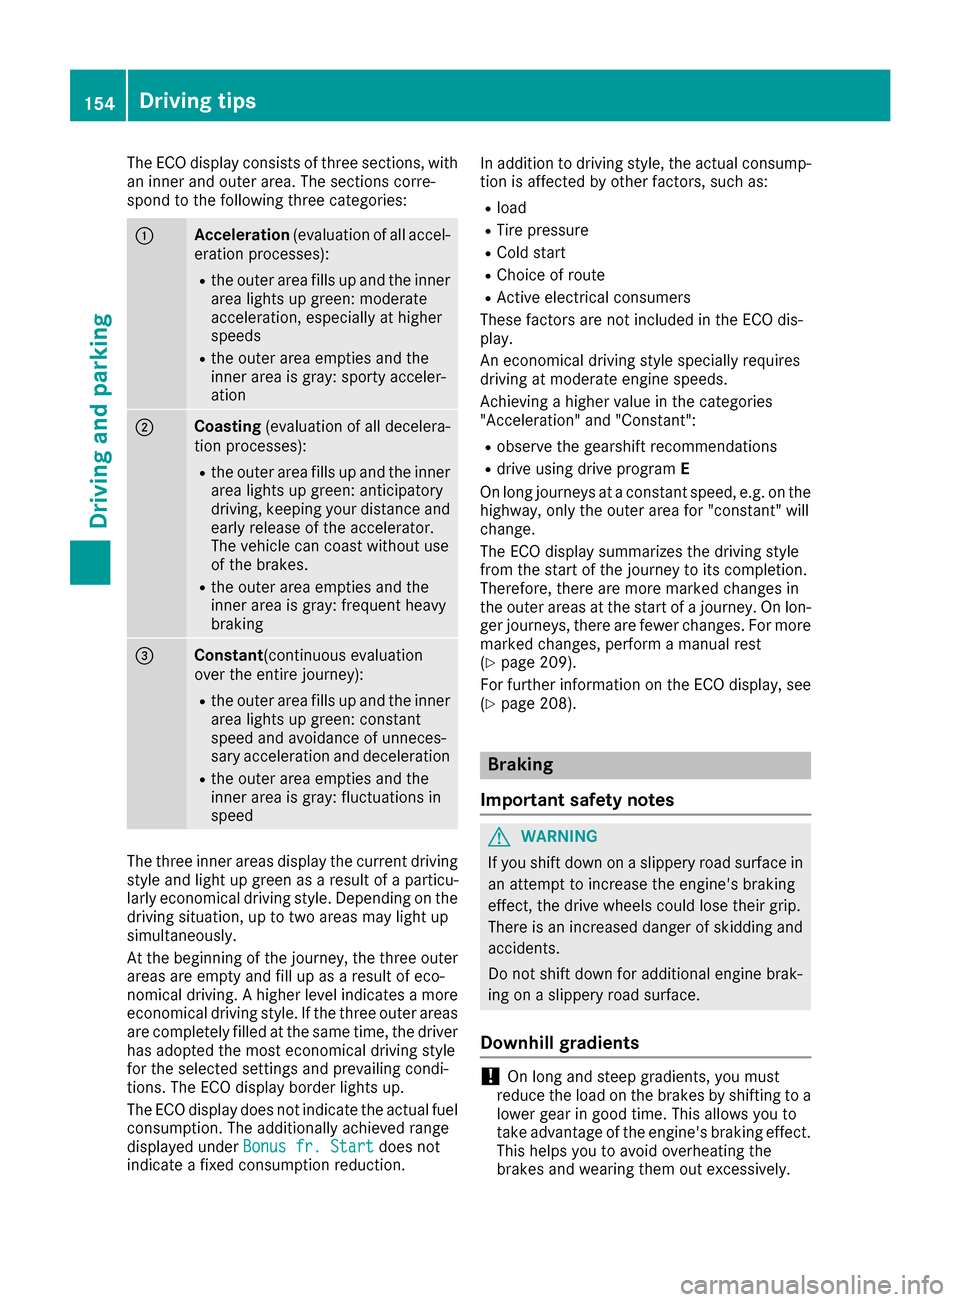
The ECO display consists of three sections, with
an inner and outer area. The sections corre-
spond to the following three categories:
:Acceleration(evaluation of all accel-
eration processes):
Rthe outer area fills up and the inner area lights up green: moderate
acceleration, especially at higher
speeds
Rthe outer area empties and the
inner area is gray: sporty acceler-
ation
;Coasting (evaluation of all decelera-
tion processes):
Rthe outer area fills up and the inner area lights up green: anticipatory
driving, keeping your distance and
early release of the accelerator.
The vehicle can coast without use
of the brakes.
Rthe outer area empties and the
inner area is gray: frequent heavy
braking
=Constant (continuous evaluation
over the entire journey):
Rthe outer area fills up and the inner area lights up green: constant
speed and avoidance of unneces-
sary acceleration and deceleration
Rthe outer area empties and the
inner area is gray: fluctuations in
speed
The three inner areas display the current driving
style and light up green as a result of a particu-
larly economical driving style. Depending on thedriving situation, up to two areas may light up
simultaneously.
At the beginning of the journey, the three outer
areas are empty and fill up as a result of eco-
nomical driving. A higher level indicates a more
economical driving style. If the three outer areas
are completely filled at the same time, the driver
has adopted the most economical driving style
for the selected settings and prevailing condi-
tions. The ECO display border lights up.
The ECO display does not indicate the actual fuel consumption. The additionally achieved range
displayed under Bonus fr. Start
does not
indicate a fixed consumption reduction. In addition to driving style, the actual consump-
tion is affected by other factors, such as:
Rload
RTire pressure
RCold start
RChoice of route
RActive electrical consumers
These factors are not included in the ECO dis-
play.
An economical driving style specially requires
driving at moderate engine speeds.
Achieving a higher value in the categories
"Acceleration" and "Constant":
Robserve the gearshift recommendations
Rdrive using drive program E
On long journeys at a constant speed, e.g. on the
highway, only the outer area for "constant" will
change.
The ECO display summarizes the driving style
from the start of the journey to its completion.
Therefore, there are more marked changes in
the outer areas at the start of a journey. On lon- ger journeys, there are fewer changes. For more
marked changes, perform a manual rest
(
Ypage 209).
For further information on the ECO display, see
(
Ypage 208).
Braking
Important safety notes
GWARNING
If you shift down on a slippery road surface in an attempt to increase the engine's braking
effect, the drive wheels could lose their grip.
There is an increased danger of skidding and
accidents.
Do not shift down for additional engine brak-
ing on a slippery road surface.
Downhill gradients
!On long and steep gradients, you must
reduce the load on the brakes by shifting to a
lower gear in good time. This allows you to
take advantage of the engine's braking effect.
This helps you to avoid overheating the
brakes and wearing them out excessively.
154Driving tips
Driving and parking
Page 167 of 370
DISTRONIC PLUS with Steering Assist and
Stop&Go Pilot helps you keep the vehicle in the
center of the lane by means of moderate steer-
ing interventions in a speed range from
0–125 mph (0–200 km/h).
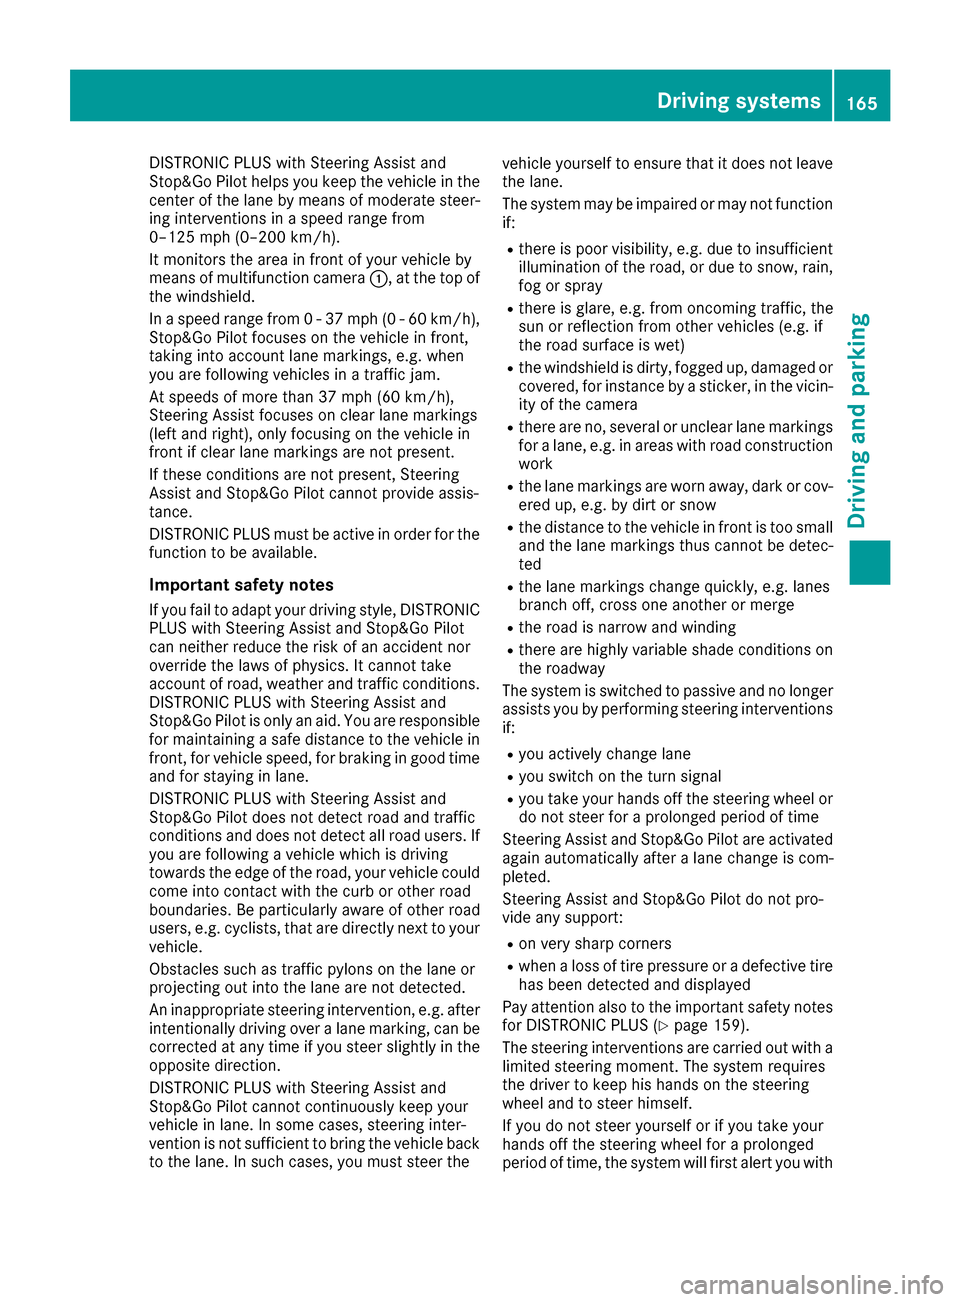
It monitors the area in front of your vehicle by
means of multifunction camera:, at the top of
the windshield.
In a speed range from 0 - 37 mph (0 - 60 km/h),
Stop&Go Pilot focuses on the vehicle in front,
taking into account lane markings, e.g. when
you are following vehicles in a traffic jam.
At speeds of more than 37 mph (60 km/h),
Steering Assist focuses on clear lane markings
(left and right), only focusing on the vehicle in
front if clear lane markings are not present.
If these conditions are not present, Steering
Assist and Stop&Go Pilot cannot provide assis-
tance.
DISTRONIC PLUS must be active in order for the
function to be available.
Important safety notes
If you fail to adapt your driving style, DISTRONIC
PLUS with Steering Assist and Stop&Go Pilot
can neither reduce the risk of an accident nor
override the laws of physics. It cannot take
account of road, weather and traffic conditions.
DISTRONIC PLUS with Steering Assist and
Stop&Go Pilot is only an ai d. Y
ou are responsible
for maintaining a safe distance to the vehicle in front, for vehicle speed, for braking in good time
and for staying in lane.
DISTRONIC PLUS with Steering Assist and
Stop&Go Pilot does not detect road and traffic
conditions and does not detect all road users. If
you are following a vehicle which is driving
towards the edge of the road, your vehicle could
come into contact with the curb or other road
boundaries. Be particularly aware of other road
users, e.g. cyclists, that are directly next to your vehicle.
Obstacles such as traffic pylons on the lane or
projecting out into the lane are not detected.
An inappropriate steering intervention, e.g. after
intentionally driving over a lane marking, can be
corrected at any time if you steer slightly in theopposite direction.
DISTRONIC PLUS with Steering Assist and
Stop&Go Pilot cannot continuously keep your
vehicle in lane. In some cases, steering inter-
vention is not sufficient to bring the vehicle back
to the lane. In such cases, you must steer the vehicle yourself to ensure that it does not leave
the lane.
The system may be impaired or may not function
if:
Rthere is poor visibility, e.g. due to insufficient
illumination of the road, or due to snow, rain,
fog or spray
Rthere is glare, e.g. from oncoming traffic, the
sun or reflection from other vehicles (e.g. if
the road surface is wet)
Rthe windshield is dirty, fogged up, damaged or
covered, for instance by a sticker, in the vicin-
ity of the camera
Rthere are no, several or unclear lane markings
for a lane, e.g. in areas with road construction
work
Rthe lane markings are worn away, dark or cov-
ered up, e.g. by dirt or snow
Rthe distance to the vehicle in front is too small
and the lane markings thus cannot be detec-
ted
Rthe lane markings change quickly, e.g. lanes
branch off, cross one another or merge
Rthe road is narrow and winding
Rthere are highly variable shade conditions on the roadway
The system is switched to passive and no longer
assists you by performing steering interventions
if:
Ryou actively change lane
Ryou switch on the turn signal
Ryou take your hands off the steering wheel or do not steer for a prolonged period of time
Steering Assist and Stop&Go Pilot are activated
again automatically after a lane chang
e is com-
pleted.
Steering Assist and Stop&Go Pilot do not pro-
vide any support:
Ron very sharp corners
Rwhen a loss of tire pressure or a defective tire
has been detected and displayed
Pay attention also to the important safety notes
for DISTRONIC PLUS (
Ypage 159).
The steering interventions are carried out with a
limited steering moment. The system requires
the driver to keep his hands on the steering
wheel and to steer himself.
If you do not steer yourself or if you take your
hands off the steering wheel for a prolonged
period of time, the system will first alert you with
Driving system s165
Driving an d parking
Z
Page 176 of 370
Parking tips:
ROn narrow roads, drive as close to the parkingspace as possible.
RParking spaces that are littered or overgrown
might be identified or measured incorrectly.
RParking spaces that are partially occupied by
trailer drawbars might not be identified as
such or be measured incorrectly.
RSnowfall or heavy rain may lead to a parking
space being measured inaccurately.
RPay attention to the PARKTRONIC
(Ypage 172) warning messages during the
parking procedure.
RYou can intervene in the steering procedure
to correct it at any time. Active Parking Assist
is then deactivated.
RWhen transporting a load which protrudes
from your vehicle, you should not use Active
Parking Assist.
RNever use Active Parking Assist when snow
chains are installed.
RAlways pay attention to the specified tire
pressure for your vehicle. This has a direct
influence on the parking characteristics of the
vehicle.
Use Active Parking Assist for parking spaces:
Rparallel or at right angles to the direction of
travel
Ron straight roads, not bends
Ron the same level as the road, e.g. not on the
pavement
Detecting parking spaces
Objects located above the height range of Active
Parking Assist will not be detected when the
parking space is measured. These are not taken
into account when the parking procedure is cal-
culated, e.g. overhanging loads, truck over-
hangs or loading ramps.
GWARNING
If there are objects above the detection range:
RActive Park Assist may steer too early
Rthe vehicle may not stop in front of these
objects
You may cause a collision as a result. There is
a risk of an accident.
If objects are located above the detection
range, stop and deactivate Active Parking
Assist.
For further information on the detection range
(
Ypage 171).
Active Parking Assist does not assist you park-
ing in spaces at right angles to the direction of
travel if:
Rtwo parking spaces are located directly next
to one another
Rthe parking space is directly next to a low
obstacle such as a low curb
Ryou forward-park
Active Parking Assist does not assist you park-
ing in spaces that are parallel or at right angles
to the direction of travel if:
Rthe parking space is on a curb
Rthe system reads the parking space as being
blocked, for example by foliage or grass pav-
ing blocks
Rthe area is too small for the vehicle to maneu-
ver into
Rthe parking space is bordered by an obstacle,
e.g. a tree, a post or a trailer
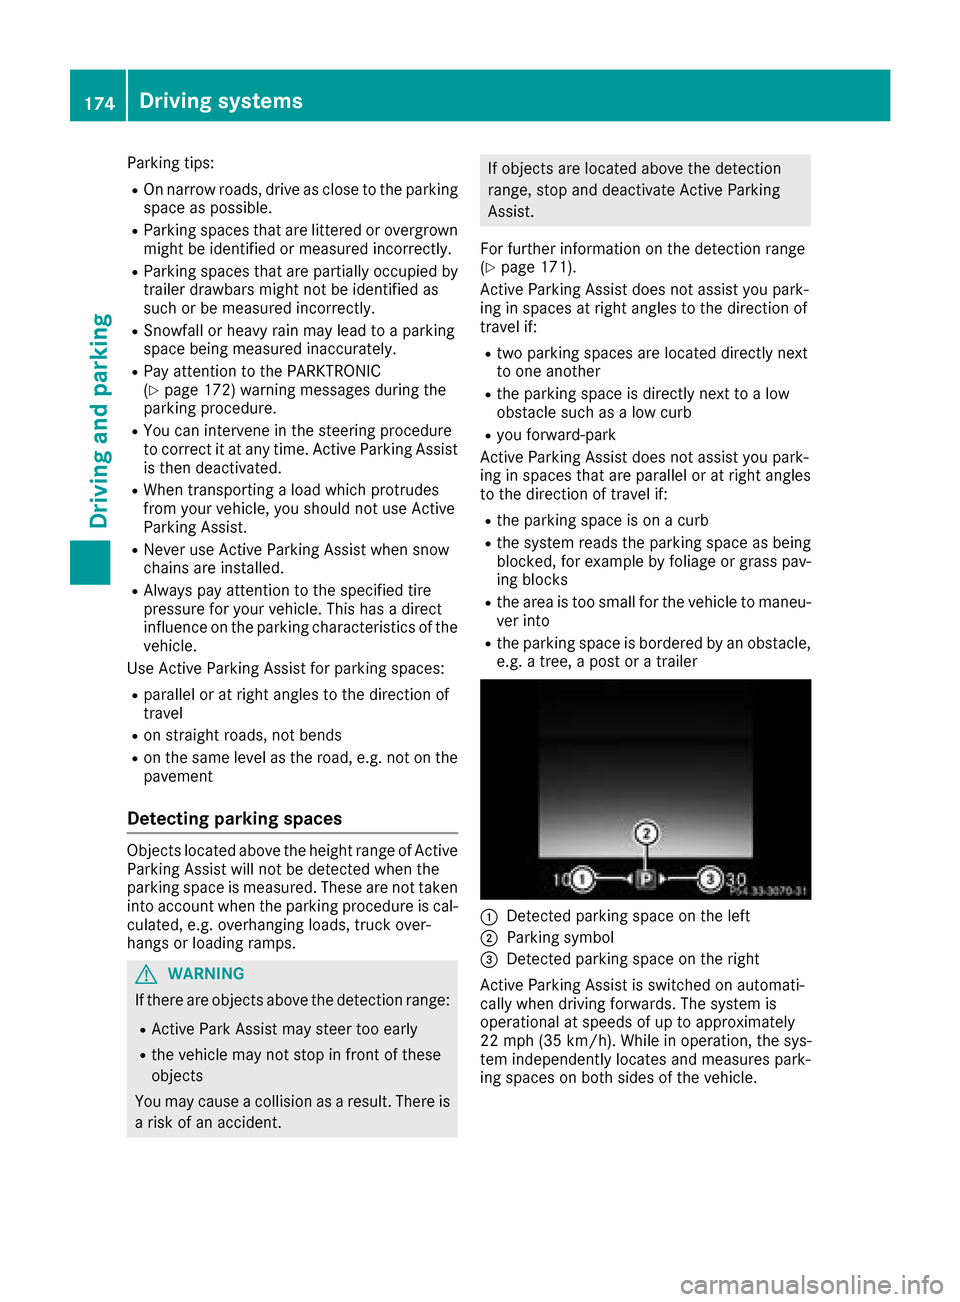
:Detected parking space on the left
;Parking symbol
=Detected parking space on the right
Active Parking Assist is switched on automati-
cally when driving forwards. The system is
operational at speeds of up to approximately
22 mph (35 km/ h). While in operation, the sys-
tem independently locates and measures park-
ing spaces on both sides of the vehicle.
174Driving systems
Driving and parking
Page 196 of 370
If you select the reverse gear, Active Blind Spot
Assist is not operational.
The brightness of the warning lamps is auto-
matically adapted to the brightness of the sur-
roundings.
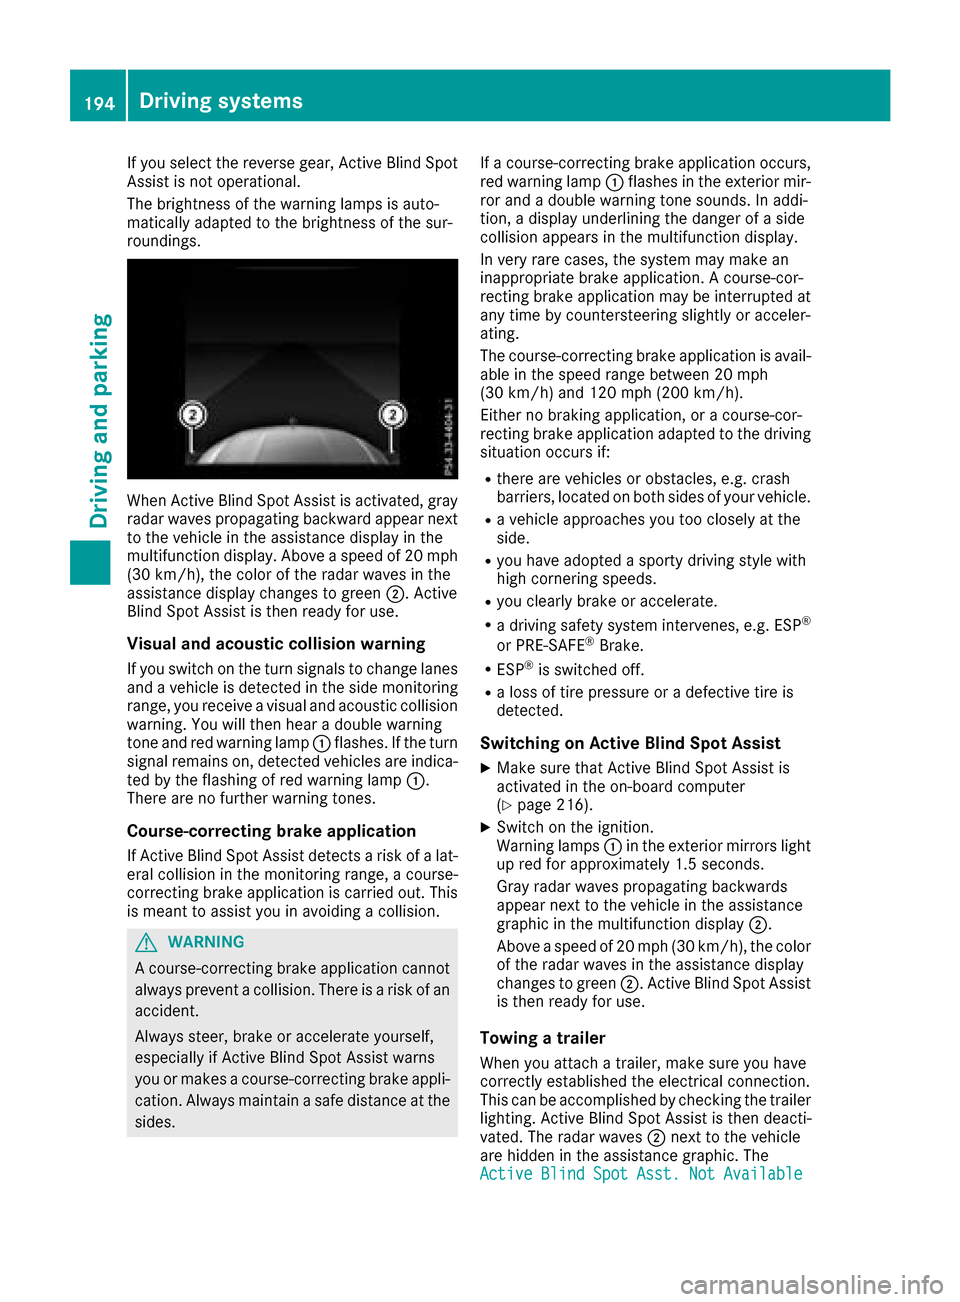
When Active Blind Spot Assist is activated, gray
radar waves propagating backward appear next
to the vehicle in the assistance display in the
multifunction display. Above a speed of 20 mph
(30 km/h), the color of the radar waves in the
assistance display changes to green;. Active
Blind Spot Assist is then ready for use.
Visual and acoustic collision warning
If you switch on the turn signals to change lanes
and a vehicle is detected in the side monitoring
range, you receive a visual and acoustic collision
warning. You will then hear a double warning
tone and red warning lamp :flashes. If the turn
signal remains on, detected vehicles are indica-
ted by the flashing of red warning lamp :.
There are no further warning tones.
Course-correcting brake application
If Active Blind Spot Assist detects a risk of a lat-
eral collision in the monitoring range, a course-
correcting brake application is carried out. This
is meant to assist you in avoiding a collision.
GWARNING
A course-correcting brake application cannot always prevent a collision. There is a risk of an
accident.
Always steer, brake or accelerate yourself,
especially if Active Blind Spot Assist warns
you or makes a course-correcting brake appli-
cation. Always maintain a safe distance at the
sides. If a course-correcting brake application occurs,
red warning lamp
:flashes in the exterior mir-
ror and a double warning tone sounds. In addi-
tion, a display underlining the danger of a side
collision appears in the multifunction display.
In very rare cases, the system may make an
inappropriate brake application. A course-cor-
recting brake application may be interrupted at
any time by countersteering slightly or acceler-
ating.
The course-correcting brake application is avail-
able in the speed range between 20 mph
(30 km/h) and 120 mph (200 km/h).
Either no braking application, or a course-cor-
recting brake application adapted to the driving situation occurs if:
Rthere are vehicles or obstacles, e.g. crash
barriers, located on both sides of your vehicle.
Ra vehicle approaches you too closely at the
side.
Ryou have adopted a sporty driving style with
high cornering speeds.
Ryou clearly brake or accelerate.
Ra driving safety system intervenes, e.g. ESP®
or PRE-SAFE®Brake.
RESP®is switched off.
Ra loss of tire pressure or a defective tire is
detected.
Switching on Active Blind Spot Assist
XMake sure that Active Blind Spot Assist is
activated in the on-board computer
(
Ypage 216).
XSwitch on the ignition.
Warning lamps :in the exterior mirrors light
up red for approximately 1.5 seconds.
Gray radar waves propagating backwards
appear next to the vehicle in the assistance
graphic in the multifunction display ;.
Above a speed of 20 mph (30 km/h), the color
of the radar waves in the assistance display
changes to green ;. Active Blind Spot Assist
is then ready for use.
Towing a trailer
When you attach a trailer, make sure you have
correctly established the electrical connection.
This can be accomplished by checking the trailer
lighting. Active Blind Spot Assist is then deacti-
vated. The radar waves ;next to the vehicle
are hidden in the assistance graphic. The
Active
BlindSpotAsst.NotAvailable
194Driving systems
Driving and parking
Page 198 of 370
Lane-correcting brake application
If you leave your lane, under certain circumstan-
ces the vehicle will brake briefly on one side.
This is meant to assist you in bringing the vehicle
back to the original lane.
GWARNING
A lane-correcting brake application cannot
always bring the vehicle back into the original lane. There is a risk of an accident.
Always steer, brake or accelerate yourself,
especially if Active Lane Keeping Assist warns
you or makes a lane-correcting brake appli-
cation.
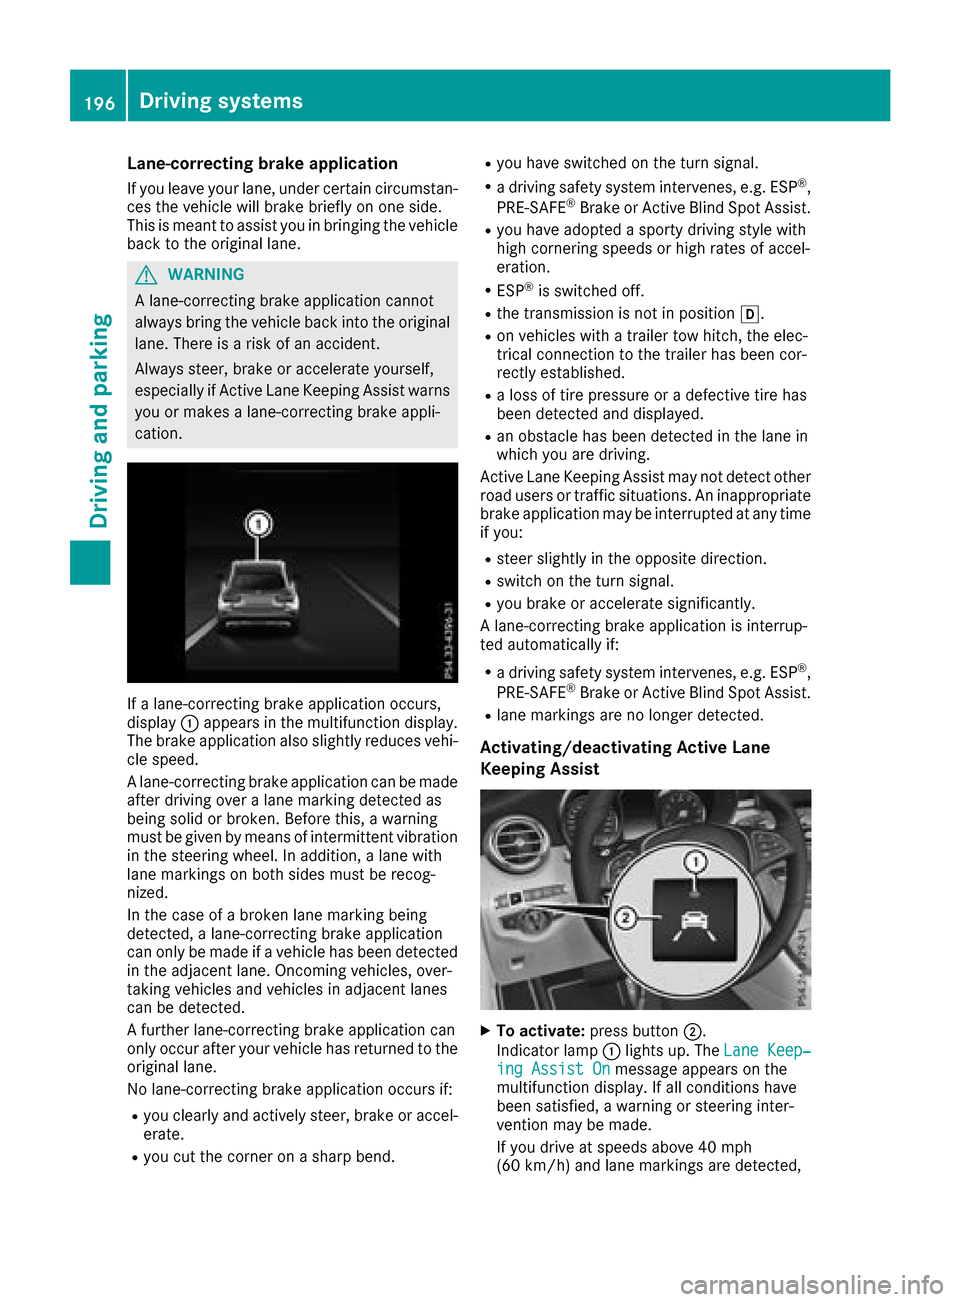
If a lane-correcting brake application occurs,
display :appears in the multifunction display.
The brake application also slightly reduces vehi-
cle speed.
A lane-correcting brake application can be made
after driving over a lane marking detected as
being solid or broken. Before this, a warning
must be given by means of intermittent vibration
in the steering wheel. In addition, a lane with
lane markings on both sides must be recog-
nized.
In the case of a broken lane marking being
detected, a lane-correcting brake application
can only be made if a vehicle has been detected
in the adjacent lane. Oncoming vehicles, over-
taking vehicles and vehicles in adjacent lanes
can be detected.
A further lane-correcting brake application can
only occur after your vehicle has returned to the
original lane.
No lane-correcting brake application occurs if:
Ryou clearly and actively steer, brake or accel-
erate.
Ryou cut the corner on a sharp bend.
Ryou have switched on the turn signal.
Ra driving safety system intervenes, e.g. ESP®,
PRE-SAFE®Brake or Active Blind Spot Assist.
Ryou have adopted a sporty driving style with
high cornering speeds or high rates of accel-
eration.
RESP®is switched off.
Rthe transmission is not in position h.
Ron vehicles with a trailer tow hitch, the elec-
trical connection to the trailer has been cor-
rect
ly established.
Ra loss of tire pressure or a defective tire has
been detected and displayed.
Ran obstacle has been detected in the lane in
which you are driving.
Active Lane Keeping Assist may not detect other
road users or traffic situations. An inappropriate
brake application may be interrupted at any time
if you:
Rsteer slightly in the opposite direction.
Rswitch on the turn signal.
Ryou brake or accelerate significantly.
A lane-correcting brake application is interrup-
ted automatically if:
Ra driving safety system intervenes, e.g. ESP®,
PRE-SAFE®Brake or Active Blind Spot Assist.
Rlane markings are no longer detected.
Activating/deactivating Active Lane
Keeping Assist
XTo activate: press button ;.
Indicator lamp :lights up. The Lane Keep‐
ing Assist Onmessage appears on the
multifunction display. If all conditions have
been satisfied, a warning or steering inter-
vention may be made.
If you drive at speeds above 40 mph
(60 km/h) and lane markings are detected,
196Driving systems
Driving and parking
Page 200 of 370

For more information, please contact a qualified
specialist workshop.
Please observe the manufacturer's operating
instructions for the trailer coupling if a detach-
able trailer coupling is used.
Couple and uncouple the trailer carefully. If you
do not couple the trailer to the towing vehicle
correctly, the trailer could become detached.
Make sure that the following values are not
exceeded:
Rthe permissible trailer drawbar noseweight
Rthe permissible trailer load
Rthe permissible rear axle load of the towing
vehicle
Rthe maximum permissible gross vehicle
weight of both the towing vehicle and the
trailer
The applicable permissible values, which must
not be exceeded, can be found:
Rin the vehicle documents
Ron the type plate for the trailer
Ron the vehicle identification plate
If the values differ, the lowest value applies.
When towing a trailer, your vehicle's handling
characteristics will be different in comparison
with when driving without a trailer.
The vehicle/trailer combination:
Ris heavier
Ris restricted in its acceleration and gradient-
climbing capability
Rhas an increased braking distance
Ris affected more by strong crosswinds
Rdemands more sensitive steering
Rhas a larger turning circle
This could impair the handling characteristics.
When towing a trailer, always adjust your speed
to the current road and wea
ther conditions. Do
not exceed the maximum permissible speed for
your vehicle/trailer combination.
Notes on towing a trailer
General notes
RDo not exceed the maximum permissible
speed for vehicle/trailer combinations in the
relevant country. This lowers the risk of an accident.
ROnly install an approved trailer coupling on
your vehicle.
Further information on availability and on
installation is available from any authorized
Mercedes-Benz Center.
RThe bumpers of your vehicle are not suitable
for installing detachable trailer couplings.
RDo not install hired trailer couplings or other
detachable trailer couplings on the bumpers
of your vehicle.
RIf you no longer need the ball coupling,
remove it from the ball coupling recess. This
will reduce the risk of damage to the ball cou-
pling.
When towing a trailer, set the tire pressure on
the rear axle of the towing vehicle for a maxi-
mum load; see the tire pressure table in the fuel
filler flap (
Ypage 348).
Please note that when towing a trailer, the fol-
lowing driving systems have limited availability
or are not available at all:
RPARKTRONIC (Ypage 170)
RBlind Spot Assist (Ypage 188)
RActive Lane Keeping Assist (Ypage 195)
On vehicles without level control, the height of
the ball coupling will alter according to the load
placed on the vehicle. If necessary, use a trailer
with a height-adjustable drawbar.
You will find permissible trailer loads under
"Technical data" (
Ypage 365).
Driving tips
Observe the information on ESP®trailer stabili-
zation (Ypage 72) and on pulling away with a
trailer (Ypage 130).
The maximum permissible speed for vehicle/
trailer combinations depends on the type of
trailer. Before beginning the journey, check the
trailer's documents to see what the maximum
permitted speed is. Observe the maximum per-
missible speed in the relevant country.
For certain Mercedes-Benz vehicles, the maxi-
mum permissible rear axle load is increased
when towing a trailer. See the "Technical data"
section to find out whether this applies to your
vehicle (
Ypage 365). In the event of increased
rear axle load, the vehicle/trailer combination
may not exceed a maximum speed of 60 mph
(100 km/h) for reasons concerning the operat-
ing permit. This also applies in countries in
198Towing a trailer
Driving and parking
Page 216 of 370
XIf there is more than one number for a
particular name:press the6ora
button to display the numbers.
XPress the :or9 button to select the
number you want to dial.
XPress the 6ora button to start dialing.
or
XTo exit the telephone book: press the~
or % button briefly.
Redialing
The on-board computer saves the last names or
numbers dialed in the redial memory.
XPress the òbutton on the steering wheel
to open the menu list.
XPress the :or9 button on the steering
wheel to select the Telephonemenu.
XConfirm by pressing aon the steering
wheel.
XPress the 6button to switch to the redial
memory.
XPress the :or9 button to select the
desired name or number.
XPress the 6ora button to start dialing.
or
XTo exit the redial memory: press the~
or % button briefly.
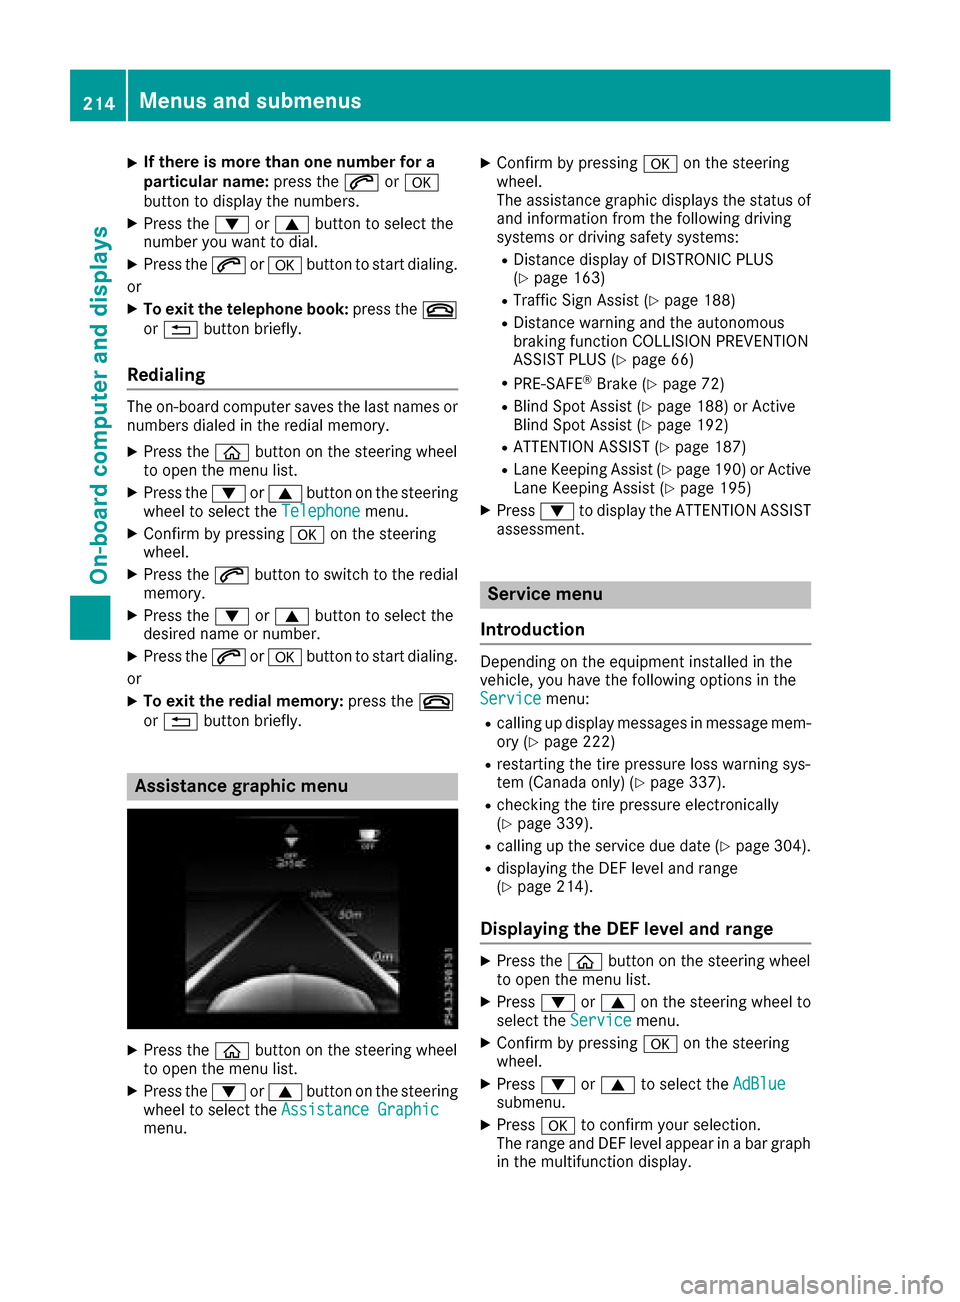
Assistance graphic menu
XPress the òbutton on the steering wheel
to open the menu list.
XPress the :or9 button on the steering
wheel to select the Assistance Graphic
menu.
XConfirm by pressing aon the steering
wheel.
The assistance graphic displays the status of
and information from the following driving
systems or driving safety systems:
RDistance display of DISTRONIC PLUS
(Ypage 163)
RTraffic Sign Assist (Ypage 188)
RDistance warning and the autonomous
braking function COLLISION PREVENTION
ASSIST PLUS (
Ypage 66)
RPRE-SAFE®Brake (Ypage 72)
RBlind Spot Assist (Ypage 188) or Active
Blind Spot Assist (Ypage 192)
RATTENTION ASSIST (Ypage 187)
RLane Keeping Assist (Ypage 190) or Active
Lane Keeping Assist (Ypage 195)
XPress :to display the ATTENTION ASSIST
assessment.
Service menu
Introduction
Depending on the equipment installed in the
vehicle, you have the following options in the
Service
menu:
Rcalling up display messages in message mem-
ory (Ypage 222)
Rrestarting the tire pressure loss warning sys-
tem (Canada only) (Ypage 337).
Rchecking the tire pressure electronically
(Ypage 339).
Rcalling up the service due date (Ypage 304).
Rdisplaying the DEF level and range
(Ypage 214).
Displaying the DEF level and range
XPress the òbutton on the steering wheel
to open the menu list.
XPress :or9 on the steering wheel to
select the Servicemenu.
XConfirm by pressing aon the steering
wheel.
XPress :or9 to select the AdBluesubmenu.
XPressato confirm your selection.
The range and DEF level appear in a bar graph
in the multifunction display.
214Menus and submenus
On-board computer and displays
Page 247 of 370

Tires
Display messagesPossible causes/consequences andMSolutions
CheckTirePressureSoonCanada only:
The tire pressure loss warning system has detected a significant loss
in pressure.
A warning tone also sounds.
Possible causes:
Ryou have changed the positions of the wheels and tires or installed
new wheels and tires
Rthe tire pressure in one or more tires has dropped significantly
GWARNING
Tire pressures that are too low pose the following hazards:
Rthey may burst, especially as the load and vehicle speed increase.
Rthey may wear excessively and/or unevenly, which may greatly
impair tire traction.
Rthe driving characteristics, as well as steering and braking, may be
greatly impaired.
There is a risk of an accident.
XStop the vehicle without making any sudden steering or braking
maneuvers. Pay attention to the traffic conditions as you do so.
XSecure the vehicle against rolling away (Ypage 149).
XCheck the tires and, if necessary, follow the instructions for a flat
tire (Ypage 315).
XCheck the tire pressures and, if necessary, correct the tire pressure.
XRestart the tire pressure loss warning system when the tire pres-
sure is correct (Ypage 337).
CheckTirePressureThen Restart RunFlat Indicator
Canada only:
The tire pressure loss warning system generated a display message
and has not been restarted since.
XSet the correct tire pressure in all four tires.
XRestart the tire pressure loss warning system (Ypage 337).
Run Flat IndicatorInoperativeCanada only:
The tire pressure loss warning system is faulty.
XVisit a qualified specialist workshop.
PleaseCorrectTirePressureThe tire pressure is too low in at least one of the tires, or the tire
pressure difference between the wheels is too great.
XCheck the tire pressures at the next opportunity (Ypage 339).
XIf necessary, correct the tire pressure.
XRestart the tire pressure monitor (Ypage 339).
Displa y messages245
On-board computer and displays
Z