2017 MERCEDES-BENZ GLC COUPE light
[x] Cancel search: lightPage 196 of 370

If you select the reverse gear, Active Blind Spot
Assist is not operational.
The brightness of the warning lamps is auto-
matically adapted to the brightness of the sur-
roundings.
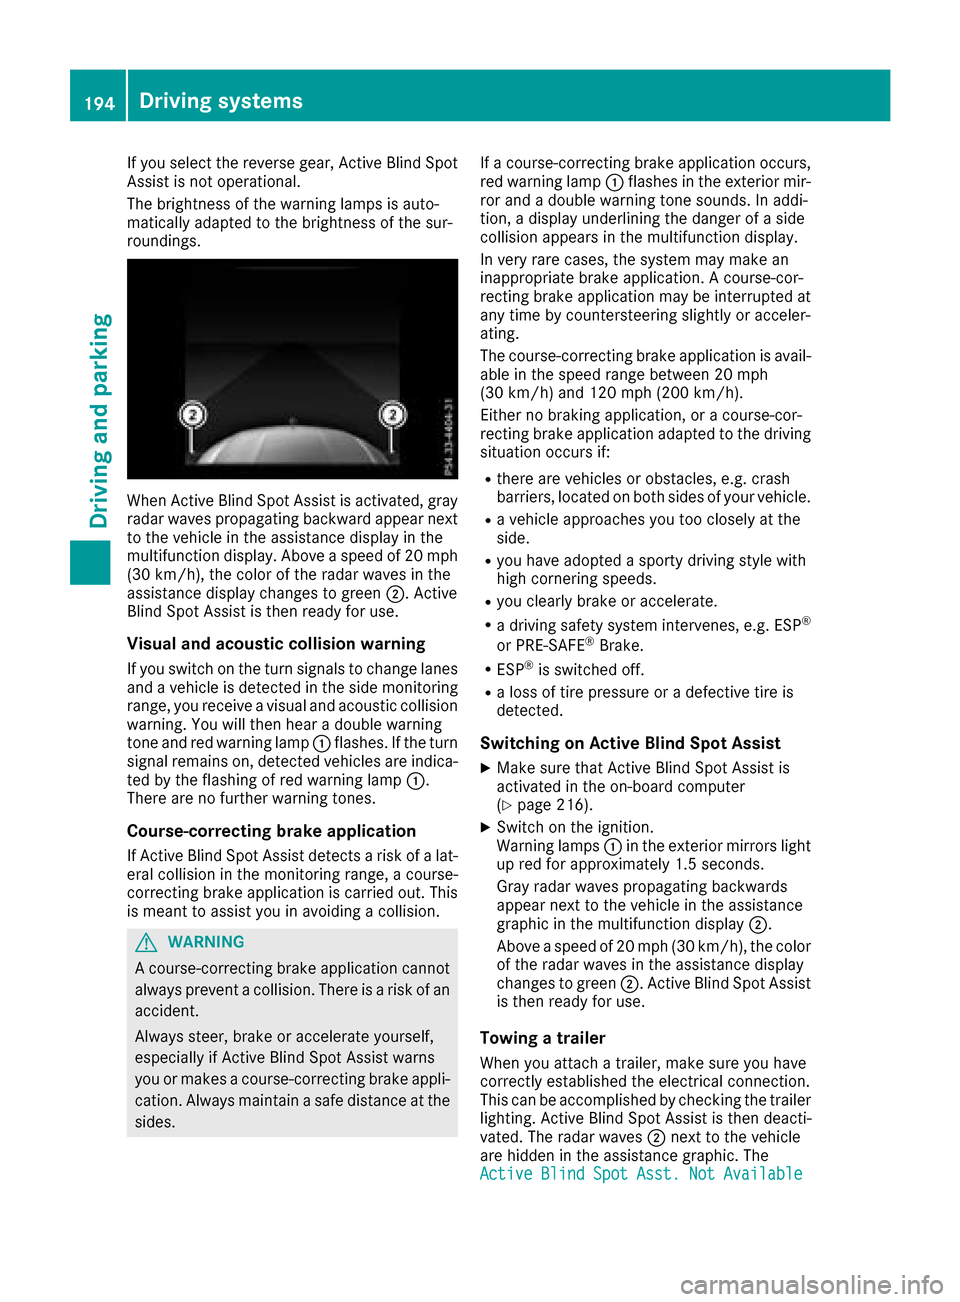
When Active Blind Spot Assist is activated, gray
radar waves propagating backward appear next
to the vehicle in the assistance display in the
multifunction display. Above a speed of 20 mph
(30 km/h), the color of the radar waves in the
assistance display changes to green;. Active
Blind Spot Assist is then ready for use.
Visual and acoustic collision warning
If you switch on the turn signals to change lanes
and a vehicle is detected in the side monitoring
range, you receive a visual and acoustic collision
warning. You will then hear a double warning
tone and red warning lamp :flashes. If the turn
signal remains on, detected vehicles are indica-
ted by the flashing of red warning lamp :.
There are no further warning tones.
Course-correcting brake application
If Active Blind Spot Assist detects a risk of a lat-
eral collision in the monitoring range, a course-
correcting brake application is carried out. This
is meant to assist you in avoiding a collision.
GWARNING
A course-correcting brake application cannot always prevent a collision. There is a risk of an
accident.
Always steer, brake or accelerate yourself,
especially if Active Blind Spot Assist warns
you or makes a course-correcting brake appli-
cation. Always maintain a safe distance at the
sides. If a course-correcting brake application occurs,
red warning lamp
:flashes in the exterior mir-
ror and a double warning tone sounds. In addi-
tion, a display underlining the danger of a side
collision appears in the multifunction display.
In very rare cases, the system may make an
inappropriate brake application. A course-cor-
recting brake application may be interrupted at
any time by countersteering slightly or acceler-
ating.
The course-correcting brake application is avail-
able in the speed range between 20 mph
(30 km/h) and 120 mph (200 km/h).
Either no braking application, or a course-cor-
recting brake application adapted to the driving situation occurs if:
Rthere are vehicles or obstacles, e.g. crash
barriers, located on both sides of your vehicle.
Ra vehicle approaches you too closely at the
side.
Ryou have adopted a sporty driving style with
high cornering speeds.
Ryou clearly brake or accelerate.
Ra driving safety system intervenes, e.g. ESP®
or PRE-SAFE®Brake.
RESP®is switched off.
Ra loss of tire pressure or a defective tire is
detected.
Switching on Active Blind Spot Assist
XMake sure that Active Blind Spot Assist is
activated in the on-board computer
(
Ypage 216).
XSwitch on the ignition.
Warning lamps :in the exterior mirrors light
up red for approximately 1.5 seconds.
Gray radar waves propagating backwards
appear next to the vehicle in the assistance
graphic in the multifunction display ;.
Above a speed of 20 mph (30 km/h), the color
of the radar waves in the assistance display
changes to green ;. Active Blind Spot Assist
is then ready for use.
Towing a trailer
When you attach a trailer, make sure you have
correctly established the electrical connection.
This can be accomplished by checking the trailer
lighting. Active Blind Spot Assist is then deacti-
vated. The radar waves ;next to the vehicle
are hidden in the assistance graphic. The
Active
BlindSpotAsst.NotAvailable
194Driving systems
Driving and parking
Page 198 of 370

Lane-correcting brake application
If you leave your lane, under certain circumstan-
ces the vehicle will brake briefly on one side.
This is meant to assist you in bringing the vehicle
back to the original lane.
GWARNING
A lane-correcting brake application cannot
always bring the vehicle back into the original lane. There is a risk of an accident.
Always steer, brake or accelerate yourself,
especially if Active Lane Keeping Assist warns
you or makes a lane-correcting brake appli-
cation.
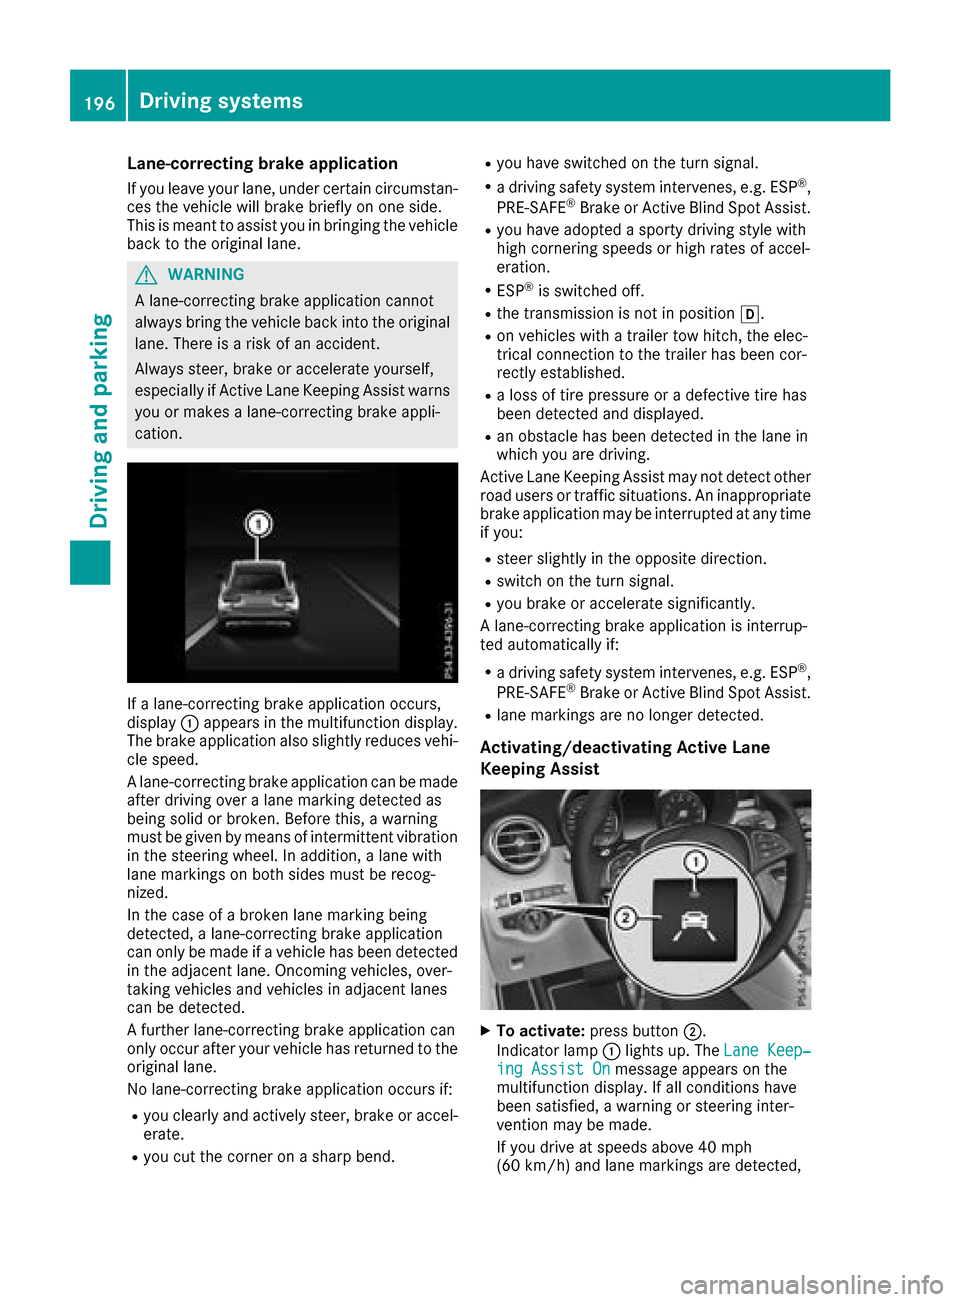
If a lane-correcting brake application occurs,
display :appears in the multifunction display.
The brake application also slightly reduces vehi-
cle speed.
A lane-correcting brake application can be made
after driving over a lane marking detected as
being solid or broken. Before this, a warning
must be given by means of intermittent vibration
in the steering wheel. In addition, a lane with
lane markings on both sides must be recog-
nized.
In the case of a broken lane marking being
detected, a lane-correcting brake application
can only be made if a vehicle has been detected
in the adjacent lane. Oncoming vehicles, over-
taking vehicles and vehicles in adjacent lanes
can be detected.
A further lane-correcting brake application can
only occur after your vehicle has returned to the
original lane.
No lane-correcting brake application occurs if:
Ryou clearly and actively steer, brake or accel-
erate.
Ryou cut the corner on a sharp bend.
Ryou have switched on the turn signal.
Ra driving safety system intervenes, e.g. ESP®,
PRE-SAFE®Brake or Active Blind Spot Assist.
Ryou have adopted a sporty driving style with
high cornering speeds or high rates of accel-
eration.
RESP®is switched off.
Rthe transmission is not in position h.
Ron vehicles with a trailer tow hitch, the elec-
trical connection to the trailer has been cor-
rect
ly established.
Ra loss of tire pressure or a defective tire has
been detected and displayed.
Ran obstacle has been detected in the lane in
which you are driving.
Active Lane Keeping Assist may not detect other
road users or traffic situations. An inappropriate
brake application may be interrupted at any time
if you:
Rsteer slightly in the opposite direction.
Rswitch on the turn signal.
Ryou brake or accelerate significantly.
A lane-correcting brake application is interrup-
ted automatically if:
Ra driving safety system intervenes, e.g. ESP®,
PRE-SAFE®Brake or Active Blind Spot Assist.
Rlane markings are no longer detected.
Activating/deactivating Active Lane
Keeping Assist
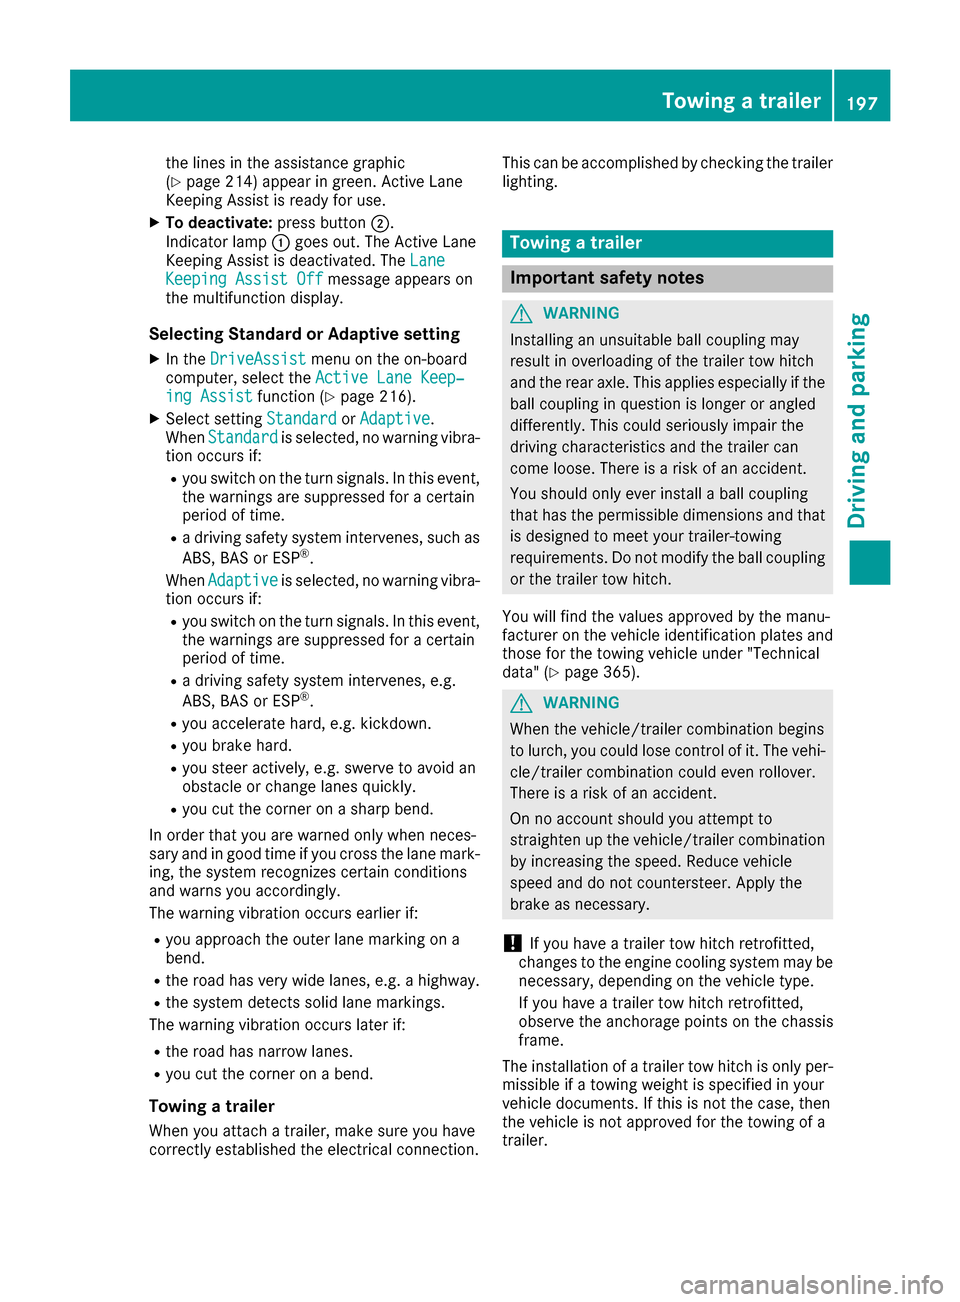
XTo activate: press button ;.
Indicator lamp :lights up. The Lane Keep‐
ing Assist Onmessage appears on the
multifunction display. If all conditions have
been satisfied, a warning or steering inter-
vention may be made.
If you drive at speeds above 40 mph
(60 km/h) and lane markings are detected,
196Driving systems
Driving and parking
Page 199 of 370

the lines in the assistance graphic
(Ypage 214) appear in green. Active Lane
Keeping Assist is ready for use.
XTo deactivate: press button;.
Indicator lamp :goes out. The Active Lane
Keeping Assist is deactivated. The Lane
Keeping Assist Offmessage appears on
the multifunction display.
Selecting Standard or Adaptive setting
XIn the DriveAssistmenu on the on-board
computer, select the Active Lane Keep‐
ing Assistfunction (Ypage 216).
XSelect settingStandardorAdaptive.
When Standardis selected, no warning vibra-
tion occurs if:
Ryou switch on the turn signals. In this event,
the warnings are suppressed for a certain
period of time.
Ra driving safety system intervenes, such as
ABS, BAS or ESP®.
When Adaptive
is selected, no warning vibra-
tion occurs if:
Ryou switch on the turn signals. In this event,
the warnings are suppressed for a certain
period of time.
Ra driving safety system intervenes, e.g.
ABS, BAS or ESP®.
Ryou accelerate hard, e.g. kickdown.
Ryou brake hard.
Ryou steer actively, e.g. swerve to avoid an
obstacle or change lanes quickly.
Ryou cut the corner on a sharp bend.
In order that you are warned only when neces-
sary and in good time if you cross the lane mark-
ing, the system recognizes certain conditions
and warns you accordingly.
The warning vibration occurs earlier if:
Ryou approach the outer lane marking on a
bend.
Rthe road has very wide lanes, e.g. a highway.
Rthe system detects solid lane markings.
The warning vibration occurs later if:
Rthe road has narrow lanes.
Ryou cut the corner on a bend.
Towing a trailer
When you attach a trailer, make sure you have
correctly established the electrical connection. This can be accomplished by checking the trailer
lighting.
Towing a trailer
Important safety notes
GWARNING
Installing an unsuitable ball coupling may
result in overloading of the trailer tow hitch
and the rear axle. This applies especially if the ball coupling in question is longer or angled
differently. This could seriously impair the
driving characteristics and the trailer can
come loose. There is a risk of an accident.
You should only ever install a ball coupling
that has the permissible dimensions and that
is designed to meet your trailer-towing
requirements. Do not modify the ball coupling
or the trailer tow hitch.
You will find the values approved by the manu-
facturer on the vehicle identification plates and
those for the towing vehicle under "Technical
data" (
Ypage 365).
GWARNING
When the vehicle/trailer combination begins
to lurch, you could lose control of it. The vehi- cle/trailer combination could even rollover.
There is a risk of an accident.
On no account should you attempt to
straighten up the vehicle/trailer combination
by increasing the speed. Reduce vehicle
speed and do not countersteer. Apply the
brake as necessary.
!If you have a trailer tow hitch retrofitted,
changes to the engine cooling system may be
necessary, depending on the vehicle type.
If you have a trailer tow hitch retrofitted,
observe the anchorage points on the chassis
frame.
The installation of a trailer tow hitch is only per-
missible if a towing weight is specified in your
vehicle documents. If this is not the case, then
the vehicle is not approved for the towing of a
trailer.
Towing a trailer197
Driving an d parking
Z
Page 202 of 370

XSwitch off the engine.
XClose the doors and tailgate.
XCouple up the trailer.
XEstablish the electrical connection between
the vehicle and the trailer.
XCheck that the trailer lighting system is work-
ing.
XPush the combination switch upwards/down-wards and check whether the corresponding
turn signal on the trailer flashes.
A trailer that is connected is recognized only
when the electrical connection is established
correctly and when the lighting system is work-
ing properly. The function of other systems also
depends on this, for example:
RESP®
RPARKTRONIC
RActive Parking Assist
RActive Blind Spot Assist
RActive Lane Keeping Assist
Vehicles with AIR BODY CONTROL: if you couple
up a trailer, the vehicle always remains at high-
way level. Observe the following note when cou-
pling up a trailer:
RUnless highway level has been set manually,
the vehicle is automatically lowered to high-
way level. If a speed of 5 mph (8 km/h) has
been reached, this may be the case.
These restrictions apply to accessories that are
supplied with power via the trailer socket in your
vehicle, e.g. a rear bicycle rack.
Observe the maximum permissible trailer
dimensions (width and length).
Most U.S. states and all Canadian provinces
require by law:
RSafety chains between the towing vehicle and
the trailer. The chains should be cross-wound
under the trailer drawbar. They must be fas-
tened to the vehicle's trailer coupling, not to
the bumper or the axle.
Leave enough play in the chains to make tight
cornering possible.
RA separate brake system for certain types of
trailer.
RSafety switch for braked trailers. Check the
specific legal requirements applicable to your state.
If the trailer becomes detached from the tow-
ing vehicle, the safety feature applies the
trailer brakes.
Towing a trailer
There are several legal requirements for towing
a trailer, e.g. the maximum permissible speed.
Make sure that your car/trailer combination
complies with the local regulations:
Rin your place of residence
Rat your destination
The police and local authorities can provide reli- able information.
To accumulate driving experience and accustom
yourself to the new handling characteristics,
practice the following at a location where there
is no traffic:
RCornering
RStopping
RBacking up
Check the following before the journey:
RTrailer tow hitch
RSafety switch for braked trailers
RSafety chains
RElectrical connections
RLighting system
RWheels and tires
RLoad securing
Adjust the exterior mirrors so that you have a
clear view of the rear section of the trailer.
If the trailer is equipped with electronically con-
trolled brakes, pull away carefully in the car/
trailer combination. Brake manually using the
brake controller and check whether the brakes
function correctly.
Regularly check that the load is secure.
When towing a trailer, your vehicle's handling
characteristics will be different in comparison
with when driving without a trailer.
The vehicle/trailer combination:
Ris heavier
Ris restricted in its acceleration and gradient-
climbing capability
Rhas an increased braking distance
Ris affected more by strong crosswinds
Rdemands more sensitive steering
Rhas a larger turning circle
Avoid sudden steering movements.
Avoid braking abruptly. If possible, brake gently
at first to allow the trailer to run on. Then,
increase the braking force rapidly.
200Towing a trailer
Driving and parking
Page 205 of 370

Important safety notes
GWARNING
If you operate information systems and com-
munication equipmen tintegrate din th evehi-
cle while driving ,you will be distracte dfrom
traffic conditions. You could also lose control
of th evehicle. Ther eis aris kof an accident.
Only operate th eequipmen twhen th etraffic
situation permits. If you are no tsur ethat this
is possible ,park th evehicl epayin gattention
to traffic condition sand operate th eequip-
men twhen th evehicl eis stationary.
You must observ eth elegal requirements for th e
country in whic hyou are currentl ydriving when
operating th eon-board computer.
GWARNIN G
If th einstrumen tcluste rhas faile dor mal-
functioned, you may no trecognize function
restriction sin systems relevan tto safety. The
operating safet yof your vehicl emay be
impaired .Ther eis aris kof an accident.
Drive on carefully. Hav eth evehicl echecke d
at aqualified specialist workshop immedi-
ately.
If th eoperating safet yof your vehicl eis
impaired ,pull ove ras soo nas it is saf eto do so.
Contac t aqualified specialist workshop.
The on-board computer only shows message sor
warning sfrom certain systems in th emultifunc-
tion display. You should therefor emak esur e
your vehicl eis operating safely at all times .
Fo ran overview, see th einstrumen tpanel illus-
tration (
Ypage 35).
Displays and operation
Instrument cluster lighting
The lighting in th einstrumen tcluster, in th edis-
plays and th econtrol sin th evehicl einterior can
be adjusted usin gbrightness control knob :.
XTurn brightness control knob :up or down .
If you tur nth eligh tswitch (Ypage 108) to th e
T, ÃorL position ,th ebrightness
will depend upon th ebrightness of th eambi -
en tlight.
iThe ligh tsensor in th einstrumen tcluste r
automatically control sth ebrightness of th e
multifunction display.
In daylight, th edisplays in th einstrumen t
cluste rare illuminated. Adimming function is
no tpossibl ein daylight.
Speedometer with segments
The speedometer is divided int osegments
depending on th eequipment.
The segments in th espeedometer indicat e
whic hspee drange is available.
RCruis econtrol activated (Ypage 157):
The segments ligh tup from th estore dspee d
to th een dof th escale.
RDISTRONI CPLU Sactivated (Ypage 159):
On eor two segments in th eset spee drange
ligh tup.
RDISTRONI CPLU Sdetects avehicl ein fron t
moving mor eslowly than th estore dspeed:
The segments between th espee dof th evehi-
cle in fron tand th estore dspee dligh tup.
Displays and operation203
On-board computer and displays
Z
Page 208 of 370

RaDISTRONIC PLUS Steering Assist and
Stop&Go Pilot (Ypage 164)
R_ Adaptive Highbeam Assist
(Ypage 110)
Rè ECO start/stop function (Ypage 131)
RëHOLD function (Ypage 166)
Head-up display
General notes
The head-up display projects information from
the navigation system and the driver assistance
system above the dashboard into the driver's
field of vision. The head-up display allows the
driver to see all of the information without hav-
ing to take their eyes off the road.
A requirement for the display of the contents is that the following functions are available in the
vehicle and are switched on:
RCruise control
RDISTRONIC PLUS
RTraffic Sign Assist
RNavigation
Important safety notes
The head-up display is only an aid and is not a
substitute for attentive driving.
The visibility of the head-up display is influencedby the following conditions:
Rthe driver's seat position
Rthe positioning of the display image
Rthe general ambient light
Rsunglasses with polarization filters
Rwet roads
Rblocking of sunlight by objects on the display
cover
In the event of extreme sunlight, sections of the
display may fade. This can be reversed by
switching the head-up display off and on again.
iVehicles with the head-up display are equip-
ped with a special windshield. Should repairs
be necessary, have the windshield replaced at
a qualified specialist workshop.
Displays and operation
Switching the head-up display on/off
XPress button :.
When the head-up display is switched on, the display appears in the driver's field of vision.
Standard displays in the head-up display
:Navigation messages
;Current speed
=Detected traffic signs
?Cruise control or DISTRONIC PLUS set
speed
206Displays an doperation
On-boa rd computer and displays
Page 217 of 370

Observe the information and notes on "Refuel-
ing" (Ypage 146).
Settings menu
Introduction
Depending on the equipment installed in the
vehicle, you have the following options in the
Settings
menu:
RChanging assistance settings (Ypage 215).
RChanging head-up display settings
(Ypage 216).
RChanging the light settings (Ypage 217).
RChanging the instrument cluster settings
(Ypage 218).
RRestoring the factory settings (Ypage 218).
Assistance submenu
Deactivating/activating ESP®
Observe the "Important safety notes" section in
the description of ESP®(Ypage 69).
GWARNING
If you deactivate ESP
®, ESP®no longer sta-
bilizes the vehicle. There is an increased risk
of skidding and an accident.
Only deactivate ESP
®in the situations descri-
bed in the following.
It may be best to deactivate ESP
®in the follow-
ing situations:
Rwhen using snow chains
Rin deep snow
Ron sand or gravel
Deactivating/activating ESP®in Mercedes-
AMG vehicles (Ypage 70).
For further information about ESP®, see
(Ypage 69).
XStart the engine.
XPress the òbutton on the steering wheel
to open the menu list.
XPress :or9 on the steering wheel to
select the Settingsmenu.
XConfirm by pressing aon the steering
wheel.
XPress :or9 to select the DriveAs‐sistsubmenu.
XPressato confirm.
XPress :or9 to select ESP.
XPressato confirm.
The current selection appears.
XTo activate/deactivate: press theabut-
ton again.
If the å warning lamp in the instrument
cluster lights up when the vehicle is ready to
drive, ESP
®is deactivated.
If the ÷ andå warning lamps light up
continuously, ESP
®is not available due to a mal-
function.
Observe the information on warning lamps
(
Ypage 254).
Observe the information on display messages
(
Ypage 223).
Activating/deactivating COLLISION PRE-
VENTION ASSIST PLUS
XPress the òbutton on the steering wheel
to open the menu list.
XPress the :or9 button on the steering
wheel to select the Settingsmenu.
XConfirm by pressing aon the steering
wheel.
XUse : or9 to select the DriveAssistsubmenu.
XPressato confirm.
XPress 9or: to select CollisionPrevention.
XPressato confirm.
The current selection appears.
XTo activate/deactivate: pressaagain.
When COLLISION PREVENTION ASSIST PLUS
is deactivated, the æsymbol appears in
the multifunction display in the Assistance
Graphicmenu.
For further information about COLLISION PRE-
VENTION ASSIST PLUS, see (
Ypage 66).
Activating/deactivating PRE-SAFE®
Brake
PRE‑SAFE®Brake is only available for vehicles
with the Driving Assistance package.
XPress the òbutton on the steering wheel
to open the menu list.
XPress the :or9 button on the steering
wheel to select the Settingsmenu.
Menus and submenus215
On-board computer and displays
Z
Page 219 of 370

Using theDisplay Contentfunction, you can
choose from up to four display options depend-
ing on the vehicle's equipment. The selected
contents appear in the Head-up Display.
If you select a display with traffic signs, detected traffic signs from Traffic Sign Assist appear in
the head-up display.
XPress the òbutton on the steering wheel
to open the menu list.
XPress :or9 on the steering wheel to
select the Settingsmenu.
XConfirm by pressing aon the steering
wheel.
XPress :or9 to select the Head-upDisplaysubmenu.
XPressato confirm.
XPress :or9 to select Display Con‐tent.
XPressato confirm.
A graphic selection list appears.
XPress :or9 to select the desired dis-
play.
XPress the abutton to confirm the selec-
tion.
You can find more information on the navigation
displays in the multimedia system (see Digital
Operator's Manual).
Information on displays of Traffic Sign Assist
(
Ypage 187).
Setting the position
You can adjust the position of the Head-up Dis-
play on the windshield. You can compensate for
height differences if the seat positions are
changed, for example.
XSwitch on the Head-up Display (Ypage 206).
XPress the òbutton on the steering wheel
to open the menu list.
XPress the :or9 button on the steering
wheel to select the Settingsmenu.
XConfirm by pressing aon the steering
wheel.
XUse : or9 to select the Head-upDisplaysubmenu.
XPressato confirm.
XPress :or9 to select the Positionfunction.
XPress theabutton to save the setting.
XPress :or9 to adjust the position to a
level from Level+5(up) toLevel-5(down).
XPress the aor% button to save the
setting.
Using the Memory function, you can save and
call up the set position of the Head-up Display as
a single memory preset (
Ypage 106).
Setting the brightness
The brightness of the Head-up Display is auto-
matically adjusted to the surrounding ambient
light. You can also individually adjust the bright-
ness of the Head-up Display.
XSwitch on the Head-up Display (Ypage 206).
XPress the òbutton on the steering wheel
to open the menu list.
XPress the :or9 button on the steering
wheel to select the Settingsmenu.
XConfirm by pressing aon the steering
wheel.
XUse : or9 to select the Head-upDisplaysubmenu.
XPressato confirm.
XPress :or9 to select the Brightnessfunction.
XPress theabutton to save the setting.
XPress the :or9 button to adjust the
brightness to a level from Level+5(bright) to
Level -5(dark).
XPress the aor% button to save the
setting.
Light submenu
Switching the daytime running lamps on/
off
This function is not available in Canada.
XPress òon the steering wheel to open the
menu list.
XPress :or9 on the steering wheel to
select the Settingsmenu.
XConfirm by pressing aon the steering
wheel.
XPress :or9 to select the Lightssubmenu.
XPressato confirm.
XUsing :or9, select the DaytimeRunning Lightsfunction.
If the DaytimeRunningLightsfunction has
been switched on, the multifunction display
Menus and submenus217
On-board computer and displays
Z