2017 MERCEDES-BENZ GLC COUPE warning light
[x] Cancel search: warning lightPage 262 of 370
Warning/
indicator
lampNSignal type
Possible causes/consequences and M
Solutions
XAt coolant temperatures below 248 ‡ (120 †), drive to the nearest qualified
specialist workshop.
XAvoid heavy loads on the engine as you do so, e.g. driving in mountainous terrain
and stop-and-go traffic.
Driving systems
Warning/
indicator
lampNSignal type
Possible causes/consequences and M
Solutions
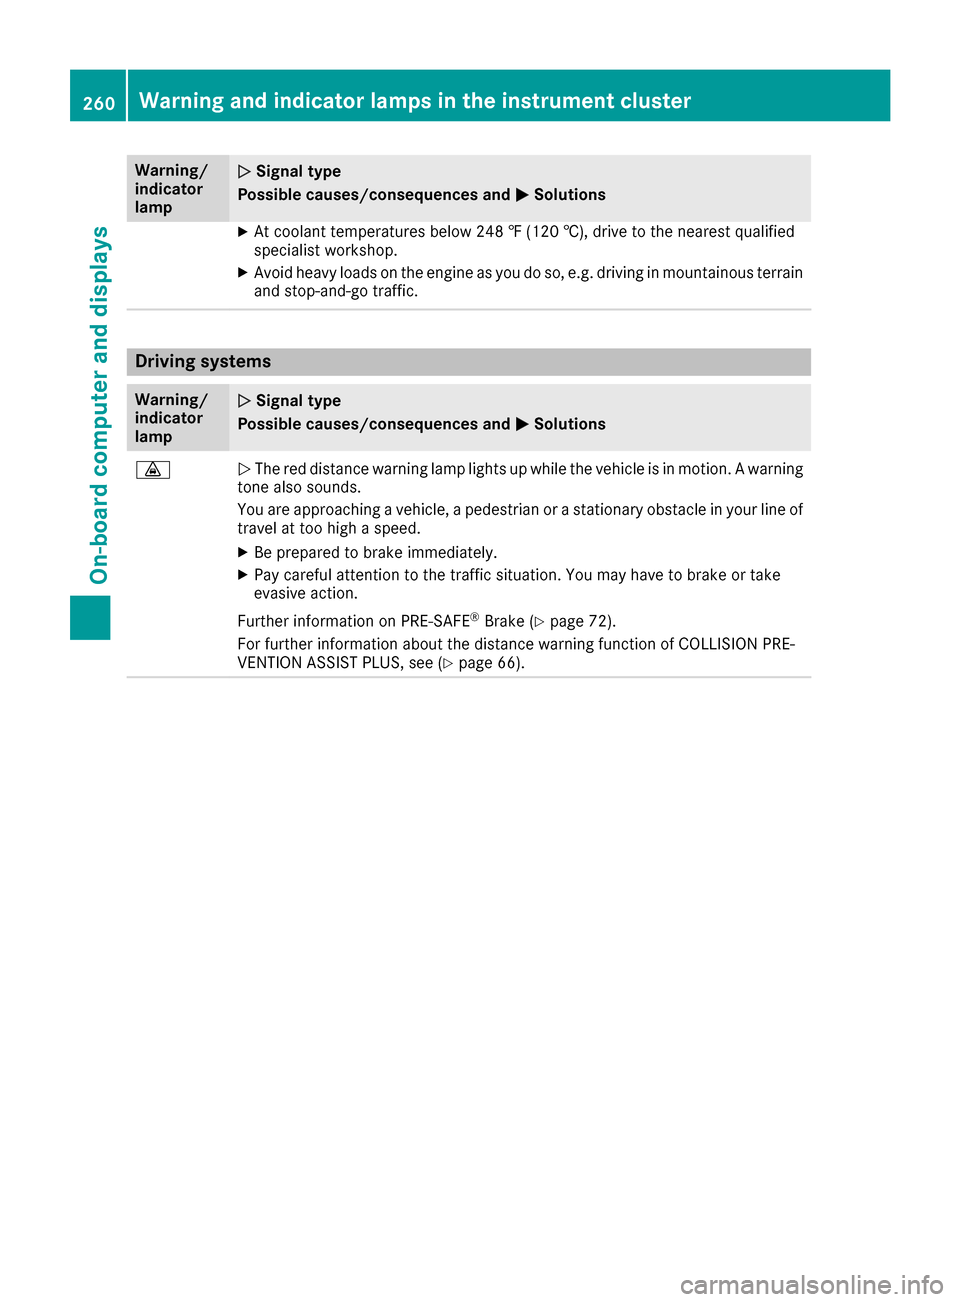
·NThe red distance warning lamp lights up while the vehicle is in motion. A warning
tone also sounds.
You are approaching a vehicle, a pedestrian or a stationary obstacle in your line of travel at too high a speed.
XBe prepared to brake immediately.
XPay careful attention to the traffic situation. You may have to brake or take
evasive action.
Further information on PRE ‑SAFE
®Brake (Ypage 72).
For further information about the distance warning function of COLLISION PRE-
VENTION ASSIST PLUS, see (
Ypage 66).
260Warning and indicator lamps in the instrument cluster
On-board computer and displays
Page 265 of 370
General notes
The multimedia system section in this Opera-
tor's Manual describes the basic principles for
operation. More information can be found in theDigital Operator's Manual.
Important safety notes
GWARNING
If you operate information systems and com-
munication equipment integrated in the vehi-
cle while driving, you will be distracted from
traffic conditions. You could also lose control
of the vehicle. There is a risk of an accident.
Only operate the equipment when the traffic
situation permits. If you are not sure that this
is possible, park the vehicle paying attention
to traffic conditions and operate the equip-
ment when the vehicle is stationary.
You must observe the legal requirements for the
country in which you are currently driving when
operating the multimedia system.
The multimedia system calculates the route to
the destination without taking the following into
account, for example:
Rtraffic lights
Rstop and yield signs
Rparking or stopping restrictions
Rroad narrowing
Rother road and traffic rules and regulations
The multimedia system may give incorrect nav-
igation recommendations if the actual street/
traffic situation does not correspond with the
digital map's data.
For example:
Ra diverted route
Rthe road layout or the direction of a one-way
street has been changed
For this reason, you must always observe road
and traffic rules and regulations during your
journey. Road and traffic rules and regulations
always have priority over multimedia system
driving recommendations.
Navigation announcements are intended to
direct you while driving without diverting your
attention from the road and driving. Please always use this feature instead of con-
sulting the map display for directions. Looking
at the icons or map display can distract you from
traffic conditions and driving, and increase the
risk of an accident.
This equipment complies with FCC radiation
exposure limits set forth for uncontrolled equip-
ment and meets the FCC radio frequency (RF)
Exposure Guidelines in Supplement C to OET65.
This equipment has very low levels of RF energy
that is deemed to comply without maximum
permissive exposure evaluation (MPE). How-
ever, it is recommended
to insta
ll it at a distance
of at least 8 inches (approx. 20 cm) between the
radiation source and a person's body (not
including limbs such as hands, wrists, feet and
legs).
GWARNING
Modifications to electronic components, their software as well as wiring can impair their
function and/or the function of other net-
worked components. In particular, systems
relevant to safety could also be affected. As a
result, these may no longer function as inten-
ded and/or jeopardize the operating safety of
the vehicle. There is an increased risk of an
accident and injury.
Never tamper with the wiring as well as elec-
tronic components or their software. You
should have all work to electrical and elec-
tronic equipment carried out at a qualified
specialist workshop.
Function restrictions
For safety reasons, some functions are restric-
ted or unavailable while the vehicle is in motion.
You will notice this, for example, because either
you will not be able to select certain menu items
or a message will appear to this effect.
Function restrictions263
Multimedia system
Z
Page 277 of 370

Depending on the vehicle's equipment, the fol-
lowing may be in the stowage space:
Ran SD card slot
Ra multimedia connector unit with two USB
ports, e.g. for iPod®, iPhone®or MP3 player
(see the Digital Operator's Manual)
Ra mobile phone bracket
Ra small stowage space in the upper front sec-
tion
Stowage compartment in the doors
You can store items such as a rolled-up fluores-
cent jacket (driver's door) and the vehicle docu-
ment wallet (front-passenger door) in stowage
space :in the doors.
In doors ;you can store bottles with a capacity
of up to 34 fl. oz. (1.0 liter).
Stowage space in the rear
Stowage compartment in the rear seat
armrest
!Do not sit on or support your body weight on
the rear seat armrest when it is folded down,
as you could otherwise damage it.
!Close the cover of the stowage compart-
ment before folding the rear seat armrest
back into the seat backrest.
XTo open: fold down the seat armrest.
XPress on the front of release catch :and fold
the cover of the armrest upwards.
Additional stowage space
Depending on the equipment, the following
additional stowage areas are available in the
vehicle:
Rcard and coin holder in the dashboard above
the light switch (not suitable for holding thin
objects such as shopping tokens)
Rthe open stowage compartment in the center
console
Rstowage net in the front-passenger footwell
Rthe map pockets on the back of the driver's
and front-passenger seat
Rparcel net on the left-hand side in the cargo
compartment
Observe the loading guidelines (
Ypage 273)
and the safety notes regarding stowage spaces
(
Ypage 273).
Ski and snowboard bag
Important safety notes
GWARNING
The skibag in conjunction with the lashing
straps cannot restrain any objects other than
skis.
Stowag earea s275
Stowag ean d features
Z
Page 280 of 370
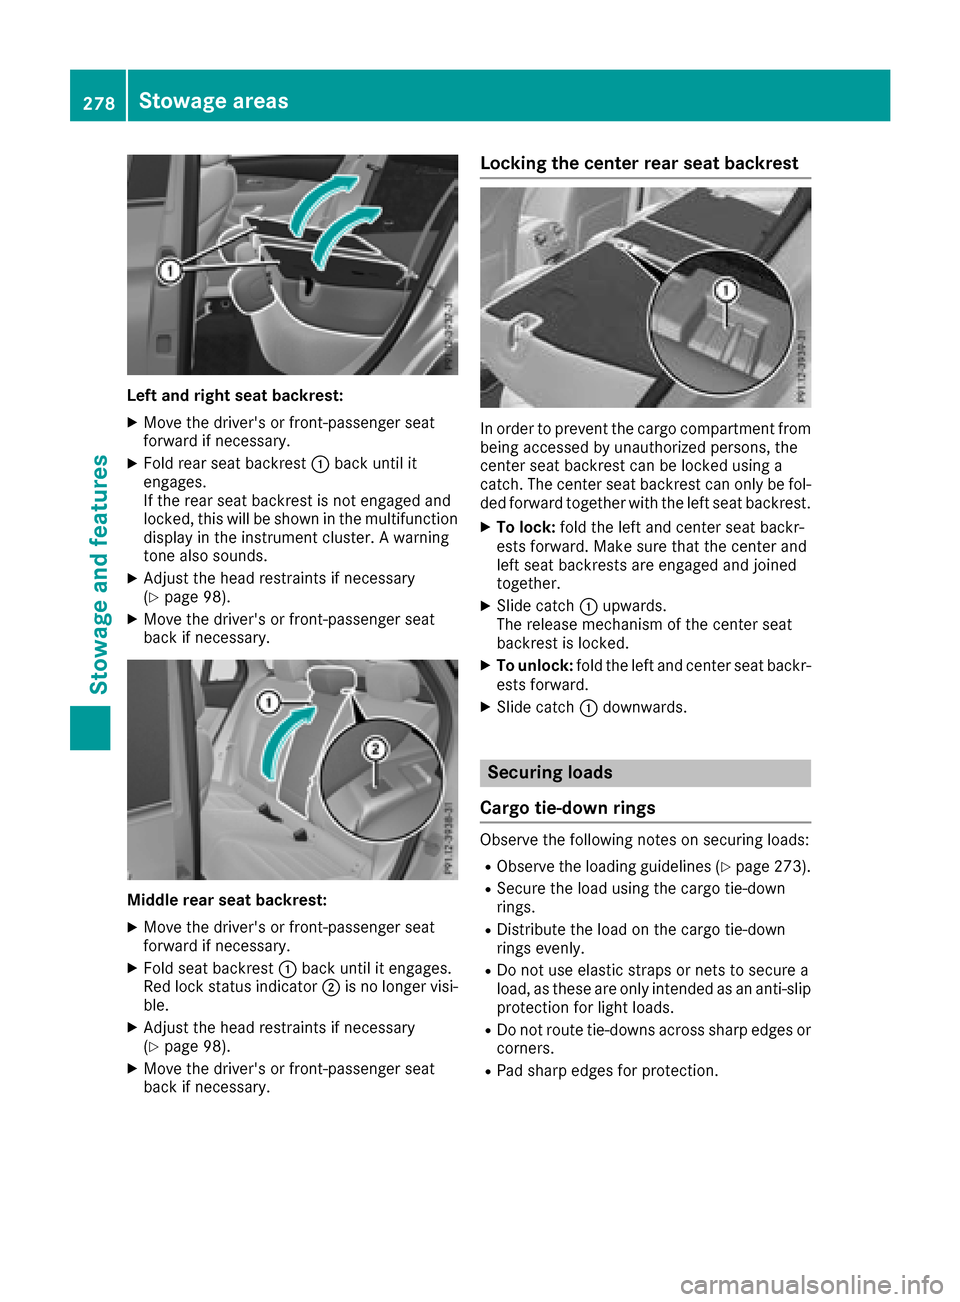
Left and right seat backrest:
XMove the driver's or front-passenger seat
forward if necessary.
XFold rear seat backrest:back until it
engages.
If the rear seat backrest is not engaged and
locked, this will be shown in the multifunction display in the instrument cluster. A warning
tone also sounds.
XAdjust the head restraints if necessary
(Ypage 98).
XMove the driver's or front-passenger seat
back if necessary.
Middle rear seat backrest:
XMove the driver's or front-passenger seat
forward if necessary.
XFold seat backrest :back until it engages.
Red lock status indicator ;is no longer visi-
ble.
XAdjust the head restraints if necessary
(Ypage 98).
XMove the driver's or front-passenger seat
back if necessary.
Locking the center rear seat backrest
In order to prevent the cargo compartment from
being accessed by unauthorized persons, the
center seat backrest can be locked using a
catch. The center seat backrest can only be fol-
ded forward together with the left seat backrest.
XTo lock: fold the left and center seat backr-
ests forward. Make sure that the center and
left seat backrests are engaged and joined
together.
XSlide catch :upwards.
The release mechanism of the center seat
backrest is locked.
XTo unlock: fold the left and center seat backr-
ests forward.
XSlide catch :downwards.
Securing loads
Cargo tie-down rings
Observe the following notes on securing loads:
RObserve the loading guidelines (Ypage 273).
RSecure the load using the cargo tie-down
rings.
RDistribute the load on the cargo tie-down
rings evenly.
RDo not use elastic straps or nets to secure a
load, as these are only intended as an anti-slip
protection for light loads.
RDo not route tie-downs across sharp edges or corners.
RPad sharp edges for protection.
278Stowage areas
Stowage and features
Page 281 of 370
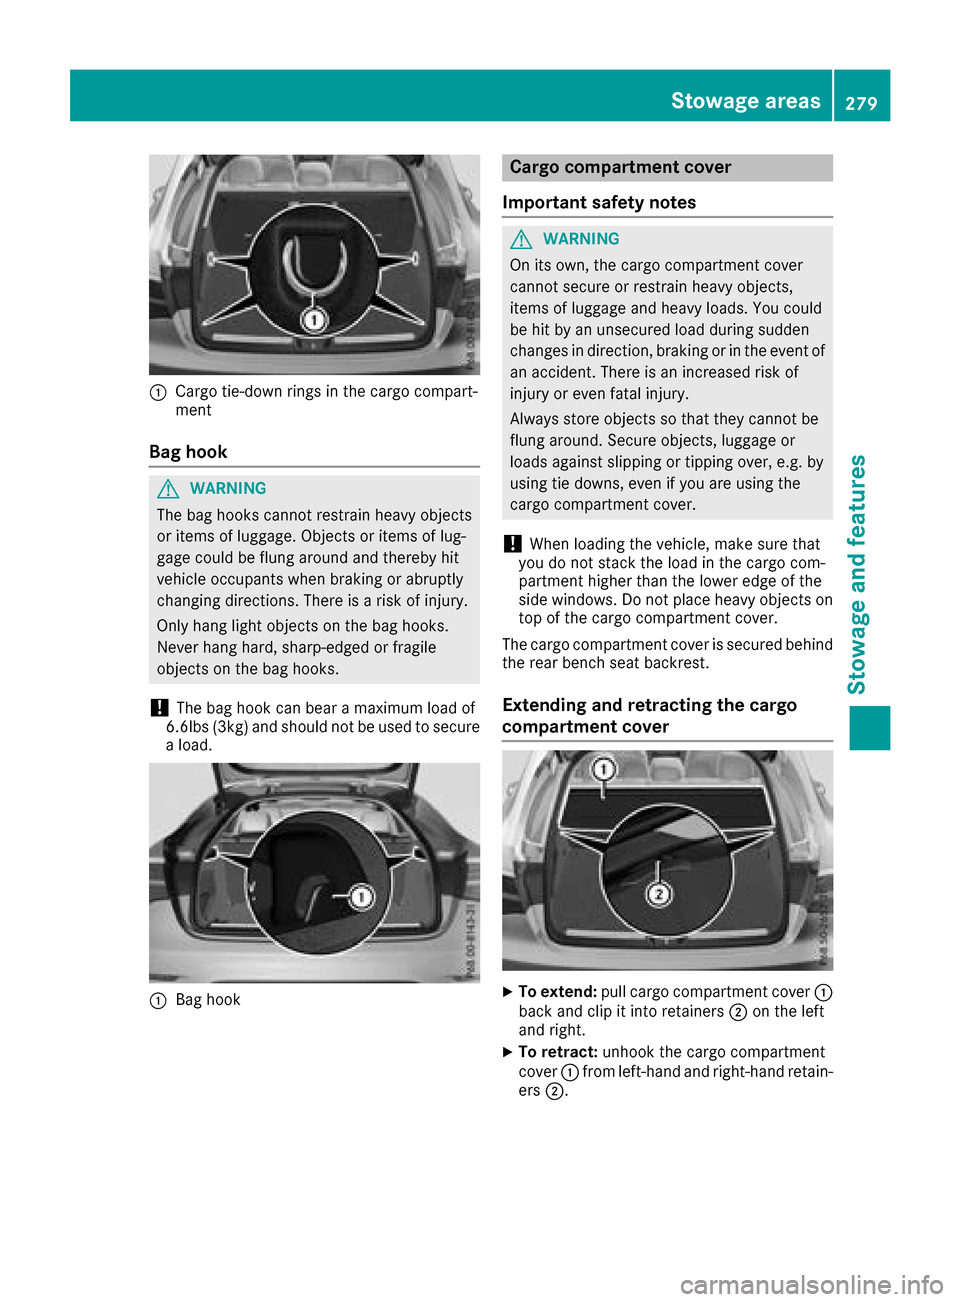
:Cargo tie-downrings inthe cargo compart-
ment
Bag hook
GWAR NING
The bag hooks cannot restrain heavy objects
or items of luggage. Objects or items of lug-
gage could beflung around and there byhit
veh icle occupants when braking or abrupt ly
changing directions. There isa risk of injury.
Only hang light objects on the bag hooks.
Never hang hard, sharp-edged or fragile
objects on the bag hooks.
!The bag hook can bear a maximum load of
6. 6lbs (3kg) and should not beused to secure
a load.
:Bag hook
Cargo compartment cover
Important safety notes
GWARNING
On its own, the cargo compartment cover
cannot secure or restrain heavy objects,
items of luggage and heavy loads. You could
be hit by an unsecured load during sudden
changes indirection, braking or in the event of
an accident. There is an increased risk of
injury or even fatal injury.
Always store objects so that they cannot be
flung aroun d.Secure objects, luggage or
loads against slipping or tipping over, e.g. by
using tie downs, even if you are using the
cargo compartment cover.
!When loading the vehicle, make sure that
you do not stack the load inthe cargo com-
partment higher than the lower edge of the
side wind ows. Do not place heavy objects on
top of the cargo compartment cover.
The cargo compartment cover is secured behind
the rear bench seat backrest.
Extending and retracting the cargo
compartment cover
XTo extend: pull cargo compartment cover :
back and clip itinto retainers ;on the left
and right.
XTo ret ract: unhook the cargo compartment
cover :from left-hand and right-hand retain-
ers ;.
Stowage areas279
Stowage and features
Z
Page 286 of 370
Never exceed the maximum roof load and
adjust your driving style.
You will find information on the maximum roof
load in the "Technical data" section
(
Ypage 364).
!Mercedes-Benz recommends that you only
use roof carriers that have been tested and
approved for Mercedes-Benz vehicles. This
helps to avoid damage to the vehicle.
Position the load on the roof carrier in such a
way that the vehicle will not sustain damage
even when it is in motion.
Depending on the vehicle equipment, ensure
that when the roof carrier is installed you can:
Rraise the sliding sunroof fully
Ropen the tailgate fully
An incorrectly secured roof carrier or roof load
may become detached from the vehicle. You
must therefore ensure that you observe the roof
carrier manufacturer's installation instructions.
Vehicles with panorama roof with power
tilt/sliding panel (Canada only): if a roof car-
rier is installed, the panorama roof with power
tilt/sliding panel cannot be opened. The pano-
rama roof with power tilt/sliding panel can still
be raised to allow ventilation of the vehicle inte- rior. If the panorama roof with power tilt/sliding
panel makes contact with a roof carrier
approved by Mercedes-Benz, the sunroof will
lower slightly but remain raised at the rear.
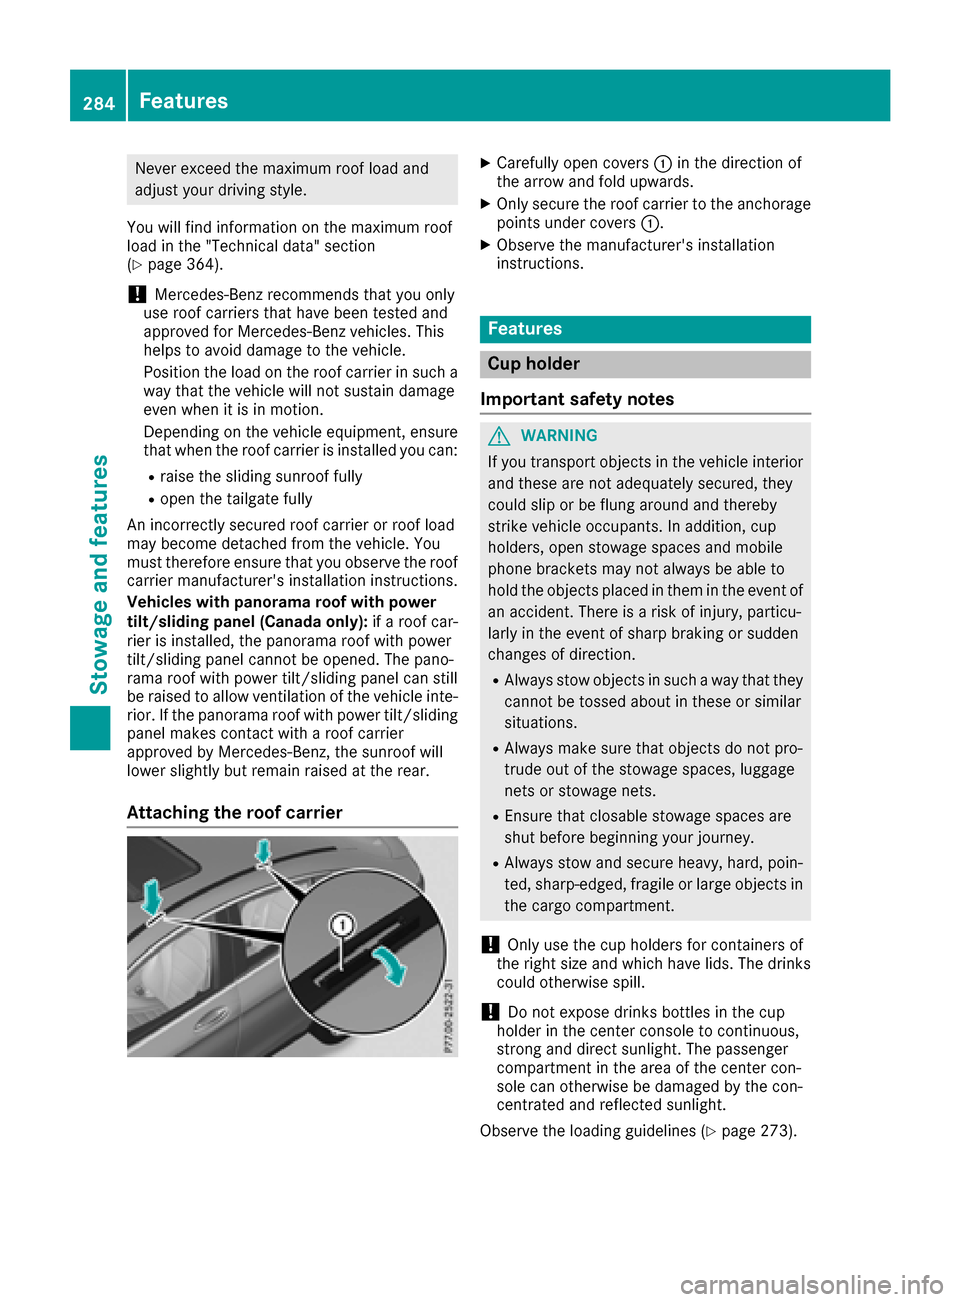
Attaching the roof carrier
XCarefully open covers :in the direction of
the arrow and fold upwards.
XOnly secure the roof carrier to the anchorage
points under covers :.
XObserve the manufacturer's installation
instructions.
Features
Cup holder
Important safety notes
GWARNING
If you transport objects in the vehicle interior
and these are not adequately secured, they
could slip or be flung around and thereby
strike vehicle occupants. In addition, cup
holders, open stowage spaces and mobile
phone brackets may not always be able to
hold the objects placed in them in the event of
an accident. There is a risk of injury, particu-
larly in the event of sharp braking or sudden
changes of direction.
RAlways stow objects in such a way that they cannot be tossed about in these or similar
situations.
RAlways make sure that objects do not pro-
trude out of the stowage spaces, luggage
nets or stowage nets.
REnsure that closable stowage spaces are
shut before beginning your journey.
RAlways stow and secure heavy, hard, poin-
ted, sharp-edged, fragile or large objects in
the cargo compartment.
!Only use the cup holders for containers of
the right size and which have lids. The drinks could otherwise spill.
!Do not expose drinks bottles in the cup
holder in the center console to continuous,
strong and direct sunlight. The passenger
compartment in the area of the center con-
sole can otherwise be damaged by the con-
centrated and reflected sunlight.
Observe the loading guidelines (
Ypage 273).
284Features
Stowage and features
Page 287 of 370
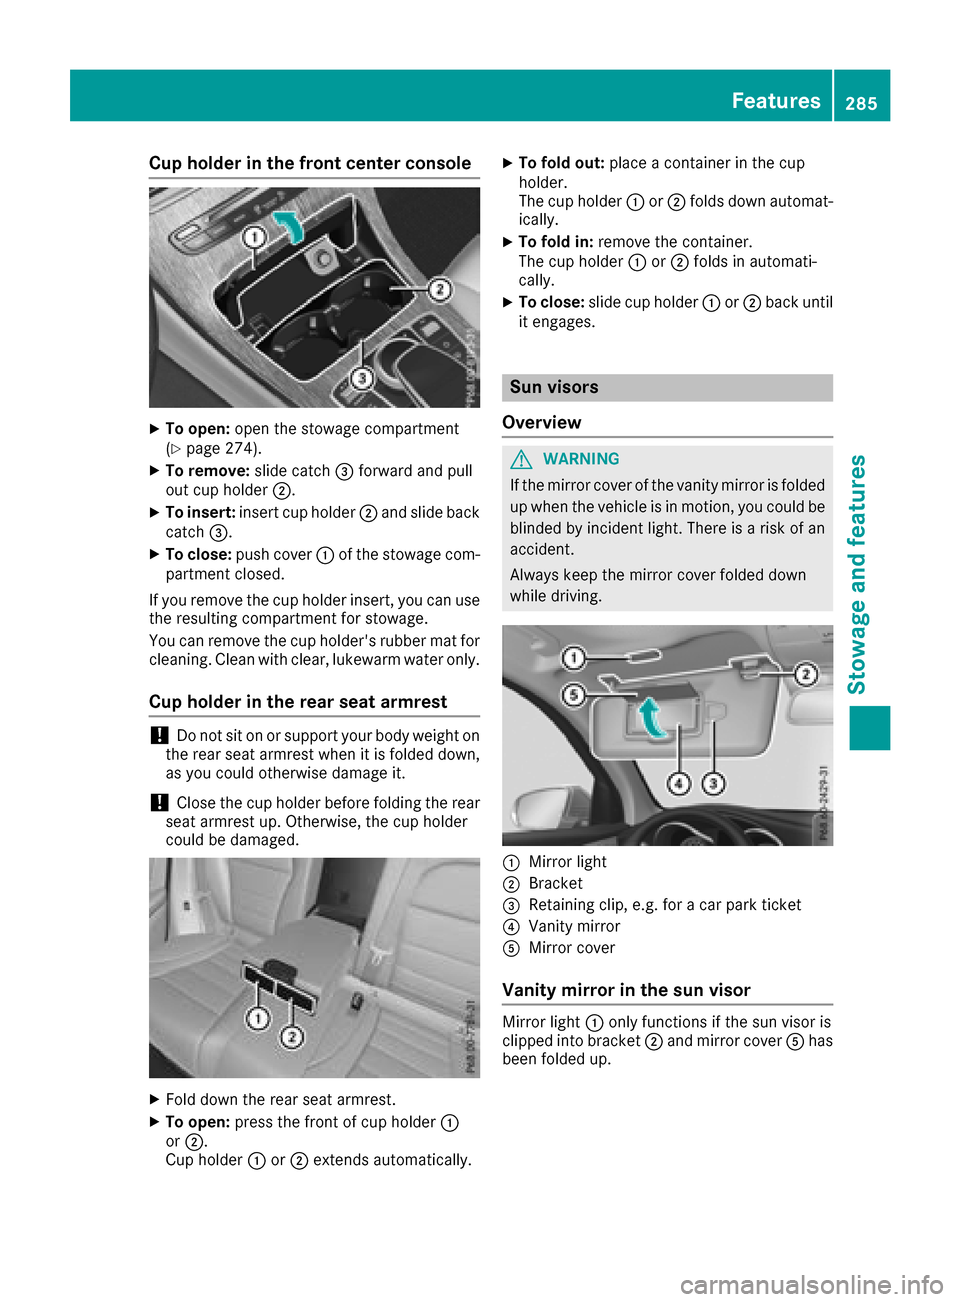
Cup holder in the front center console
XTo open:open the stowage compartment
(Ypage 274).
XTo remove: slide catch=forward and pull
out cup holder ;.
XTo insert:insert cup holder ;and slide back
catch =.
XTo close: push cover :of the stowage com-
partment closed.
If you remove the cup holder insert, you can use
the resulting compartment for stowage.
You can remove the cup holder's rubber mat for
cleaning. Clean with clear, lukewarm water only.
Cup holder in the rear seat armrest
!Do not sit on or support your body weight on
the rear seat armrest when it is folded down,
as you could otherwise damage it.
!Close the cup holder before folding the rear
seat armrest up. Otherwise, the cup holder
could be damaged.
XFold down the rear seat armrest.
XTo open: press the front of cup holder :
or ;.
Cup holder :or; extends automatically.
XTo fold out: place a container in the cup
holder.
The cup holder :or; folds down automat-
ically.
XTo fold in: remove the container.
The cup holder :or; folds in automati-
cally.
XTo close: slide cup holder :or; back until
it engages.
Sun visors
Overview
GWARNING
If the mirror cover of the vanity mirror is folded
up when the vehicle is in motion, you could be
blinded by incident light. There is a risk of an
accident.
Always keep the mirror cover folded down
while driving.
:Mirror light
;Bracket
=Retaining clip, e.g. for a car park ticket
?Vanity mirror
AMirror cover
Vanity mirror in the sun visor
Mirror light :only functions if the sun visor is
clipped into bracket ;and mirror cover Ahas
been folded up.
Features285
Stowage and features
Z
Page 289 of 370
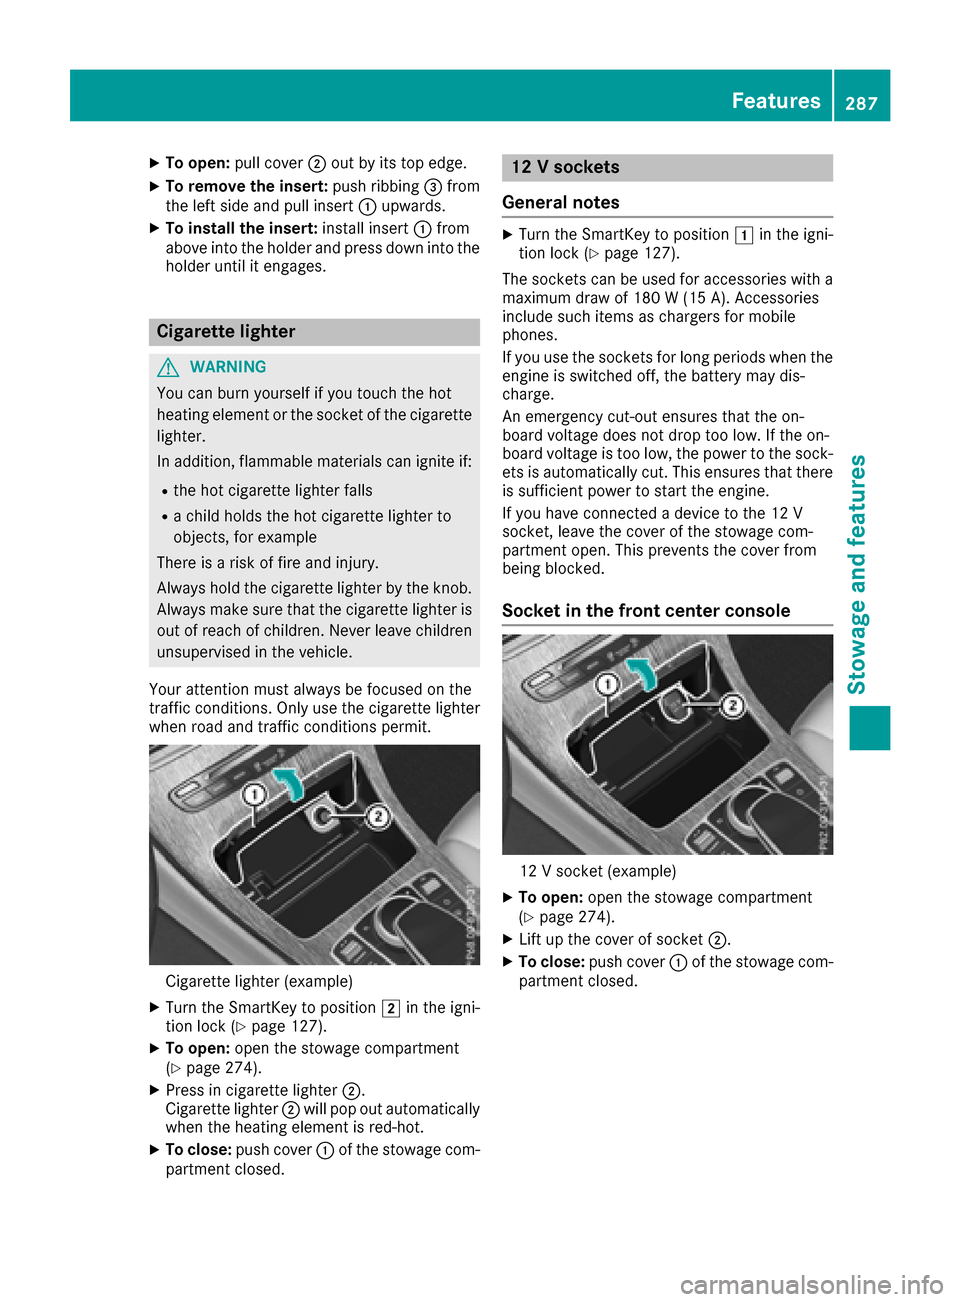
XTo open:pull cover ;out by its top edge.
XTo remove the insert: push ribbing=from
the left side and pull insert :upwards.
XTo install the insert: install insert:from
above into the holder and press down into the
holder until it engages.
Cigarette lighter
GWARNING
You can burn yourself if you touch the hot
heating element or the socket of the cigarette lighter.
In addition, flammable materials can ignite if:
Rthe hot cigarette lighter falls
Ra child holds the hot cigarette lighter to
objects, for example
There is a risk of fire and injury.
Always hold the cigarette lighter by the knob.
Always make sure that the cigarette lighter is
out of reach of children. Never leave children
unsupervised in the vehicle.
Your attention must always be focused on the
traffic conditions. Only use the cigarette lighter when road and traffic conditions permit.
Cigarette lighter (example)
XTurn the SmartKey to position 2in the igni-
tion lock (Ypage 127).
XTo open: open the stowage compartment
(Ypage 274).
XPress in cigarette lighter ;.
Cigarette lighter ;will pop out automatically
when the heating element is red-hot.
XTo close: push cover :of the stowage com-
partment closed.
12 V sockets
General notes
XTurn the SmartKey to position 1in the igni-
tion lock (Ypage 127).
The sockets can be used for accessories with a
maximum draw of 180 W (15 A). Accessories
include such items as chargers for mobile
phones.
If you use the sockets for long periods when the
engine is switched off, the battery may dis-
charge.
An emergency cut-out ensures that the on-
board voltage does not drop too low. If the on-
board voltage is too low, the power to the sock-
ets is automatically cut. This ensures that there
is sufficient power to start the engine.
If you have connected a device to the 12 V
socket, leave the cover of the stowage com-
partment open. This prevents the cover from
being blocked.
Socket in the front center console
12 V socket (example)
XTo open: open the stowage compartment
(Ypage 274).
XLift up the cover of socket ;.
XTo close:push cover :of the stowage com-
partment closed.
Features287
Stowage and features
Z