2017 MERCEDES-BENZ GLC-Class turn signal
[x] Cancel search: turn signalPage 47 of 178
You can find further information on the easy
entry and exit feature in the vehicle Operator's
Manual.
Activating/deactivating the acoustic
locking verification signal
You can also set an audible signal to confirm
that the vehicle has been locked.
XCall upVehicle Settings(Ypage 44).
XTo select Acoustic Lock Feedback: turn
and press the controller.
The function switches on or off, depending on
the previous setting.
You can find further information on the locking
feature in the vehicle Operator's Manual.
Switching the seat belt adjustment
on/off
The BeltAdjustmentfunction adjusts the driv-
er's and front-passenger seat belt to the upper
body of the occupants.
XCall up Vehicle Settings(Ypage 44).
XTo select Belt Adjustment: turn and press
the controller.
The function switches on or off, depending on
the previous setting.
You can find further information on seat belt
adjustment in the vehicle Operator's Manual.
Switching the automatic mirror fold-
ing function on/off
When the Automatic Mirror Foldingfunc-
tion is activated, the outside mirrors fold in auto-
matically as soon as you lock the vehicle from
the outside. The outside mirrors fold out auto-
matically again as soon as you unlock the vehi-
cle.
XCall up Vehicle Settings(Ypage 44).
XTo select Automatic Mirror Folding: turn
and press the controller.
The function switches on or off, depending on
the previous setting.
You can find further information on the auto-
matic folding mirror function in the vehicle Oper-
ator's Manual.
Switching locator lighting on/off
If you switch on the Locator Lightingfunc-
tion, the exterior lighting is switched on for a
short time when it is dark. The light switch must
be set to Ã; see the vehicle Operator's Man-
ual.
The exterior lighting remains on for 40 seconds
after the vehicle is unlocked. When you start the
engine, the locator lighting is switched off and
the automatic driving lights are activated.
XCall up Vehicle Settings(Ypage 44).
XTo select LocatorLighting: turn and press
the controller.
XPress the controller.
The function is switched on or off, depending
on the previous status.
You can find further information on the locator
lighting in the vehicle Operator's Manual.
Activating/deactivating the auto-
matic door locking mechanism
The vehicle is locked automatically when the
ignition is switched on and the vehicle is travel-
ing faster than walking pace.
XCall up Vehicle Settings(Ypage 44).
XTo select Automatic Locking: turn and
press the controller.
The function switches on or off, depending on
the previous setting.
You can find further information on the locking
feature in the vehicle Operator's Manual.
Setting the switch-off delay time
Interior lighting switch-off delay time
The interior lighting is activated for the duration
of the switch-off delay time when the SmartKey
is removed from the ignition lock.
XCall up Vehicle Settings(Ypage 44).
XTo select Interior Lighting DelayedSwitch-off: turn and press the controller.
The setting element is active.
XTo change the delayed switch-off time: turn
and press the controller.
You can find further information on the interior
lighting in the vehicle Operator's Manual.
Vehicle settings45
Vehicle functions
Z
Page 80 of 178

Displaying real-time traffic reports
Starting asearc hfor traffic reports
XTo switch to navigation mode: press the
Ø button.
XTo show th emenu :slid e6 thecontroller .
XTo selectTraffi c:turn and press th econ-
troller.
If satellite signal scanno tbe received or there
are no traffic reports ,you will see amessag e
to this effect .
XTo close thereport: press th econtroller .
Traffic symbol information
:Affected roads wit hindication of direction
;Symbol fo rrepor ttype, e.g. traffic flo wmes -
sag e
XTo switch to navigation mode: press the
Ø button.
XTo show th emenu :slid e6 thecontroller .
XTo selectTraffi c:turn and press th econ-
troller.
XTo selec tTraffi cSymbol Information:
turn and press th econtroller .
The map appears and shows th eavailable
traffic information as icons. The first traffic
information is highlighted.
XTo highlight additional traffic symbols ,selec t
Nex torPrevious.
XTo move th emap: selectMap.
You can move th emap to enable further traf-
fic information to be displayed.
You can hav eth etraffic repor trelevant to atraf-
fic icon shown .
XTo selectDetail s:turn and press th econ-
troller.
The repor tshows th efollowin ginformation :
RState/province ,road and display of th eaffec -
te ddirection
RSection of th eroad to whic hth etraffic repor t
applies
RTraffic icon and traffic repor t
XTo close thedetailed display :press th e
% button.
Displaying reports on th erout e
The function is only available whil erout eguid -
anc eis active .It shows th eavailable traffic
reports affecting th ecurren troute.
If there are no reports fo rth erout eor th efunc-
tion is no tsupporte din th eselecte dlanguage:
th eMessages
OnRoutemen uitem is gray and
canno tbe selected.
78Real-time traffic reports
Navigation
Page 115 of 178
XTo selectYes: turn and press the controller.
All speed dials are deleted.
Messages (text messages and e-
mails)
General notes
New messages are identified by the /sym-
bol in the display of the multimedia system and
an audible signal. Once you have read all the
messages, the symbol is no longer displayed.
The multimedia system displays the 100 newest
text messages and e-mails.
The ú symbol is displayed when the mobile
phone's message memory is full. The symbol is
no longer displayed if you delete messages on
the mobile phone.
Function restrictions
Text messages cannot be written while the vehi-
cle is in motion.
Requirements
To use the message functions, the connected
mobile phone must support the MAP Bluetooth®
profile. The prompt for the MAP Bluetooth®pro-
file may have to be confirmed on the mobile
phone.
With some mobile phones, some settings still
have to be made after connecting to the multi-
media system (see the manufacturer's operat-
ing instructions). The messages are then dis-
played the next time you connect to the multi-
media system.
An e-mail account must be set up on the mobile
phone for the e-mail function (see the manufac-
turer’s operating instructions).
To read and write e-mails in the multimedia sys- tem, the e-mail account first needs to be con-
figured (
Ypage 114).
Some mobile phones with the MAP Bluetooth®
profile:
Ronly show new text messages
Rdo not support the deleting or editing of text
messages
Rdo not support the drafts folder for text mes- sages
Rdo not support the sending of text messages
Rdo not support the e-mail function
Rdo not send messages when in a locked sta-
tus.
Not all mobile phones available on the market
are equally suitable. Further information about
settings and supported functions of Bluetooth
®-
capable mobile phones can be found on the
Internet at
http://www.mercedes-benz.com/connect .
Or call the Mercedes-Benz Customer Assistance
Center at 1-800-FOR-MERCedes
(1-800-367-6372) (for the USA) or Customer
Relations at 1-800-387-0100 (for Canada).
Settings
Calling up the settings menu for mes-
sages
XTo call up the telephone menu: press the
% button.
XTo switch to the menu bar: slide 6the con-
troller.
XTo select 1: turn and press the controller.
The message menu is displayed.
XTo switch to the menu bar: slide 6the con-
troller.
XTo select Settings: turn and press the con-
troller.
The text message settings and the available e-
mail accounts of the connected mobile phone
will be displayed.
Configuring the text messages dis-
played
XCall up the settings menu for messages
(Ypage 113).
XTo highlight Text Message: turn the control-
ler.
XTo select G: slide 9the controller.
A menu with the following options is shown:
RAll Messages
All the messages are displayed.
RNew Messages
Only the messages that are new on the
mobile phone are displayed. You can also
Messages (text messages and e-mails)113
Telephone
Z
Page 127 of 178

Connection status
:Display of existing connection and signal
strength of the mobile phone network
In most cases, the current connection status is
then shown in the status bar when you switch to
another main function.
Detailed connection status
XCall up Internet functions (Ypage 124).
XTo switch to the menu bar: slide 6the con-
troller.
XTo select Settings: turn and press the con-
troller.
XTo select Connection Status: turn and
press the controller.
The following information is displayed:
Rthe volume of transferred data
Rconnection status
Rthe device name of the mobile phone
Ending the connection
USA: you cannot cancel the connection your-
self. The Internet connection is automatically
terminated if the system does not recognize any
user input within a five-minute time period.
Canada:
XCall up Internet functions (Ypage 124).
XTo switch to the menu bar: slide 6the con-
troller.
XTo select ©: turn and press the controller.
If the mobile phone Internet connection is can-
celed, the multimedia system tries to reconnect.
You should therefore always end the connection
in the multimedia system.
Mercedes-Benz Apps
General notes
To be able to use Mercedes-Benz Apps, you have
to register and confirm the terms and condi-
tions.
Calling up Mercedes-Benz Apps
XCall up Internet functions (Ypage 124).
XTo select Mercedes-Benz Apps: turn and
press the controller.
XTo call up the app: turn and press the con-
troller.
You can find further Mercedes-Benz Apps and
information under:
http://apps.mercedes-benz.com/apps/
iThe available features are country-depend-
ent.
License fees may be applicable.
Mercedes-Benz Companion
Introduction
The Mercedes-Benz Companion app enables
door-to-door navigation.
Door-to-door navigation means:
RThe current destination is transferred from
the vehicle's multimedia system to an exter-
nal device (iPhone
®or Apple Watch®).
This enables you to continue navigating to a
destination which is in a pedestrian zone, for
example.
RConversely, a destination can be selected on
the external device and transferred to the
vehicle's multimedia system.
Requirements
Observe the following requirements for using
Mercedes-Benz Companion:
RThe iPhone®must be switched on and logged
into a mobile phone network.
RThe iPhone®must have an IOS version higher
than version 8.0.
Mercedes-Benz Companion125
Online and Internet functions
Z
Page 136 of 178
Using the search function
XIn radio mode: slide6the controller.
The radio menu bar appears.
XSelect èand enter the first letters of the
required station using the controller.
XPress OKto confirm.
The multimedia system displays a list of avail-
able stations.
XTo select stations from the list: turn the con-
troller and press to confirm.
Using the preset position
XIn radio mode: slide 6the controller.
XTo select Preset: turn and press the control-
ler.
XTo select Enter Preset: turn and press the
controller.
XEnter the station preset of the desired station.
Station list
XIn radio mode, press the controller.
The station list appears with the stations cur-
rently available.
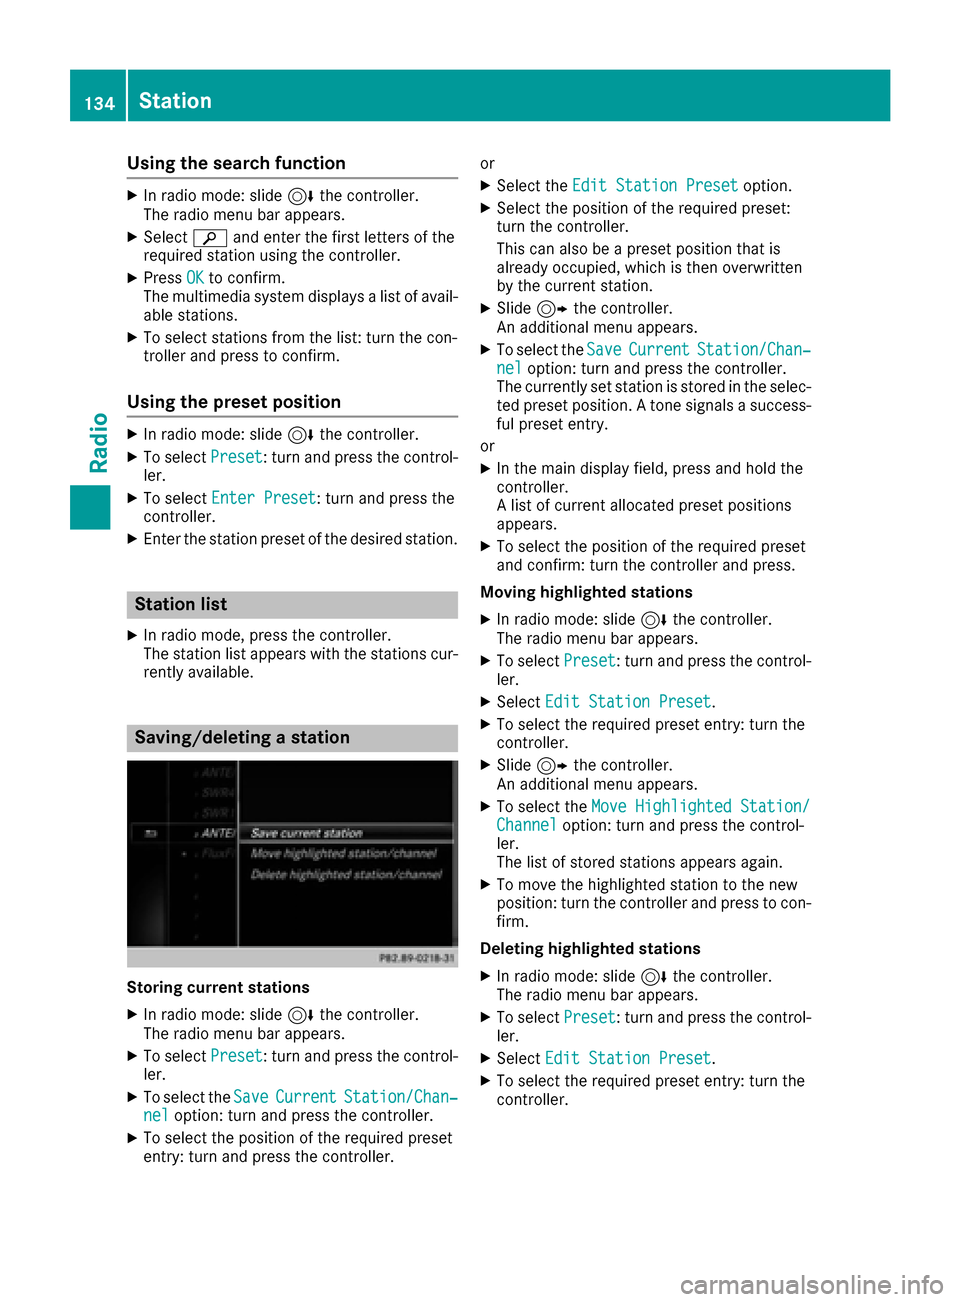
Saving/deleting a station
Storing current stations
XIn radio mode: slide 6the controller.
The radio menu bar appears.
XTo select Preset: turn and press the control-
ler.
XTo select the SaveCurrentStation/Chan‐neloption: turn and press the controller.
XTo select the position of the required preset
entry: turn and press the controller. or
XSelect the
Edit Station Presetoption.
XSelect the position of the required preset:
turn the controller.
This can also be a preset position that is
already occupied, which is then overwritten
by the current station.
XSlide9the controller.
An additional menu appears.
XTo select the SaveCurrentStation/Chan‐neloption: turn and press the controller.
The currently set station is stored in the selec-
ted preset position. A tone signals a success-
ful preset entry.
or
XIn the main display field, press and hold the
controller.
A list of current allocated preset positions
appears.
XTo select the position of the required preset
and confirm: turn the controller and press.
Moving highlighted stations
XIn radio mode: slide 6the controller.
The radio menu bar appears.
XTo select Preset: turn and press the control-
ler.
XSelect Edit Station Preset.
XTo select the required preset entry: turn the
controller.
XSlide9the controller.
An additional menu appears.
XTo select the Move Highlighted Station/Channeloption: turn and press the control-
ler.
The list of stored stations appears again.
XTo move the highlighted station to the new
position: turn the controller and press to con-
firm.
Deleting highlighted stations
XIn radio mode: slide 6the controller.
The radio menu bar appears.
XTo select Preset: turn and press the control-
ler.
XSelect Edit Station Preset.
XTo select the required preset entry: turn the
controller.
134Station
Radio
Page 138 of 178
If available, you will see:
Rthe track that is currently being played
Rthe artist of the track that is currently being
played
Rthe album name
Rthe channel abbreviation
Rthe logo of the station or Artist Experience®
Back to radio display:
XTo selectInfo: slide6and press the con-
troller.
Satellite radio
General notes
The satellite radio mode requires satellite radio
equipment and registration with a satellite radio
provider.
Note that the categories and channels shown in
the illustrations depend on the program content
offered by the provider. The illustrations and
descriptions in these operating instructions may
therefore differ from the channels and catego-
ries offered by the provider.
Satellite radio mode may be temporarily unavail-
able or interrupted for a variety of reasons.
These include environmental or topographical
conditions as well as other factors beyond the
control of Mercedes-Benz USA, LLC. This means
operation may not be possible in certain areas.
These include:
Rtunnels
Rparking garages
Rlocations inside or next to buildings
Rlocations in the vicinity of other structures
Sirius XM®Satellite Radio offers more than 140
digital-quality radio channels, providing 100%
commercial-free music, sports, news and enter-
tainment.
Sirius XM
®Satellite Radio uses a fleet of high-
performance satellites to broadcast around the
clock throughout the USA and Canada.
The satellite radio program is available for a
monthly fee. Details are available from the Sirius
XM
®Service Center and at
http://www.siriusxm.com (USA) or
http://www.siriusxm.ca (Canada).
Your new Mercedes-Benz vehicle comes with
Sirius XM
®Satellite Radio pre-installed at the factory. This service is free for a six-month trial
period. About a month before the trial period
ends, information will be provided on how to
extend this subscription. An acoustic signal
sounds and a message is shown, describing how
the subscription can be extended.
iSirius, XM and all related marks and logos
are trademarks of Sirius XM Radio Inc. and its
subsidiaries. All other marks, channel names
and logos are the property of their respective
owners. All rights reserved.
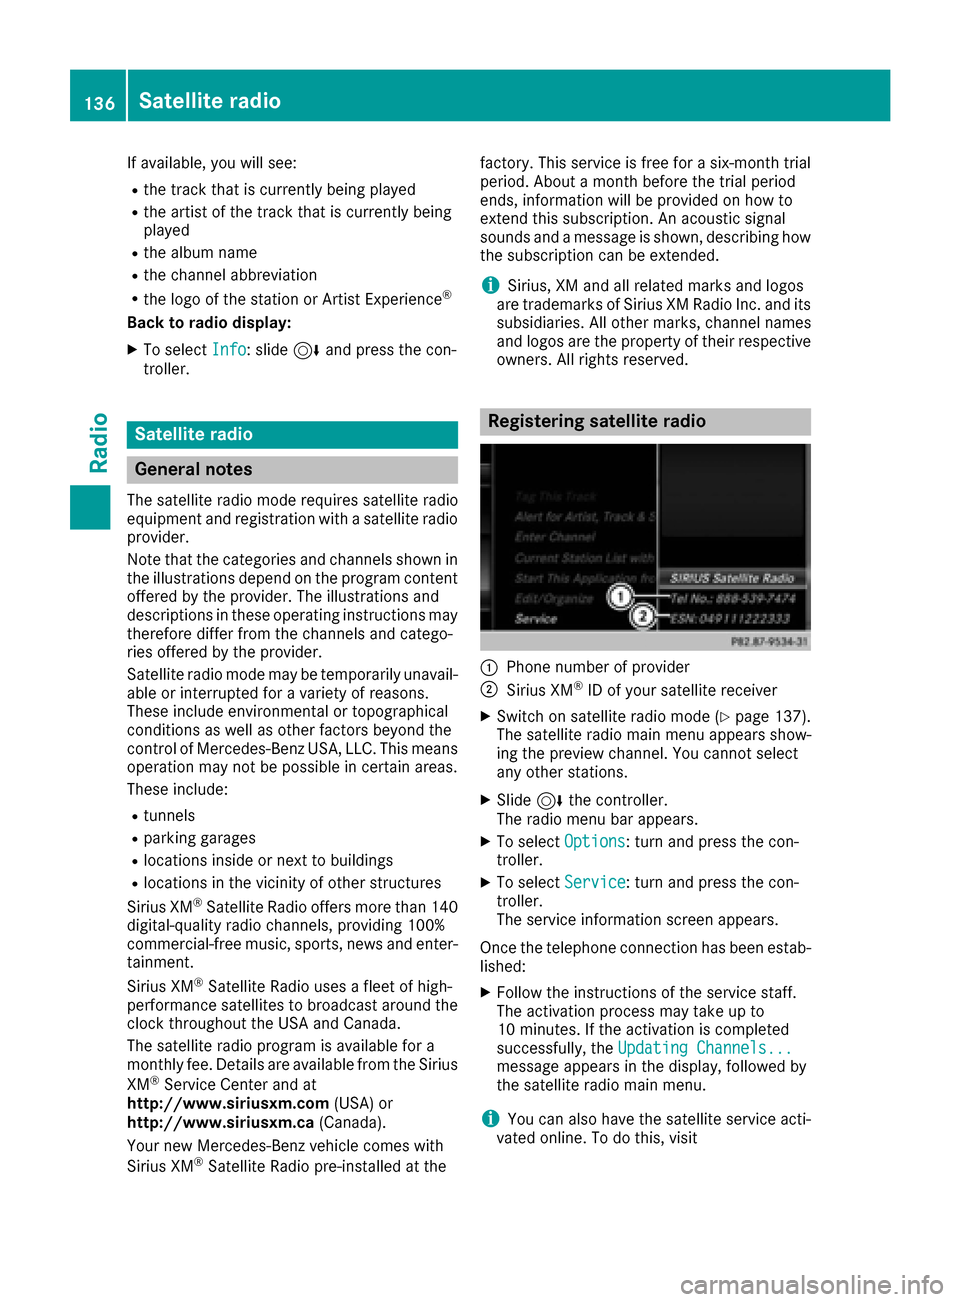
Registering satellite radio
:Phone number of provider
;Sirius XM®ID of your satellite receiver
XSwitch on satellite radio mode (Ypage 137).
The satellite radio main menu appears show-
ing the preview channel. You cannot select
any other stations.
XSlide 6the controller.
The radio menu bar appears.
XTo select Options: turn and press the con-
troller.
XTo select Service: turn and press the con-
troller.
The service information screen appears.
Once the telephone connection has been estab-
lished:
XFollow the instructions of the service staff.
The activation process may take up to
10 minutes. If the activation is completed
successfully, the Updating Channels...
message appears in the display, followed by
the satellite radio main menu.
iYou can also have the satellite service acti-
vated online. To do this, visit
136Satellite radio
Radio
Page 139 of 178
http://www.siriusxm.com(USA) or
http://www.siriusxm.ca (Canada).
iIf registration is not included when purchas-
ing the system, your credit card details will be
required to activate your account.
If the satellite receiver is not installed correctly, the Device
Unavailablemessage will appear.
Switching to satellite radio
XTo show the main function bar: slide 5the
controller.
XTo select Radio: turn and press the controller.
The radio display appears. You will hear the
last station played on the last waveband
selected.
XTo select Radioin radio mode: slide 5and
press the controller.
The menu with the available radio modes
appears.
XTo select SatRadio: turn and press the con-
troller.
The No
Servicemessage appears if there is no
signal.
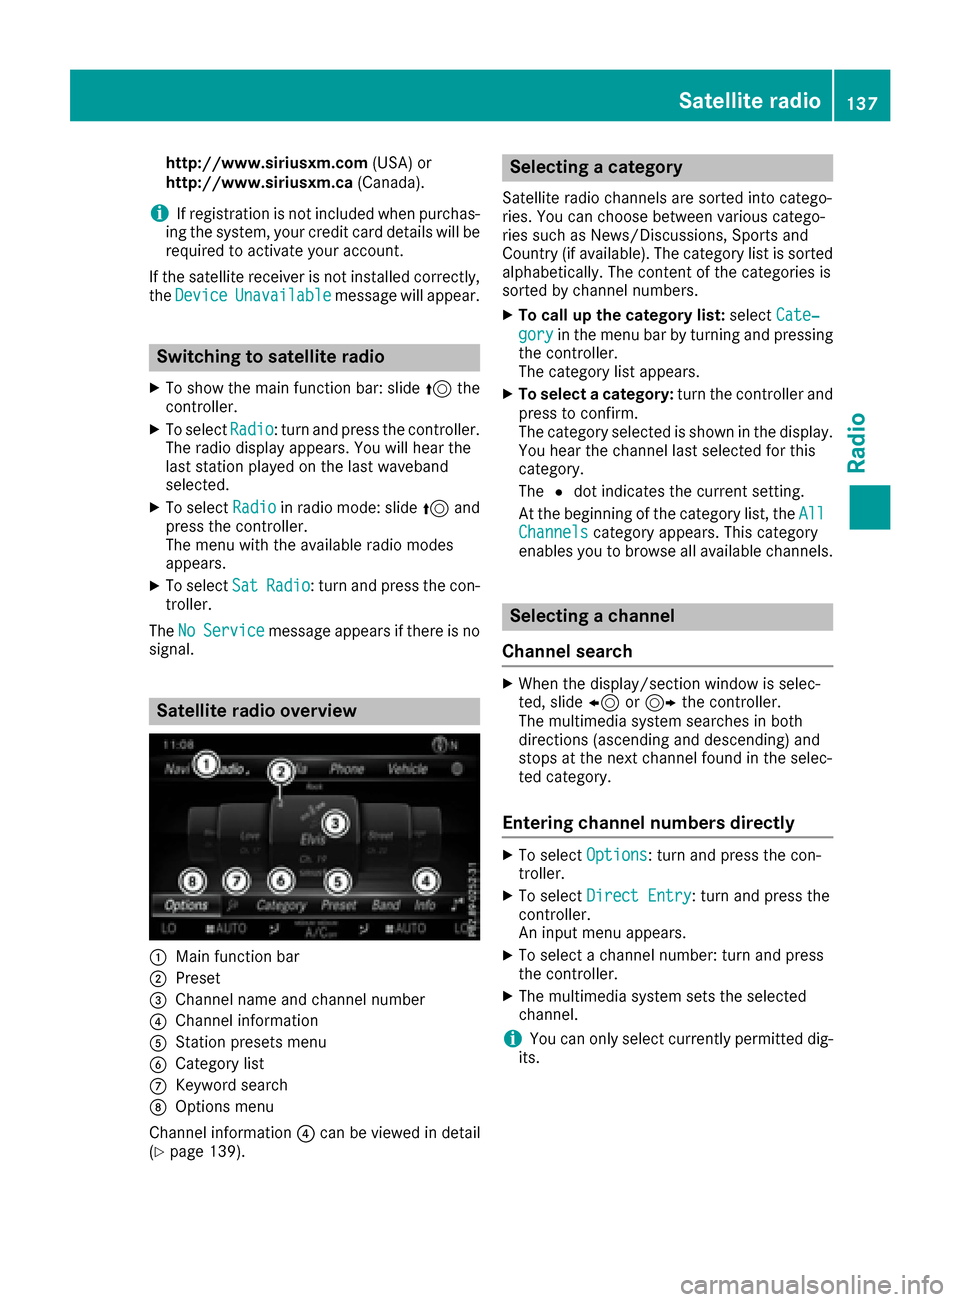
Satellite radio overview
:Main function bar
;Preset
=Channel name and channel number
?Channel information
AStation presets menu
BCategory list
CKeyword search
DOptions menu
Channel information ?can be viewed in detail
(
Ypage 139).
Selecting a category
Satellite radio channels are sorted into catego-
ries. You can choose between various catego-
ries such as News/Discussions, Sports and
Country (if available). The category list is sorted
alphabetically. The content of the categories is
sorted by channel numbers.
XTo call up the category list: selectCate‐
goryin the menu bar by turning and pressing
the controller.
The category list appears.
XTo select a category: turn the controller and
press to confirm.
The category selected is shown in the display.
You hear the channel last selected for this
category.
The #dot indicates the current setting.
At the beginning of the category list, the All
Channelscategory appears. This category
enables you to browse all available channels.
Selecting a channel
Channel search
XWhen the display/section window is selec-
ted, slide 8or9 the controller.
The multimedia system searches in both
directions (ascending and descending) and
stops at the next channel found in the selec-
ted category.
Entering channel numbers directly
XTo select Options: turn and press the con-
troller.
XTo select Direct Entry: turn and press the
controller.
An input menu appears.
XTo select a channel number: turn and press
the controller.
XThe multimedia system sets the selected
channel.
iYou can only select currently permitted dig-
its.
Satellite radio137
Radio