2017 MERCEDES-BENZ C-Class Setting time
[x] Cancel search: Setting timePage 45 of 178

Your multimediasyste mequipment
These operatin ginstruction sdescribe all th e
standar dan doptional equipment of your multi-
media system, as available at th etime of going
to press. Country-specifi cdifference sare pos -
sible. Bear in min dthat your vehicle may no t
feature all function sdescribed here. Thi salso
applies to safety-relevan tsystems an dfunc-
tions.
Read th einformation on qualifie dspecialis t
workshop sin th evehicle Operator's Manual.
Important safet ynotes
GWARNING
If you operat emobile communication equip-
men twhil edriving, you will be distracted from
traffic conditions. You could also los econtro l
of th evehicle. There is aris kof an accident.
Only operat ethis equipment when th evehicle
is stationary.
You mus tobserv eth elegal requirements fo rth e
country in whic hyou are currentl ydrivin gwhen
operatin gmobile communication sequipment in
th evehicle.
Vehicl esettings
Calling up vehicle settings
XPress th eØ button.
or
XPress Vehicl ein themain function bar .
The vehicle men uis displayed.
XTo selec tVehicle Settings:press th econ-
troller.
The Vehicl eSettings
men uis active .
XTo selectth edesire dvehicle setting :turn an d
press th econtroller .
The main are awit hth esetting elemen tis
active .
Selecting adifferent vehicle setting:
XTo activat eth emen ufo rselecting th evehicle
setting :slid e5 thecontroller . Exiting th
evehicle settings :
XTo select& :slid e6 andpress th econ-
troller.
Ambien tlighting
General notes
You can set th efollowin gfo rth eambien tlight-
ing:
RBrightness
Thi ssetting makes an additional change to
th ebrightness of th eambien tlighting .
RColor
Thi ssetting changes th ecolor of th eambien t
lighting .
Setting th ebrightness
XCall up VehicleSettings(Ypage 43).
XTo selec tAmbien tLigh tBrightness:turn
an dpress th econtroller .
The setting elemen tis active .The brightness
valu eis displayed.
XTo change th ebrightness value: turn th econ-
troller.
You can fin dfurther information on th einterio r
lighting in th evehicle Operator's Manual.
Setting th ecolor
XCall up VehicleSettings(Ypage 43).
XTo selec tAmbien tLigh tColo r:turn an d
press th econtroller .
The setting elemen tis active .
XTo selec t acolor :turn an dpress th econtrol-
ler .
You can fin dfurther information on th einterio r
lighting in th evehicle Operator's Manual.
Switching th edisplay lighting on/of f
If thevehicle is no tequippe dwit hth e"Ambien t
lighting "package, you can turn th edisplay light-
in g on or of fwit hthis function .
Vehicle settings43
Vehicle functions
Z
Page 46 of 178

XCallupVehicle Settings(Ypage 43).
XTo select Ambient Light: Display: turn
and press the controller.
The function switches on or off, dependin g on
the previous setting.
iThe brightness can beadjusted using the
controller on the rotary light switch.
You can find further information on the interior
lighting inthe veh icleOperator's Manual.
Setting the easy entry and exit feature
This function makes getting inand out of your
veh icle easier.
XCall upVehicle Settings(Ypage 43).
XTo select Easy Entry/Exit: turn and press
the controller.
The setting element isactive.
XTo change the setting: press the controller.
You can find further information on the easy
entry and exit featureinthe veh icleOperator's
Manual.
Activating/deactivating the acoustic
locking verification signal
You can also set an audiblesignal to confirm
that the veh iclehas been locke d.
XCallupVehicle Settings(Ypage 43).
XTo select Acoustic Lock Feedback: turn
and press the controller.
The function switches on or off, dependin g on
the previous setting.
You can find further information on the locking
feature inthe veh icleOperator's Manual.
Switching the seat belt adjustment
on/off
TheBeltAdjustmentfunction adjusts the driv-
er's and front passenger seat beltto the upper
body of the occupants.
XCallupVehicle Settings(Ypage 43).
XTo select Belt Adjustment: turn and press
the controller.
The function switches on or off, dependin g on
the previous setting. You can find further information on seat belt
adjustment in the vehicle Operator's Manual.
Switching the automatic mirror fold-
ing function on/off
When the
Automatic Mirror Foldingfunc-
tion isactivated, the outside mirrors fold in auto-
matically as soon as you lock the vehicle from
the outside. The outside mirrors fold out auto-
matically again as soon as you unlock the veh i-
cle.
XCall up Vehicle Settings(Ypage 43).
XTo select Automatic Mirror Folding: turn
and press the controller.
The function switches on or off, depending on
the previous setting.
You can find further information on the auto-
mat icfolding mirror function inthe vehicle Oper-
ator's Manual.
Switching locator lighting on/off
If you switch on the Locator Lightingfunc-
tion, the exterior lighting is switched on for a
short time when it is dark. The light switch must
be set to Ã; see the vehicle Operator's Man-
ual.
The exterior lighting remains on for 40 seconds
after the vehicle is unlocked. When you start the
engine, the locator lighting is switched off and
the automatic driving lights are activated.
XCall up Vehicle Settings(Ypage 43).
XTo select LocatorLighting: turn and press
the controller.
XPress the controller.
The function isswitched on or off, depending
on the previous status.
You can find further information on the locator
lighting in the vehicle Operator's Manual.
Activating/deactivating the auto-
matic door locking mechanism
The vehicle islocked automatically when the
ignition is switched on and the vehicle istravel-
ing faster than walking pace.
44Vehicle settings
Vehicle functions
Page 47 of 178

XCallupVehicle Settings(Ypage 43).
XTo select Automatic Locking: turn and
press the controller.
The function switches on or off, dependin g on
the previous setting.
You can find further information on the locking
feature inthe veh icleOperator's Manual.
Setting the switch-off delay time
Interior lighting switch-off delay time
The interior lighting isactivated for the duration
of the switch-off delay time when the SmartKey
is removed from the ignition lock.
XCall upVehicle Settings(Ypage 43).
XTo select Interior Lighting DelayedSwitch-off: turn and press the controller.
The setting element isactive.
XTo change the delayed switch-off time: turn
and press the controller.
You can find further information on the interior
lighting inthe veh icleOperator's Manual.
Exterior lighting switch-off delay time
Ifyou switch on the Exterior LightingDelayed Switch-offfunction, the exterior
lighting is switched on for a short time after the
engine is switched off. The light switch must be
set to Ã; see the veh icleOperator's Manual.
The exterior lighting remains on for 60 seconds
after the engine is switched off. Ifyou close all
the doors and the tailgate, the exterior lighting
swit ches off after the set time.
XCall upVehicle Settings(Ypage 43).
XTo select Exterior Lighting DelayedSwitch-off: turn and press the controller.
The setting element isactive.
XTo change the delayed switch-off time: turn
and press the controller.
Activating/deactivating the trunk lid
opening height restriction
Activating the Trunk Opening-heightRestrictionfunctionallowsyou to avoid
bumping the trunk lidon a low garage cei ling, for
example. Setting via the multimed iasystem is
availab lefor the Sedan and Coupe.
XCall up Vehicle Settings(Ypage 43 ).
XTo select Trunk Opening-heightRestriction: turn and press the controller.
The function switches on or off, depending on
the previous setting.
360° camera
General notes
The 360° camera covers the immediate sur-
roundings of the vehicle and assists you, for
instance when parking or at exits with reduced
visibility.
The 360° camera is only an aid. It is not a
replacement for your attention to your imm edi-
ate surroundings. You are always responsible
for safe maneuvering and parking. Make sure
that no persons or animals are inthe maneu-
vering range.
For more information on the 360° camera see
the vehicle Operator's Manual.
Displaying the 360° camera image
The 360° camera image can be displayed if:
Ryour vehicle isequipped with a 360° camera
Rthe 360°Camerafunction isswitched on; see
the vehicle Operator's Manual
XPress the Øbutton.
or
XPress Vehicleinthe main function bar.
The vehicle menu isdisplayed.
XTo select 360° Camera: turn and press the
controller.
The 360° camera image appears in split-
screen mode.
You willsee the previous view on the display if,
when the function is switched on:
Ryou turn the SmartKey to position 1in the
ignition lock
Ryou select transmission position P
Rwhen you are driving at moderate speeds
Switching the display off manually
XTo select &: slide 6and press the con-
troller.
360° camera45
Vehicle functions
Z
Page 50 of 178
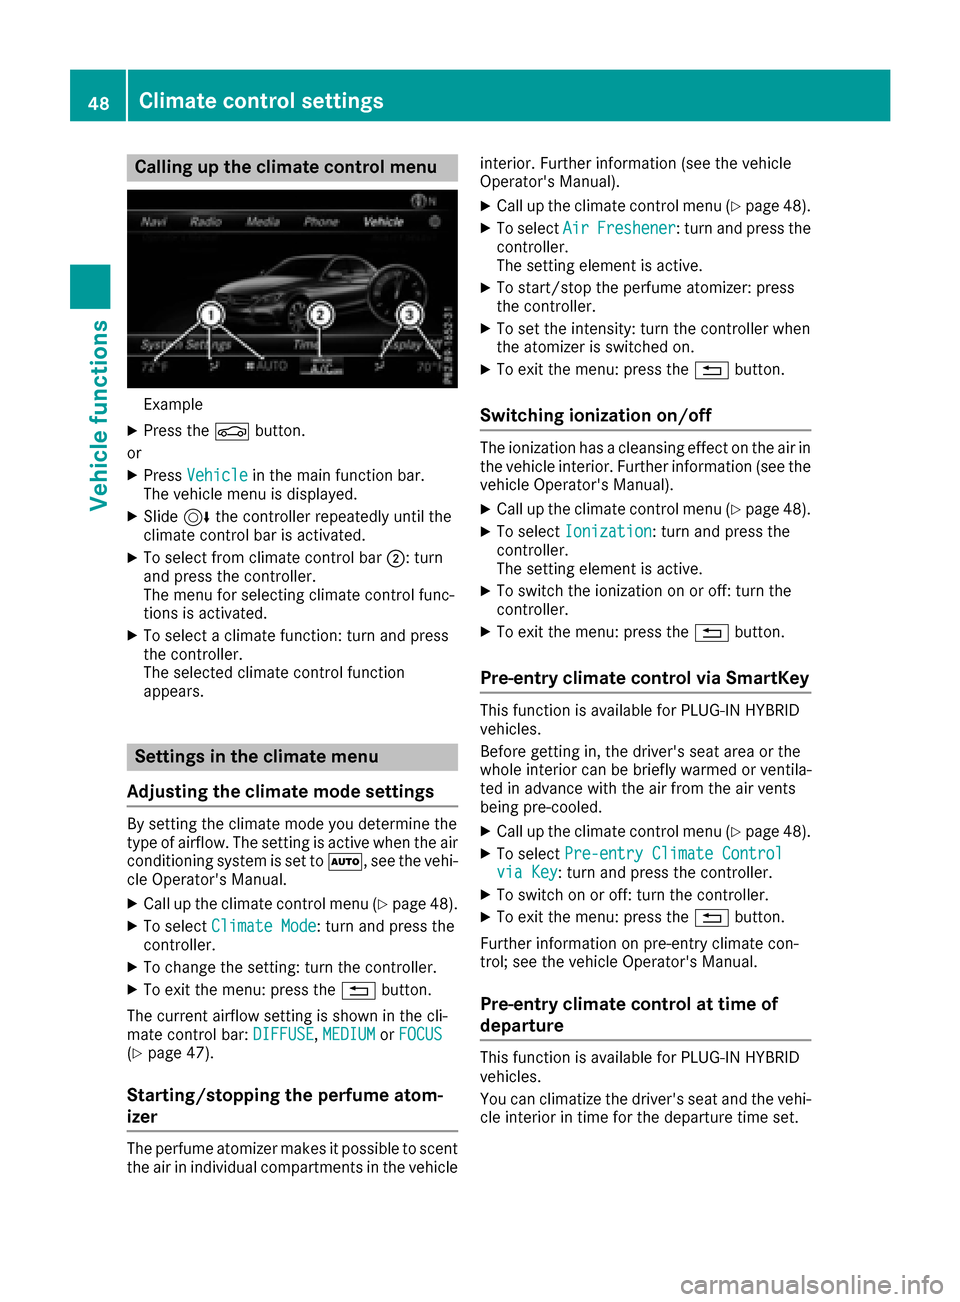
Calling up the climate control menu
Example
XPress theØbutton.
or
XPress Vehiclein the main function bar.
The vehicle menu is displayed.
XSlide 6the controller repeatedly until the
climate control bar is activated.
XTo select from climate control bar ;: turn
and press the controller.
The menu for selecting climate control func-
tions is activated.
XTo select a climate function: turn and press
the controller.
The selected climate control function
appears.
Settings in the climate menu
Adjusting the climate mode settings
By setting the climate mode you determine the
type of airflow. The setting is active when the air
conditioning system is set to Ã, see the vehi-
cle Operator's Manual.
XCall up the climate control menu (Ypage 48).
XTo select Climate Mode: turn and press the
controller.
XTo change the setting: turn the controller.
XTo exit the menu: press the %button.
The current airflow setting is shown in the cli-
mate control bar: DIFFUSE
,MEDIUMor FOCUS(Ypage 47).
Starting/stopping the perfume atom-
izer
The perfume atomizer makes it possible to scent
the air in individual compartments in the vehicle interior. Further information (see the vehicle
Operator's Manual).
XCall up the climate control menu (Ypage 48).
XTo select
AirFreshener: turn and press the
controller.
The setting element is active.
XTo start/stop the perfume atomizer: press
the controller.
XTo set the intensity: turn the controller when
the atomizer is switched on.
XTo exit the menu: press the %button.
Switching ionization on/off
The ionization has a cleansing effect on the air in
the vehicle interior. Further information (see the
vehicle Operator's Manual).
XCall up the climate control menu (Ypage 48).
XTo select Ionization: turn and press the
controller.
The setting element is active.
XTo switch the ionization on or off: turn the
controller.
XTo exit the menu: press the %button.
Pre-entry climate control via SmartKey
This function is available for PLUG ‑IN HYBRID
vehicles.
Before getting in, the driver's seat area or the
whole interior can be briefly warmed or ventila-
ted in advance with the air from the air vents
being pre-cooled.
XCall up the climate control menu (Ypage 48).
XTo select Pre-entry Climate Controlvia Key: turn and press the controller.
XTo switch on or off: turn the controller.
XTo exit the menu: press the %button.
Further information on pre-entry climate con-
trol; see the vehicle Operator's Manual.
Pre-entry climate control at time of
departure
This function is available for PLUG ‑IN HYBRID
vehicles.
You can climatize the driver's seat and the vehi-
cle interior in time for the departure time set.
48Climate control settings
Vehicle functions
Page 51 of 178
XCallup the climate control menu (Ypage 48).
XTo select Pre-entry Climate Ctrl. atDepartureTime: turn and press the control-
ler.
A rotary menu appears.
XTo select the setting: turn the controller.
The menu symbol, text and image show the
selected setting.
XTo exit the menu: press the %button.
Settings in the bottom bar of the cli-
mate control menu
Activating/deactivating climate con-
trol
This setting ismade inthe bottom bar of the
clim ate control menu.
XCall up the climate control menu (Ypage 48).
XSlide6 the controller repeatedly untilthe
bottom bar is activated.
XTo select OClimate Ctrl On: turn and
press the controller.
The climate control is switched on Oor off
ª dependin g on the settings.
If the clim ate control is switched off:
Rtheclim ate control setting functions are
deactivate d.
Rtheblower is swit ched off.
Rthe air recirculation flaps are closed
Switching cooling with air dehumidifi-
cation on/off
This settingismade inthe bottom bar of the
clim ate control menu.
XCall up the climate control menu (Ypage 48).
XSlide6 the controller repeatedly untilthe
bottom bar isactivated.
XTo select OA/C: turn and press the control-
ler.
XSwit ch co olingwit h air dehumidif ication on
O or off ª.
iThe current status of the co oling function is
displ ayed inthe clim ate control bar: A/C ON
– activated, A/C OFF – deactivated
(
Ypage 47).
iDeactivating the cooling with air dehumidi-
fication function reduces fuel consumption.
Synchronizing the climate control set-
tings
Use OSync(synchronization) to select the cli-
mate control setting for all zones together Oor
separate lyª.
This setting is made in the bottom bar of the
clim ate control menu.
XCall up the climate control menu (Ypage 48).
XSlide 6the controller repeatedly until the
bottom bar is activated.
XTo select OSync: turn and press the con-
troller.
XSwit ch the synchronization function on Oor
off ª.
For further information on synchronizing climate
control settings (see the vehicle Operator's
Manual).
DYNAMIC SELECT
General notes
You can use DYNAMIC SELECTto configure the
foll owin g settings for the Individual drive pro-
gram:
RDrive system
RSuspension
RSt eering
RClimate control
RECO start/stop function
In addition, current vehicle and engine data is
visualized via the two further Vehicle
Dataand
Engine Datamenus.
iIn a few countries, the ECO start/stop func-
tion isdeactivated at the factory due to the
availab lefuel grade. In this case, the ECO
start /stop function is not availab leregardless
of the display in the multimedia system dis-
play.
The ECO Assist setting is availab leon
PLUG‑ IN HYBRID vehicles.
In Mercedes-AMG vehicles, you can use
DYNAMIC
SELECTto configure the foll owing set-
tings for the Individual drive program:
RDrive system
RSuspension
DYNAMIC SELECT49
Vehicle functions
Z
Page 52 of 178
RTransmission
RSports exhaust system
RElectronic Stability Program ESP®
There may be fewer settings or set values, or
none, depending on your vehicle's equipment.
For further information on the Individual drive
program; see the vehicle Operator's Manual.
Configuration via the DYNAMIC
SELECT switch
XUse the DYNAMIC SELECT switch to select
the Individual drive program; see the vehicle
Operator's Manual.
A window appears after a short while.
XTo confirmAdjust:press the controller.
The Individual Configuration
menu for
setting the drive program appears.
XTo select Drive,Suspension,Steering,
Climate Control
or Eco Start/StopFunction:turn and press the controller.
XSelect individual settings.
The menu symbol, text and image show the
selected setting.
In Mercedes-AMG vehicles, you can configure
the settings of the drive system, suspension,
transmission, sports exhaust system and Elec-
tronic Stability Program ESP
®.
Displaying vehicle data
XPress the Øbutton.
or
XPress Vehiclein the main function bar.
The vehicle menu is displayed.
XTo select DYNAMIC SELECT:turn and press
the controller.
The Individual
Configuration,VehicleDataand Engine Datamenus appear.
XSelect Vehicle Data.
Updates of the following data are displayed:
RRoad type analogous to the selected drive
program
RG-force display of longitudinal and lateral
acceleration
RAccelerator and brake pedal activity
RActivity of the suspension struts
RWheel angle
ROverrun mode animation
The G-force display is not available in all of the
drive programs.
Daytime or night-time view is shown depending
on the automatic light sensor.
Displaying engine data
XPress Vehiclein the main function bar.
The vehicle menu is displayed.
XTo select DYNAMIC SELECT:turn and press
the controller.
The Individual
Configuration,VehicleDataand Engine Datamenus appear.
XSelect Engine Data.
The following current data is displayed:
REngine output
REngine torque
REngine oil temperature
ROn-board electrical system voltage
iThe values for engine output and engine tor-
que may deviate from the nominal values.
Items that can influence this are, for example:
REngine speed
RSea level
RFuel grade
ROutside temperature
In Mercedes-AMG vehicles you will see current
data on the transmission oil temperature
instead of the on-board electrical system volt-
age.
Setting options
You can choose from the following settings for
the drive:
CComfort
SSport
S+Sport +
MManual
EEco
50DYNAMIC SELECT
Vehicle functions
Page 56 of 178
XTo switch to navigation mode:press the
Ø button.
XIf no route guidance is active, select.
iIf route guidance is active, first slide 6the
controller and show the menu.
XSelect Route Settings.
XSelect a route type.
A filled circle indicates the current selection.
RActive route guidance: the multimedia sys-
tem calculates a new route.
RInactive route guidance: the multimedia
system uses the selection as the new set-
ting.
iRoute guidance active: a destination has
been entered and the route has been calcu-
lated.
Route guidance inactive: no destination has
been entered yet and no route has been cal-
culated yet.
FastRouteThe multimedia system cal-
culates a route with a short
travel time.
DynamicTrafficRoute
Based on the Fast Routeroute type and includes traf-
fic reports on the route for the
route guidance.
Eco RouteThe multimedia system cal-
culates an economical route.
The journey may take slightly
longer compared to taking
the fast route.
ShortRouteThe multimedia system cal-
culates a short distance
route.
TheDynamic Traffic Routeroute type uses
real-time traffic reports from SIRIUS satellite
radio.
Further Information on real-time traffic reports
(
Ypage 76).
XTo calculate alternative routes: select
Calculate Alternative Routes
.
Switch the function on Oor off ª.
Function activated: after each route calcula-
tion, route alternatives are offered that cor-
respond to the local conditions (
Ypage 75). If desired, you can have the multimedia sys-
tem calculate alternative routes even during
route guidance (
Ypage 75).
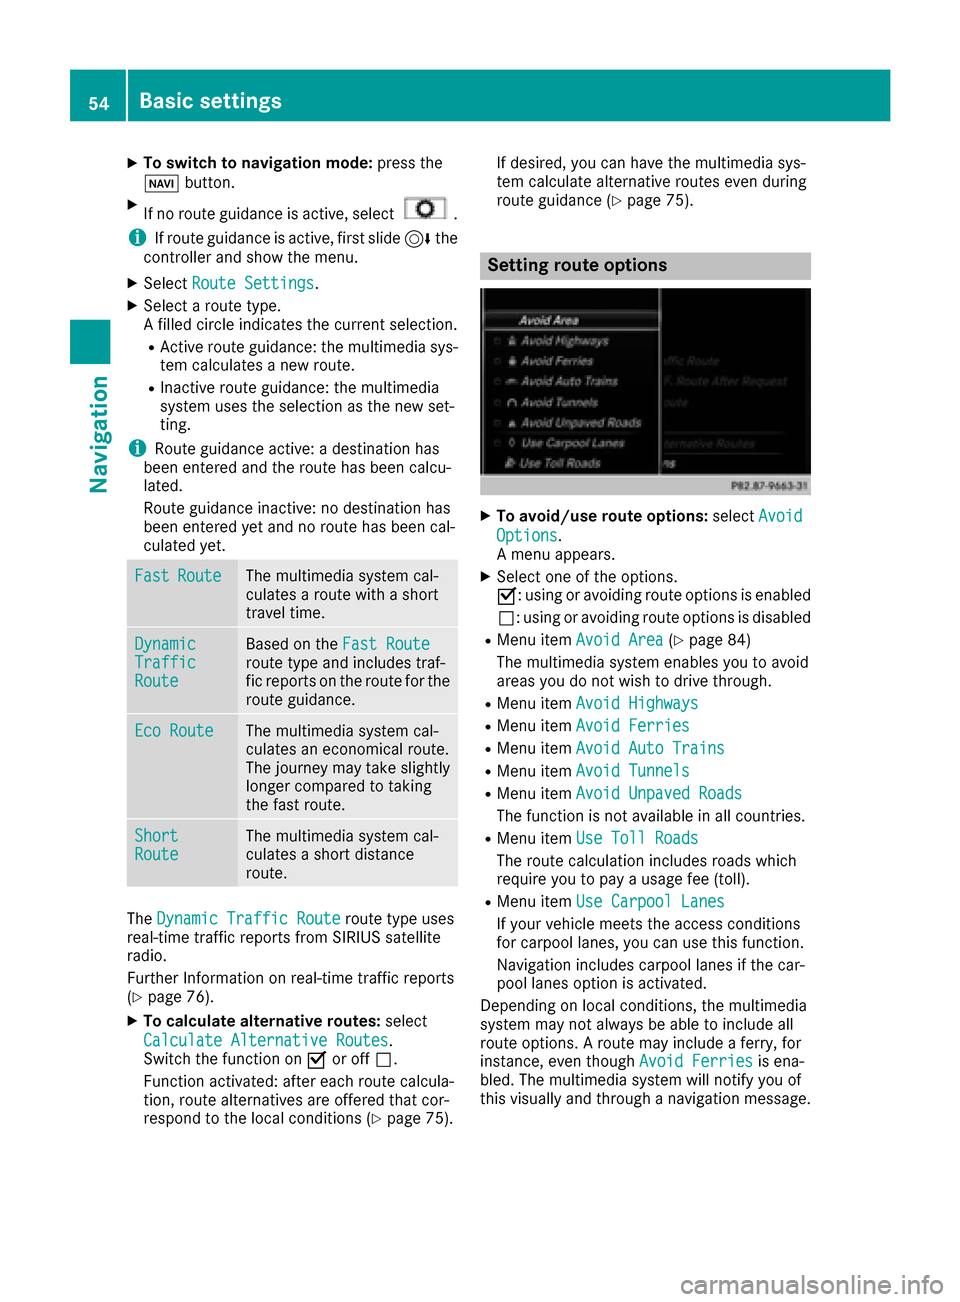
Setting route options
XTo avoid/use route options:
selectAvoid
Options.
A menu appears.
XSelect one of the options.
O: using or avoiding route options is enabled
ª: using or avoiding route options is disabled
RMenu item Avoid Area(Ypage 84)
The multimedia system enables you to avoid
areas you do not wish to drive through.
RMenu item Avoid Highways
RMenu itemAvoid Ferries
RMenu itemAvoid Auto Trains
RMenu itemAvoid Tunnels
RMenu itemAvoid Unpaved Roads
The function is not available in all countries.
RMenu itemUse Toll Roads
The route calculation includes roads which
require you to pay a usage fee (toll).
RMenu itemUse Carpool Lanes
If your vehicle meets the access conditions
for carpool lanes, you can use this function.
Navigation includes carpool lanes if the car-
pool lanes option is activated.
Depending on local conditions, the multimedia
system may not always be able to include all
route options. A route may include a ferry, for
instance, even though Avoid Ferries
is ena-
bled. The multimedia system will notify you of
this visually and through a navigation message.
54Basic settings
Navigation
Page 57 of 178
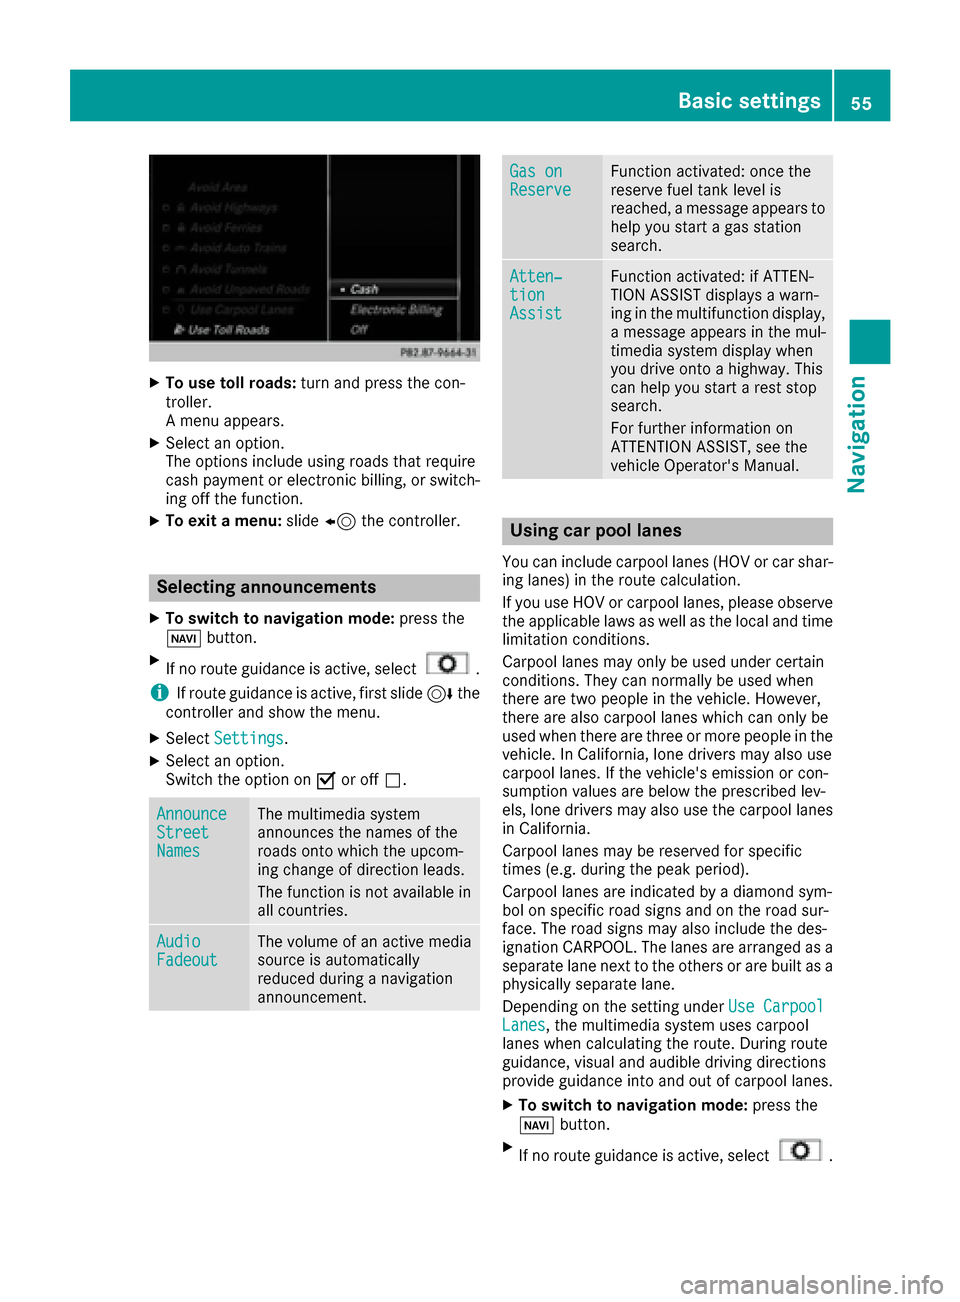
XTo use toll roads:turn and press the con-
troller.
A menu appears.
XSelect an option.
The options include using roads that require
cash payment or electronic billing, or switch-
ing off the function.
XTo exit a menu: slide8 the controller.
Selecting announcements
XTo switch to navigation mode: press the
Ø button.
XIf no route guidance is active, select.
iIf route guidance is active, first slide 6the
controller and show the menu.
XSelect Settings.
XSelect an option.
Switch the option on Oor off ª.
AnnounceStreetNames
The multimedia system
announces the names of the
roads onto which the upcom-
ing change of direction leads.
The function is not available in
all countries.
AudioFadeoutThe volume of an active media
source is automatically
reduced during a navigation
announcement.
Gas onReserveFunction activated: once the
reserve fuel tank level is
reached, a message appears to
help you start a gas station
search.
Atten‐tionAssist
Function activated: if ATTEN-
TION ASSIST displays a warn-
ing in the multifunction display,
a message appears in the mul-
timedia system display when
you drive onto a highway. This
can help you start a rest stop
search.
For further information on
ATTENTION ASSIST, see the
vehicle Operator's Manual.
Using car pool lanes
You can include carpool lanes (HOV or car shar-
ing lanes) in the route calculation.
If you use HOV or carpool lanes, please observe
the applicable laws as well as the local and time
limitation conditions.
Carpool lanes may only be used under certain
conditions. They can normally be used when
there are two people in the vehicle. However,
there are also carpool lanes which can only be
used when there are three or more people in the
vehicle. In California, lone drivers may also use
carpool lanes. If the vehicle's emission or con-
sumption values are below the prescribed lev-
els, lone drivers may also use the carpool lanes
in California.
Carpool lanes may be reserved for specific
times (e.g. during the peak period).
Carpool lanes are indicated by a diamond sym-
bol on specific road signs and on the road sur-
face. The road signs may also include the des-
ignation CARPOOL. The lanes are arranged as a
separate lane next to the others or are built as a
physically separate lane.
Depending on the setting under Use Carpool
Lanes, the multimedia system uses carpool
lanes when calculating the route. During route
guidance, visual and audible driving directions
provide guidance into and out of carpool lanes.
XTo switch to navigation mode: press the
Ø button.
XIf no route guidance is active, select.
Basic settings55
Navigation
Z