Page 145 of 178

Selecting an active partition
XTo selectSelect Active Partition: turn
and press the controller.
With the Select
ActivePartitionoption,
you can select a partition in the USB data
medium.
Showing track information
XTo select Show Track Information: turn
and press the controller.
Ticking or removing the tick from the box in
front of Show Track Information
displays
or hides the information on the track, artist
and album in the main display field.
Saving files to Media Register
iWith the SaveFilestoMediaRegisteroption, you can transfer supported audio,
image or video files to the multimedia system
hard drive.
XTo select the Save Files to Media Reg‐isteroption: turn and press the controller.
A menu appears (Ypage 146).
Managing Media Register
XDelete or rename individual files in the Media
Register (Ypage 148).
XDelete all files in the Media Register
(Ypage 148).
XCall up information on the preset
(Ypage 149).
Stop and playback function
XTo pause playback: in audio/video mode,
slide 6the controller.
The media menu bar is shown.
XTo activate Ëin the media menu bar: turn
and press the controller.
Playback is interrupted here. The display
changes to Ì.
XTo continue playback: in audio/video mode,
slide 6the controller.
The media menu bar is shown.
XTo activate Ìin the media menu bar: turn
and press the controller.
Playback is continued from the point of inter- ruption. The symbol changes to Ë.
Selecting a track
Selecting using the current track list
XTo display the current track list: press the
controller in the basic display.
The category list appears.
XSelect the current track list.
XTo select a track: turn the controller and press
to confirm.
Selecting by skipping to a track
XTo skip forwards or backwards to a track: turn
or briefly slide 9or8 the controller in
the media basic display.
Search menu
XIn media mode, slide 6the controller.
The media menu bar is shown.
XTo select Search: turn and press the control-
ler.
The category list is shown.
XSelect a category, e.g. Genres.
Sub-categories appear with the selection of
the main category (depends on the multime-
dia system default settings and the music
tracks available).
XSelect a sub-category, for example Rock.
If the sub-category Rock
contains music
tracks, these will be displayed.
Gracenote®Media Database
General notes
This function is available in audio CD mode.
There is a version of
Gracenote®music recognition technology,
Emeryville, California, USA on the multimedia
system hard disk. You will recognize this by the
Audio/video mode143
Media
Z
Page 146 of 178

logo in the bottom right-hand corner of certain
audio displays.
If the audio CD does not contain any CD text
information, the multimedia system can use the
Gracenote
®Media Database to identify
unknown audio tracks when in CD audio mode.
Internet update of metadata
The Updating Metadata Via Internetoption allows any missing metadata for an audio
CD (e.g. cover, track, album, artist) to be uploa-
ded retrospectively to the internal Gracenote
®
database.
An Internet connection is required for this
(
Ypage 123).
Selecting Internet update of metadata
XIn media mode, slide 6the controller.
The media menu bar is shown.
XTo select: turn and press the control-
ler.
XSelect Updating Metadata Via Internetin the selection list.
A connection with the Gracenote®data server
is established. The missing data is loaded,
saved and displayed in the main display field.
If there is no data found or there is no Internet
connection, a corresponding error message
will appear.
Switching the Gracenote®data display
on/off
XSwitch on audio CD mode (Ypage 142).
XTo select Gracenote Media Database: turn
and press the controller.
XTo switch the display off: select None.
In the basic display, Track 1is shown instead
of the Gracenote®data, for example.
XTo switch on the display: press the controller.
Media search
General notes
The multimedia system plays back files from the following data media:
RDisc (CD/DVD Audio)
RMemory card
RMedia Register
RUSB storage device
RApple®devices (folder, year and photos are
not available)
The categories are displayed according to the
data available.
Starting the media search
XIn media mode, slide 6the controller.
The media menu bar is shown.
XTo select Search: turn and press the control-
ler.
The category list appears.
Category list
XIn media mode, slide 6the controller.
The media menu bar is shown.
XTo select Search: turn and press the control-
ler.
The category list is shown.
Depending on the connected media sources and
files, the following categories are listed:
RCurrent Tracklist
RFolder
RSelect By Cover
RKeyword Search
RPlaylists
RArtists
RAlbums
RTrack
RGenres
RYear
RComposers
RVideos
RPhotos
RPodcasts
RAudiobooks
iThe categories are available as soon as the
entire media content has been read and ana-
lyzed.
If the same device is reconnected with
unchanged media content, these categories
are available more quickly.
144Media search
Media
Page 147 of 178

When connecting Apple®devices, the cate-
gories “Folder”, “Year” and “Photos” are not
available.
Searching by current track list
XTo select Current Tracklistin the cate-
gory list: turn and press the controller.
The selection list appears.
XSelect the required track.
Searching by folder
Playable files can be searched for in the active
data medium's directories.
XTo select Folderin the category list: turn and
press the controller.
The folder list appears.
XSelect the required folder.
The track list appears.
XSelect the required track.
Selecting by cover
XTo select Select By Coverin the category
list: turn and press the controller.
A menu with cover views appears.
XSelect the required cover.
The track list appears.
XSelect the required track.
Searching by genre
XTo select Genresin the category list: turn and
press the controller.
The multimedia system searches in all media
sources. A selection list with Genre and media
sources appears.
XSelect the desired music genre.
A selection list with music tracks from the
selected genre appears.
XSelect a music track.
The track is played. The basic menu for the
active media source is shown.
XTo exit the selection list: press the %but-
ton.
Keyword search
XTo select Keyword Searchin the category
list: turn and press the controller.
The input field appears.
XTo select the required characters: turn and
press the controller for each one (Ypage 29).
Entering just part of the name of a track or
artist is enough. The search result then dis-
plays the entire text.
XSelect ¬.
The search results are displayed.
The numbers behind the results, such as for
Tracks
(5/0), mean: 5 results that contain
the exact keyword searched for and 0 results
that are similar.
XSelect one of the results.
Keywords that have already been searched
for are displayed in the "Search history" with- out having to enter them completely. They
can be accepted directly and displayed in the
search result.
XSelect an entry.
Albums and covers (if available) are shown.
The multimedia system searches in all media
sources.
XSelect an album.
The tracks are listed.
Media search145
Media
Z
Page 148 of 178

XSelect a track.
The basic display appears and playback
starts.
Media Register
General notes
You can store music files, photos or video files inthe Media Register. The memory has a capacity
of 10.8 GB.
iKeep your original music files, photos and
video files in a secure location. An error in the multimedia system may result in the loss of
files stored in the Media Register. Mercedes-
Benz is not liable for any loss of data.
Switching on the Media Register
XIn media mode press the Õbutton.
The menu appears with the available media
sources.
XTo select Media Register: turn and press
the controller.
Playback begins at the point last listened to.
If there are no files, you will see a message to
this effect.
Further options for switching on:
Rusing the main function bar: (Ypage 138)
Rusing the device list: (Ypage 139)
Rusing the Õbutton: (Ypage 138)
Media Register basic display
:Main function bar
;Display for the active data medium
=Media menu bar
?Track display on the disc
ATrack number and number of tracks in the
track list
BNumerical time display
CGraphic time display
DCover view (if available)
Copying files to the Media Register
General notes
You can copy photos, music files and videos
from the following data mediums:
RDisc (CD/DVD)
RSD card
RUSB storage device
RMP3
iData can only be copied from an MP3 player
if this can be configured as a mass storage
device.
Video files from DVD-V cannot be copied.
While copying, several functions will not be
available. If this is the case, you will see a
message to this effect.
146Media Register
Media
Page 149 of 178

1. Selecting a data medium
XIn media mode: press theÕbutton.
The menu appears with the available media
sources.
XTo select the media source: turn the control-
ler and press to confirm.
XTo switch to the menu bar: slide 6the con-
troller.
XTo select: turn and press the control-
ler.
XSelect Save Files to Media Register.
The media list appears. A data medium from
which files can be copied is selected auto-
matically.
iThe Save Files to Media Registerfunction can be reached from any media
application.
XSelect the displayed data medium.
The data medium is loaded.
If the data medium contains files that can be
copied, a selection menu appears.
2. Selecting files
XTo select All Media Files: turn and press
the controller.
This command copies all files from the selec-
ted data medium. The symbol next to All
Media Filesis filled in. All subsequent
entries have a checkmark Obeside them.
XSelect a folder.
A checkmark Onext to the folder entry high-
lights the selection.
XTo select Continue: turn and press the con-
troller.
The copying menu appears.
3. Starting the copying process
In the example, files are copied from a USB
device to the Media Register.
XTo select Start: press the controller.
iThe selection of a target folder is optional. If
there is no target folder given, the selected
files are saved to the main directory of the
Media Register.
XTo select TargetFolder: turn and press the
controller.
XSelect a folder.
XSelect Continue.
XTo select Start: press the controller.
The copying procedure starts and is shown in
the progress bar.
It may take some time for the copying process
to be completed, depending on the amount of
data. If there is not enough memory space, a
message to this effect appears.
Once the copying procedure is complete, you
will hear the first track of the copied album.
You can now copy more files to the Media
Register.
XTo cancel copying: selectCancel.
Files are stored in the Media Register up until
the point of cancellation.
iIt is possible to change to a different func-
tion (e.g. radio) during the copying procedure.
The copying procedure continues in the back-
ground. While the copying procedure is taking
Media Register147
Media
Z
Page 150 of 178

place, this is shown by a symbol in the status
bar.
Renaming/deleting files
XIn media mode: press theÕbutton.
The menu appears with the available media
sources.
XTo select the media source: turn the control-
ler and press to confirm.
XTo switch to the menu bar: slide 6the con-
troller.
XTo select: turn and press the control-
ler.
XSelect Manage Media Register.
XSelectRename / Delete Files.
The file list is displayed.
XTo highlight the file: turn and press the con-
troller.
XSlide 9the controller.
You can select between EditandDelete.
iOnly folders can be renamed.
Renaming a file
XTo select Edit: turn and press the controller.
An input field appears.
XRename folder.
XTo save changes with ¬: turn and press
the controller.
Renaming a folder only changes the file name.
Depending on whether or not the Show
Track Informationoption has been selec-
ted, this change may not be visible in the main
display field.
Deleting a file
XTo select Delete: turn and press the control-
ler.
Deleting all files
!
In order to prevent malfunctions, do not use
COMAND during this time.
This function deletes all files from the Media
Register.
XIn media mode: press the Õbutton.
The menu appears with the available media
sources.
XTo select the media source: turn the control-
ler and press to confirm.
XTo switch to the menu bar: slide 6the con-
troller.
XTo select: turn and press the control-
ler.
XSelect Manage Media Register.
XSelectDelete All Media Files.
The prompt Would you like to delete
all media files?appears.Nois highligh-
ted.
148Media Register
Media
Page 151 of 178

XTo selectYes: turn and press the controller.
The Please Wait...message appears. The
Data Deletedmessage then appears.
All files are deleted.
Calling up memory space info
XIn media mode: press the Õbutton.
The menu appears with the available media
sources.
XTo select the media source: turn the control-
ler and press to confirm.
XTo switch to the menu bar: slide 6the con-
troller.
XTo select: turn and press the control-
ler.
XSelect Manage Media Register.
XSelectMemory Info.
Selecting a playback mode
The following options are available:
RNormal Track Sequence: the tracks are
played in the normal order (e.g. track 1, 2, 3
etc.).
RRandomMedium: all the tracks on the medium
are played in random order.
RRandom Track List: the tracks in the cur-
rently active track list are played in random
order.
XIn media mode: press the Õbutton.
The menu appears with the available media
sources.
XTo select the media source: turn the control-
ler and press to confirm.
XTo switch to the menu bar: slide 6the con-
troller.
XTo select: turn and press the control-
ler.
XSelect Playback Mode.
The options list appears. The #dot indicates
the current setting.
XSelect the desired option.
The option is switched on. For all options
except Normal Track Sequence
, you will
see a corresponding icon in the main display.
iThe Normal Track Sequenceoption is
automatically selected when you change the
disc you are currently listening to or when you
select a different medium. If an option is
selected, it remains selected after the multi-
media system has been switched on or off.
Bluetooth®audio mode
Connecting Bluetooth®audio devices
Requirements
XActivate the Bluetooth®function in the mul-
timedia system (Ypage 39).
Bluetooth
®audio mode requires a Bluetooth®-
capable audio device.
Check your Bluetooth
®audio device for the fol-
lowing (see the manufacturer's operating
instructions):
RBluetooth®audio profile
Bluetooth®audio mode149
Media
Z
Page 152 of 178

The Bluetooth®audio device must support
the A2DP and AVRCP Bluetooth®audio pro-
files.
RBluetooth®visibility
Certain Bluetooth®audio devices do not just
require activation of the Bluetooth®function.
In addition, your device must be made "visi-
ble" to other devices.
RBluetooth®device name
This device name is predetermined but can
usually be changed. For a clear selection of
the Bluetooth
®device, Mercedes-Benz rec-
ommends that you customize the device
name.
iA2DP ( Advanced AudioDistribution Profile):
Bluetooth®audio profile for audio data trans-
mission
AVRCP (Audio VideoRemote ControlProfile):
Bluetooth
®audio profile for audio data play-
back
iThe Bluetooth®device must be visible for
authorization. After authorization, the multi-
media system even finds the Bluetooth
®
device when it is not visible.
General notes
Before using your Bluetooth®audio device with
the multimedia system for the first time, you will
need to authorize it.
When you authorize a new Bluetooth
®audio
device, it is connected automatically. Connec-
tion involves first searching for a Bluetooth
®
audio device and then authorizing it.
You can authorize up to 15 Bluetooth®devices.
iIf you authorize a mobile phone that sup-
ports Bluetooth®audio, the A2DP and AVRCP
Bluetooth®audio profiles are connected
automatically.
The mobile phone is then entered:
Rin the Bluetooth®telephone list
(Ypage 92)
Rin the Bluetooth®device list
(Ypage 150)
Mercedes-Benz recommends authorizing a
mobile phone in Bluetooth
®telephony
(Ypage 93).
Searching for and authorizing a Blue-
tooth®audio device
Switching to Bluetooth®audio mode
XTo call up the media menu: press the Õ
button.
The last media source you have set is dis-
played.
XTo display the main function bar: slide 5the
controller.
XTo select Media: turn and press the controller.
XTo select Bluetooth Audio: turn and press
the controller.
A menu appears.
If you see the No
BluetoothAudioDeviceConnectedmessage, you will need to author-
ize the Bluetooth®audio device first.
XSlide 6the controller.
The media menu bar is shown.
XTo select Connect Device: turn and press
the controller.
Searching for Bluetooth
®audio
XTo select Search for Audio Devices:
press the controller.
A message appears.
XSelect Start Search.
The multimedia system searches for Blue-
tooth
®audio devices within range and adds
them to the Bluetooth®device list.
The duration of the search depends on the
number of Bluetooth
®audio devices within
range and their characteristics.
:Bluetooth®audio player within range and
already authorized
;Newly detected mobile phone with Blue-
tooth®audio mode in range
The Bluetooth
®device list displays all author-
ized devices, whether they are within range or
150Bluetooth®audio mode
Media
 1
1 2
2 3
3 4
4 5
5 6
6 7
7 8
8 9
9 10
10 11
11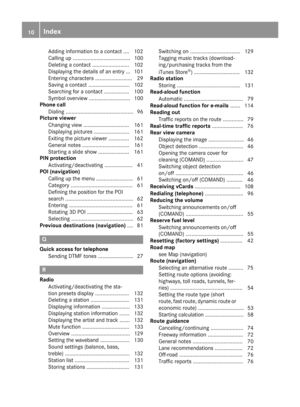 12
12 13
13 14
14 15
15 16
16 17
17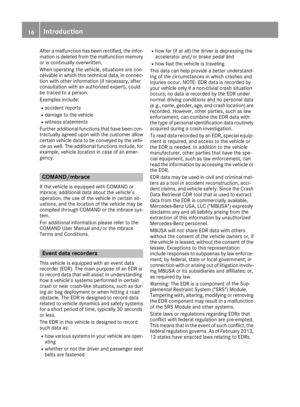 18
18 19
19 20
20 21
21 22
22 23
23 24
24 25
25 26
26 27
27 28
28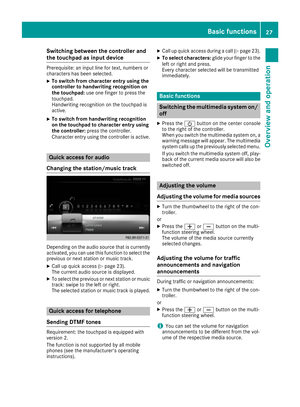 29
29 30
30 31
31 32
32 33
33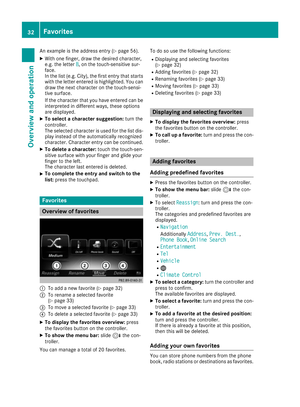 34
34 35
35 36
36 37
37 38
38 39
39 40
40 41
41 42
42 43
43 44
44 45
45 46
46 47
47 48
48 49
49 50
50 51
51 52
52 53
53 54
54 55
55 56
56 57
57 58
58 59
59 60
60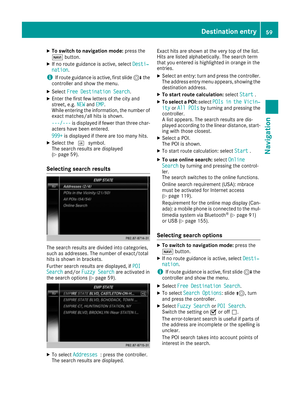 61
61 62
62 63
63 64
64 65
65 66
66 67
67 68
68 69
69 70
70 71
71 72
72 73
73 74
74 75
75 76
76 77
77 78
78 79
79 80
80 81
81 82
82 83
83 84
84 85
85 86
86 87
87 88
88 89
89 90
90 91
91 92
92 93
93 94
94 95
95 96
96 97
97 98
98 99
99 100
100 101
101 102
102 103
103 104
104 105
105 106
106 107
107 108
108 109
109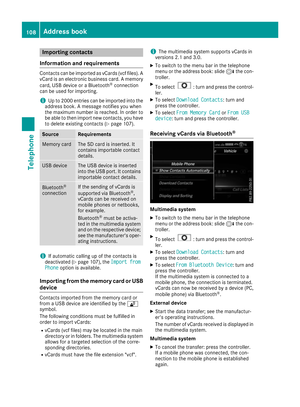 110
110 111
111 112
112 113
113 114
114 115
115 116
116 117
117 118
118 119
119 120
120 121
121 122
122 123
123 124
124 125
125 126
126 127
127 128
128 129
129 130
130 131
131 132
132 133
133 134
134 135
135 136
136 137
137 138
138 139
139 140
140 141
141 142
142 143
143 144
144 145
145 146
146 147
147 148
148 149
149 150
150 151
151 152
152 153
153 154
154 155
155 156
156 157
157 158
158 159
159 160
160 161
161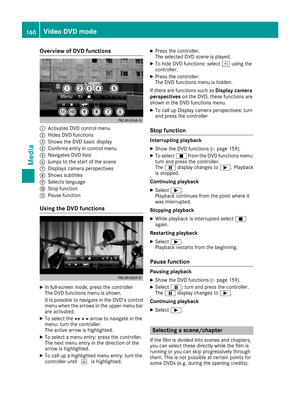 162
162 163
163 164
164 165
165 166
166 167
167 168
168 169
169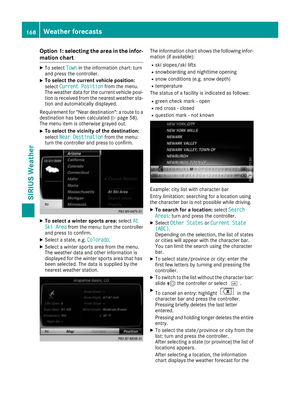 170
170 171
171 172
172 173
173 174
174 175
175 176
176 177
177