2017 LINCOLN CONTINENTAL service
[x] Cancel search: servicePage 350 of 584

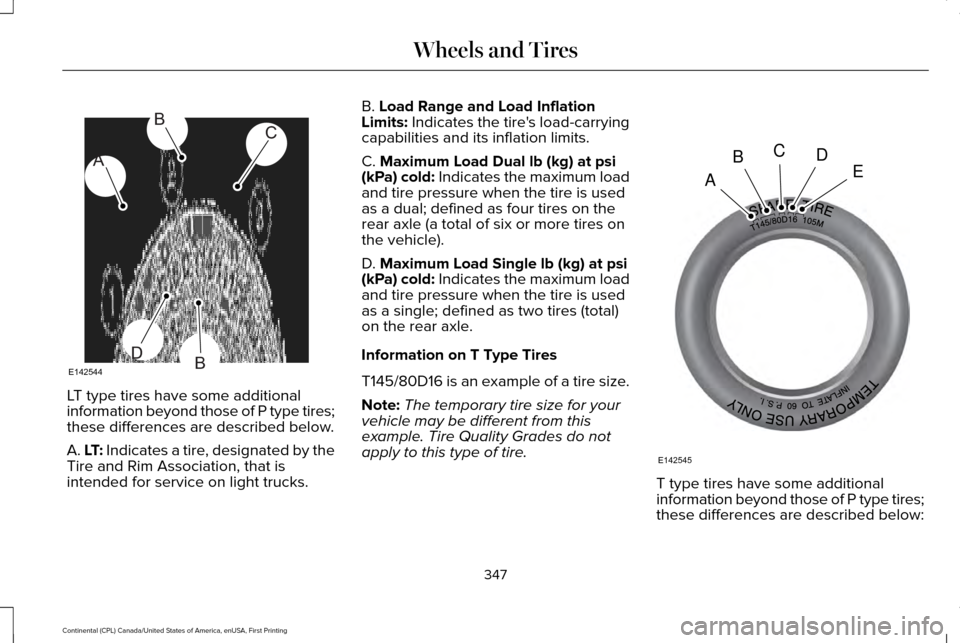
LT type tires have some additional
information beyond those of P type tires;
these differences are described below.
A. LT: Indicates a tire, designated by the
Tire and Rim Association, that is
intended for service on light trucks. B. Load Range and Load Inflation
Limits: Indicates the tire's load-carrying
capabilities and its inflation limits.
C.
Maximum Load Dual lb (kg) at psi
(kPa) cold: Indicates the maximum load
and tire pressure when the tire is used
as a dual; defined as four tires on the
rear axle (a total of six or more tires on
the vehicle).
D.
Maximum Load Single lb (kg) at psi
(kPa) cold: Indicates the maximum load
and tire pressure when the tire is used
as a single; defined as two tires (total)
on the rear axle.
Information on T Type Tires
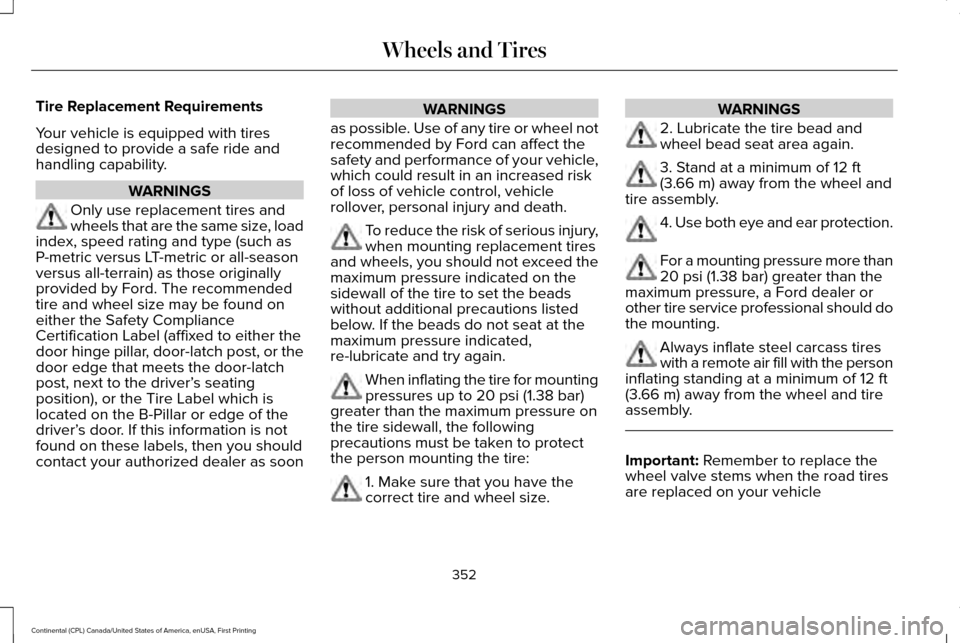
T145/80D16 is an example of a tire size.
Note: The temporary tire size for your
vehicle may be different from this
example. Tire Quality Grades do not
apply to this type of tire. T type tires have some additional
information beyond those of P type tires;
these differences are described below:
347
Continental (CPL) Canada/United States of America, enUSA, First Printing Wheels and TiresA
BC
BDE142544 A
BCDE
E142545
Page 351 of 584

A. T: Indicates a type of tire, designated
by the Tire and Rim Association, that is
intended for temporary service on cars,
sport utility vehicles, minivans and light
trucks.
B.
145: Indicates the nominal width of
the tire in millimeters from sidewall edge
to sidewall edge. In general, the larger
the number, the wider the tire.
C.
80: Indicates the aspect ratio which
gives the tire's ratio of height to width.
Numbers of 70 or lower indicate a short
sidewall.
D.
D: Indicates a diagonal type tire.
R:
Indicates a radial type tire.
E.
16: Indicates the wheel or rim
diameter in inches. If you change your
wheel size, you will have to purchase
new tires to match the new wheel
diameter. Location of the Tire Label
You will find a Tire Label containing tire
inflation pressure by tire size and other
important information located on the
B-Pillar or the edge of the driver’
s door.
Inflating Your Tires
Safe operation of your vehicle requires
that your tires are properly inflated.
Remember that a tire can lose up to half
of its air pressure without appearing flat.
Every day before you drive, check your
tires. If one looks lower than the others,
use a tire gauge to check pressure of all
tires and adjust if required.
At least once a month and before long
trips, inspect each tire and check the tire
pressure with a tire gauge (including
spare, if equipped). Inflate all tires to the
inflation pressure recommended by Ford
Motor Company. You are strongly urged to buy a reliable
tire pressure gauge, as automatic
service station gauges may be
inaccurate. Ford recommends the use
of a digital or dial-type tire pressure
gauge rather than a stick-type tire
pressure gauge.
Use the recommended cold inflation
pressure for optimum tire performance
and wear. Under-inflation or
over-inflation may cause uneven
treadwear patterns
WARNING
Under-inflation is the most common
cause of tire failures and may result
in severe tire cracking, tread separation
or blowout, with unexpected loss of
vehicle control and increased risk of
injury. Under-inflation increases sidewall
flexing and rolling resistance, resulting
in heat buildup and internal damage to
the tire. It also may result in unnecessary
tire stress, irregular wear, loss of vehicle
control and accidents. A tire can lose up
to half of its air pressure and not appear
to be flat! 348
Continental (CPL) Canada/United States of America, enUSA, First Printing Wheels and Tires
Page 355 of 584

Tire Replacement Requirements
Your vehicle is equipped with tires
designed to provide a safe ride and
handling capability.
WARNINGS
Only use replacement tires and
wheels that are the same size, load
index, speed rating and type (such as
P-metric versus LT-metric or all-season
versus all-terrain) as those originally
provided by Ford. The recommended
tire and wheel size may be found on
either the Safety Compliance
Certification Label (affixed to either the
door hinge pillar, door-latch post, or the
door edge that meets the door-latch
post, next to the driver’ s seating
position), or the Tire Label which is
located on the B-Pillar or edge of the
driver’ s door. If this information is not
found on these labels, then you should
contact your authorized dealer as soon WARNINGS
as possible. Use of any tire or wheel not
recommended by Ford can affect the
safety and performance of your vehicle,
which could result in an increased risk
of loss of vehicle control, vehicle
rollover, personal injury and death. To reduce the risk of serious injury,
when mounting replacement tires
and wheels, you should not exceed the
maximum pressure indicated on the
sidewall of the tire to set the beads
without additional precautions listed
below. If the beads do not seat at the
maximum pressure indicated,
re-lubricate and try again. When inflating the tire for mounting
pressures up to 20 psi (1.38 bar)
greater than the maximum pressure on
the tire sidewall, the following
precautions must be taken to protect
the person mounting the tire: 1. Make sure that you have the
correct tire and wheel size. WARNINGS
2. Lubricate the tire bead and
wheel bead seat area again.
3. Stand at a minimum of
12 ft
(3.66 m) away from the wheel and
tire assembly. 4. Use both eye and ear protection.
For a mounting pressure more than
20 psi (1.38 bar)
greater than the
maximum pressure, a Ford dealer or
other tire service professional should do
the mounting. Always inflate steel carcass tires
with a remote air fill with the person
inflating standing at a minimum of
12 ft
(3.66 m) away from the wheel and tire
assembly. Important:
Remember to replace the
wheel valve stems when the road tires
are replaced on your vehicle
352
Continental (CPL) Canada/United States of America, enUSA, First Printing Wheels and Tires
Page 360 of 584

Your vehicle has also been equipped with a
TPMS malfunction indicator to indicate when
the system is not operating properly. The
TPMS malfunction indicator is combined with
the low tire pressure telltale. When the
system detects a malfunction, the telltale will
flash for approximately one minute and then
remain continuously illuminated. This
sequence will continue upon subsequent
vehicle start-ups as long as the malfunction
exists.
When the malfunction indicator is illuminated,
the system may not be able to detect or
signal low tire pressure as intended. TPMS
malfunctions may occur for a variety of
reasons, including the installation of
replacement or alternate tires or wheels on
the vehicle that prevent the TPMS from
functioning properly. Always check the TPMS
malfunction telltale after replacing one or
more tires or wheels on your vehicle to
ensure that the replacement or alternate tires
and wheels allow the TPMS to continue to
function properly.
This device complies with Part 15 of the FCC
Rules and with Industry Canada
license-exempt RSS standard(s). Operation
is subject to the following two conditions:
•
This device may not cause harmful
interference.
• This device must accept any interference
received, including interference that may
cause undesired operation.
Changing Tires With a Tire Pressure
Monitoring System Note:
Each road tire is equipped with a tire
pressure sensor located inside the wheel
and tire assembly cavity. The pressure
sensor is attached to the valve stem. The
pressure sensor is covered by the tire and
is not visible unless the tire is removed. Take
care when changing the tire to avoid
damaging the sensor
You should always have your tires serviced
by an authorized dealer.
Check the tire pressure periodically (at least
monthly) using an accurate tire gauge. See
Inflating Your Tires in this chapter.
357
Continental (CPL) Canada/United States of America, enUSA, First Printing Wheels and TiresE142549
Page 363 of 584

When Inflating Your Tires
When putting air into your tires (such as at a
gas station or in your garage), the tire
pressure monitoring system may not respond
immediately to the air added to your tires.
It may take up to two minutes of driving over
20 mph (32 km/h) for the light to turn off after
you have filled your tires to the
recommended inflation pressure
How Temperature Affects Your Tire
Pressure
The tire pressure monitoring system monitors
tire pressure in each pneumatic tire. While
driving in a normal manner, a typical
passenger tire inflation pressure may
increase about 2–4 psi (14–28 kPa) from a
cold start situation. If the vehicle is stationary
overnight with the outside temperature
significantly lower than the daytime
temperature, the tire pressure may decrease
about
3 psi (21 kPa) for a drop of 30°F (17°C)
in ambient temperature. This lower pressure
value may be detected by the tire pressure
monitoring system as being significantly
lower than the recommended inflation pressure and activate the system warning
light for low tire pressure. If the low tire
pressure warning light is on, visually check
each tire to verify that no tire is flat. If one or
more tires are flat, repair as necessary.
Check the air pressure in the road tires. If
any tire is under-inflated, carefully drive the
vehicle to the nearest location where air can
be added to the tires. Inflate all the tires to
the recommended inflation pressure.
CHANGING A ROAD WHEEL
WARNINGS
Do not use tire sealants as they may
damage the tire pressure monitoring
system. If the tire pressure monitor sensor
becomes damaged it may not function.
Note:
The tire pressure monitoring system
indicator light will illuminate when the spare
tire is in use. To restore the full function of
the monitoring system, all road wheels
equipped with tire pressure monitoring
sensors must be mounted on the vehicle. If you get a flat tire while driving, do not apply
the brake heavily. Instead, gradually
decrease your speed. Hold the steering
wheel firmly and slowly move to a safe place
on the side of the road.
Have a flat serviced by an authorized dealer
in order to prevent damage to the tire
pressure monitoring system sensors.
See
Tire Pressure Monitoring System (page 356).
Replace the spare tire with a road tire as
soon as possible. During repairing or
replacing of the flat tire, have an authorized
dealer inspect the tire pressure monitoring
system sensor for damage.
Dissimilar Spare Wheel and Tire
Assembly Information WARNING
Failure to follow these guidelines could
result in an increased risk of loss of
vehicle control, injury or death. 360
Continental (CPL) Canada/United States of America, enUSA, First Printing Wheels and Tires
Page 365 of 584

When driving with the full-size dissimilar
spare wheel and tire assembly additional
caution should be given to:
•
Towing a trailer.
• Driving vehicles equipped with a camper
body.
• Driving vehicles with a load on the cargo
rack.
Drive cautiously when using a full-size
dissimilar spare wheel and tire assembly and
seek service as soon as possible.
Tire Change Procedure (If Equipped) WARNINGS
When one of the front wheels is off the
ground, the transmission alone will not
prevent the vehicle from moving or slipping
off the jack, even if the transmission is in park
(P). WARNINGS
To help prevent your vehicle from
moving when changing a wheel, shift
the transmission into park (P), set the parking
brake and use an appropriate block or wheel
chock to secure the wheel diagonally
opposite to the wheel being changed. For
example, when changing the front left wheel,
place an appropriate block or wheel chock
on the right rear wheel. No person should place any portion of
their body under a vehicle that is
supported by a jack. Do not attempt to change a tire on the
side of the vehicle close to moving
traffic. Pull far enough off the road to avoid
the danger of being hit when operating the
jack or changing the wheel. Always use the jack provided as
original equipment with your vehicle.
If using a jack other than the one provided,
make sure the jack capacity is adequate for
the vehicle weight, including any vehicle
cargo or modifications. If you are unsure if
the jack capacity is adequate, contact the
authorized dealer. Note:
Passengers should not remain in your
vehicle when the vehicle is being jacked.
1. Park on a level surface, set the parking brake and activate the hazard flashers.
2. Place the transmission in park (P) and turn the engine off. 3.
Block both the front and rear of the wheel
diagonally opposite the flat tire. For
example, if the left front tire is flat, block
the right rear wheel.
4. Lift the carpeted load floor panel and secure in the up position with the hanger
clip.
362
Continental (CPL) Canada/United States of America, enUSA, First Printing Wheels and TiresE175447
Page 381 of 584

CAPACITIES AND SPECIFICATIONS - 2.7L ECOBOOST™
Capacities
WARNING
The air conditioning refrigerant system contains refrigerant under high \
pressure. Only qualified personnel should service the air
conditioning refrigerant system. Opening the air conditioning refrigeran\
t system can cause personal injury.
Capacity
Item
6.0 qt (5.7 L)
Engine oil (with oil filter).
10.9 qt (10.3 L)
Engine coolant (Front Wheel Drive).
11.0 qt (10.4 L)
Engine coolant (All Wheel Drive).
Between MIN/MAX on brake fluid reservoir
Brake fluid.
16.0–20.8 fl oz (473–615 ml)
Rear differential fluid (All Wheel Drive).
15.2 fl oz (450 ml)*
Power Transfer Unit fluid (All Wheel Drive).
11.6 qt (11 L)
**
Automatic transmission fluid.
Fill as required
Windshield washer fluid.
18.0 gal (68.1 L)
Fuel tank.
378
Continental (CPL) Canada/United States of America, enUSA, First Printing Capacities and Specifications
Page 386 of 584

Specification
Name
MXL-1
If you use oil and fluids that do not meet the
defined specification and viscosity grade,
this may lead to:
• Component damage which is not
covered by the vehicle warranty.
• Longer engine cranking periods.
• Increased emission levels.
• Reduced engine performance.
• Reduced fuel economy.
• Degraded brake performance.
We recommend Motorcraft® motor oil for
your vehicle. If Motorcraft® oil is not available,
use motor oils of the recommended viscosity
grade that meet API SN requirements and
display the API Certification Mark for gasoline
engines. Do not use oil labeled with API SN
service category unless the label also
displays the API certification mark. An oil that displays this symbol conforms to
current engine, emission system and fuel
economy performance standards of the
International Lubricants Specification
Advisory Committee (ILSAC).Do not use supplemental engine oil additives
because they are unnecessary and could
lead to engine damage that may not be
covered by your vehicle warranty.
Note:
Ford recommends using DOT 4 Low
Viscosity (LV) High Performance Brake Fluid
or equivalent meeting WSS-M6C65-A2. Use
of any fluid other than the recommended
fluid may cause degraded brake
performance and not meet the Ford
performance standards. Keep brake fluid
clean and dry. Contamination with dirt,
water, petroleum products or other materials
may result in brake system damage and
possible failure.
Note: Automatic transmissions that require
MERCON LV transmission fluid should only
use MERCON LV transmission fluid. The use
of any other fluid may cause transmission
damage.
383
Continental (CPL) Canada/United States of America, enUSA, First Printing Capacities and SpecificationsE142732