Page 180 of 589
Features of your vehicle
94
4
LO : Normal wiper speed
HI : Fast wiper speed
✽ ✽
NOTICE
If there is heavy accumulation of
snow or ice on the windshield, defrost
the windshield for about 10 minutes,
or until the snow and/or ice is
removed before using the windshield
wipers to ensure proper operation.
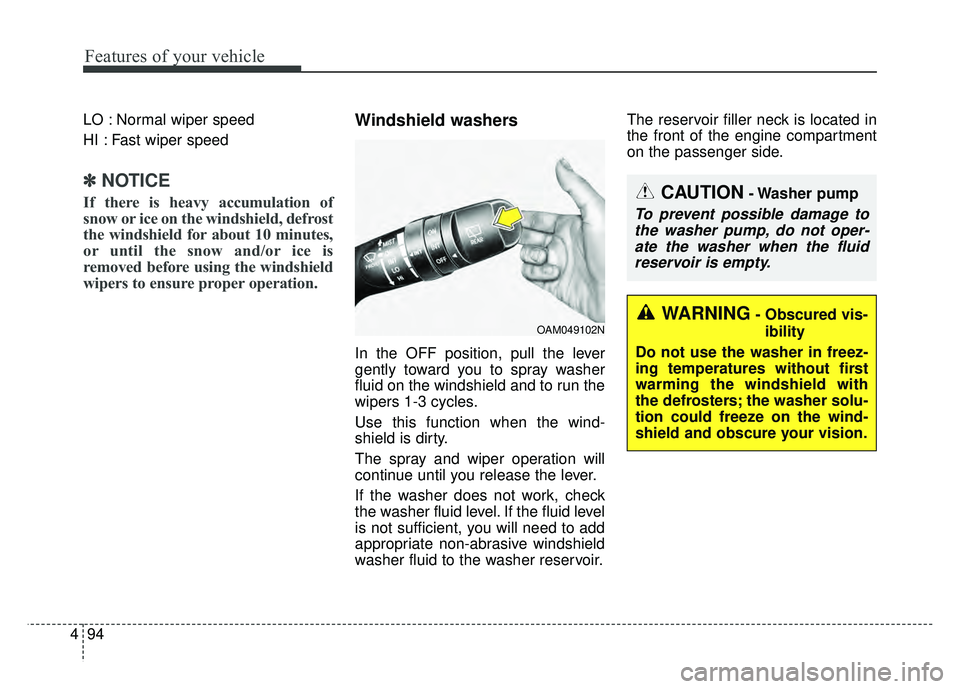
Windshield washers
In the OFF position, pull the lever
gently toward you to spray washer
fluid on the windshield and to run the
wipers 1-3 cycles.
Use this function when the wind-
shield is dirty.
The spray and wiper operation will
continue until you release the lever.
If the washer does not work, check
the washer fluid level. If the fluid level
is not sufficient, you will need to add
appropriate non-abrasive windshield
washer fluid to the washer reservoir. The reservoir filler neck is located in
the front of the engine compartment
on the passenger side.
OAM049102N
CAUTION- Washer pump
To prevent possible damage to
the washer pump, do not oper-ate the washer when the fluidreservoir is empty.
WARNING- Obscured vis-
ibility
Do not use the washer in freez-
ing temperatures without first
warming the windshield with
the defrosters; the washer solu-
tion could freeze on the wind-
shield and obscure your vision.
Page 191 of 589
4105
Features of your vehicle
Mode selection
The mode selection knob controls
the direction of the air flow through
the ventilation system.
Air can be directed to the floor, dash-
board outlets, or windshield. Five
symbols are used to represent.Vent mode (B, D)
Air flow is directed toward the upper
body and face. Additionally, each
outlet can be controlled to direct the
air discharged from the outlet.
Vent-Floor mode (B, D, C, E)
Air flow is directed towards the face
and the floor.
Floor mode (C, E, A, D)
Most of the air flow is directed to the
floor, with a small amount of the air
being directed to the windshield and
side window defrosters. Floor/Defrost mode
(A, C, E, D)
Most of the air flow is directed to the
floor and the windshield with a small
amount directed to the side window
defrosters.
Defrost mode (A, D)
Most of the air flow is directed to the
windshield with a small amount of air
directed to the side window
defrosters.
OPS043155
Page 192 of 589
Features of your vehicle
106
4
Instrument panel vents
The outlet vents can be opened or
closed separately using the thumb-
wheel.
Also, you can adjust the direction of
air delivery from these vents using
the vent control lever as shown.
Temperature control
The temperature control knob allows
you to control the temperature of the
air flow from the ventilation system.
To change the air temperature in the
passenger compartment, turn the
knob to the right position for warm air
or left position for cooler air. To operate the MAX A/C, turn the
temperature knob to extreme left. Air
flow is directed toward the upper
body and face.
In this mode, the air conditioning and
the recirculated air position will be
selected automatically.
OPS043059
OPS043156
OPS043159
Page 203 of 589
4117
Features of your vehicle
The air flow outlet port is converted
as follows:Vent mode (B, D)
Air flow is directed toward the upper
body and face. Additionally, each out-
let can be controlled to direct the air
discharged from the outlet.
Vent-Floor mode (B, D, C, E)
Air flow is discharged towards the
face and floor. Floor mode (C, E, A, D)
Most of the air flow is directed to the
floor, with a small amount of the air
being directed to the windshield and
side window defroster.
Floor/Defrost mode
(A, C, E, D)
Most of the air flow is directed to the
floor and the windshield with a small
amount directed to the side window
defrosters.
Page 224 of 589
Features of your vehicle
138
4
During mild weather or under condi-
tions where the operation of the seat
warmer is not needed, keep the
switches in the “OFF” position.
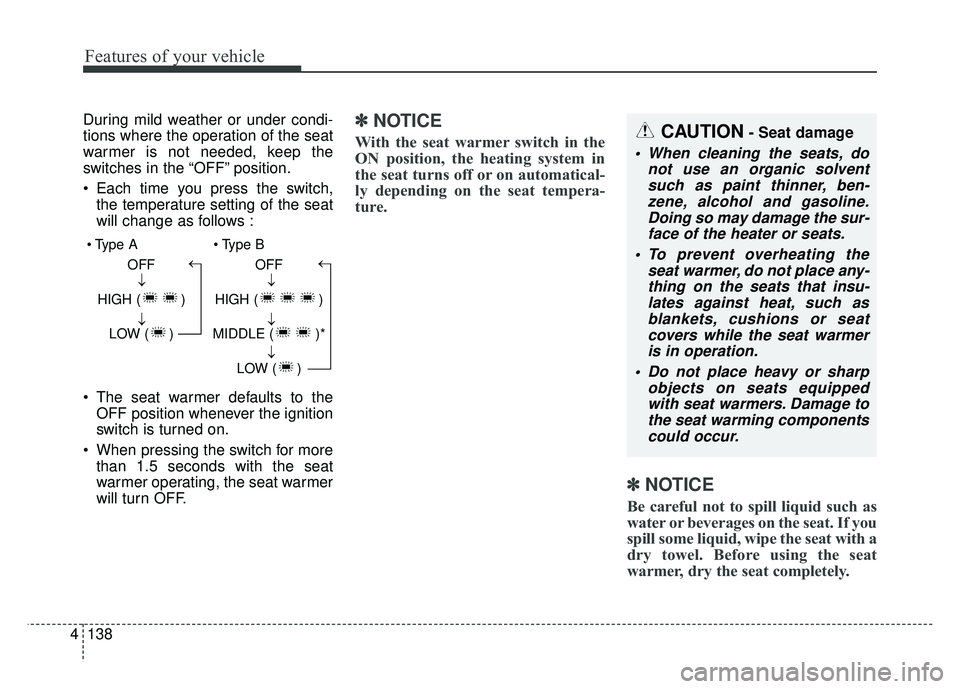
Each time you press the switch,
the temperature setting of the seat
will change as follows :
The seat warmer defaults to the OFF position whenever the ignition
switch is turned on.
When pressing the switch for more than 1.5 seconds with the seat
warmer operating, the seat warmer
will turn OFF.✽ ✽ NOTICE
With the seat warmer switch in the
ON position, the heating system in
the seat turns off or on automatical-
ly depending on the seat tempera-
ture.
✽ ✽NOTICE
Be careful not to spill liquid such as
water or beverages on the seat. If you
spill some liquid, wipe the seat with a
dry towel. Before using the seat
warmer, dry the seat completely.
CAUTION- Seat damage
When cleaning the seats, do
not use an organic solventsuch as paint thinner, ben-zene, alcohol and gasoline.Doing so may damage the sur-face of the heater or seats.
To prevent overheating the seat warmer, do not place any-thing on the seats that insu-lates against heat, such asblankets, cushions or seatcovers while the seat warmeris in operation.
Do not place heavy or sharp objects on seats equippedwith seat warmers. Damage tothe seat warming componentscould occur.
OFF
HIGH ( ) LOW ( )→→→ OFF
HIGH ( )
MIDDLE ( )* LOW ( )
→→→→
Page 226 of 589
Features of your vehicle
140
4
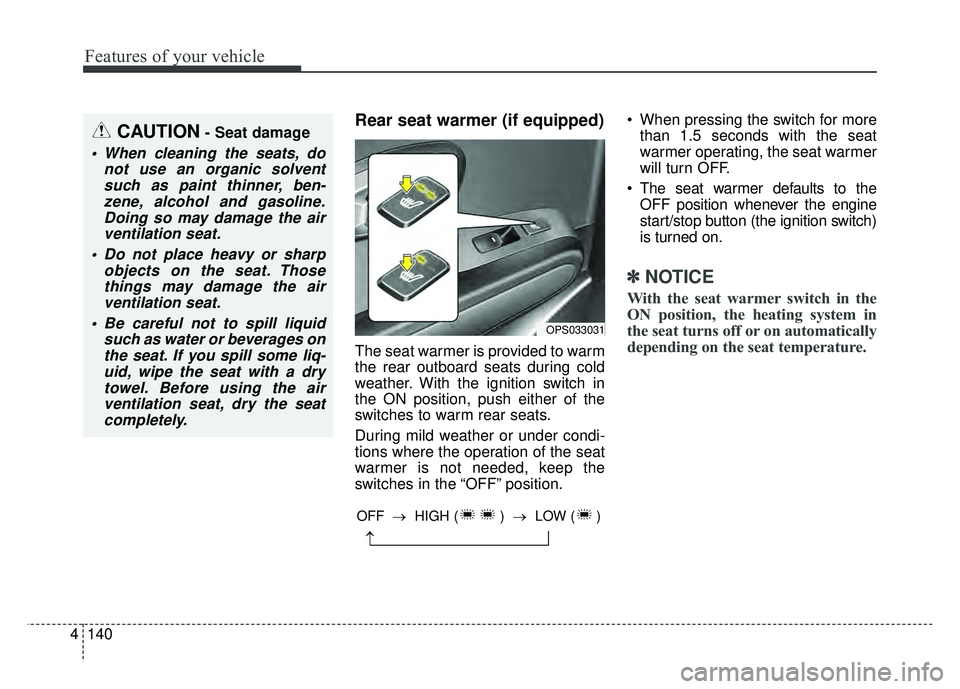
Rear seat warmer (if equipped)
The seat warmer is provided to warm
the rear outboard seats during cold
weather. With the ignition switch in
the ON position, push either of the
switches to warm rear seats.
During mild weather or under condi-
tions where the operation of the seat
warmer is not needed, keep the
switches in the “OFF” position. When pressing the switch for more
than 1.5 seconds with the seat
warmer operating, the seat warmer
will turn OFF.
The seat warmer defaults to the OFF position whenever the engine
start/stop button (the ignition switch)
is turned on.
✽ ✽ NOTICE
With the seat warmer switch in the
ON position, the heating system in
the seat turns off or on automatically
depending on the seat temperature.
CAUTION- Seat damage
When cleaning the seats, do
not use an organic solventsuch as paint thinner, ben-zene, alcohol and gasoline.Doing so may damage the airventilation seat.
Do not place heavy or sharp objects on the seat. Thosethings may damage the airventilation seat.
Be careful not to spill liquid such as water or beverages onthe seat. If you spill some liq-uid, wipe the seat with a drytowel. Before using the airventilation seat, dry the seatcompletely.
OPS033031
→
OFF → HIGH ( ) →LOW ( )
Page 227 of 589
4141
Features of your vehicle
✽
✽NOTICE
Be careful not to spill liquid such as
water or beverages on the seat. If you
spill some liquid, wipe the seat with a
dry towel. Before using the seat
warmer, dry the seat completely.
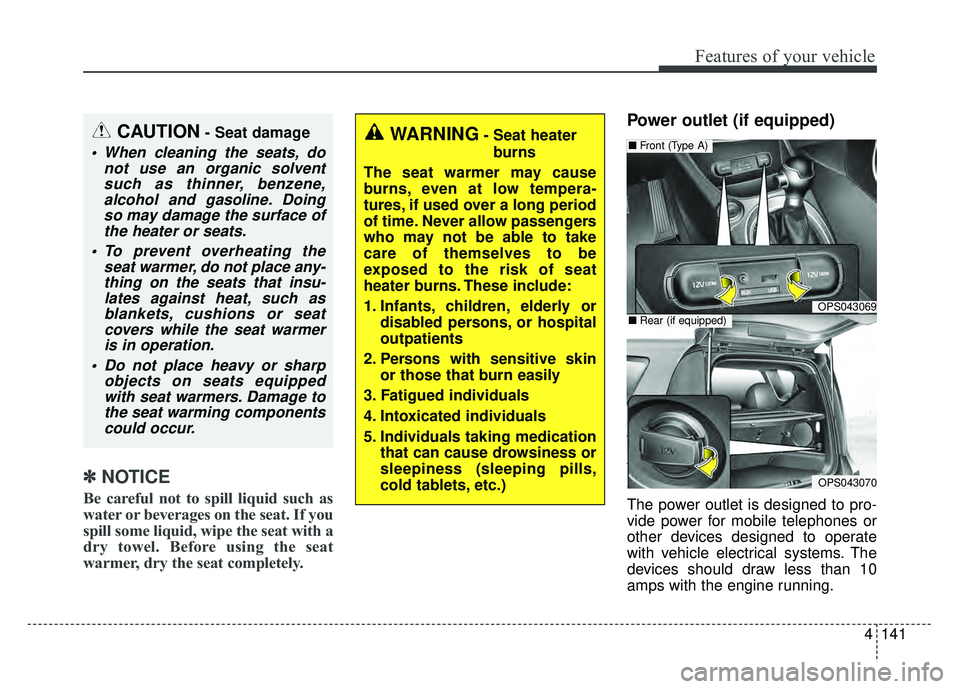
Power outlet (if equipped)
The power outlet is designed to pro-
vide power for mobile telephones or
other devices designed to operate
with vehicle electrical systems. The
devices should draw less than 10
amps with the engine running.
OPS043069
■ Front (Type A)
OPS043070
■Rear (if equipped)
CAUTION- Seat damage
When cleaning the seats, do
not use an organic solventsuch as thinner, benzene,alcohol and gasoline. Doingso may damage the surface ofthe heater or seats.
To prevent overheating the seat warmer, do not place any-thing on the seats that insu-lates against heat, such asblankets, cushions or seatcovers while the seat warmeris in operation.
Do not place heavy or sharp objects on seats equippedwith seat warmers. Damage tothe seat warming componentscould occur.
WARNING- Seat heater
burns
The seat warmer may cause
burns, even at low tempera-
tures, if used over a long period
of time. Never allow passengers
who may not be able to take
care of themselves to be
exposed to the risk of seat
heater burns. These include:
1. Infants, children, elderly or disabled persons, or hospital
outpatients
2. Persons with sensitive skin or those that burn easily
3. Fatigued individuals
4. Intoxicated individuals
5. Individuals taking medication that can cause drowsiness or
sleepiness (sleeping pills,
cold tablets, etc.)
Page 234 of 589
Features of your vehicle
148
4
The following specification is the
maximum weight that can be
loaded onto the roof rack.
Distribute the load as evenly as
possible across the crossbars (if
equipped) and roof rack and
secure the load firmly.
Loading cargo or luggage in
excess of the specified weight limit
on the roof rack may damage your
vehicle.
The vehicle center of gravity will be higher when items are loaded onto
the roof rack. Avoid sudden starts,
braking, sharp turns, abrupt
maneuvers or high speeds that
may result in loss of vehicle control
or rollover resulting in an accident. Always drive slowly and turn cor-
ners carefully when carrying items
on the roof rack. Severe wind
updrafts, caused by passing vehi-
cles or natural causes, can cause
sudden upward pressure on items
loaded on the roof rack. This is
especially true when carrying
large, flat items such as wood pan-
els or mattresses. This could cause
the items to fall off the roof rack
and cause damage to your vehicle
or others around you.
To prevent damage or loss of cargo while driving, check frequently
before or while driving to make
sure the items on the roof rack are
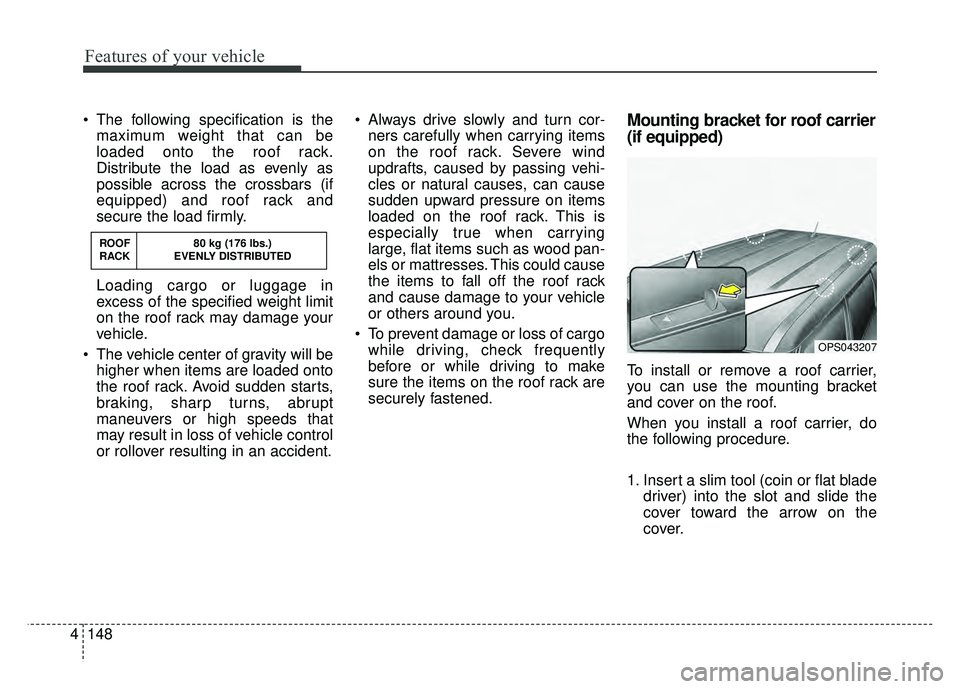
securely fastened.Mounting bracket for roof carrier
(if equipped)
To install or remove a roof carrier,
you can use the mounting bracket
and cover on the roof.
When you install a roof carrier, do
the following procedure.
1. Insert a slim tool (coin or flat blade driver) into the slot and slide the
cover toward the arrow on the
cover.
OPS043207
ROOF 80 kg (176 lbs.)
RACK EVENLY DISTRIBUTED