Page 41 of 54

Map/Room Lamps
Automatic turn off function*
The interior lights automatically turn off approximately 30 seconds after the
ENGINE START/STOP button is OFF .
Map/Personal Lamp
Push the lens A to turn the Map Lamp ON/OFF . This light produces a spot
beam for convenient use as a Map Lamp or Personal Lamp for the driver or
front passenger .
Room Lamp
: When pressed B, the lamp turns ON when any door is opened .
: When pressed C, the lamp stays on continuously .
( Type A )
( Type B)
Sunroof Operation*
The Sunroof and Sunshade operation is controlled through a multi-
directional switch/lever, and the ignition needs to be in the ON position to
operate the Sunroof/Sunshade .
Slide the Sunshade and Sunroof:
•Auto Open: Slide lever backward to the farthest position and release
•Auto Close (Sunroof only): Slide the lever D forward to the farthest
position and release
Slide the Sunshade:
•Open: Manually slide the Sunshade open
•Auto Close: Slide the lever D forward to the farthest position
Slide the Sunroof (with Sunshade open):
•Open: Slide the lever D backward and release
•Close: Slide the lever D partially forward to the first detent position or
pull the lever downward
Tilt the Sunroof:
•Raise: Push lever D upward
•Auto Close: Slide the lever D forward to the farthest position
REMINDER: Sunshade needs to remain OPEN while Sunroof is open and vehicle is moving .
•When doors are unlocked by the Smart Key*, the lamp turns ON for approximately 30 seconds •If your vehicle is equipped with the theft alarm system, the interior lights automatically turn off approximately 3 seconds after the system is in armed stage •Using interior lights for an extended period of time may cause battery discharge
QUICK TIPS To stop the Sunroof/Sunshade at any position, push or pull the Sunroof control lever in any direction .
QUICK TIP
CAA
B
D
C
39*IF EQUIPPED ALWAYS CHECK THE OWNER’S MANUAL FOR COMPLETE OPER ATING INFORMATION AND SAFET Y WARNINGS .
OTHER KEY FEATURES
Page 42 of 54

NIRO FEATURES & FUNCTIONS GUIDE40
Fuel Door Release
Press the button C to release the fuel door .
Hood Release Lever and Latch
Opening the Hood:
1 . Pull the Hood Release Lever A to unlatch the Hood
2 . In the front of the vehicle, lift the Hood slightly, pull the secondary
Latch B inside of the Hood’s center and lift the Hood
Closing the Hood: Lower the Hood about halfway and then press
down to securely lock in place .
(Buttons located on Driver's Panel to the left of the Steering Wheel)
C
(Located on Driver side kick panel)(Latch located inside hood)
A
One-Click Fuel Cap Video
To view a video on your mobile device, snap this QR Code or visit the listed website .
Refer to page 2 for more information .
QR CODE
www.KuTechVideos.com/de23/2017
Fuel Cap / Malfunction
Indicator (Check Engine Light)
Tighten for ONE CLICK to prevent Malfunction
Indicator from illuminating .
REMINDER: The Fuel Filler Door Release button is located on the left side of the Steering Wheel on the lower button panel
REMINDERS:
•Sunvisor may not shield all direct light
•
Do not operate the vehicle if Sunvisor is impairing your visibility
•
Be aware of your seating position when adjusting or swinging Sunvisor around from the front or side windows
Sunvisor
Use the Sunvisor to shield
direct light through the front
or side windows . Slide the
Sunvisor out and adjust
as needed .
CLICK!
B
OTHER KEY FEATURES
Page 43 of 54

41*IF EQUIPPED ALWAYS CHECK THE OWNER’S MANUAL FOR COMPLETE OPER ATING INFORMATION AND SAFET Y WARNINGS .
Parking Assist System*
The Parking Assist System* is not a safety device . The Parking Assist
System* is a supplemental system that assists the driver by chiming if any
object is detected within the sensing area to the front, rear and side of the
vehicle when moving forward or backing up .
The system is activated when the ignition is ON and the vehicle is in R
(Reverse) .To deactivate the system,
press the Parking Assist System*
button A LED illuminated), when
vehicle is in D (Drive) or R (Reverse) .
To activate, press button A again
(LED not illuminated) .
REMINDERS:
•If the vehicle is moving at speeds over 3 mph, the system may not activate correctly
•
When more than two objects are sensed at the same time, the closest one will be recognized first
•
The above images are for illustration purposes only and may not reflect actual operation
The Parking Assist System* is not a substitute for proper and safe parking and backing-up procedures. Always drive safely and use caution when backing up. The Parking Assist System* may not detect every object in front of or behind the vehicle.
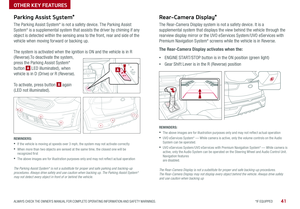
Rear-Camera Display*
The Rear-Camera Display system is not a safety device . It is a
supplemental system that displays the view behind the vehicle through the
rearview display mirror or the UVO eServices System/UVO eServices with
Premium Navigation System* screens while the vehicle is in Reverse .
The Rear-Camera Display activates when the:
•ENGINE START/STOP button is in the ON position (green light)
•Gear Shift Lever is in the R (Reverse) position
REMINDERS:
•The above images are for illustration purposes only and may not reflect actual operation
•
UVO eServices System* — While camera is active, only the volume controls on the Audio System can be operated .
•
UVO eServices System/UVO eServices with Premium Navigation System* — While camera is active, only the Audio System can be operated on the Steering Wheel and Audio Control Unit . Navigation features are disabled .
The Rear-Camera Display is not a substitute for proper and safe backing-up procedures. The Rear-Camera Display may not display every object behind the vehicle. Always drive safely and use caution when backing up
A
OTHER KEY FEATURES
Page 44 of 54
NIRO FEATURES & FUNCTIONS GUIDE42
Hybrid Battery Air Intake
The Hybrid Battery Air Intake, located on the side underneath the rear
seats, is used to cool down the hybrid battery . For safety reasons, this
vent should never be blocked . Doing so may cause the battery to overheat .
PRECAUTION: Never clean the battery vent with a WET cloth or spill liquid over the air intake . This could cause an electric shock, which could cause serious damage, injury or death .
Clean the air intake for the hybrid battery regularly with a dry cloth
QUICK TIP
OTHER KEY FEATURES
Page 45 of 54

43ALWAYS CHECK THE OWNER’S MANUAL FOR COMPLETE OPER ATING INFORMATION AND SAFET Y WARNINGS .
Tire Mobility Kit Video To view a video on your mobile device, snap this QR Code or visit the listed website .
Refer to page 2 for more information .
QR CODE
www.KuTechVideos.com/de23/2017
A
B
Child-Protector Rear Door Lock
Locate these locks on the rear edge of the rear passenger doors . Turn the
safety lock to the LOCK position to disable the inner door handles from
opening the rear doors .
REMINDER: Child-Protector Rear Door Lock is located on rear passenger’s door jamb .
Tire Mobility Kit
The Tire Mobility Kit may temporarily seal
certain types of tire damage .
For operational information, please refer to
the Owner’s Manual .
A Sealant Bottle
B Compressor
•The Tire Mobility Kit is a temporary fix and is to be used for one tire only; the tire should be inspected as soon as possible •The kit should only be used for sealing/inflating passenger car tires; do not use for inflating any other type of tires •Some damaged tires cannot be sealed completely; do not use the kit if it appears a tire is damaged beyond repair
QUICK TIPS
REMINDERS:
•The above images are for illustration purposes only and may not reflect actual operation
•
After tire is properly sealed, drive cautiously at a maximum speed of 50 mph for a maximum distance of up to 120 miles .
OTHER KEY FEATURES
Page 46 of 54
 /
Passenger Airbag Off Indicator
ODS detects the presence and position of the front passenger and adjusts
or turns")
SAFETY FEATURES
NIRO FEATURES & FUNCTIONS GUIDE44
Occupant Detection System (ODS) /
Passenger Airbag Off Indicator
ODS detects the presence and position of the front passenger and adjusts
or turns off airbag deployment accordingly .
Depending on the situation and type of
accident, the system may:
•Deploy airbag (Adult)
•Not deploy the airbag (Unoccupied)
If the system determines that the airbag should not be deployed, the
“PASSENGER AIR BAG OFF” light will illuminate .
Seat Belts
To properly fasten your safety belts:
1 .
Insert the belt tongue plate A into the buckle B until it clicks
2 .
Position the lap portion of the belt across your lap as LOW ON THE
HIPS as possible C . Adjust the belt to a SNUG FIT by pulling up on the
shoulder portion D .
PRESS
A
B
Seat Belt Retractor Locks
Retractor locks allow lap/shoulder seat belts to remain unlocked during
normal vehicle operation for freedom of movement and increased comfort .
During a STRONG STOP, SUDDEN TURN OR CERTAIN COLLISIONS, seat
belt retractors will automatically lock the belts to reduce the risk of injury .
D
C
The Seat Belt warning chime operates for driver’s seat only .
QUICK TIP
REMINDER:
For maximum protection, always wear your Seat Belt .
OFF
PASSENGER
AIR BAG
Page 47 of 54

Normal Maintenance Schedule
When your vehicle requires service, remember that your dealer knows your vehicle best . Your dealer has factory-trained technicians, recommended special tools,
genuine Kia replacement parts and is dedicated to your complete satisfaction . For expert advice and quality service, see your authorized Kia dealer .
* And, if necessary, adjust, correct, clean, or replace .1 If TOP TIER detergent gasoline is not available, one bottle of additive is recommended . Additives are available from your authorized Kia dealer along with information on how to use them . Do not mix other additives .2 Inspect HSG belt for evidence of cuts, cracks, excessive wear or oil saturation and replace if necessary . If HSG belt noise occurred, readjust HSG belt tension before replacing .* And, if necessary, adjust, correct, clean, or replace .1 If TOP TIER detergent gasoline is not available, one bottle of additive is recommended . Additives are available from your authorized Kia dealer along with information on how to use them . Do not mix other additives .2 Inspect HSG belt for evidence of cuts, cracks, excessive wear or oil saturation and replace if necessary . If HSG belt noise occurred, readjust HSG belt tension before replacing .
MAINTENANCE
45ALWAYS CHECK THE OWNER’S MANUAL FOR COMPLETE OPER ATING INFORMATION AND SAFET Y WARNINGS .
Check your Maintenance Schedule or schedule an appointment with a dealer using your UVO eServices account by logging into your UVO App or your account on MyUVO . com ( Vehicles equipped with UVO eServices only; see page 27 for setup information)
QUICK TIP
7,500 miles
PERFORM:
•Add fuel additive1
•Rotate tire position)
REPLACE:
•Engine oil and filter
INSPECT*:
•Air cleaner filter
•HSG belt2
•Vacuum hose
15,000 miles
PERFORM:
•Add fuel additive1
•Rotate tire position
REPLACE:
•Climate control air filter (for evaporator and blower unit)
•Engine oil and filter
INSPECT*:
•Air cleaner filter
•HSG belt2
•Vacuum hose
•Air conditioning refrigerant
•Brake hoses and lines
•Drive shafts and boots
•Exhaust pipe and muffler
•Front brake disc/pads, calipers and rotors
•Rear brake disc/pads
•Steering gear box, linkage & boots/lower
arm ball joint, upper arm ball joint
•Suspension mounting bolts
•Engine Clutch Actuator Hose and Lines
Page 48 of 54

* And, if necessary, adjust, correct, clean, or replace .1 If TOP TIER detergent gasoline is not available, one bottle of additive is recommended . Additives are available from your authorized Kia dealer along with information on how to use them . Do not mix other additives .2 Inspect HSG belt for evidence of cuts, cracks, excessive wear or oil saturation and replace if necessary . If HSG belt noise occurred, readjust HSG belt tension before replacing .
* And, if necessary, adjust, correct, clean, or replace .** If equipped 1 If TOP TIER detergent gasoline is not available, one bottle of additive is recommended . Additives are available from your authorized Kia dealer along with information on how to use them . Do not mix other additives . 2 Fuel filter & fuel tank air filter are considered to be maintenance free but periodic inspection is recommended for this maintenance schedule depends on fuel quality . If there are some important safety matters like fuel flow restriction, surging, loss of power, hard starting problem etc ., replace the fuel filter immediately regardless of maintenance schedule and consult an authorized Kia dealer for details .3 Inspect HSG belt for evidence of cuts, cracks, excessive wear or oil saturation and replace if necessary . If HSG belt noise occurred, readjust HSG belt tension before replacing .
MAINTENANCE
NIRO FEATURES & FUNCTIONS GUIDE46
22,500 miles
PERFORM:
•Add fuel additive1
•Rotate tire position
REPLACE:
•Engine oil and filter
•Engine clutch actuator fluid
INSPECT*:
•Air cleaner filter
•HSG belt2
•Vacuum hose
30,000 miles
PERFORM:
•Add fuel additive1
•Rotate tire position
REPLACE:
•Air cleaner filter
•Climate control air filter (for evaporator and blower unit)
•Engine oil and filter
INSPECT*:
•Air conditioning refrigerant
•Brake fluid
•Brake hoses and lines
•Drive shafts and boots
•Exhaust pipe and muffler
•Front brake disc/pads, calipers and
rotors
•Fuel filter2
•Fuel cap, fuel lines, fuel hoses and
connections
•Fuel tank air filter**2
•HSG belt3
•Rear brake disc/pads
•Parking brake
•Steering gear box, linkage & boots/lower
arm ball joint, upper arm ball joint
•Suspension mounting bolts
•Vacuum hose
•Vapor hose and fuel filler cap
•Engine clutch actuator hose and lines
Normal Maintenance Schedule (Continued)