Page 486 of 653

What to do in an emergency
8
6
IF THE ENGINE OVERHEATS
If your temperature gauge indicates over-
heating, you will experience a loss of
power, or hear loud pinging or knocking,
the engine is probably too hot. If this hap-
pens, you should:
1. Pull off the road and stop as soon as it is safe to do so.
2. Place the shift lever in P (automatic transaxle) or neutral (manual
transaxle) and set the parking brake. If
the air conditioning is on, turn it off.
3. If engine coolant is running out under the vehicle or steam is coming out
from the hood, stop the engine. Do notopen the hood until the coolant has
stopped running or the steaming has
stopped. If there is no visible loss of
engine coolant and no steam, leave
the engine running and check to be
sure the engine cooling fan is operat-
ing. If the fan is not running, turn the
engine off.
4. Check to see if the water pump drive belt is missing. If it is not missing,
check to see that it is tight. If the drive
belt seems to be satisfactory, check
for coolant leaking from the radiator,
hoses or under the vehicle. (If the air
conditioning had been in use, it is nor-
mal for cold water to be draining from
it when you stop). 5. If the water pump drive belt is broken
or engine coolant is leaking out, stop
the engine immediately and we recom-
mend that you call an authorized Kia
dealer. 6. If you cannot find the cause of the
overheating, wait until the engine tem-
perature has returned to normal. Then,if coolant has been lost, carefully add
coolant to the reservoir to bring the
fluid level in the reservoir up to the
halfway mark.
7. Proceed with caution, keeping alert for further signs of overheating. If over-
heating happens again, we recom-
mend that you call an authorized Kia
dealer.
CAUTION
Serious loss of coolant indicates
there is a leak in the cooling systemand we recommend that the systembe checked by an authorized Kia dealer.
WARNING
While the engine is running, keep
hair, hands and clothing away from
moving parts such as the fan and
drive belts to prevent injury.
WARNING
Do not remove the radiator cap
when the engine is hot. This can
allow coolant to blow out of the
opening and cause serious burns.
Page 487 of 653

69
What to do in an emergency
IF YOU HAVE A FLAT TIRE (WITH SPARE TIRE, IF EQUIPPED)
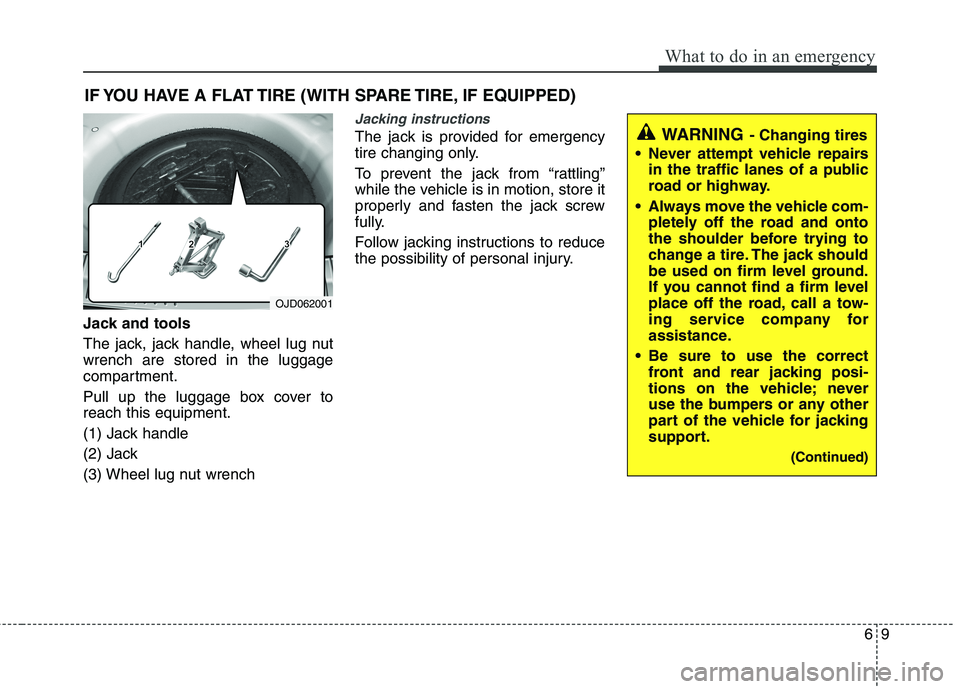
Jack and tools
The jack, jack handle, wheel lug nut wrench are stored in the luggage
compartment.
Pull up the luggage box cover to reach this equipment.
(1) Jack handle
(2) Jack
(3) Wheel lug nut wrench
Jacking instructions
The jack is provided for emergency
tire changing only.
To prevent the jack from “rattling”
while the vehicle is in motion, store it
properly and fasten the jack screw
fully.
Follow jacking instructions to reduce
the possibility of personal injury.
OJD062001
WARNING - Changing tires
Never attempt vehicle repairs in the traffic lanes of a public
road or highway.
Always move the vehicle com- pletely off the road and onto
the shoulder before trying to
change a tire. The jack should
be used on firm level ground.
If you cannot find a firm level
place off the road, call a tow-
ing service company for
assistance.
Be sure to use the correct front and rear jacking posi-
tions on the vehicle; never
use the bumpers or any other
part of the vehicle for jacking
support.
(Continued)
Page 488 of 653
What to do in an emergency
10
6
Removing and storing the spare tire
Turn the tire hold-down wing bolt (1)
counterclockwise.
Store the tire in the reverse order of
removal.
To prevent the spare tire and tools
from “rattling” while the vehicle is in
motion, store them properly. Changing tires
1. Park on a level surface and apply
the parking brake firmly.
2. Shift the shift lever into R (Reverse) with manual transaxle
or P (Park) with automatic
transaxle.
3. Activate the hazard warning flash- er.
OGD061004
(Continued)
The vehicle can easily roll offthe jack causing serious
injury or death.
Do not get under a vehicle that is supported by a jack.
Do not start or run the engine while the vehicle is on the
jack.
Do not allow anyone to remain in the vehicle while it is on the
jack.
Make sure any children pres- ent are in a secure place away
from the road and from the
vehicle to be raised with the
jack.
OED066033
Page 489 of 653
611
What to do in an emergency
4. Remove the wheel lug nut wrench,jack, jack handle, and spare tire
from the vehicle.
5. Block both the front and rear of the wheel that is diagonally opposite
the jack position. 6. Loosen the wheel lug nuts coun-
terclockwise one turn each, but do
not remove any nut until the tire
has been raised off the ground.
WARNING - Changing a tire
To prevent vehicle movement
while changing a tire, always
set the parking brake fully,
and always block the wheel
diagonally opposite the wheel
being changed.
We recommend that the wheels of the vehicle be
chocked, and that no person
remain in a vehicle that is
being jacked.
OJD065003OJD065004
Page 490 of 653
What to do in an emergency
12
6
7. Place the jack at the front (1) or
rear (2) jacking position closest to
the tire you are changing. Place
the jack at the designated loca-
tions under the frame. The jacking
positions are plates welded to the
frame with two tabs and a raised
dot to index with the jack. 8. Insert the jack handle into the jack
and turn it clockwise, raising the
vehicle until the tire just clears the
ground. This measurement is
approximately 30 mm (1.2 in).
Before removing the wheel lug
nuts, make sure the vehicle is sta-
ble and that there is no chance for
movement or slippage.
WARNING - Jack location
To reduce the possibility of
injury, be sure to use only the
jack provided with the vehicle
and in the correct jack position;
never use any other part of the
vehicle for jack support.
OJD065016
OJD065018
OJD065019
Page 491 of 653

613
What to do in an emergency
9. Loosen the wheel nuts andremove them with your fingers. Slide the wheel off the studs and
lay it flat so it cannot roll away. To
put the wheel on the hub, pick up
the spare tire, line up the holeswith the studs and slide the wheel
onto them. If this is difficult, tip thewheel slightly and get the top holein the wheel lined up with the top
stud. Then jiggle the wheel back
and forth until the wheel can be
slid over the other studs. 10. To reinstall the wheel, hold it on
the studs, put the wheel nuts onthe studs and tighten them finger
tight. The nuts should be installedwith their tapered small diameter
ends directed inward. Jiggle thetire to be sure it is completely
seated, then tighten the nuts as
much as possible with your fin-gers again.
11. Lower the vehicle to the ground by turning the wheel nut wrench
counterclockwise.
WARNING
Wheels and wheel covers may have sharp edges. Handle
them carefully to avoid possi-
ble severe injury.
Before putting the wheel into place, be sure that there isnothing on the hub or wheel
(such as mud, tar, gravel, etc.)
that interferes with the wheel
from fitting solidly against the
hub. If there is, remove it. If thecontact of the mounting sur-face between the wheel and
hub is not good, the wheel
nuts could come loose and
cause loss of a wheel. Loss of
a wheel may result in losing
control of the vehicle. This may
cause serious injury or death.
Page 493 of 653

615
What to do in an emergency
To prevent the jack, jack handle,
wheel lug nut wrench and spare tire
from rattling while the vehicle is in
motion, store them properly.
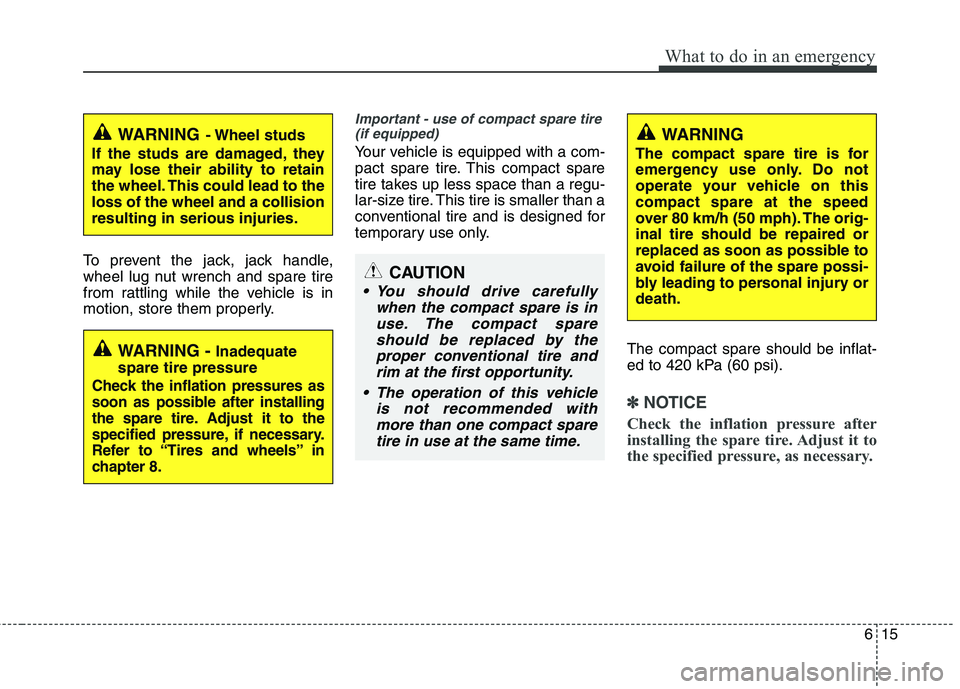
Important - use of compact spare tire(if equipped)
Your vehicle is equipped with a com-
pact spare tire. This compact spare
tire takes up less space than a regu-
lar-size tire. This tire is smaller than a
conventional tire and is designed for
temporary use only.
The compact spare should be inflat-
ed to 420 kPa (60 psi).
✽✽NOTICE
Check the inflation pressure after
installing the spare tire. Adjust it to
the specified pressure, as necessary.
CAUTION
You should drive carefully when the compact spare is inuse. The compact spareshould be replaced by theproper conventional tire and rim at the first opportunity.
The operation of this vehicle is not recommended withmore than one compact sparetire in use at the same time.
WARNING
The compact spare tire is for
emergency use only. Do not
operate your vehicle on thiscompact spare at the speed
over 80 km/h (50 mph). The orig-inal tire should be repaired or
replaced as soon as possible to
avoid failure of the spare possi-
bly leading to personal injury ordeath.WARNING - Wheel studs
If the studs are damaged, they
may lose their ability to retain
the wheel. This could lead to theloss of the wheel and a collisionresulting in serious injuries.
WARNING - Inadequate
spare tire pressure
Check the inflation pressures as
soon as possible after installing
the spare tire. Adjust it to the
specified pressure, if necessary.
Refer to “Tires and wheels” in
chapter 8.
Page 497 of 653

619
What to do in an emergency
IF YOU HAVE A FLAT TIRE (WITH TIRE MOBILITY KIT, IF EQUIPPED)
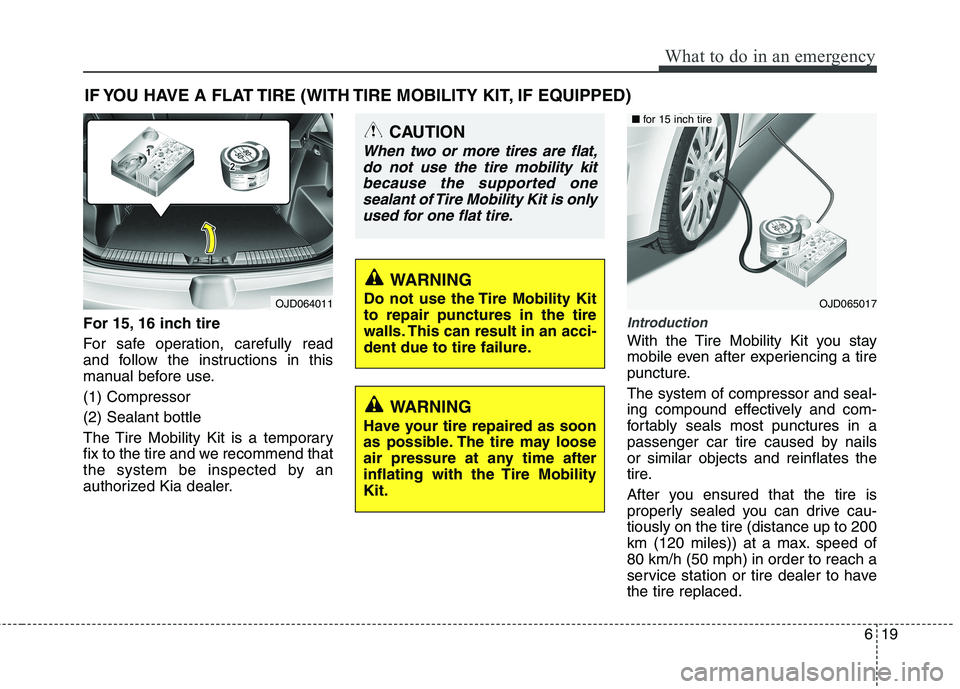
For 15, 16 inch tire
For safe operation, carefully read
and follow the instructions in this
manual before use. (1) Compressor(2) Sealant bottle
The Tire Mobility Kit is a temporary
fix to the tire and we recommend that
the system be inspected by an
authorized Kia dealer.
Introduction
With the Tire Mobility Kit you stay
mobile even after experiencing a tire
puncture. The system of compressor and seal-
ing compound effectively and com-
fortably seals most punctures in a
passenger car tire caused by nailsor similar objects and reinflates the
tire.
After you ensured that the tire is
properly sealed you can drive cau-tiously on the tire (distance up to 200
km (120 miles)) at a max. speed of80 km/h (50 mph) in order to reach a
service station or tire dealer to havethe tire replaced.
WARNING
Have your tire repaired as soon
as possible. The tire may loose
air pressure at any time after
inflating with the Tire MobilityKit.
OJD064011OJD065017
CAUTION
When two or more tires are flat, do not use the tire mobility kitbecause the supported one sealant of Tire Mobility Kit is onlyused for one flat tire.
WARNING
Do not use the Tire Mobility Kit to repair punctures in the tire
walls. This can result in an acci-
dent due to tire failure.
■ for 15 inch tire