Page 673 of 723

Maintenance
86
8
7. Install a new headlight bulb and
snap the headlight bulb retaining
wire into position by aligning the
wire with the groove on the bulb.
8. Connect the headlight bulb socket connector.
9. Install the headlight bulb cover by turning it clockwise.
10. Connect the power connector to the back of the headlight assem-
bly.Headlight (Low, High Non-HID Type)
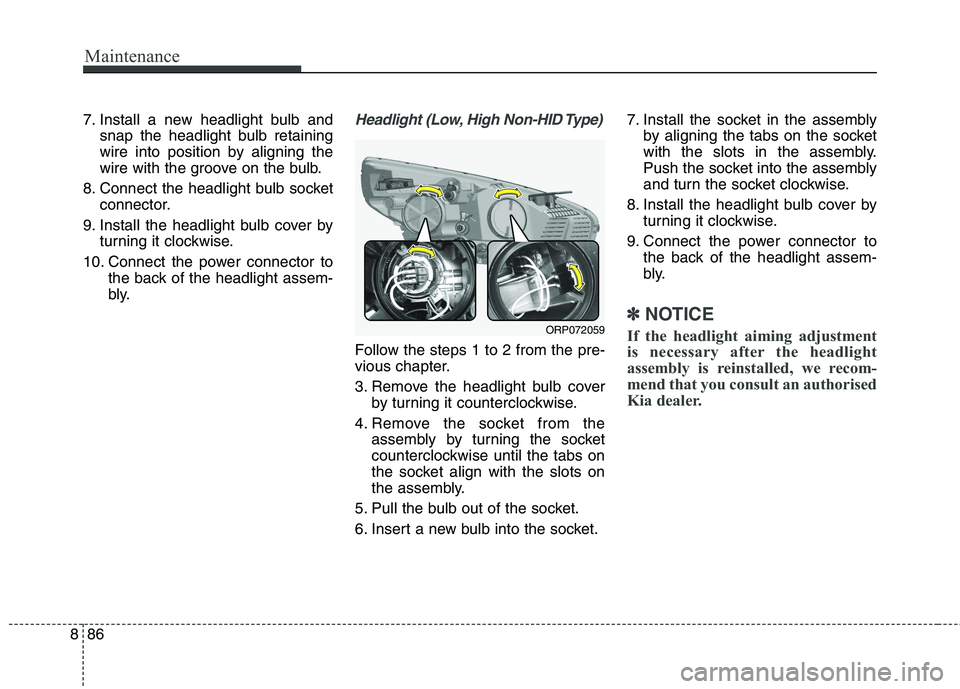
Follow the steps 1 to 2 from the pre-
vious chapter.
3. Remove the headlight bulb coverby turning it counterclockwise.
4. Remove the socket from the assembly by turning the socket
counterclockwise until the tabs on
the socket align with the slots on
the assembly.
5. Pull the bulb out of the socket.
6. Insert a new bulb into the socket. 7. Install the socket in the assembly
by aligning the tabs on the socket
with the slots in the assembly.
Push the socket into the assembly
and turn the socket clockwise.
8. Install the headlight bulb cover by turning it clockwise.
9. Connect the power connector to the back of the headlight assem-
bly.
✽✽ NOTICE
If the headlight aiming adjustment
is necessary after the headlight
assembly is reinstalled, we recom-
mend that you consult an authorised
Kia dealer.ORP072059
Page 675 of 723

Maintenance
88
8
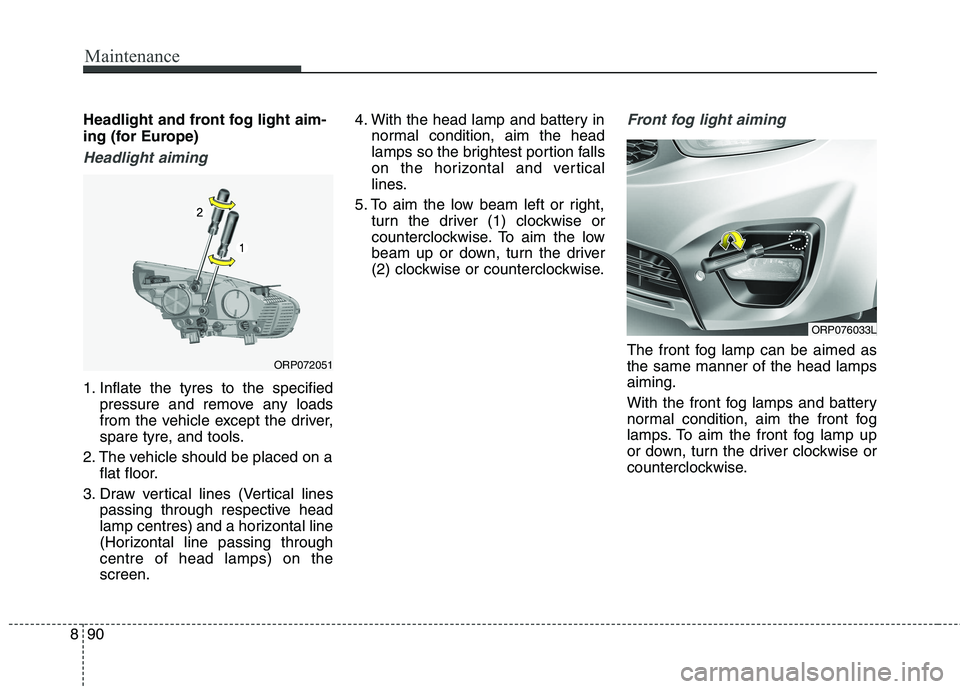
Turn signal light
Follow the steps 1 to 2 from the pre-
vious page.
3. Remove the socket from the
assembly by turning the socket
counterclockwise until the tabs on
the socket align with the slots on
the assembly.
4. Remove the bulb from the socket by pressing it in and rotating it
counterclockwise until the tabs on
the bulb align with the slots in the
socket. Pull the bulb out of the
socket.
OHD076046
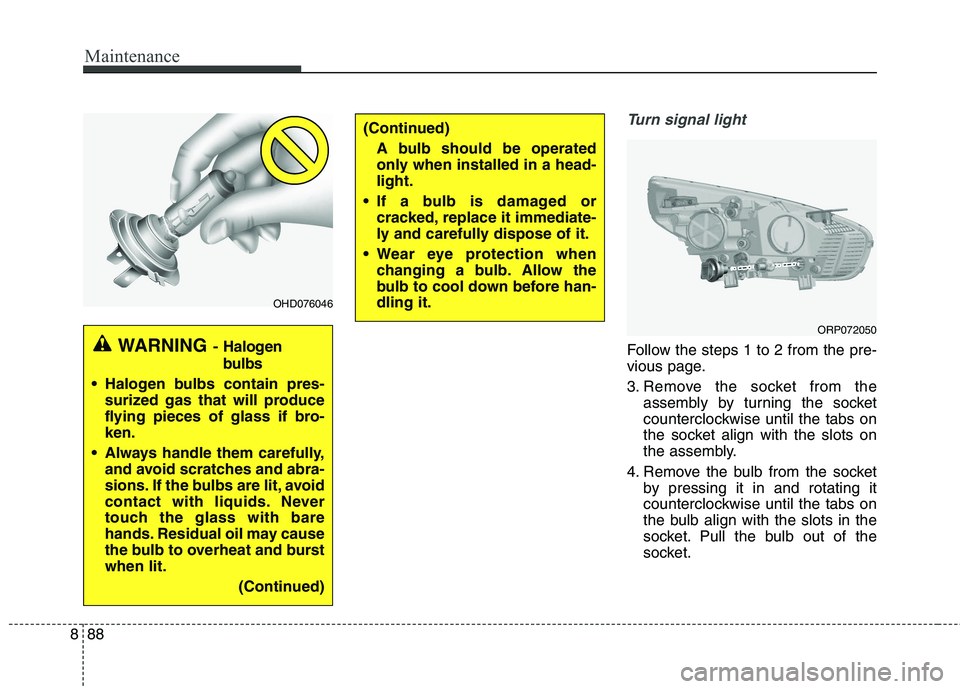
WARNING - Halogen
bulbs
Halogen bulbs contain pres-
surized gas that will produce
flying pieces of glass if bro-ken.
Always handle them carefully, and avoid scratches and abra-
sions. If the bulbs are lit, avoid
contact with liquids. Never
touch the glass with bare
hands. Residual oil may cause
the bulb to overheat and burstwhen lit.
(Continued)
(Continued)A bulb should be operated
only when installed in a head-light.
If a bulb is damaged or cracked, replace it immediate-
ly and carefully dispose of it.
Wear eye protection when changing a bulb. Allow the
bulb to cool down before han-dling it.
ORP072050
Page 676 of 723
889
Maintenance
5. Insert a new bulb by inserting itinto the socket and rotating it until
it locks into place.
6. Install the socket in the assembly by aligning the tabs on the socket
with the slots in the assembly.
Push the socket into the assembly
and turn the socket clockwise.Front fog light (if equipped)
1. Pull the wheel guard down byrotating the screws.
2. Reach your hand into the back of the front bumper.
3. Disconnect the power connector from the socket. 4. Remove the bulb-socket from the
housing by turning the socket
counter clockwise until the tabs on
the socket align with the slots onthe housing.
5. Install the new bulb-socket into the housing by aligning the tabs on
the socket with the slots in the
housing. Push the socket into the
housing and turn the socket clock-
wise.
6. Connect the power connector to the socket.
ORP072063
OJD072050
Page 677 of 723

Maintenance
90
8
Headlight and front fog light aim-
ing (for Europe)
Headlight aiming
1. Inflate the tyres to the specified
pressure and remove any loads
from the vehicle except the driver,
spare tyre, and tools.
2. The vehicle should be placed on a flat floor.
3. Draw vertical lines (Vertical lines passing through respective head
lamp centres) and a horizontal line
(Horizontal line passing throughcentre of head lamps) on thescreen. 4. With the head lamp and battery in
normal condition, aim the head
lamps so the brightest portion falls
on the horizontal and vertical
lines.
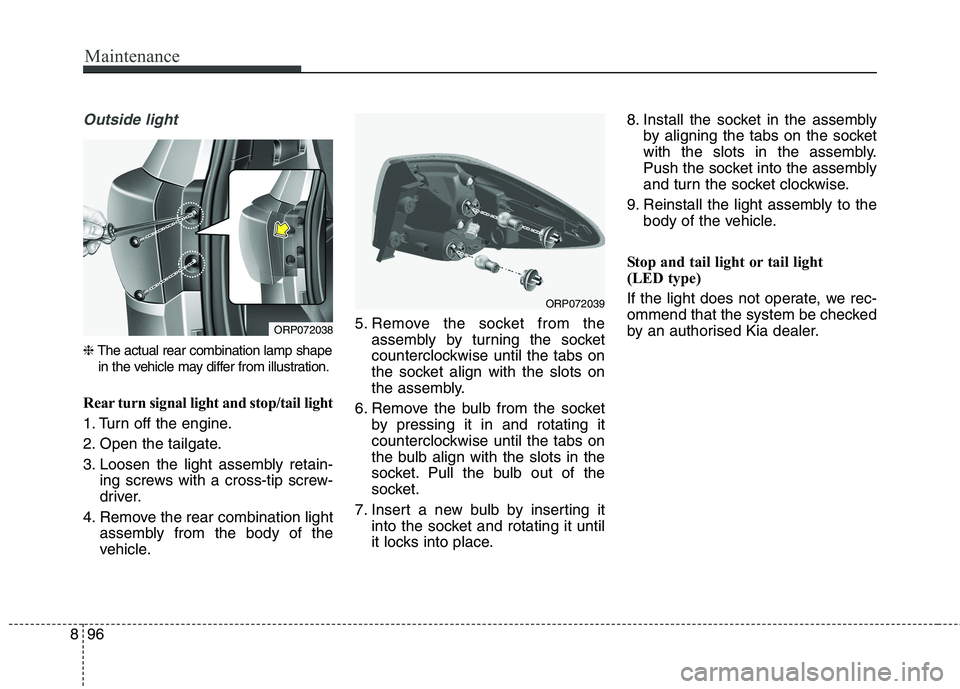
5. To aim the low beam left or right, turn the driver (1) clockwise or
counterclockwise. To aim the low
beam up or down, turn the driver
(2) clockwise or counterclockwise.
Front fog light aiming
The front fog lamp can be aimed as the same manner of the head lampsaiming.
With the front fog lamps and battery
normal condition, aim the front fog
lamps. To aim the front fog lamp up
or down, turn the driver clockwise or
counterclockwise.ORP072051
ORP076033L
Page 683 of 723

Maintenance
96
8
Outside light
❈ The actual rear combination lamp shape
in the vehicle may differ from illustration.
Rear turn signal light and stop/tail light
1. Turn off the engine.
2. Open the tailgate.
3. Loosen the light assembly retain- ing screws with a cross-tip screw-
driver.
4. Remove the rear combination light assembly from the body of the
vehicle. 5. Remove the socket from the
assembly by turning the socket
counterclockwise until the tabs on
the socket align with the slots on
the assembly.
6. Remove the bulb from the socket by pressing it in and rotating it
counterclockwise until the tabs on
the bulb align with the slots in the
socket. Pull the bulb out of the
socket.
7. Insert a new bulb by inserting it into the socket and rotating it until
it locks into place. 8. Install the socket in the assembly
by aligning the tabs on the socket
with the slots in the assembly.
Push the socket into the assembly
and turn the socket clockwise.
9. Reinstall the light assembly to the body of the vehicle.
Stop and tail light or tail light
(LED type)
If the light does not operate, we rec-
ommend that the system be checked
by an authorised Kia dealer.
ORP072039
ORP072038
Page 684 of 723
897
Maintenance
Inside light
1. Turn off the engine.
2. Open the tailgate.
3. Remove the service cover using aflat-blade screwdriver. Tail light/Back-up light (Bulb type)
4. Remove the socket from the
assembly by turning the socket
counterclockwise until the tabs on
the socket align with the slots on
the assembly.
5. Remove the bulb from the socket by pressing it in and rotating it counter-
clockwise until the tabs on the bulb
align with the slots in the socket.
Pull the bulb out of the socket.
(Back-up lamp : Remove the bulb
from the socket by pulling it out) 6. Insert a new bulb by inserting it
into the socket and rotating it until
it locks into place.
7. Install the socket in the assembly by aligning the tabs on the socket
with the slots in the assembly.
Push the socket into the assembly
and turn the socket clockwise.
8. Install the service cover by putting it into the service hole.
ORP072042
ORP072040
Page 685 of 723
Maintenance
98
8
Rear fog light (if equipped)
1. Remove the socket from the
assembly by turning the socket
counterclockwise until the tabs on
the socket align with the slots on
the assembly.
2. Pull the bulb out of the socket.
3. Insert a new bulb into the socket.
4. Install the socket into the assem- bly by aligning the tabs on the
socket with the slots on the
assembly and turning the socket
clockwise.
5. Reinstall the light assembly to the body of the vehicle. Tail light or stop and tail light
(LED type)
If the light does not operate, we rec-
ommend that the system be checked
by an authorised Kia dealer.
High mounted stop light bulb replacement
If the light does not operate, we rec-
ommend that the system be checked
by an authorised Kia dealer.
ODMEMC2012
ORP072043
Page 686 of 723
899
Maintenance
License plate light bulb replacement
1. Remove the lens retaining screwswith a philips head screwdriver.
2. Remove the socket from the assembly by turning the socket
counterclockwise.
3. Remove the bulb by pulling it straight out.
4. Install the socket into the assembly by aligning the tabs on the socket
with the slots on the assembly and
turning the socket clockwise.
5. Install a new bulb.
6. Reinstall the lens securely with the lens retaining screws.
ORP076080L
■Map lamp
■Vanity mirror lamp
■ Luggage room lamp
■Room lamp
■Foot lamp
OGD071039/OQL075067/ORP072044/ ORP072056R/ORP072045