Page 100 of 268

5. Route guidance
5-10
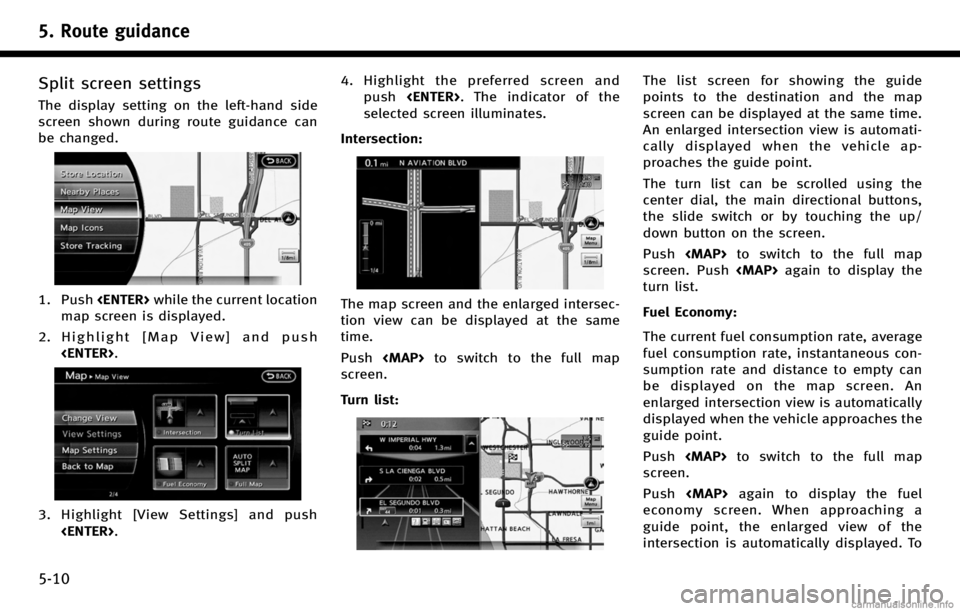
Split screen settings
The display setting on the left-hand side
screen shown during route guidance can
be changed.
1. Pushwhile the current location
map screen is displayed.
2. Highlight [Map View] and push .
3. Highlight [View Settings] and push
. 4. Highlight the preferred screen and
push . The indicator of the
selected screen illuminates.
Intersection:
The map screen and the enlarged intersec-
tion view can be displayed at the same
time.
Push
Page 101 of 268

display the fuel economy information,
push.
To display the map screen, push
again.
NOTE:
Use the values displayed on the fuel economy
screen as a guide. When the fuel gauge
indicates empty or the low fuel warning light
illuminates even if the distance to empty
reading indicates a sufficient amount of fuel
remains, refuel the vehicle as soon as possible.
Full map:
The current location map is displayed. An
enlarged intersection view is automatically
displayed when the vehicle approaches the
guide point.
When an enlarged intersection view is
displayed, pushing returns to the map screen.
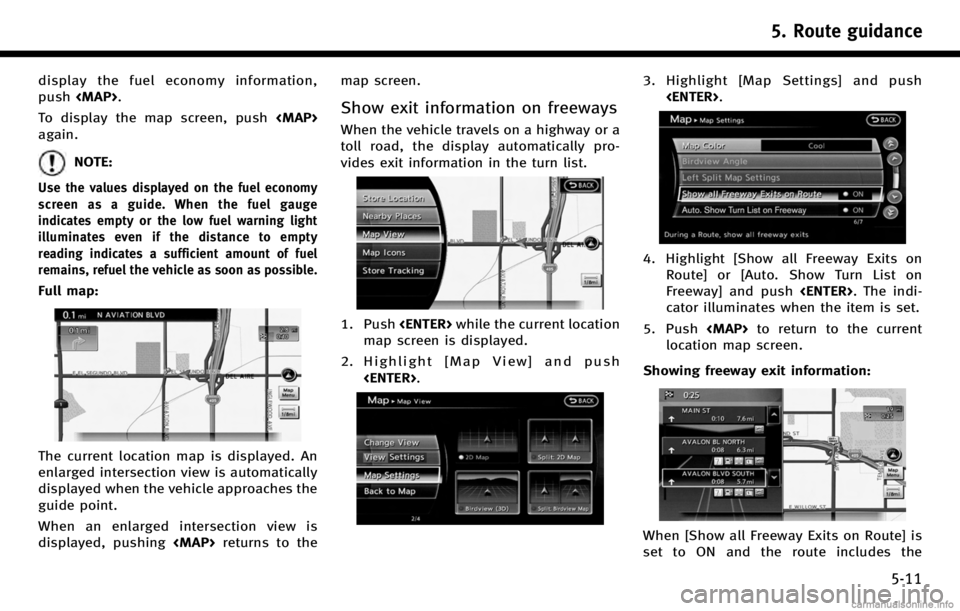
Show exit information on freeways
When the vehicle travels on a highway or a
toll road, the display automatically pro-
vides exit information in the turn list.
1. Push
while the current location
map screen is displayed.
2. Highlight [Map View] and push .
3. Highlight [Map Settings] and push.
4. Highlight [Show all Freeway Exits onRoute] or [Auto. Show Turn List on
Freeway] and push . The indi-
cator illuminates when the item is set.
5. Push to return to the current
location map screen.
Showing freeway exit information:
When [Show all Freeway Exits on Route] is
set to ON and the route includes the
5. Route guidance
5-11
Page 102 of 268
5. Route guidance
5-12
freeway or toll road, all exits along the
route which have exit information will be
shown in the turn list. The exit information
is shown as icons.
Displaying turn list automatically on free-
way:
When [Auto. Show Turn List on Freeway] is
set to ON, the turn list will be automatically
displayed while the vehicle travels on a
freeway or toll road.
Selecting a waypoint from the exit infor-
mation list:
When exit information is displayed on the
turn list, a waypoint to a facility located
near the freeway exit can be set as a
waypoint.
1. Highlight the exit where the exit in-formation icon is displayed, and push
. The category list screen is
displayed.
2. Highlight the landmark category andpush . The list screen for
showing facilities located near the
freeway exit is displayed.
3. Highlight the preferred facility for the waypoint and push .
4. The waypoint is set, and the route
search is performed.
“Procedures after setting destina-
tion” (page 5-2)
Page 103 of 268

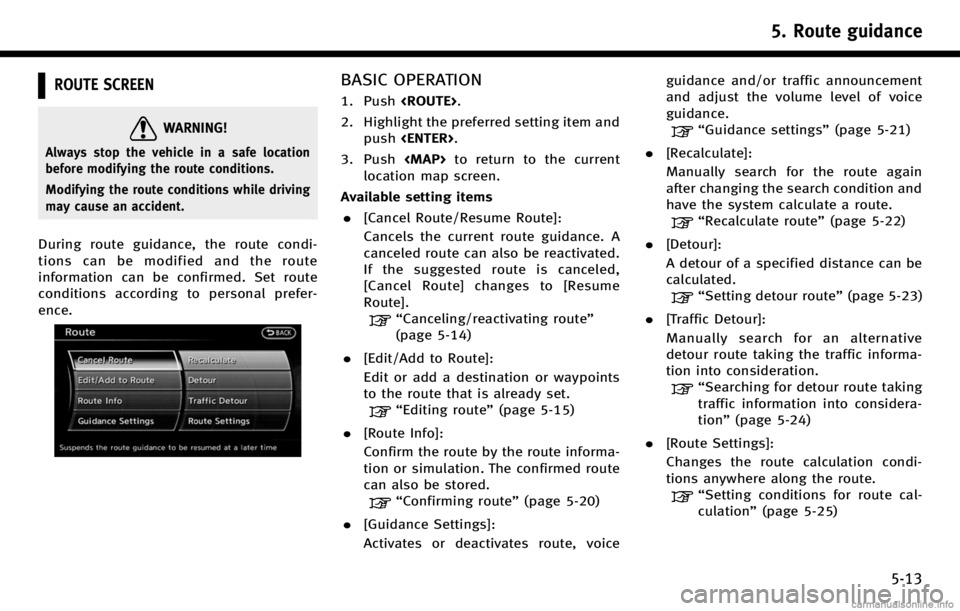
ROUTE SCREEN
WARNING!
Always stop the vehicle in a safe location
before modifying the route conditions.
Modifying the route conditions while driving
may cause an accident.
During route guidance, the route condi-
tions can be modified and the route
information can be confirmed. Set route
conditions according to personal prefer-
ence.
BASIC OPERATION
1. Push.
2. Highlight the preferred setting item and push .
3. Push to return to the current
location map screen.
Available setting items . [Cancel Route/Resume Route]:
Cancels the current route guidance. A
canceled route can also be reactivated.
If the suggested route is canceled,
[Cancel Route] changes to [Resume
Route].
“Canceling/reactivating route”
(page 5-14)
. [Edit/Add to Route]:
Edit or add a destination or waypoints
to the route that is already set.
“Editing route” (page 5-15)
. [Route Info]:
Confirm the route by the route informa-
tion or simulation. The confirmed route
can also be stored.
“Confirming route” (page 5-20)
. [Guidance Settings]:
Activates or deactivates route, voice guidance and/or traffic announcement
and adjust the volume level of voice
guidance.
“Guidance settings”
(page 5-21)
. [Recalculate]:
Manually search for the route again
after changing the search condition and
have the system calculate a route.
“Recalculate route” (page 5-22)
. [Detour]:
A detour of a specified distance can be
calculated.
“Setting detour route” (page 5-23)
. [Traffic Detour]:
Manually search for an alternative
detour route taking the traffic informa-
tion into consideration.
“Searching for detour route taking
traffic information into considera-
tion” (page 5-24)
. [Route Settings]:
Changes the route calculation condi-
tions anywhere along the route.
“Setting conditions for route cal-
culation” (page 5-25)
5. Route guidance
5-13
Page 104 of 268
5. Route guidance
5-14
CANCELING/REACTIVATING ROUTE
A route that is already set can be canceled
at any time. If a route is deleted, the
destination and waypoints are also can-
celed.
It is also possible to reactivate a canceled
route.
INFO:
Canceling a route does not delete the destina-
tion and waypoint information completely.
“Delete destination”(page 4-24)
Canceling route
1. Push.
2. Highlight [Cancel Route] and push .
3. A confirmation message is displayed.
Highlight [Yes] and push .
The route is canceled along with the
destination and waypoints.
Voice command
1. Push
>located on the steering
wheel.
2. After the tone sounds, speak a com- mand.
To cancel a route:
"Cancel Route" (Alternate Command
Mode)
Reactivating route
1. Push .
2. Highlight [Resume Route] and push .
3. A confirmation message is displayed.Highlight [Yes] and push . The
canceled route is reactivated.
Page 105 of 268
![INFINITI QX70 2017 Navigation Manual INFO:
If a new route is set, the canceled route cannot
be reactivated.
EDITING ROUTE
1. Push<ROUTE>.
2. Highlight [Edit/Add to Route] and push <ENTER>.
3. Highlight the preferred condition and push <E INFINITI QX70 2017 Navigation Manual INFO:
If a new route is set, the canceled route cannot
be reactivated.
EDITING ROUTE
1. Push<ROUTE>.
2. Highlight [Edit/Add to Route] and push <ENTER>.
3. Highlight the preferred condition and push <E](/manual-img/42/35071/w960_35071-104.png)
INFO:
If a new route is set, the canceled route cannot
be reactivated.
EDITING ROUTE
1. Push.
2. Highlight [Edit/Add to Route] and push .
3. Highlight the preferred condition and push .
4. Push to return to the previous
screen. Push to return to the
current location map screen.
Available setting items
*1[Add Destination]:
“Setting destination or waypoint”
(page 5-15)
*2Current destination:
Changes or deletes the destination.
“ Editing/deleting destination or
waypoint” (page 5-17)
*3Condition for calculating a route to the
destination:
Changes the conditions for calculating
a route to the destination.
“Changing route calculation con-
ditions”(page 5-19)
*4[Add Waypoint]:
“Setting destination or waypoint”
(page 5-15)
*5Current waypoint:
Changes or deletes the waypoint.
“Editing/deleting destination or
waypoint” (page 5-17)
*6Condition for calculating a route to a
waypoint:
Changes the conditions for calculating
a route to a waypoint.
“Changing route calculation con-
ditions”(page 5-19)
*7[Calculate]:
Manually search for the route again
after changing the search conditions
and have the system calculate a route.
“Changing route calculation con-
ditions”(page 5-19)
Setting destination or waypoint
A destination or waypoint can be added to
the route that has already been set. A total
of 6 destinations or waypoints can be set.
5. Route guidance
5-15
Page 106 of 268
![INFINITI QX70 2017 Navigation Manual 5. Route guidance
5-16
1. Push<ROUTE>.
2. Highlight [Edit/Add to Route] and push <ENTER>.
3. Highlight [Add Destination] or [Add Waypoint] and push <ENTER>.
If [Add Destination] is selected, the
curre INFINITI QX70 2017 Navigation Manual 5. Route guidance
5-16
1. Push<ROUTE>.
2. Highlight [Edit/Add to Route] and push <ENTER>.
3. Highlight [Add Destination] or [Add Waypoint] and push <ENTER>.
If [Add Destination] is selected, the
curre](/manual-img/42/35071/w960_35071-105.png)
5. Route guidance
5-16
1. Push.
2. Highlight [Edit/Add to Route] and push .
3. Highlight [Add Destination] or [Add Waypoint] and push .
If [Add Destination] is selected, the
current destination changes to a way-
point.
4. Set a destination or waypoint. The method of searching for a destination
or waypoint is the same as the one for a destination.
“4. Setting destination”
5. The selected location is displayed at
the center of the map. Highlight [Add to
Route] after confirming the location and
push .
INFO:
Even after setting a destination/waypoint,
the destination/waypoint location can be
adjusted, the route can be stored, etc.
“Editing/deleting destination or way-
point” (page 5-17)
6. Return to the [Edit Route] screen. Set
the route conditions as necessary.
7. Highlight [Calculate] and push .
The system will recalculate the routes.
After the route search is completed, the
display will automatically return to the
current location map screen.
INFO:
.
The prior route is automatically deleted.
.Added waypoints and search conditions will
not be taken into consideration for the route
calculation until [Calculate] is highlighted
and is pushed.
Page 107 of 268
Editing/deleting destination or
waypoint
The destination or waypoint that has
already been set can be modified or
deleted.
If a location is modified or deleted when a
suggested route is already set, the prior
suggested route will be recalculated ac-
cordingly.
1. Push.
2. Highlight [Edit/Add to Route] and push .
3. Highlight a destination or waypoint that is already set and push .
4. Highlight [Move Dest.] to modify the
location and push .
“Moving location of destination”
(page 5-5)
5. Highlight [Delete] and push to
delete the location.
6. A confirmation message is displayed. Confirm the contents of the message,
highlight [Yes] and push . The
destination or waypoint is deleted from
the route. Return to the [Edit Route]
screen.
7. By highlighting [Calculate] and pushing
, the system will recalculate the
routes. After the route search is com-
pleted, the display will automatically
return to the current location map
screen.
5. Route guidance
5-17