Page 115 of 614
Features of your vehicle
18
4
Using the transmitter (if equipped)
Park the vehicle and stop the engine.
Arm the system as described below.
1. Turn off the engine and remove
the ignition key from the ignition
switch.
2. Make sure that all doors, the engine hood and liftgate (tailgate)
are closed and latched.
3. Lock the doors by pressing the lock button on the transmitter.
After completion of the steps above,
the hazard warning lights will blink
once to indicate that the system is
armed.
If any door, liftgate (tailgate) or
engine hood remains open, the haz-
ard warning lights won't operate and
theft-alarm will not arm. After you
close all doors, liftgate (tailgate) and
engine hood, the hazard warning
lights blink once.
Using the mechanical key
Park the vehicle and stop the engine.
Arm the system as described below.
1. Turn off the engine and remove the key from the ignition switch(if
equipped).
2. Make sure that all doors, the engine hood and liftgate (tailgate)
are closed and latched.
3. Lock the doors by inserting the key into the key hole on the front out-
side door handle and turning the
key toward the rear of the vehicle.
If any door, liftgate (tailgate) or
engine hood remains open, the theft-
alarm will not arm.
✽ ✽ NOTICE
If you lock or unlock the doors by
using the mechanical key, the haz-
ard warning light won't operate.
Do not arm the system until all
passengers have left the vehicle. If
the system is armed while a pas-
senger(s) remains in the vehicle,
the alarm may be activated when
the remaining passenger(s) leave
the vehicle. If any door (or trunk)
or engine hood is opened within
30 seconds after the system
enters the armed stage, the sys-
tem is disarmed to prevent an
unnecessary alarm.
Page 141 of 614
Features of your vehicle
44
4
Opening the hood
1. Pull the release lever to unlatch
the hood. The hood should pop
open slightly. 2. Go to the front of the vehicle, raise
the hood slightly, pull the second-
ary latch (1) inside of the hood up
and lift the hood (2).
3. Raise the hood. It will raise com- pletely by itself after it has been
raised about halfway.
HOOD
WARNING
Open the hood after turning off
the engine on a flat surface,
shifting the shift lever to the
P(Park) position, and setting the
parking brake.
ODM042023
ODM046024L
WARNING
When you check the engine
compartment, please make sure
your head is not injured by the
hood safety hook which is
located inside of the hood.
ODMNMC2034
Page 143 of 614
Features of your vehicle
46
4
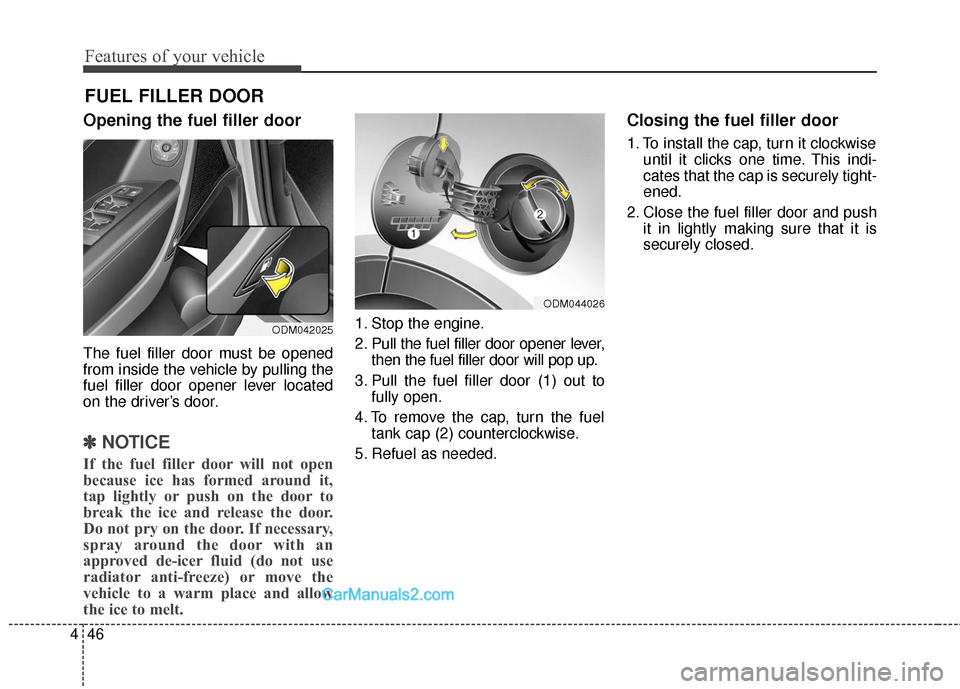
Opening the fuel filler door
The fuel filler door must be opened
from inside the vehicle by pulling the
fuel filler door opener lever located
on the driver’s door.
✽ ✽
NOTICE
If the fuel filler door will not open
because ice has formed around it,
tap lightly or push on the door to
break the ice and release the door.
Do not pry on the door. If necessary,
spray around the door with an
approved de-icer fluid (do not use
radiator anti-freeze) or move the
vehicle to a warm place and allow
the ice to melt.
1. Stop the engine.
2. Pull the fuel filler door opener lever,
then the fuel filler door will pop up.
3. Pull the fuel filler door (1) out to fully open.
4. To remove the cap, turn the fuel tank cap (2) counterclockwise.
5. Refuel as needed.
Closing the fuel filler door
1. To install the cap, turn it clockwise until it clicks one time. This indi-
cates that the cap is securely tight-
ened.
2. Close the fuel filler door and push it in lightly making sure that it is
securely closed.
FUEL FILLER DOOR
ODM042025
ODM044026
Page 145 of 614
Features of your vehicle
48
4
(Continued)
When refueling, always shut
the engine off. Sparks pro-
duced by electrical compo-
nents related to the engine
can ignite fuel vapors causing
a fire. Once refueling is com-
plete, check to make sure the
filler cap and filler door are
securely closed, before start-
ing the engine.
DO NOT use matches or a lighter and DO NOT SMOKE or
leave a lit cigarette in your
vehicle while at a gas station
especially during refueling.
Automotive fuel is highly
flammable and can, when
ignited, result in fire.
If a fire breaks out during refu- eling, leave the vicinity of the
vehicle, and immediately con-
tact the manager of the gas
station and then contact the
local fire department or 911.
Follow any safety instructions
they provide.(Continued)
When using an approvedportable fuel container, be sure
to place the container on the
ground prior to refueling. Static
electricity discharge from the
container can ignite fuel vapors
causing a fire. Once refueling
has begun, contact with the
vehicle should be maintained
until the filling is complete.
Use only approved portable
plastic fuel containers designed
to carry and store gasoline.
Do not use cellular phones while refueling. Electric cur-
rent and/or electronic interfer-
ence from cellular phones can
potentially ignite fuel vapors
causing a fire.
(Continued)CAUTION
Make sure to refuel your vehi-cle according to the "Fuelrequirements" suggested insection 1.
If the fuel filler cap requires replacement, use only a gen-uine HYUNDAI cap or theequivalent specified for yourvehicle. An incorrect fuel fillercap can result in a seriousmalfunction of the fuel systemor emission control system.
Do not spill fuel on the exterior surfaces of the vehicle. Anytype of fuel spilled on paintedsurfaces may damage the paint.
After refueling, make sure the fuel cap is installed securelyto prevent fuel spillage in theevent of an accident.
Page 153 of 614
Features of your vehicle
56
4
Electric power steering (EPS)
The power steering uses a motor to
assist you in steering the vehicle. If
the engine is off or if the power steer-
ing system becomes inoperative, the
vehicle may still be steered, but it will
require increased steering effort.
The motor driven power steering is
controlled by a power steering con-
trol unit which senses the steering
wheel torque and vehicle speed to
command the motor.
The steering becomes heavier as
the vehicle’s speed increases and
becomes lighter as the vehicle’s
speed decreases for optimum steer-
ing control.
Should you notice any change in the
effort required to steer during normal
vehicle operation, have the power
steering checked by an authorized
HYUNDAI dealer.
✽ ✽
NOTICE
The following symptoms may occur
during normal vehicle operation:
• The EPS warning light does not
illuminate.
• The steering gets heavy immedi- ately after turning the ignition
switch on. This happens as the sys-
tem performs the EPS system
diagnostics. When the diagnostics
is completed, the steering wheel
will return to its normal condition.
• A click noise may be heard from the EPS relay after the ignition
switch is turned to the ON or
LOCK (OFF) position.
• A motor noise may be heard when the vehicle is at a stop or at a low
driving speed.
• If the Electric Power Steering System does not operate normally,
the warning light will illuminate on
the instrument cluster. The steer-
ing wheel may become difficult to
control or operate abnormally.
Take your vehicle to an authorized
HYUNDAI dealer and have the
vehicle checked as soon as possible. (Continued)
STEERING WHEEL
CAUTION
If the Electric Power Steering
System does not operate nor-mally, the warning light willilluminate on the instrumentcluster. The steering wheelmay become difficult to con-trol or operate abnormally.Take your vehicle to anauthorized HYUNDAI dealerand have the vehicle checkedas soon as possible.
When you operate the steer- ing wheel in low temperature,abnormal noise could occur. Iftemperature rises, the noisewill disappear. This is a normalcondition.
When the vehicle is stationary, if you turn the steering wheelall the way to the left or rightcontinuously, the steeringwheel becomes heavier fromthe end. But this is for yoursafety, not system malfunc-tion. As time passes, thesteering wheel return to itsnormal condition.
Page 176 of 614
479
Features of your vehicle
INSTRUMENT CLUSTER
1. Tachometer
2. Speedometer
3. Engine coolant temperature gauge
4. Fuel gauge
5. LCD display
6. Warning and indicator lights (if equipped)
7. Turn signal indicator lights
ONC047117N/ONC047084N
■
■Type A
❈The actual cluster in the vehicle may
differ from the illustration.
For more details, refer to the "Gauges"
in this chapter.
■
■ Type B
Page 177 of 614
Features of your vehicle
80
4
Instrument Cluster Control
Adjusting Instrument Cluster
Illumination
The brightness of the instrument
panel illumination is changed by
moving the illumination control knob
right or left when the ignition switch
or Engine Start/Stop button is ON, or
the tail lights are turned on. The brightness has 20 levels : 1
(MIN) ~ 20 (MAX)
If you hold the illumination control knob on the right end (+) or left end
(-), the brightness will be changed
continuously.
If the brightness reaches to the maximum or minimum level, an
alarm will sound.
Gauges
Speedometer
The speedometer indicates the
speed of the vehicle and is calibrated
in miles per hour (mph) and/or kilo-
meters per hour (km/h).ODM042056
ODM046057N
ODM046621L/ODM046620L
■
Type A
■Type B
Page 179 of 614
Features of your vehicle
82
4
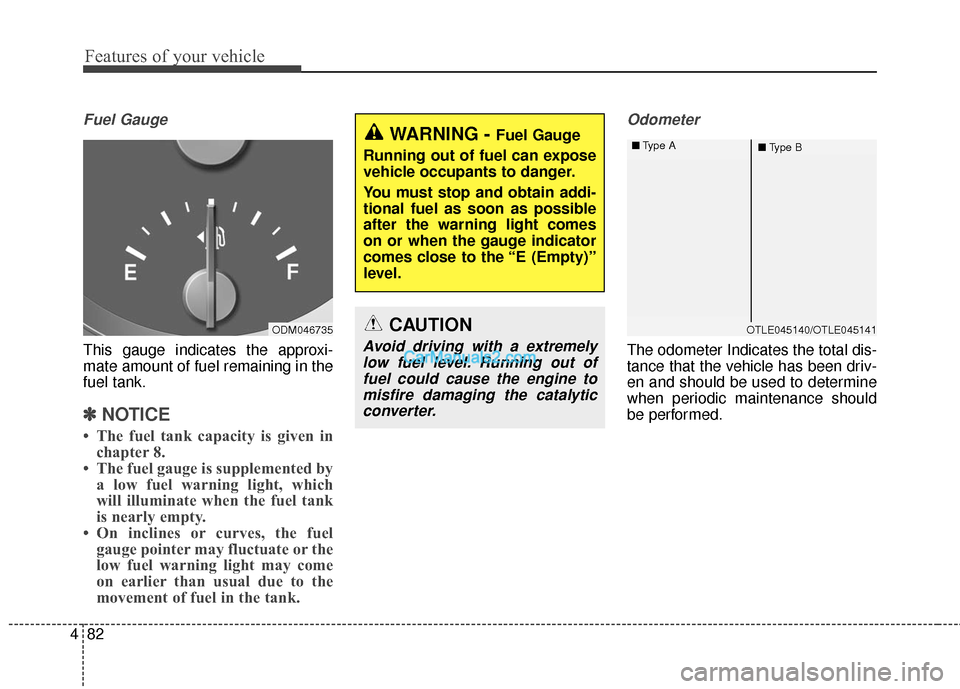
Fuel Gauge
This gauge indicates the approxi-
mate amount of fuel remaining in the
fuel tank.
✽ ✽
NOTICE
• The fuel tank capacity is given in
chapter 8.
• The fuel gauge is supplemented by a low fuel warning light, which
will illuminate when the fuel tank
is nearly empty.
• On inclines or curves, the fuel gauge pointer may fluctuate or the
low fuel warning light may come
on earlier than usual due to the
movement of fuel in the tank.
Odometer
The odometer Indicates the total dis-
tance that the vehicle has been driv-
en and should be used to determine
when periodic maintenance should
be performed.
ODM046735
WARNING - Fuel Gauge
Running out of fuel can expose
vehicle occupants to danger.
You must stop and obtain addi-
tional fuel as soon as possible
after the warning light comes
on or when the gauge indicator
comes close to the “E (Empty)”
level.
CAUTION
Avoid driving with a extremely low fuel level. Running out offuel could cause the engine tomisfire damaging the catalyticconverter.
OTLE045140/OTLE045141
■
Type A
■Type B