2017 Hyundai Santa Fe drive mode
[x] Cancel search: drive modePage 18 of 569
Your vehicle at a glance
42
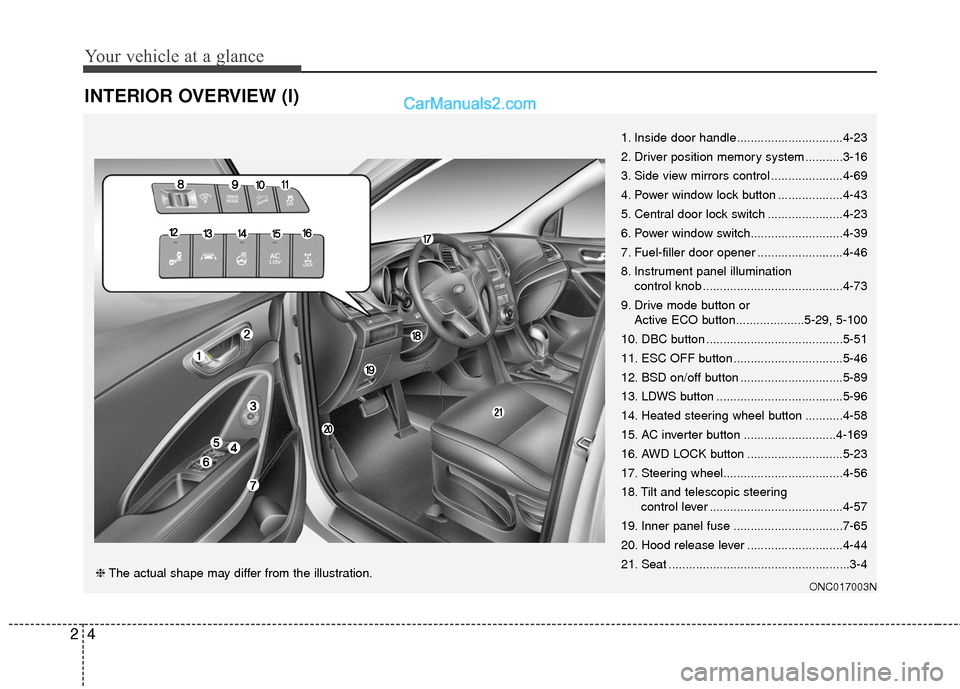
INTERIOR OVERVIEW (I)
1. Inside door handle...............................4-23
2. Driver position memory system ...........3-16
3. Side view mirrors control .....................4-69
4. Power window lock button ...................4-43
5. Central door lock switch ......................4-23
6. Power window switch...........................4-39
7. Fuel-filler door opener .........................4-46
8. Instrument panel illumination control knob .........................................4-73
9. Drive mode button or Active ECO button....................5-29, 5-100
10. DBC button ........................................5-51
11. ESC OFF button ................................5-46
12. BSD on/off button ..............................5-89
13. LDWS button .....................................5-96
14. Heated steering wheel button ...........4-58
15. AC inverter button ...........................4-169
16. AWD LOCK button ............................5-23
17. Steering wheel...................................4-56
18. Tilt and telescopic steering control lever .......................................4-57
19. Inner panel fuse ................................7-65
20. Hood release lever ............................4-44
21. Seat .....................................................3-4
ONC017003N❈ The actual shape may differ from the illustration.
Page 55 of 569
Safety features of your vehicle
34
3
Seat belts - Rear seat 3-point sys-
tem with combination lockingretractor
To fasten your seat belt:
Combination retractor type seat belts
are installed in the rear seat positions
to help accommodate the installation
of child restraint systems. Although a
combination retractor is also installed
in the front passenger seat position, it
is strongly recommended that children
always be seated in the rear seat.
NEVER place any infant restraint sys-
tem in the front seat of the vehicle.
This type of seat belt combines the
features of both an emergency lock-
ing retractor seat belt and an auto-
matic locking retractor seat belt. To
fasten your seat belt, pull it out of the
retractor and insert the metal tab into
the buckle. There will be an audible
"click" when the tab locks into the
buckle. When not securing a child
restraint, the seat belt operates in the
same way as the driver's seat belt
(Emergency Locking Retractor Type).
It automatically adjusts to the proper
length only after the lap belt portion of
the seat belt is adjusted manually so
that it fits snugly around your hips. When the seat belt is fully extended
from the retractor to allow the instal-
lation of a child restraint system, the
seat belt operation changes to allow
the belt to retract, but not to extend
(Automatic Locking Retractor Type).
Refer to “Using a child restraint sys-
tem” in this section.
To convert from the automatic lock-
ing feature to the emergency locking
operation mode, allow the unbuckled
seat belt to fully retract.
(Continued)
Position one arm under the
shoulder belt and the other
over the belt, as shown in the
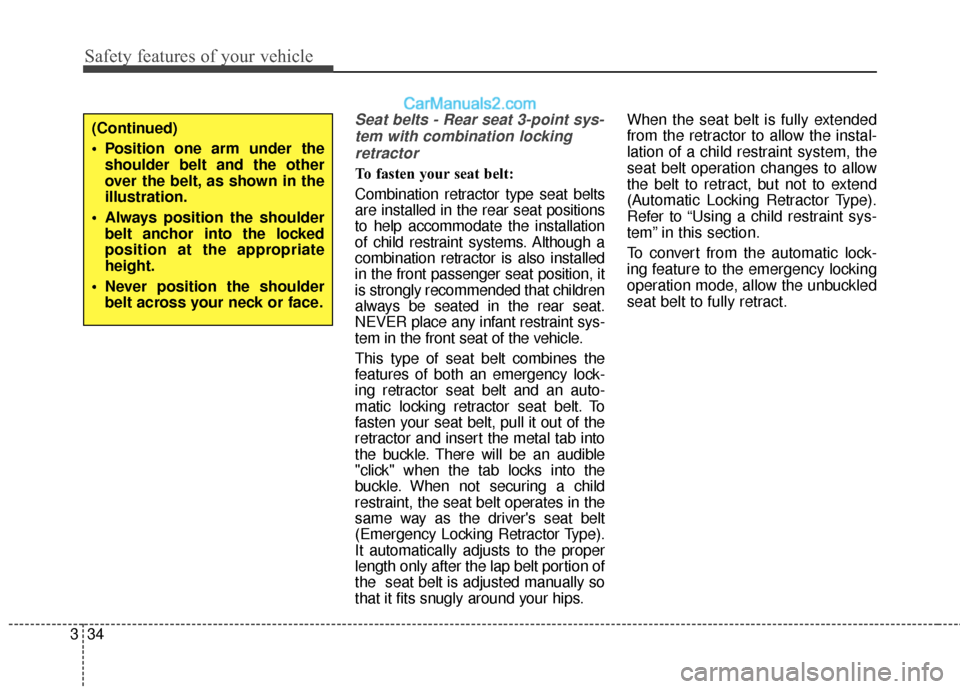
illustration.
Always position the shoulder belt anchor into the locked
position at the appropriate
height.
Never position the shoulder belt across your neck or face.
Page 66 of 569
345
Safety features of your vehicle
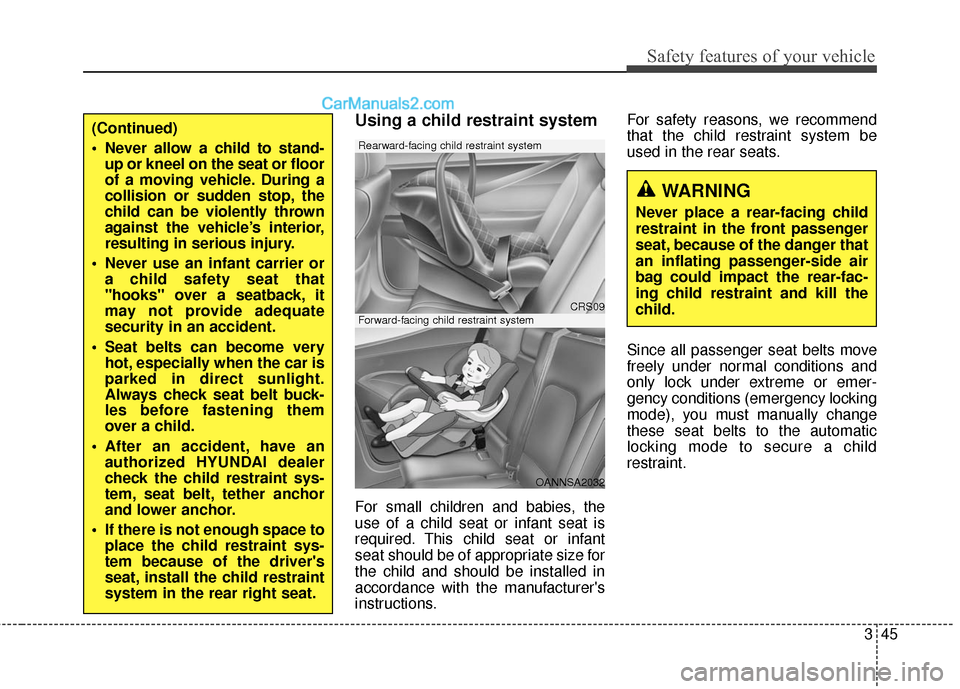
Using a child restraint system
For small children and babies, the
use of a child seat or infant seat is
required. This child seat or infant
seat should be of appropriate size for
the child and should be installed in
accordance with the manufacturer's
instructions.For safety reasons, we recommend
that the child restraint system be
used in the rear seats.
Since all passenger seat belts move
freely under normal conditions and
only lock under extreme or emer-
gency conditions (emergency locking
mode), you must manually change
these seat belts to the automatic
locking mode to secure a child
restraint.
WARNING
Never place a rear-facing child
restraint in the front passenger
seat, because of the danger that
an inflating passenger-side air
bag could impact the rear-fac-
ing child restraint and kill the
child.
CRS09
OANNSA2032
Forward-facing child restraint system
Rearward-facing child restraint system
(Continued)
Never allow a child to stand-
up or kneel on the seat or floor
of a moving vehicle. During a
collision or sudden stop, the
child can be violently thrown
against the vehicle’s interior,
resulting in serious injury.
Never use an infant carrier or a child safety seat that
"hooks" over a seatback, it
may not provide adequate
security in an accident.
Seat belts can become very hot, especially when the car is
parked in direct sunlight.
Always check seat belt buck-
les before fastening them
over a child.
After an accident, have an authorized HYUNDAI dealer
check the child restraint sys-
tem, seat belt, tether anchor
and lower anchor.
If there is not enough space to place the child restraint sys-
tem because of the driver's
seat, install the child restraint
system in the rear right seat.
Page 88 of 569

367
Safety features of your vehicle
Your vehicle is equipped with a
Supplemental Restraint (Air Bag)
System and the lap/shoulder belts at
both the driver and passenger seat-
ing positions.
The front air bags are designed to
supplement the three-point seat
belts. For these air bags to provide
protection, the seat belts must be
worn at all times when driving.
The indications of the system's pres-
ence are the letters "SRS AIR BAG"
embossed on the air bag pad cover
in the steering wheel, on the knee
bolster below the steering wheel col-
umn and the passenger's side front
panel pad above the glove box.
The SRS consists of air bags
installed under the pad covers in the
center of the steering wheel , in the
knee bolster below the steering
wheel column and the passenger's
side front panel above the glove box.
The purpose of the SRS is to provide
the vehicle's driver and/or the front
passenger with additional protection
than that offered by the seat belt sys-
tem alone in case of a frontal impact
of sufficient severity.The seat belt buckle sensors deter-
mine if the driver and front passen-
ger's seat belts are fastened. These
sensors provide the ability to control
the SRS deployment based on
whether or not the seat belts are fas-
tened, and how severe the impact is.
The advanced SRS offers the ability
to control the air bag inflation within
two levels. A first stage level is pro-
vided for moderate-severity impacts.
A second stage level is provided for
more severe impacts.
According to the impact severity and
seat belt usage, the SRSCM (SRS
Control Module) controls the air bag
inflation. Failure to properly wear
seat belts can increase the risk or
severity of injury in an accident.
Additionally, your vehicle is equipped
with an occupant classification sys-
tem in the front passenger's seat.
The occupant classification system
detects the presence of a passenger
in the front passenger's seat and will
turn off the front passenger's air bag
under certain conditions. For more
detail, see "Occupant classification
system" in this section.
Page 105 of 569
Mirrors . . . . . . . . . . . . . . . . . . . . . . . . . . . . . . . . . . 4-60\
. . . . . . . . . . . . . . . . . . . . . . . . 4-60
. . . . . . . . . . . . . . . . . . . . . . . . . . . . 4-68
Instrument cluster . . . . . . . . . . . . . . . . . . . . . . . . . 4-72
. . . . . . . . . . . . . . . . . . . . . 4-73
. . . . . . . . . . . . . . . . . . . . . . . . . . . . . . . . . . . . \
. 4-73
. . . . . . . . . . . . . . . . . . . . . . 4-76
LCD display . . . . . . . . . . . . . . . . . . . . . . . . . . . . . . 4-77
. . . . . . . . . . . . . . . . . . . . . . . . . 4-77
. . . . . . . . . . . . . . . . . . . . . . . . . . . . . . . . . 4-77
. . . . . . . . . . . . . . . . . . . . . . . . . 4-78
Warning System (SCC/LDWS) Mode . . . . . . . . . . 4-78
. . . . . . . . . . . . . . . . . . . . . . . . . . . . . . . . . . . 4-\
79
. . . . . . . . . . . . . . . . . . . . . . . . . . . . . . . . 4-79
. . . . . . . . . . . . . . . . . . . . . . . . . . . 4-80
. . . . . . . . . . . . . . . . . . . . . . . . . . . . 4-86
Trip computer . . . . . . . . . . . . . . . . . . . . . . . . . . . . . 4-95
. . . . . . . . . . . . . . . . . . . . . . . . . . . . . . . 4-96
. . . . . . . . . . . . . . . . . . . . . . . . . . . . . . . . . . . . \
4-97
. . . . . . . . . . . . . . . . . . . . . . . . . . 4-98
Warning and indicator lights . . . . . . . . . . . . . . . 4-100
. . . . . . . . . . . . . . . . . . . . . . . . . . . . . . 4-100
. . . . . . . . . . . . . . . . . . . . . . . . . . . . . 4-108
Driver assist system . . . . . . . . . . . . . . . . . . . . . . . 4-113
. . . . . . . . . . . . . . . . . . . . 4-113
. . . . . . . . . . . . . . . . . . . . . . . . . . 4-117
. . . . . . . . . . . . . . . . . . . 4-118
Hazard warning flasher . . . . . . . . . . . . . . . . . . . . 4-119
Lighting . . . . . . . . . . . . . . . . . . . . . . . . . . . . . . . . . 4-120
. . . . . . . . . . . . . . . . . . . . . . . . . . . . . 4-120
. . . . . . . . . . . . . . . . . . . . . . . . . . . . . 4-121
. . . . . . . . . . . . . . . . . . . . . . . . . . . 4-126
. . . . . . . . 4-129
Wipers and washers . . . . . . . . . . . . . . . . . . . . . . . 4-130
. . . . . . . . . . . . . . . . . . . . . . . . . . . 4-130
. . . . . . . . . 4-132
Interior light . . . . . . . . . . . . . . . . . . . . . . . . . . . . . 4-133
. . . . . . . . . . . . . . . . . . . 4-133
. . . . . . . . . . . . . . . . . . . . . . . . . . . . . . . . . . 4-13\
3
. . . . . . . . . . . . . . . . . . . . . . . . . . . . . . . . . 4-134
. . . . . . . . . . . . . . . . . . . . . . . . . 4-135
. . . . . . . . . . . . . . . . . . . . . . . . . . 4-135
. . . . . . . . . . . . . . . . . . . . . . . . . . . . . 4-135
4
Page 134 of 569
431
Features of your vehicle
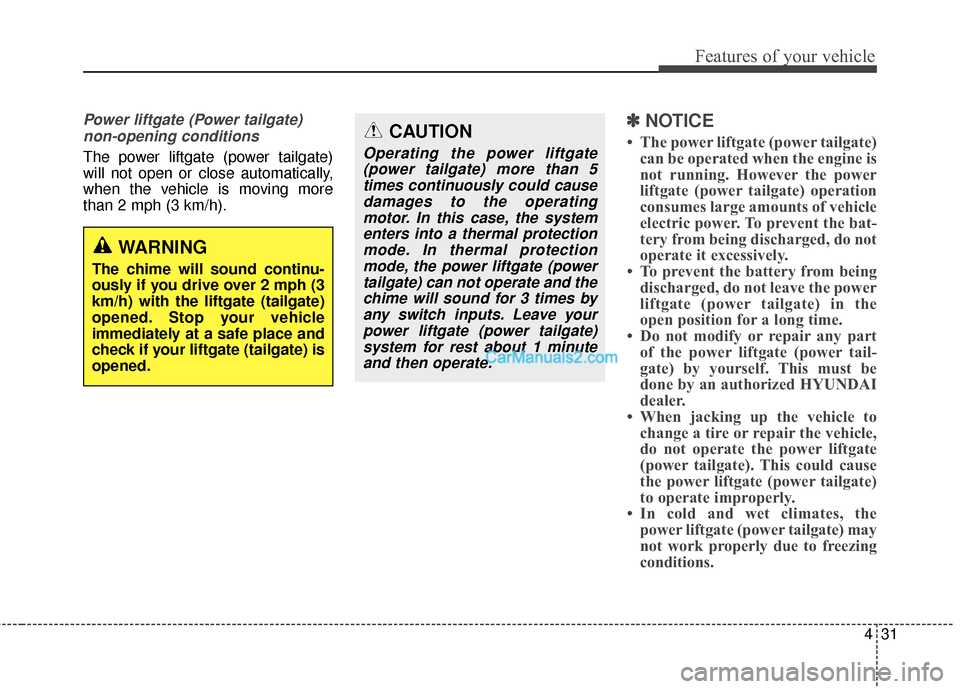
Power liftgate (Power tailgate)non-opening conditions
The power liftgate (power tailgate)
will not open or close automatically,
when the vehicle is moving more
than 2 mph (3 km/h).
✽ ✽ NOTICE
• The power liftgate (power tailgate)
can be operated when the engine is
not running. However the power
liftgate (power tailgate) operation
consumes large amounts of vehicle
electric power. To prevent the bat-
tery from being discharged, do not
operate it excessively.
• To prevent the battery from being discharged, do not leave the power
liftgate (power tailgate) in the
open position for a long time.
• Do not modify or repair any part of the power liftgate (power tail-
gate) by yourself. This must be
done by an authorized HYUNDAI
dealer.
• When jacking up the vehicle to change a tire or repair the vehicle,
do not operate the power liftgate
(power tailgate). This could cause
the power liftgate (power tailgate)
to operate improperly.
• In cold and wet climates, the power liftgate (power tailgate) may
not work properly due to freezing
conditions.
WARNING
The chime will sound continu-
ously if you drive over 2 mph (3
km/h) with the liftgate (tailgate)
opened. Stop your vehicle
immediately at a safe place and
check if your liftgate (tailgate) is
opened.
CAUTION
Operating the power liftgate
(power tailgate) more than 5times continuously could causedamages to the operatingmotor. In this case, the systementers into a thermal protectionmode. In thermal protectionmode, the power liftgate (powertailgate) can not operate and thechime will sound for 3 times byany switch inputs. Leave yourpower liftgate (power tailgate)system for rest about 1 minuteand then operate.
Page 179 of 569
Features of your vehicle
76
4
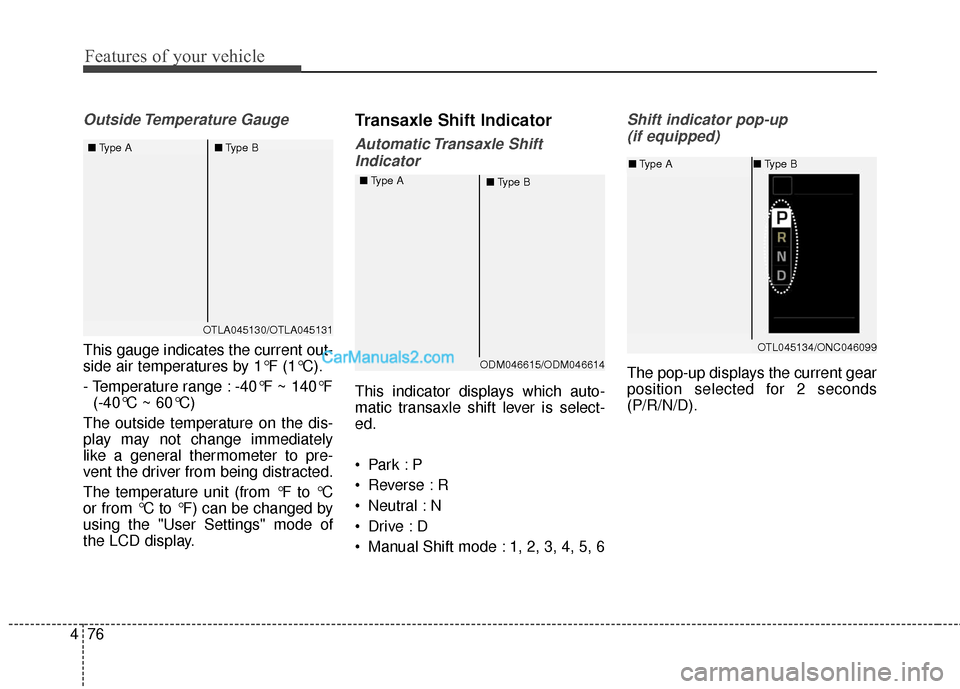
Outside Temperature Gauge
This gauge indicates the current out-
side air temperatures by 1°F (1°C).
- Temperature range : -40°F ~ 140°F
(-40°C ~ 60°C)
The outside temperature on the dis-
play may not change immediately
like a general thermometer to pre-
vent the driver from being distracted.
The temperature unit (from °F to °C
or from °C to °F) can be changed by
using the "User Settings" mode of
the LCD display.
Transaxle Shift Indicator
Automatic Transaxle Shift Indicator
This indicator displays which auto-
matic transaxle shift lever is select-
ed.
Reverse : R
Neutral : N
Manual Shift mode : 1, 2, 3, 4, 5, 6
Shift indicator pop-up (if equipped)
The pop-up displays the current gear
position selected for 2 seconds
(P/R/N/D).
OTLA045130/OTLA045131
■
Type A ■Type B
ODM046615/ODM046614
■
Type A
■Type B
OTL045134/ONC046099
■Type A ■Type B
Page 187 of 569
Features of your vehicle
84
4
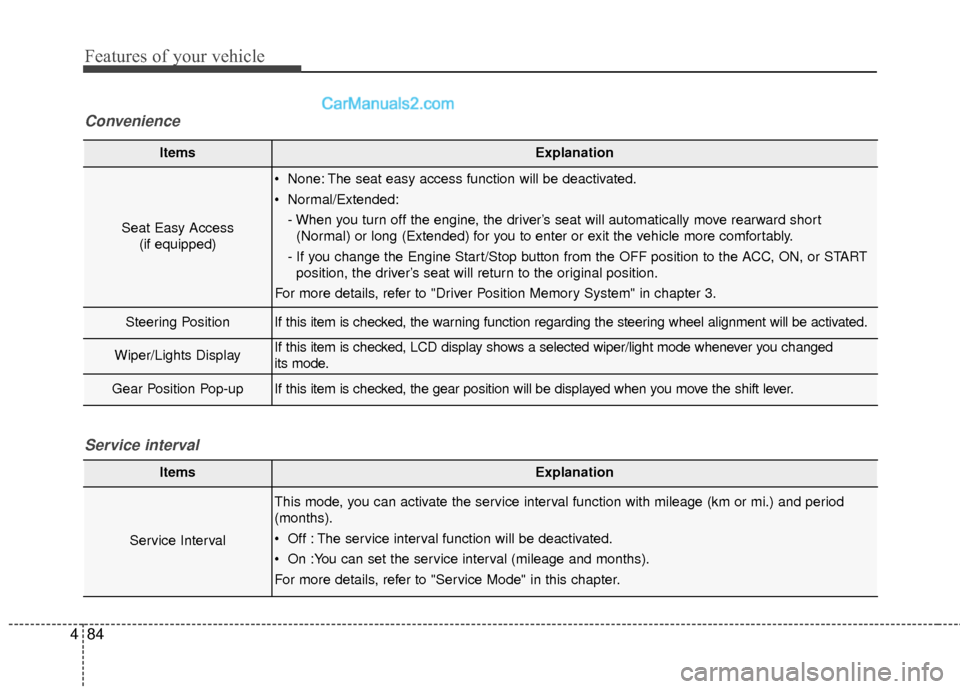
ItemsExplanation
Seat Easy Access
(if equipped)
None: The seat easy access function will be deactivated.
Normal/Extended:
- When you turn off the engine, the driver’s seat will automatically move rearward short(Normal) or long (Extended) for you to enter or exit the vehicle more comfortably.
- If you change the Engine Start/Stop button from the OFF position to the ACC, ON, or START position, the driver’s seat will return to the original position.
For more details, refer to "Driver Position Memory System" in chapter 3.
Steering PositionIf this item is checked, the warning function regarding the steering wheel alignment will be activated.
Wiper/Lights DisplayIf this item is checked, LCD display shows a selected wiper/light mode whenever you changed
its mode.
Gear Position Pop-upIf this item is checked, the gear position will be displayed when you move the shift lever.
Convenience
ItemsExplanation
Service Interval
This mode, you can activate the service interval function with mileage (km or mi.) and period
(months).
Off : The service interval function will be deactivated.
On :You can set the service interval (mileage and months).
For more details, refer to "Service Mode" in this chapter.
Service interval