Page 126 of 569
423
Features of your vehicle
Operating door locks from
inside the vehicle
With the door lock button
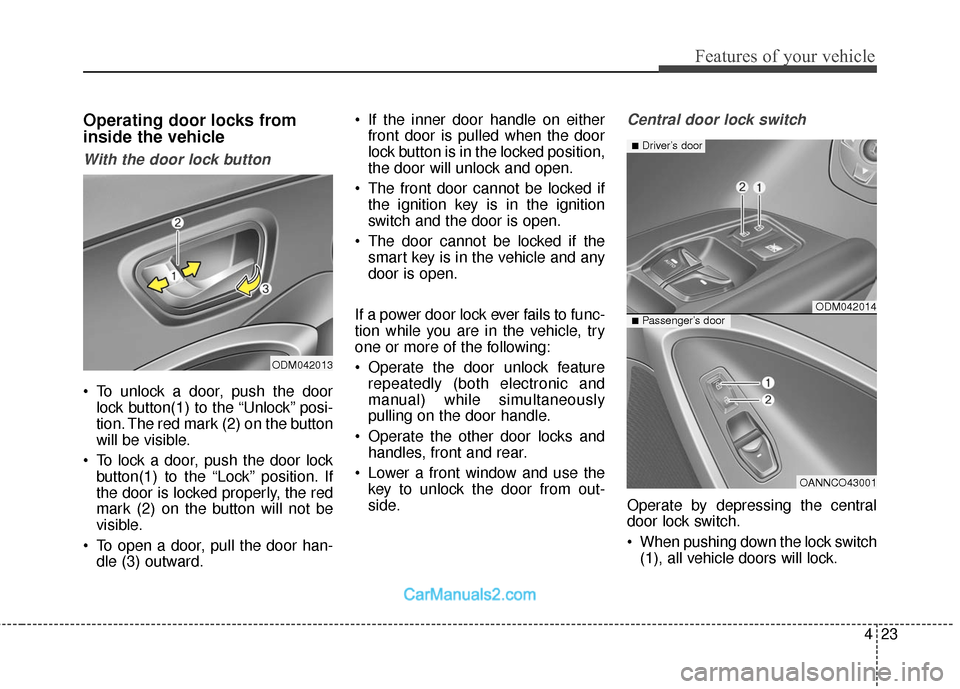
To unlock a door, push the doorlock button(1) to the “Unlock” posi-
tion. The red mark (2) on the button
will be visible.
To lock a door, push the door lock button(1) to the “Lock” position. If
the door is locked properly, the red
mark (2) on the button will not be
visible.
To open a door, pull the door han- dle (3) outward. If the inner door handle on either
front door is pulled when the door
lock button is in the locked position,
the door will unlock and open.
The front door cannot be locked if the ignition key is in the ignition
switch and the door is open.
The door cannot be locked if the smart key is in the vehicle and any
door is open.
If a power door lock ever fails to func-
tion while you are in the vehicle, try
one or more of the following:
Operate the door unlock feature repeatedly (both electronic and
manual) while simultaneously
pulling on the door handle.
Operate the other door locks and handles, front and rear.
Lower a front window and use the key to unlock the door from out-
side.
Central door lock switch
Operate by depressing the central
door lock switch.
When pushing down the lock switch(1), all vehicle doors will lock.
ODM042013
ODM042014
OANNCO43001
■Driver’s door
■Passenger’s door
Page 129 of 569
Features of your vehicle
26
4
Non-Powered liftgate (tailgate)
Opening the liftgate (tailgate)
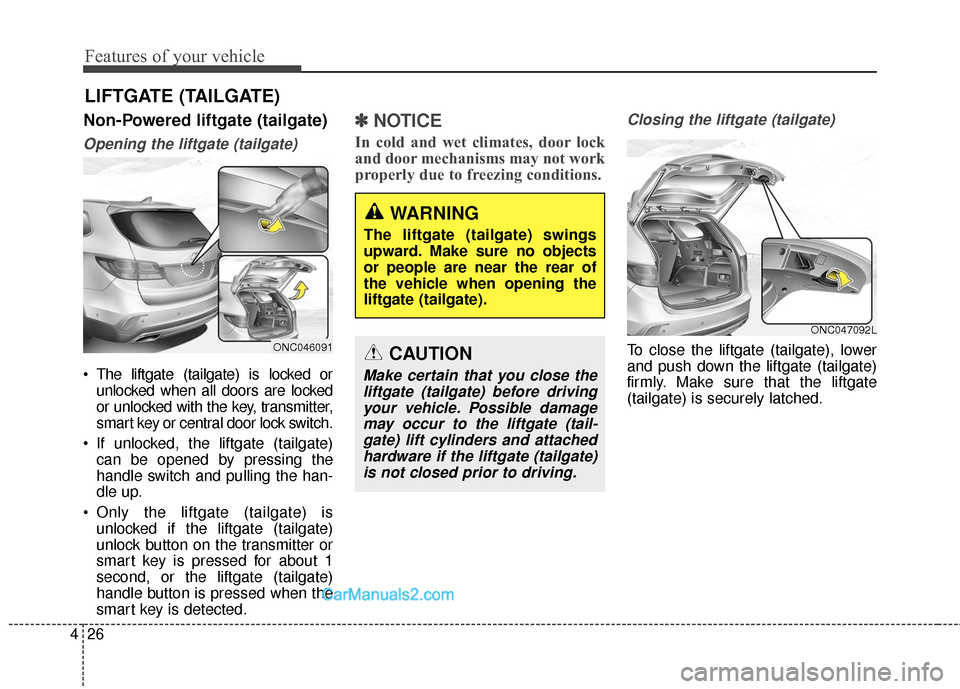
• The liftgate (tailgate) is locked or
unlocked when all doors are locked
or unlocked with the key, transmitter,
smart key or central door lock switch.
If unlocked, the liftgate (tailgate) can be opened by pressing the
handle switch and pulling the han-
dle up.
Only the liftgate (tailgate) is unlocked if the liftgate (tailgate)
unlock button on the transmitter or
smart key is pressed for about 1
second, or the liftgate (tailgate)
handle button is pressed when the
smart key is detected.
✽ ✽ NOTICE
In cold and wet climates, door lock
and door mechanisms may not work
properly due to freezing conditions.
Closing the liftgate (tailgate)
To close the liftgate (tailgate), lower
and push down the liftgate (tailgate)
firmly. Make sure that the liftgate
(tailgate) is securely latched.
LIFTGATE (TAILGATE)
ONC046091
ONC047092L
WARNING
The liftgate (tailgate) swings
upward. Make sure no objects
or people are near the rear of
the vehicle when opening the
liftgate (tailgate).
CAUTION
Make certain that you close the
liftgate (tailgate) before drivingyour vehicle. Possible damagemay occur to the liftgate (tail-gate) lift cylinders and attachedhardware if the liftgate (tailgate)is not closed prior to driving.
Page 143 of 569
Features of your vehicle
40
4
Power windows
The ignition switch must be in the ON
position for power windows to operate.
Each door has a power window
switch that controls that door's win-
dow. The driver has a power window
lock switch which can block the oper-
ation of passenger windows. The dri-
ver’s door has a master power win-
dow switch that controls all the win-
dows in the vehicle. The power win-
dows can be operated for approxi-
mately 30 seconds after the ignition
key is removed or turned to the ACC
or LOCK position. However, if the
front doors open, the power windows
cannot be operated within the 30
second period.
✽ ✽
NOTICE
While driving with the rear windows
down or with the sunroof (if
equipped) in an open (or partially
open) position, your vehicle may
demonstrate a wind buffeting or
pulsation noise. This noise is a nor-
mal occurrence and can be reduced
or eliminated by taking the follow-
ing actions. If the noise occurs with
one or both of the rear windows
down, partially lower both front
windows approximately one inch. If
you experience the noise with the
sunroof open, slightly reduce the
size of the sunroof opening.
Window opening and closing
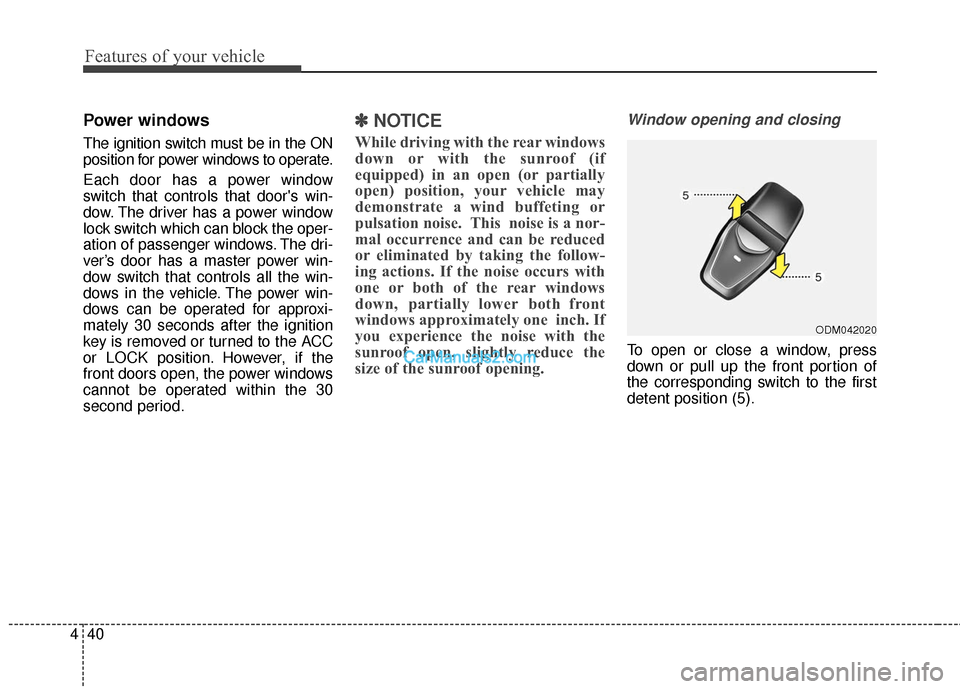
To open or close a window, press
down or pull up the front portion of
the corresponding switch to the first
detent position (5).
ODM042020
Page 144 of 569
441
Features of your vehicle
Auto up/down window (front seat)(if equipped)
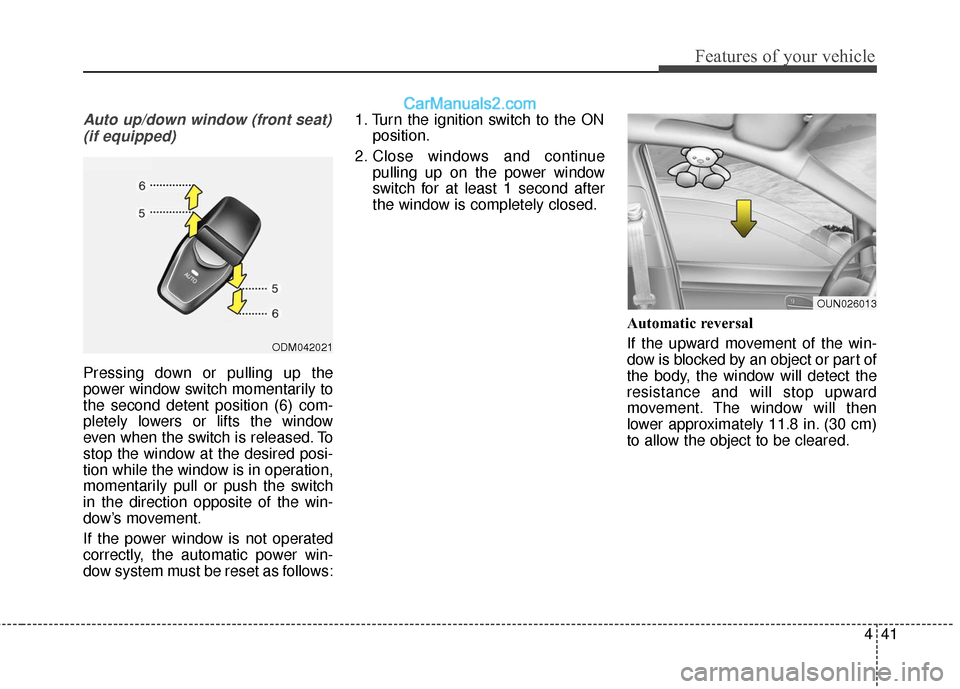
Pressing down or pulling up the
power window switch momentarily to
the second detent position (6) com-
pletely lowers or lifts the window
even when the switch is released. To
stop the window at the desired posi-
tion while the window is in operation,
momentarily pull or push the switch
in the direction opposite of the win-
dow’s movement.
If the power window is not operated
correctly, the automatic power win-
dow system must be reset as follows: 1. Turn the ignition switch to the ON
position.
2. Close windows and continue pulling up on the power window
switch for at least 1 second after
the window is completely closed.
Automatic reversal
If the upward movement of the win-
dow is blocked by an object or part of
the body, the window will detect the
resistance and will stop upward
movement. The window will then
lower approximately 11.8 in. (30 cm)
to allow the object to be cleared.
ODM042021
OUN026013
Page 145 of 569
Features of your vehicle
42
4
If the window detects the resistance
while the power window switch is
pulled up continuously, the window
will stop upward movement then
lower approximately 1 in. (2.5 cm). If
the power window switch is pulled up
continuously again within 5 seconds
after the window is lowered by the
automatic window reversal feature,
the automatic window reversal will
not operate.✽ ✽
NOTICE
The automatic reverse feature for
the driver’s window is only active
when the "auto up" feature is used
by fully pulling up the switch. The
automatic reverse feature will not
operate if the window is raised using
the halfway position on the power
window switch.WARNING
Always check for obstructions
before raising any window to
avoid injuries or vehicle damage.
If an object less than 0.16 in. (4
mm) in diameter is caught
between the window glass and
the upper window channel, the
automatic reverse window may
not detect the resistance and will
not stop and reverse direction.
Page 148 of 569
445
Features of your vehicle
Closing the hood
1. Before closing the hood, check thefollowing:
ment must be correctly installed.
bustible material must be
removed from the engine com-
partment.
2. Lower the hood halfway and push down to securely lock in place.WARNING
Before closing the hood,ensure that all obstructions
are removed from the hood
opening. Closing the hood
with an obstruction present in
the hood opening may result
in property damage or severe
personal injury.
Do not leave gloves, rags or any other combustible materi-
al in the engine compartment.
Doing so may cause a heat-
induced fire.
Always double check to be sure that the hood is firmly
latched before driving away. If
it is not latched, the hood
could open while the vehicle
is being driven, causing a
total loss of visibility, which
might result in an accident.
Do not move the vehicle with the hood in the raised posi-
tion, as vision is obstructed
and the hood could fall or be
damaged.
Page 204 of 569
4101
Features of your vehicle
Parking Brake & BrakeFluid Warning Light
This warning light illuminates:
Once you set the ignition switch or Engine Start/Stop Button to the ON
position.
- It illuminates for approximately 3seconds
- It remains on if the parking brake is applied.
When the parking brake is applied.
When the brake fluid level in the reservoir is low.
- If the warning light illuminateswith the parking brake released, it
indicates the brake fluid level in
reservoir is low. If the brake fluid level in the reservoir
is low:
1. Drive carefully to the nearest safe
location and stop your vehicle.
2. With the engine stopped, check the brake fluid level immediately
and add fluid as required (For
more details, refer to "Brake Fluid"
in chapter 7).
Then check all brake components for fluid leaks. If any leak on the
brake system is still found, the
warning light remains on, or the
brakes do not operate properly, do
not drive the vehicle.
In this case, have your vehicle
towed to an authorized HYUNDAI
dealer and inspected. Dual-diagonal braking system
Your vehicle is equipped with dual-
diagonal braking systems. This
means you still have braking on two
wheels even if one of the dual sys-
tems should fail.
With only one of the dual systems
working, more than normal pedal
travel and greater pedal pressure are
required to stop the vehicle.
Also, the vehicle will not stop in as
short a distance with only a portion
of the brake system working.
If the brakes fail while you are driv-
ing, shift to a lower gear for addition-
al engine braking and stop the vehi-
cle as soon as it is safe to do so.
Page 242 of 569
4139
Features of your vehicle
MANUAL CLIMATE CONTROL SYSTEM (IF EQUIPPED)
ONCNCL2001/ODM042273/ONCNCL2002
1. Front windshield defrost button
2. Temperature control button
3. Air conditioning button
4. MAX A/C (Max airconditioning) button
5. Rear window defroster button
6. Air intake control button
7. Mode selection button
8. Fan speed control knob
9. 3rd row climate control ON/OFF button
10. 3rd row fan speed control knob
11. 3rd row blower ON/OFF button
12. 3rd row mode selection button
13. 3rd row temperature control knob
* if equipped
■
■ Front climate control (Type A) ■
■
Front climate control (Type B)
■
■3rdrow air climate control (for Type A)