Page 15 of 456
Your vehicle at a glance
4
2
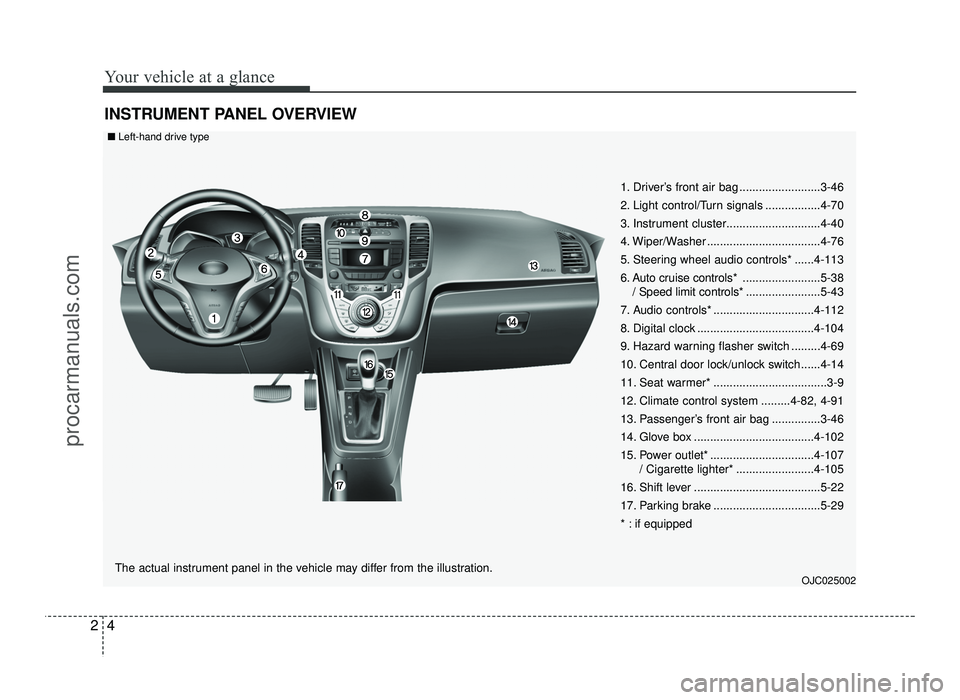
INSTRUMENT PANEL OVERVIEW
1. Driver’s front air bag .........................3-46
2. Light control/Turn signals .................4-70
3. Instrument cluster.............................4-40
4. Wiper/Washer ...................................4-76
5. Steering wheel audio controls* ......4-113
6. Auto cruise controls* ........................5-38
/ Speed limit controls* .......................5-43
7. Audio controls* ...............................4-112
8. Digital clock ....................................4-104
9. Hazard warning flasher switch .........4-69
10. Central door lock/unlock switch......4-14
11. Seat warmer* ...................................3-9
12. Climate control system .........4-82, 4-91
13. Passenger’s front air bag ...............3-46
14. Glove box .....................................4-102
15. Power outlet* ................................4-107 / Cigarette lighter* ........................4-105
16. Shift lever .......................................5-22
17. Parking brake .................................5-29
* : if equipped
OJC025002
The actual instrument panel in the vehicle may differ from the illustration.
■
Left-hand drive type
procarmanuals.com
Page 16 of 456
25
Your vehicle at a glance
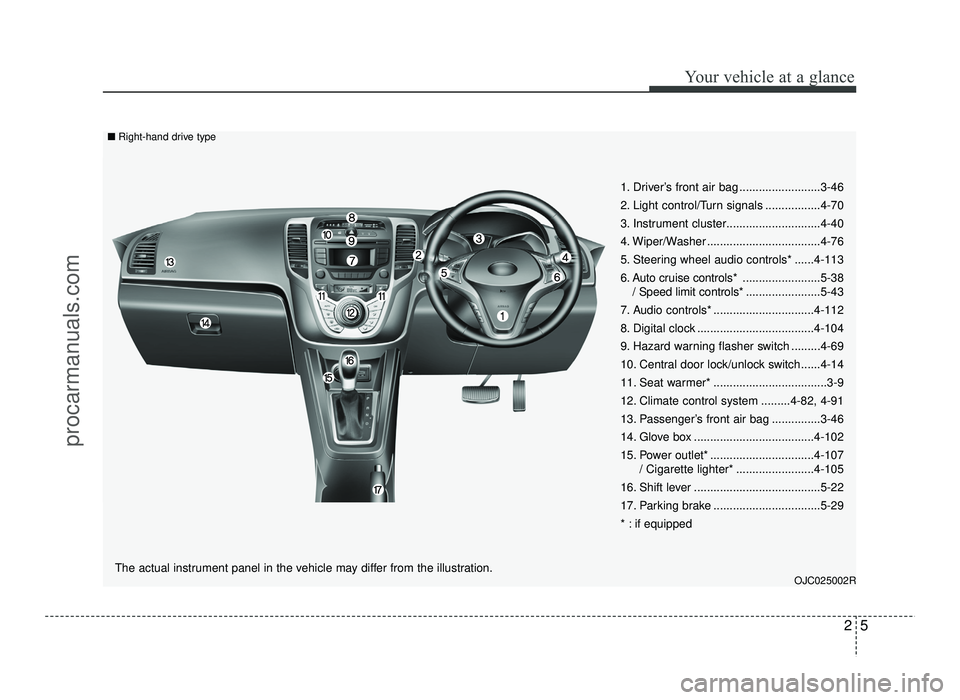
1. Driver’s front air bag .........................3-46
2. Light control/Turn signals .................4-70
3. Instrument cluster.............................4-40
4. Wiper/Washer ...................................4-76
5. Steering wheel audio controls* ......4-113
6. Auto cruise controls* ........................5-38
/ Speed limit controls* .......................5-43
7. Audio controls* ...............................4-112
8. Digital clock ....................................4-104
9. Hazard warning flasher switch .........4-69
10. Central door lock/unlock switch......4-14
11. Seat warmer* ...................................3-9
12. Climate control system .........4-82, 4-91
13. Passenger’s front air bag ...............3-46
14. Glove box .....................................4-102
15. Power outlet* ................................4-107 / Cigarette lighter* ........................4-105
16. Shift lever .......................................5-22
17. Parking brake .................................5-29
* : if equipped
OJC025002R
The actual instrument panel in the vehicle may differ from the illustration.
■
Right-hand drive type
procarmanuals.com
Page 101 of 456
423
Features of your vehicle
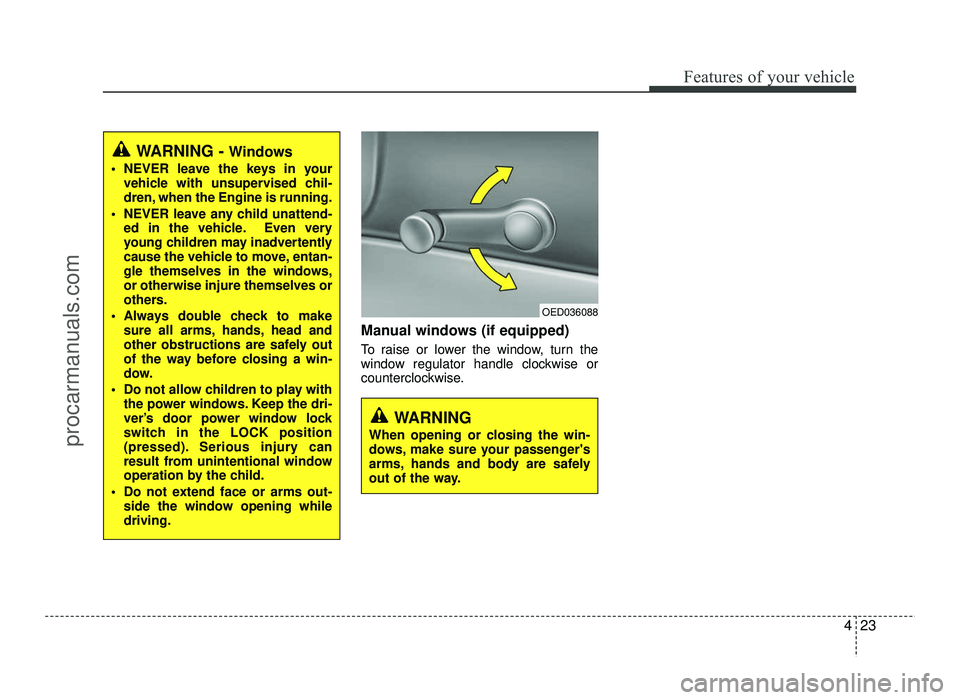
Manual windows (if equipped)
To raise or lower the window, turn the
window regulator handle clockwise or
counterclockwise.
WARNING - Windows
NEVER leave the keys in your vehicle with unsupervised chil-
dren, when the Engine is running.
NEVER leave any child unattend- ed in the vehicle. Even very
young children may inadvertently
cause the vehicle to move, entan-
gle themselves in the windows,or otherwise injure themselves or
others.
Always double check to make sure all arms, hands, head and
other obstructions are safely out
of the way before closing a win-
dow.
Do not allow children to play with the power windows. Keep the dri-
ver’s door power window lock
switch in the LOCK position
(pressed). Serious injury can
result from unintentional window
operation by the child.
Do not extend face or arms out- side the window opening whiledriving.
OED036088
WARNING
When opening or closing the win-
dows, make sure your passenger's
arms, hands and body are safely
out of the way.
procarmanuals.com
Page 104 of 456
Features of your vehicle
26
4
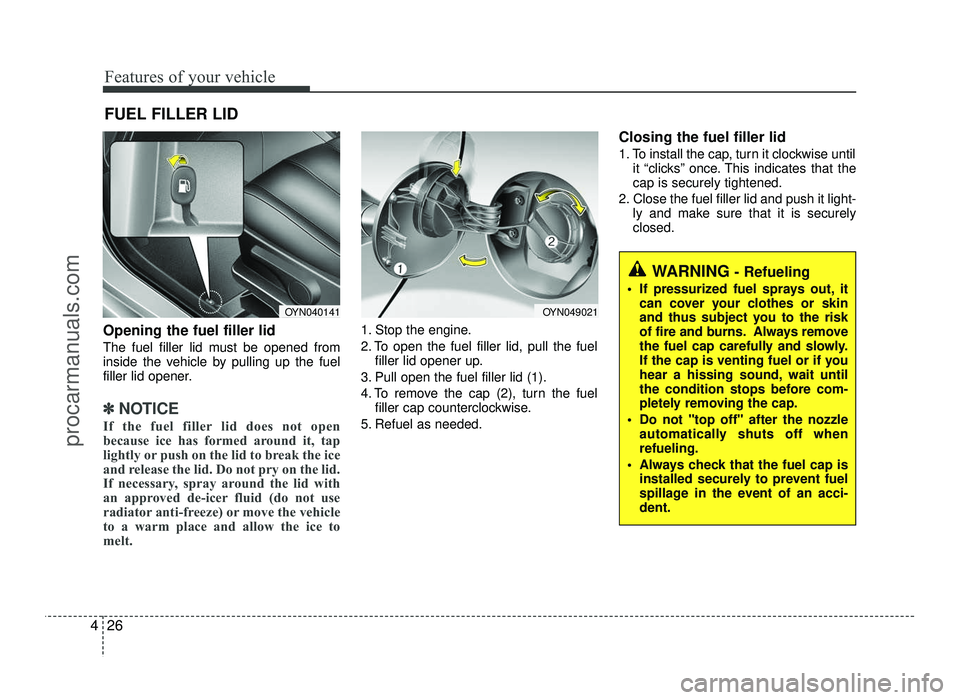
Opening the fuel filler lid
The fuel filler lid must be opened from
inside the vehicle by pulling up the fuel
filler lid opener.
✽✽
NOTICE
If the fuel filler lid does not open
because ice has formed around it, tap
lightly or push on the lid to break the ice
and release the lid. Do not pry on the lid.
If necessary, spray around the lid with
an approved de-icer fluid (do not use
radiator anti-freeze) or move the vehicle
to a warm place and allow the ice to
melt.
1. Stop the engine.
2. To open the fuel filler lid, pull the fuel filler lid opener up.
3. Pull open the fuel filler lid (1).
4. To remove the cap (2), turn the fuel filler cap counterclockwise.
5. Refuel as needed. Closing the fuel filler lid
1. To install the cap, turn it clockwise until
it “clicks” once. This indicates that the cap is securely tightened.
2. Close the fuel filler lid and push it light- ly and make sure that it is securelyclosed.
FUEL FILLER LID
WARNING
- Refueling
If pressurized fuel sprays out, it can cover your clothes or skin
and thus subject you to the risk
of fire and burns. Always remove
the fuel cap carefully and slowly.
If the cap is venting fuel or if you
hear a hissing sound, wait until
the condition stops before com-
pletely removing the cap.
Do not "top off" after the nozzle automatically shuts off whenrefueling.
Always check that the fuel cap is installed securely to prevent fuel
spillage in the event of an acci-dent.
OYN040141OYN049021
procarmanuals.com
Page 182 of 456
Features of your vehicle
104
4
INTERIOR FEATURES
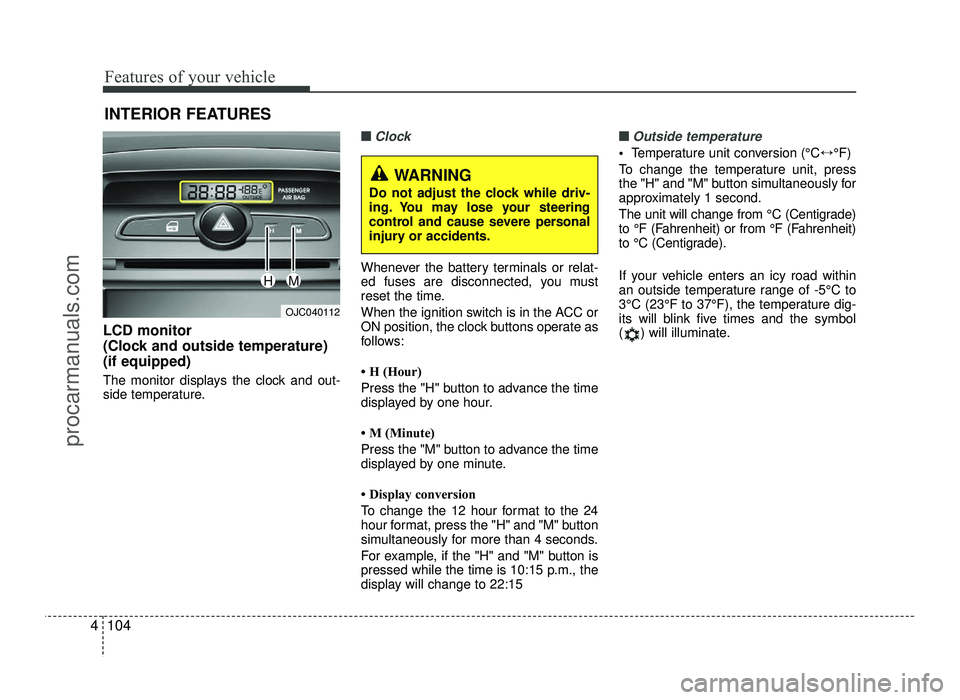
LCD monitor
(Clock and outside temperature)(if equipped)
The monitor displays the clock and out-
side temperature.
■■Clock
Whenever the battery terminals or relat-
ed fuses are disconnected, you must
reset the time.
When the ignition switch is in the ACC or
ON position, the clock buttons operate as
follows:
H (Hour)
Press the "H" button to advance the time
displayed by one hour.
M (Minute)
Press the "M" button to advance the time
displayed by one minute.
Display conversion
To change the 12 hour format to the 24
hour format, press the "H" and "M" button
simultaneously for more than 4 seconds.
For example, if the "H" and "M" button is
pressed while the time is 10:15 p.m., the
display will change to 22:15
■■Outside temperature
Temperature unit conversion (°C ↔°F)
To change the temperature unit, press
the "H" and "M" button simultaneously for
approximately 1 second.
The unit will change from °C (Centigrade)
to °F (Fahrenheit) or from °F (Fahrenheit)
to °C (Centigrade).
If your vehicle enters an icy road within
an outside temperature range of -5°C to
3°C (23°F to 37°F), the temperature dig-
its will blink five times and the symbol
( ) will illuminate.
OJC040112
WARNING
Do not adjust the clock while driv-
ing. You may lose your steering
control and cause severe personal
injury or accidents.
HM
procarmanuals.com
Page 190 of 456
Features of your vehicle
112
4
✽✽
NOTICE
If you install an after market HID head lamp, your vehicle’s audio and
electronic device may malfunction.
Prevent chemicals such as perfume, cosmetic oil, sun cream, hand cleaner,
and air freshener from contacting the
interior parts because they may cause
damage or discoloration.
Antenna
Roof antenna
Your vehicle uses a roof antenna to
receive both AM and FM signals. This
antenna can be removed. To remove the
antenna, turn it counter clockwise, To
install the antenna, turn it clockwise.
AUDIO SYSTEM
OYN049126
CAUTION
• Before entering a place with a low
height clearance or a car wash,remove the antenna by rotating it
counter-clockwise. If not, the antenna may be damaged.
When reinstalling your antenna, it is important that it is fully tight-ened to ensure proper reception.
When cargo is loaded on the roof rack, do not place the cargo nearthe antenna pole to ensure proper
reception.
procarmanuals.com
Page 306 of 456
What to do in an emergency
10
6
Removing and storing the spare tire
Turn the tire hold-down wing bolt
counterclockwise.
Store the tire in the reverse order of
removal.
To prevent the spare tire and tools
from “rattling” while the vehicle is in
motion, store them properly. Changing tires
1. Park on a level surface and apply
the parking brake firmly.
2. Shift the shift lever into R (Reverse) for manual transaxle or
P (Park) for automatic transaxle.
3. Activate the hazard warning flash- er. 4. Remove the wheel lug nut wrench,
jack, jack handle, and spare tire
from the vehicle.
5. Block both the front and rear of wheel that is diagonally opposite
the jack position.
OED066025OED066033OJC065019
procarmanuals.com
Page 307 of 456
611
What to do in an emergency
6. Loosen the wheel lug nuts coun-terclockwise one turn each, but do
not remove any nut until the tire
has been raised off the ground. 7. Place the jack at the front or rear
jacking position closest to the tire
you are changing. Place the jackat the designated locations under
the frame. The jacking positions
are plates welded to the frame
with two tabs and a raised dot to
index with the jack.
WARNING - Changing a tire
To prevent vehicle movement
while changing a tire, always
set the parking brake fully,
and always block the wheel
diagonally opposite the wheel
being changed.
We recommend that the wheels of the vehicle be
chocked, and that no person
remain in a vehicle that is
being jacked.
OED066026
WARNING - Jack location
To reduce the possibility of
injury, be sure to use only the
jack provided with the vehicle
and in the correct jack position;
never use any other part of the
vehicle for jack support.
OJC065020
procarmanuals.com