2017 Hyundai Ioniq Hybrid fuel
[x] Cancel search: fuelPage 182 of 553
3-80
Convenient features of your vehicle
Edit settings after shifting to P
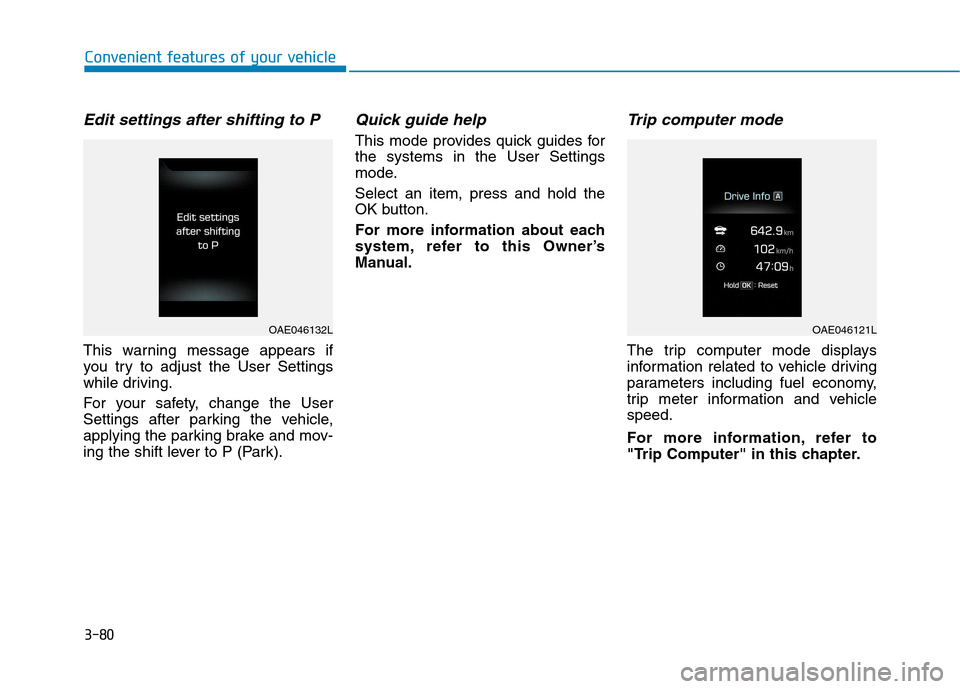
This warning message appears if
you try to adjust the User Settings
while driving.
For your safety, change the User
Settings after parking the vehicle,
applying the parking brake and mov-
ing the shift lever to P (Park).
Quick guide help
This mode provides quick guides forthe systems in the User Settings
mode. Select an item, press and hold the
OK button.
For more information about each
system, refer to this Owner’s
Manual.
Trip computer mode
The trip computer mode displays
information related to vehicle driving
parameters including fuel economy,
trip meter information and vehiclespeed.
For more information, refer to
"Trip Computer" in this chapter.
OAE046132LOAE046121L
Page 187 of 553
3-85
Convenient features of your vehicle
3
If the service interval is activated and the time and distance is adjusted,
messages are displayed in the fol-
lowing situations each time the vehi-
cle is turned on.
- Service in: Displayed to inform the driver theremaining mileage and days to
service.
- Service required : Displayed when the mileage anddays to service has been reachedor passed.
Information
If any of the following conditions
occur, the mileage and number of days
to service may be incorrect.
- The battery cable is disconnected.
- The fuse switch is turned off.
- The battery is discharged. 7. Other Features
- Off: The average fuel economy will
not reset automatically whenever refueling.
- After Ignition: The average fuel economy will reset automatically
whenever it has passed 4 hours
after turning OFF the engine.
- After Refueling: The average fuel economy will reset automaticallywhen refueling.
For more information, refer to
"Trip Computer" in this chapter.
To select the fuel economy unit.(km/L, L/100, MPG)
To select the temperature unit.
(°C,°F)
To select the tire pressure unit.
(psi, kPa, bar)
To select language. 8. Reset
You can reset the menus in the User
Settings Mode. All menus in the User
Settings Mode are initialized, except
language and service interval.
i
Page 189 of 553
3-87
Convenient features of your vehicle
3
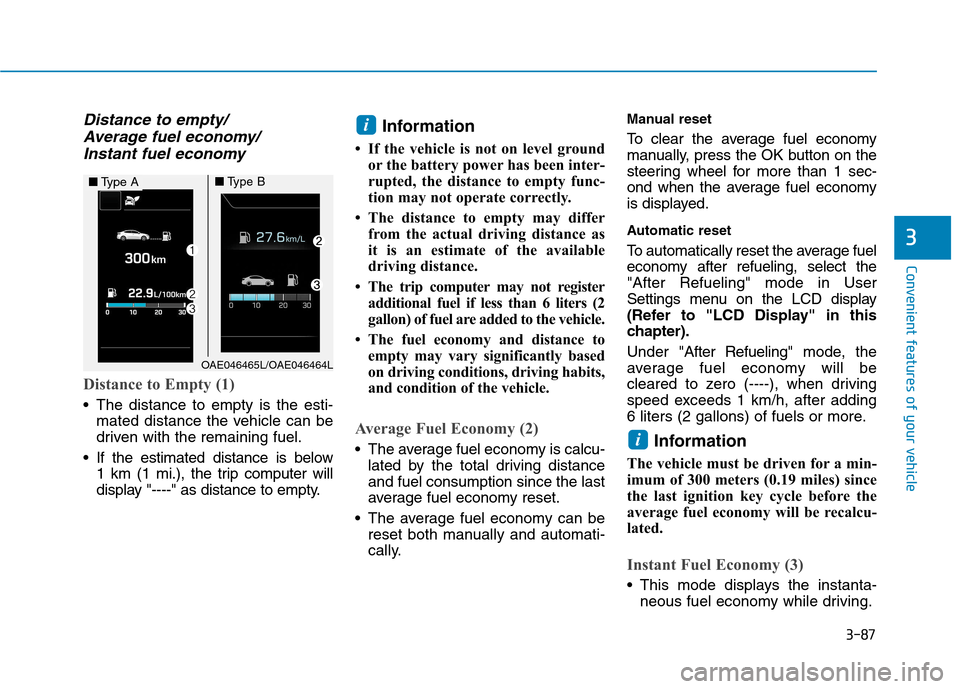
Distance to empty/Average fuel economy/
Instant fuel economy
Distance to Empty (1)
The distance to empty is the esti- mated distance the vehicle can be
driven with the remaining fuel.
If the estimated distance is below 1 km (1 mi.), the trip computer will
display "----" as distance to empty. Information
If the vehicle is not on level ground or the battery power has been inter-
rupted, the distance to empty func-
tion may not operate correctly.
The distance to empty may differ from the actual driving distance as
it is an estimate of the available
driving distance.
The trip computer may not register additional fuel if less than 6 liters (2
gallon) of fuel are added to the vehicle.
The fuel economy and distance to empty may vary significantly based
on driving conditions, driving habits,
and condition of the vehicle.
Average Fuel Economy (2)
The average fuel economy is calcu-lated by the total driving distance and fuel consumption since the last
average fuel economy reset.
The average fuel economy can be reset both manually and automati-
cally. Manual reset
To clear the average fuel economy
manually, press the OK button on the
steering wheel for more than 1 sec-
ond when the average fuel economy
is displayed.
Automatic reset
To automatically reset the average fuel
economy after refueling, select the"After Refueling" mode in User
Settings menu on the LCD display
(Refer to "LCD Display" in this
chapter). Under "
After Refueling" mode, the
average fuel economy will be
cleared to zero (----), when driving
speed exceeds 1 km/h, after adding
6 liters (2 gallons) of fuels or more.
Information
The vehicle must be driven for a min-
imum of 300 meters (0.19 miles) since
the last ignition key cycle before the
average fuel economy will be recalcu-
lated.
Instant Fuel Economy (3)
This mode displays the instanta- neous fuel economy while driving.
i
i
OAE046465L/OAE046464L
■Type A■Type B
Page 191 of 553
3-89
Convenient features of your vehicle
3
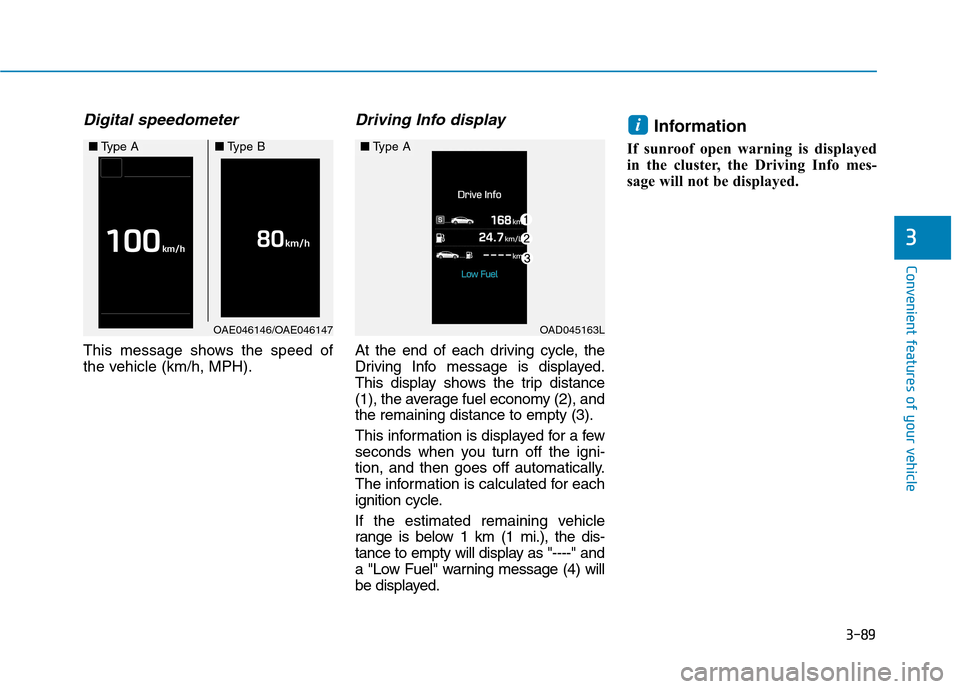
Digital speedometer
This message shows the speed of
the vehicle (km/h, MPH).
Driving Info display
At the end of each driving cycle, the
Driving Info message is displayed.
This display shows the trip distance
(1), the average fuel economy (2), andthe remaining distance to empty (3).
This information is displayed for a few
seconds when you turn off the igni-
tion, and then goes off automatically.
The information is calculated for each
ignition cycle.
If the estimated remaining vehicle
range is below 1 km (1 mi.), the dis-
tance to empty will display as "----" and
a "Low Fuel" warning message (4) will
be displayed.Information
If sunroof open warning is displayed
in the cluster, the Driving Info mes-
sage will not be displayed.
i
OAE046146/OAE046147
■ Type A■Type B
OAD045163L
■Type A
Page 300 of 553

5-16
Driving your vehicle
The dual clutch transmission givesthe driving feel of a manual trans-
mission, yet provides the ease of a
fully automatic transmission. Unlike
a traditional automatic transmis-sion, the gear shifting can some-
times be felt and heard on the dual
clutch transmission, as the actua-tors engage the clutch and thegear is selected.
The dual clutch transmission can be thought of as an automatically
shifting manual transmission.
When D (Drive) is selected, the
transmission will automatically shiftthrough the gears similar to a con-
ventional automatic transmission. The dual clutch transmission incor-
porates a dry-type dual clutch
mechanism, which allows for better
acceleration performance and
increased fuel efficiency while driv-
ing. But it differs from a conven-
tional automatic transmission in
that it does not incorporate a
torque converter. Instead, the tran-
sition from one gear to the next is
managed by clutch slip, especially
at lower speeds. As a result, shifts
are sometimes more noticeable,
and a light vibration can be felt as
the transmission shaft speed ismatched with the engine shaft
speed. This is a normal condition of
the dual clutch transmission.
The dry-type clutch transfers torque more directly and provides
a direct-drive feeling which may
feel different from a conventional
automatic transmission. This may
be more noticeable when launch-
ing the vehicle from a stop or when
traveling at low, stop-and-go vehi-
cle speeds.
To reduce the risk of serious
injury or death:
ALWAYS check the surround-
ing areas near your vehicle for
people, especially children,
before shifting a vehicle into
D (Drive) or R (Reverse).
Before leaving the driver's
seat, always make sure the
shift lever is in the P (Park)
position, then set the parking
brake, and place the ignition
switch in the LOCK/OFF posi-
tion. Unexpected and sudden
vehicle movement can occurif these precautions are not
followed.
(Continued)
(Continued)
Do not use the engine brake
(shifting from a high gear to
lower gear) rapidly on slip-
pery roads. The vehicle mayslip causing an accident.
WARNING
Page 304 of 553
5-20
Driving your vehicle
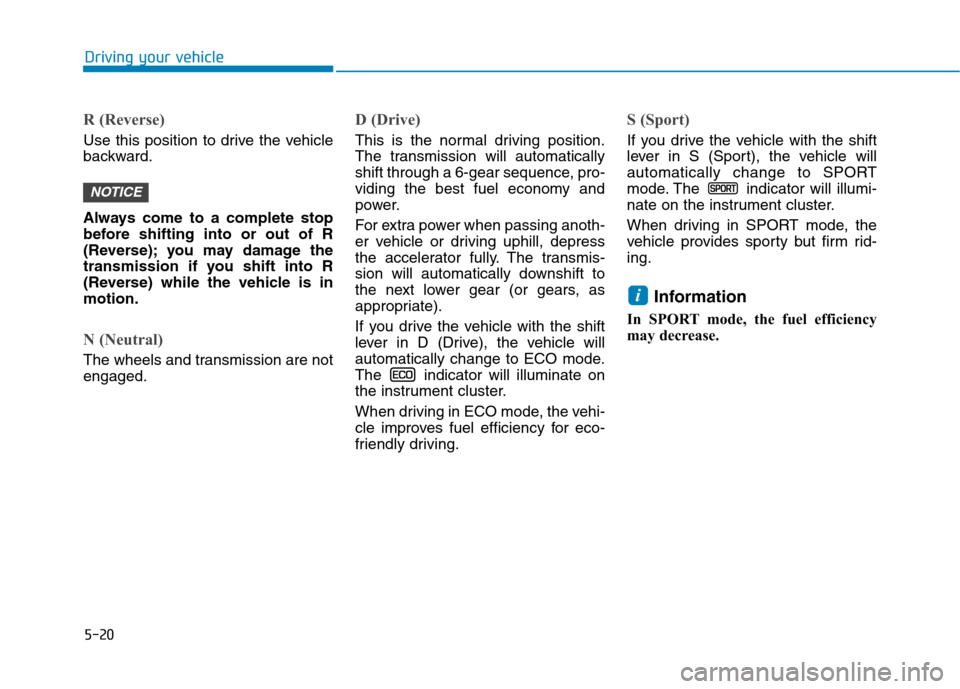
R (Reverse)
Use this position to drive the vehicle
backward.
Always come to a complete stop
before shifting into or out of R
(Reverse); you may damage the
transmission if you shift into R
(Reverse) while the vehicle is inmotion.
N (Neutral)
The wheels and transmission are not engaged.
D (Drive)
This is the normal driving position.
The transmission will automatically
shift through a 6-gear sequence, pro-
viding the best fuel economy and
power.
For extra power when passing anoth-
er vehicle or driving uphill, depress
the accelerator fully. The transmis-
sion will automatically downshift to
the next lower gear (or gears, as
appropriate).
If you drive the vehicle with the shift
lever in D (Drive), the vehicle will
automatically change to ECO mode.
The indicator will illuminate on
the instrument cluster.
When driving in ECO mode, the vehi-
cle improves fuel efficiency for eco-
friendly driving.
S (Sport)
If you drive the vehicle with the shift
lever in S (Sport), the vehicle will
automatically change to SPORT
mode. The indicator will illumi-
nate on the instrument cluster.
When driving in SPORT mode, the
vehicle provides sporty but firm rid-ing.Information
In SPORT mode, the fuel efficiency
may decrease.
i
NOTICE
Page 378 of 553

5-94
Driving your vehicle
If you believe your brakes may bewet, apply them lightly while driv-
ing until normal braking operation
returns.
Hydroplaning
If the road is wet enough and you are
going fast enough, your vehicle may
have little or no contact with the road
surface and actually ride on the
water. The best advice is SLOW
DOWN when the road is wet.
The risk of hydroplaning increas- es as the depth of tire tread
decreases, refer to "Tire Tread" in
chapter 7.
Driving in flooded areas
Avoid driving through flooded areas
unless you are sure the water is nohigher than the bottom of the wheel
hub. Drive through any water slowly.
Allow adequate stopping distance
because brake performance may bereduced.
After driving through water, dry the
brakes by gently applying them sev-
eral times while the vehicle is moving
slowly.
Highway driving
Tires
Adjust the tire inflation, as specified.
Under-inflation may overheat or
damage the tires.
Do not install worn-out or damaged
tires, which may reduce traction or
fail the braking operation.
Information
Never over-inflate your tires above the
maximum inflation pressure, as speci-
fied on your tires.
Fuel, engine coolant and engine oil
Driving at higher speeds on the high-
way consumes more fuel and is less
efficient than driving at a slower,
more moderate speed. Maintain a
moderate speed in order to conserve
fuel when driving on the highway.
Be sure to check both the engine
coolant level and the engine oil
before driving.
Drive belt
A loose or damaged drive belt may
overheat the engine.
i
Page 384 of 553
5-100
Driving your vehicle
Two labels on your driver’s door sill
show how much weight your vehicle
was designed to carry: the Tire and
Loading Information Label and the
Certification Label.
Before loading your vehicle, familiar-
ize yourself with the following terms
for determining your vehicle's weight
ratings, from the vehicle's specifica-
tions and the Certification Label:
Base Curb Weight
This is the weight of the vehicle including a full tank of fuel and all
standard equipment. It does not
include passengers, cargo, or option-al equipment.
Vehicle Curb Weight
This is the weight of your new vehicle
when you picked it up from your deal-
er plus any aftermarket equipment.
Cargo Weight
This figure includes all weight added
to the Base Curb Weight, includingcargo and optional equipment.GAW (Gross Axle Weight)
This is the total weight placed on each axle (front and rear) - including
vehicle curb weight and all payload.
GAWR (Gross Axle Weight Rating)
This is the maximum allowable
weight that can be carried by a single
axle (front or rear). These numbers
are shown on the Certification Label.
The total load on each axle must
never exceed its GAWR.
GVW (Gross Vehicle Weight)
This is the Base Curb Weight plus
actual Cargo Weight plus passen-
gers.
GVWR (Gross Vehicle Weight Rating)
This is the maximum allowable
weight of the fully loaded vehicle
(including all options, equipment,
passengers and cargo). The GVWR
is shown on the Certification Label
located on the driver’s door sill.Overloading
VV
EEHH IICC LLEE WW EEIIGG HH TT
The Gross Axle Weight Rating
(GAWR) and the Gross Vehicle
Weight Rating (GVWR) for your
vehicle are on the Certification
Label attached to the driver's
(or front passenger’s) door.Exceeding these ratings can
cause an accident or vehicle
damage. You can calculate the
weight of your load by weighing
the items (and people) before
putting them in the vehicle. Be
careful not to overload your
vehicle.
WARNING